Ecosyste.ms: Awesome
An open API service indexing awesome lists of open source software.
https://github.com/simonhamp/the-og
A pure PHP OpenGraph Image Generator
https://github.com/simonhamp/the-og
generator image-generation opengraph-images php
Last synced: 3 months ago
JSON representation
A pure PHP OpenGraph Image Generator
- Host: GitHub
- URL: https://github.com/simonhamp/the-og
- Owner: simonhamp
- License: mit
- Created: 2023-12-22T15:59:14.000Z (6 months ago)
- Default Branch: main
- Last Pushed: 2024-01-26T14:16:34.000Z (5 months ago)
- Last Synced: 2024-02-26T19:07:42.025Z (4 months ago)
- Topics: generator, image-generation, opengraph-images, php
- Language: PHP
- Homepage:
- Size: 11.9 MB
- Stars: 181
- Watchers: 4
- Forks: 8
- Open Issues: 2
-
Metadata Files:
- Readme: README.md
- Funding: .github/FUNDING.yml
- License: LICENSE
Lists
- awesome-stars - simonhamp/the-og - A pure PHP OpenGraph Image Generator (PHP)
README


# The OG
An OpenGraph image generator written purely in PHP, so you don't need to install another runtime somewhere
or a whole browser instance just to create a dynamic PNG.
## Sponsorship
The OG is completely free to use for personal or commercial use. If it's making your job easier, or you just want to
make sure it keeps being supported and improved, I'd really appreciate your donations!
[Donate now via GitHub Sponsors](https://github.com/sponsors/simonhamp)
If you're using The OG, I'd love to see your creations! Please send me a tweet/toot
([@simonhamp](https://twitter.com/simonhamp),
[@[email protected]](https://phpc.social/@simonhamp))
with some links so I can see how you're using The OG in the wild.
Thank you 🙏
### Sponsors
[Laradir](https://laradir.com/?ref=the-og-github) - Connecting the best Laravel Developers with the best Laravel Teams
## Installation
Install via Composer:
```shell
composer require simonhamp/the-og
```
## Usage
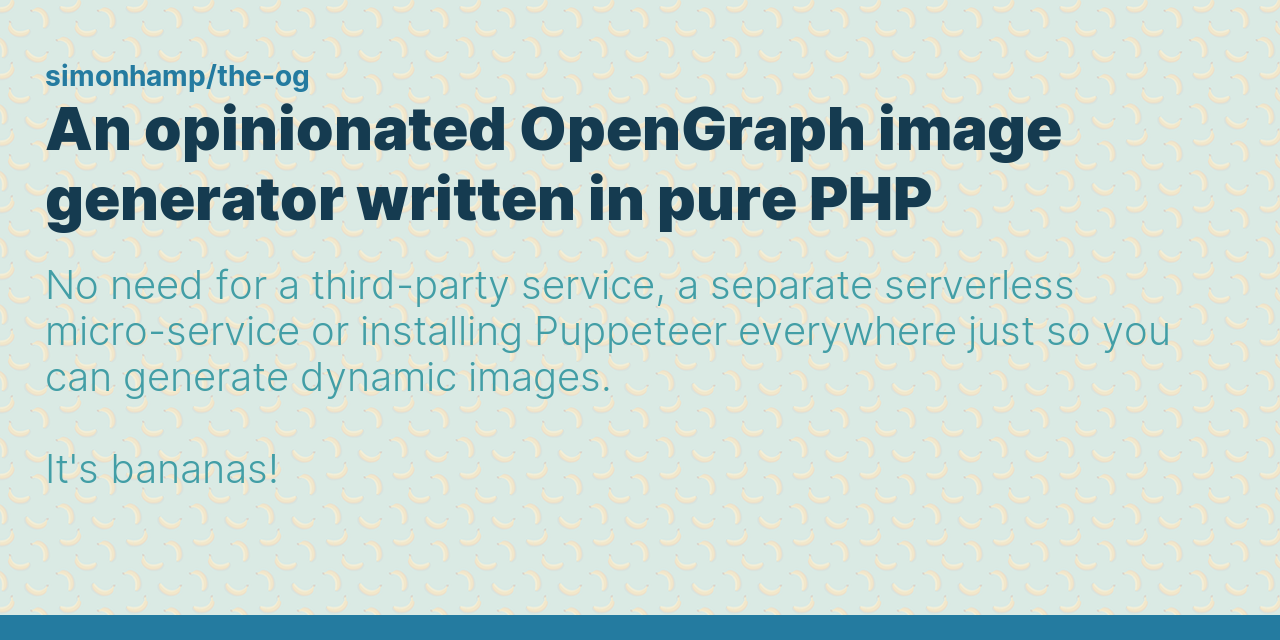
Using The OG is really simple. Here's a basic example:
```php
use SimonHamp\TheOg\Background;
use SimonHamp\TheOg\Image;
(new Image())
->accentColor('#cc0000')
->border()
->url('https://example.com/blog/some-blog-post-url')
->title('Some blog post title that is quite big and quite long')
->description(<<<'TEXT'
Some slightly smaller but potentially much longer subtext. It could be really long so we might need to trim it completely after many words.
Some slightly smaller but potentially much longer subtext. It could be really long so we might need to trim it completely after many words.
TEXT)
->background(Background::JustWaves, 0.2)
->save(__DIR__.'/test.png');
```
And here's the image that generates:

The [`Image` class](https://github.com/simonhamp/the-og/blob/main/src/Image.php) provides an elegant and fluent API for
configuring the content, style and layout of your image, as well as helpers to render the image and save it to a file.
### Checking your images
Want to see how your images will look when shared on social media? Check out [SEOToolkit's Social Share preview](https://seotoolkit.dev/social)
### Storing images
Conveniently, you can use the `save()` method to store your image on the local filesystem:
```php
$image = new Image;
$image->save('/path/to/your/image.png');
```
If you prefer to store your image somewhere other than the local filesystem (e.g. storing it on Amazon S3) you can use
the `toString()` method.
`toString()` will return the rendered image as a binary string:
```php
$image = (new Image())->toString();
// $service here could be an AWS\S3\S3Client, for example
$service->putObject([
'Key' => 'example-image.png',
'Body' => $image,
'ContentType' => 'image/png',
]);
```
This will send the raw binary data directly to the external service without needing to write the image to a file on the
local disk first.
#### Image formats
By default, The OG encodes images in **PNG format**.
If you wish to use a different format, however, you can! Simply
pass an instance of the relevant
[`intervention/image` encoder](https://github.com/Intervention/image/tree/develop/src/Encoders)
to the `save()` or `toString()` methods:
```php
use Intervention\Image\Encoders\WebpEncoder;
$image->toString(encoder: new WebpEncoder);
```
### Colors
Throughout The OG, colors can be expressed as hex codes, rgba, or HTML named colors.
### Backgrounds
The OG comes with a number of built-in background patterns that you can use to add some texture to your image. You can
find all of these defined in the [`Background` enum](https://github.com/simonhamp/the-og/blob/main/src/Background.php).
Backgrounds can be set to `Repeat` or `Cover` and have opacity too:
```php
use SimonHamp\TheOg\Background;
use SimonHamp\TheOg\BackgroundPlacement;
(new Image)->background(
background: Background::JustWaves,
opacity: 0.5,
placement: BackgroundPlacement::Cover
);
```
It also supports custom background images from local or remote sources.
See the [Custom Background Images](#custom-background-images) section below.
### Borders
Borders provide a subtle variation of color and texture to your image by framing one, or multiple edges of the image
with a single band of color—usually the theme's `accentColor`.
Borders are usually defined as part of the theme, but you can override the border position, color and size on the image
itself:
```php
use SimonHamp\TheOg\BorderPosition;
$image = new Image;
$image->border(BorderPosition::Top, 'pink', 10);
```
The available border positions are:
- `BorderPosition::All` - All 4 edges will be bordered
- `BorderPosition::Bottom` - The bottom edge will be bordered
- `BorderPosition::Left` - The left edge will be bordered
- `BorderPosition::Right` - The right edge will be bordered
- `BorderPosition::None` - No edges will be bordered
- `BorderPosition::Top` - The top edge will be bordered
- `BorderPosition::X` - Combines `BorderPosition::Top` and `BorderPosition::Bottom`
- `BorderPosition::Y` - Combines `BorderPosition::Left` and `BorderPosition::Right`
#### Removing default borders
You can remove the default border from the image by chaining the `border()` method with the `position` argument set to
`BorderPosition::None`:
```php
$image = new Image;
$image->border(BorderPosition::None);
```
### Themes
Themes set the colors, fonts, and styles for your image. There are currently 2 themes available:
`Light` and `Dark`.
The default theme is `Light`.
You can set the theme on your image at any point before it's rendered:
```php
use SimonHamp\TheOg\Theme;
$image = new Image;
$image->theme(Theme::Dark);
```
#### Creating themes
Themes are simple classes that implement the
[`Theme` interface](https://github.com/simonhamp/the-og/blob/main/src/Interfaces/Theme.php).
However, you can create your own theme most easily by simply instantiating the
[`Theme` class](https://github.com/simonhamp/the-og/blob/main/src/Theme/Theme.php):
```php
use SimonHamp\TheOg\Theme\Fonts\Inter;
use SimonHamp\TheOg\Theme\Theme;
$theme = new Theme(
accentColor: '#247BA0',
backgroundColor: '#ECEBE4',
baseColor: '#153B50',
baseFont: Inter::bold(),
callToActionBackgroundColor: '#153B50',
callToActionColor: '#ECEBE4',
descriptionColor: '#429EA6',
descriptionFont: Inter::light(),
titleFont: Inter::black(),
);
$image = new Image;
$image->theme($theme);
```
#### Fonts
Currently, there are 2 fonts available (each with 4 variants):
- [`Inter`](https://github.com/simonhamp/the-og/blob/main/src/Theme/Fonts/Inter.php)
- [`RobotoSlab`](https://github.com/simonhamp/the-og/blob/main/src/Theme/Fonts/Inter.php)
If you think a particular font will make sense added to the core of this package, please consider
[contributing](#contributing) and open a Pull Request.
#### Custom fonts
You can load custom fonts by creating a class that implements the
[`Font` interface](https://github.com/simonhamp/the-og/blob/main/src/Interfaces/Font.php):
```php
use SimonHamp\TheOg\Interfaces\Font;
class CustomFont implements Font
{
public function path(string $path): string
{
return '/path/to/your/font/source/file.ttf';
}
}
```
Then you can load this font when defining your theme:
```php
$font = new CustomFont;
$theme = new Theme(
baseFont: $font,
);
```
#### Custom background images
If the built-in background patterns don't tickle your fancy, you can load your own simply by instantiating the
[`Background` class](https://github.com/simonhamp/the-og/blob/main/src/Theme/Background.php):
```php
use SimonHamp\TheOg\Theme\Background;
$background = new Background('/path/to/your/image.png');
```
Then you can pass the background to your custom theme, or directly to your image:
```php
$theme = new Theme(
background: $background,
);
$image = (new Image)->theme($theme);
// Or
$image->background($background);
```
If you want more customization of the background, you may create your own background classes that implement the
[`Background` interface](https://github.com/simonhamp/the-og/blob/main/src/Interfaces/Background.php).
#### Overriding theme settings
You can override some theme settings, such as the accent color, background and background color, without having to
create a whole new theme.
```php
$image = new Image;
$image->backgroundColor('seagreen')
->background($customBackground);
```
### Layouts
While themes govern the _colors_ and _styles_ used within your images, layouts govern the _size of your images_ and the
_size_ and _position_ of the image's elements (text blocks, other images etc.), called **features**.
Different layouts provide different features.
There are currently 3 layouts:
- [`Standard`](https://github.com/simonhamp/the-og/blob/main/src/Layout/Layouts/Standard.php)
- [`GitHubBasic`](https://github.com/simonhamp/the-og/blob/main/src/Layout/Layouts/GitHubBasic.php)
- [`TwoUp`](https://github.com/simonhamp/the-og/blob/main/src/Layout/Layouts/TwoUp.php)
The default layout is `Standard`.
More layouts are coming.
#### Creating layouts
Layouts are simple classes with some basic settings and `features()` method to define all of your image's features.
Each layout class must implement the
[`Layout` interface](https://github.com/simonhamp/the-og/blob/main/src/Interfaces/Layout.php)
[Take a look at the Standard layout](https://github.com/simonhamp/the-og/blob/main/src/Layout/Layouts/Standard.php),
or any of the other built-in layouts, as an example.
In it, you'll see the basic settings for the layout, such as the dimensions of the canvas, the border size and location,
and any padding.
**All sizes are in pixels.**
#### Features
Features are the individual elements that make up your image, such as the Title, Description, URL etc.
**All layouts** support a background (which is always rendered first) and a border (which is always rendered last), so
you do not normally need to define these as distinct features.
Beyond that, the features of the image are entirely defined by the Layout. The order in which they are defined
determines their rendering order and, therefore, their layering.
Available built-in features:
- [`TextBox`](https://github.com/simonhamp/the-og/blob/main/src/Layout/TextBox.php)
Allows you to render a constrained block of text. The size of the box serves to constrain the text; the final size of
the box is determined by the length, font, size, and line height of the rendered text.
- [`PictureBox`](https://github.com/simonhamp/the-og/blob/main/src/Layout/PictureBox.php)
Allows you to render an image.
[See the built-in layouts](https://github.com/simonhamp/the-og/tree/main/src/Layout/Layouts) for examples of how to use
these features and add them to a layout.
#### Positioning features
Features can be positioned absolutely anywhere on the canvas or relatively to another feature on the canvas.
To use relative positioning, it's helpful to give your target feature a unique name, which is used when other features
need to reference its final rendered position.
[See the built-in layouts](https://github.com/simonhamp/the-og/tree/main/src/Layout/Layouts) for examples of how to
position features.
#### Creating features
All features must implement the
[`Box` interface](https://github.com/simonhamp/the-og/blob/main/src/Interfaces/Box.php).
The key method of any feature is the `render()` method, which is responsible for rendering the feature onto the image.
This method receives an instance of the underlying
[`Intervention\Image\Image` class](https://github.com/Intervention/image/blob/develop/src/Image.php), allowing you to
use Intervention's own modifiers directly, e.g.:
```php
use Intervention\Image\Interfaces\ImageInterface;
public function render(ImageInterface $image)
{
$image->drawCircle(10, 10, function ($circle) {
$circle->radius(150);
$circle->background('lightblue');
$circle->border('b53717', 1);
});
}
```
You should, however, extend the [`Box` class](https://github.com/simonhamp/the-og/blob/main/src/Layout/Box.php) as this
provides a number of useful conveniences, especially if you want to use relative positioning.
## Testing
The OG uses PHPUnit with [snapshot testing](https://github.com/spatie/phpunit-snapshot-assertions).
To run the integration tests, you need to install all Composer dependencies:
```shell
composer install
```
You will also need [Node.js](https://nodejs.org/en) (version 20 or above) and to install the NPM dependencies:
```shell
npm install
```
Once done, you can execute the tests:
```shell
./vendor/bin/phpunit
```
## Contributing
I'd really appreciate and welcome any PRs to help improve this package!
## Support
All support is handled via [GitHub Issues](https://github.com/simonhamp/the-og/issues).
## License
The MIT License (MIT). Please see [LICENSE](LICENSE) for more details.