Ecosyste.ms: Awesome
An open API service indexing awesome lists of open source software.
https://github.com/AndyObtiva/glimmer-dsl-opal
Glimmer DSL for Opal (Pure-Ruby Web GUI and Auto-Webifier of Desktop Apps)
https://github.com/AndyObtiva/glimmer-dsl-opal
dom dsl dsl-syntax glimmer gui opal opal-wrapper ruby ruby-gem ruby-library rubygem web
Last synced: 4 months ago
JSON representation
Glimmer DSL for Opal (Pure-Ruby Web GUI and Auto-Webifier of Desktop Apps)
- Host: GitHub
- URL: https://github.com/AndyObtiva/glimmer-dsl-opal
- Owner: AndyObtiva
- License: mit
- Archived: true
- Created: 2020-06-12T00:39:41.000Z (about 4 years ago)
- Default Branch: master
- Last Pushed: 2023-12-29T02:11:43.000Z (6 months ago)
- Last Synced: 2024-02-17T02:04:06.141Z (5 months ago)
- Topics: dom, dsl, dsl-syntax, glimmer, gui, opal, opal-wrapper, ruby, ruby-gem, ruby-library, rubygem, web
- Language: Ruby
- Homepage:
- Size: 13.2 MB
- Stars: 25
- Watchers: 6
- Forks: 2
- Open Issues: 0
-
Metadata Files:
- Readme: README.md
- Changelog: CHANGELOG.md
- Contributing: CONTRIBUTING.md
- License: LICENSE.txt
Lists
- awesome-opal - Glimmer DSL for Opal - Pure-Ruby Web GUI and Auto-Webifier of [Glimmer](https://github.com/AndyObtiva/glimmer) Desktop Apps (Uncategorized / Uncategorized)
README
# [ ](https://github.com/AndyObtiva/glimmer) Glimmer DSL for Opal [Alpha]
## Pure Ruby Web GUI and Auto-Webifier of Desktop Apps
[](http://badge.fury.io/rb/glimmer-dsl-opal)
[](https://gitter.im/AndyObtiva/glimmer?utm_source=badge&utm_medium=badge&utm_campaign=pr-badge&utm_content=badge)
## **Note: This project has been superseded by [Glimmer DSL for Web](https://github.com/AndyObtiva/glimmer-dsl-web), which you should check out for more serious usage of Glimmer on the Web going forward! Glimmer DSL for Opal was a great experiment that proved a Glimmer GUI DSL can work on the Web by rendering HTML in web browsers using Ruby as the frontend language of Rails applications instead of JavaScript, allowing both declarative programming of user interface structure and imperative programming of user interface logic to happen more productively in one language instead of the awkward and unproductive mixing of multiple languages (HTML, JS, JSX, etc...) on the Web. [Glimmer DSL for Web](https://github.com/AndyObtiva/glimmer-dsl-web) offers a more web-like approach to the Glimmer GUI DSL that better leverages existing HTML/CSS/JS skills, and will be maintained in place of this project going forward.**
### You can finally live in pure Rubyland on the web!
[Glimmer](https://github.com/AndyObtiva/glimmer) DSL for [Opal](https://opalrb.com/) is an **alpha** [gem](https://rubygems.org/gems/glimmer-dsl-opal) that enables building web GUI in pure Ruby via [Opal](https://opalrb.com/) on [Rails](https://rubyonrails.org/) **(now comes with the new Shine data-binding syntax)**.
Use in one of two ways:
- **Direct:** build the GUI of web apps with the same friendly desktop GUI Ruby syntax as [Glimmer DSL for SWT](https://github.com/AndyObtiva/glimmer-dsl-swt), thus requiring a lot less code than web technologies that is in pure Ruby and avoiding opaque web concepts like 'render' and 'reactive'. No HTML/JS/CSS skills are even required. Web designers may be involved with CSS styling only if needed.
- **Adapter:** auto-webify [Glimmer](https://github.com/AndyObtiva/glimmer) desktop apps (i.e. apps built with [Glimmer DSL for SWT](https://github.com/AndyObtiva/glimmer-dsl-swt)) via [Opal](https://opalrb.com/) on [Rails](https://rubyonrails.org/) without changing a line of GUI code. Just insert them as a single require statement in a Rails app, and BOOM! They're running on the web! Apps may then optionally be custom-styled for the web by web designers with standard CSS if needed.
Glimmer DSL for Opal successfully reuses the entire [Glimmer](https://github.com/AndyObtiva/glimmer) core DSL engine in [Opal Ruby](https://opalrb.com/) inside a web browser, and as such inherits the full range of Glimmer desktop [data-binding](https://github.com/AndyObtiva/glimmer#data-binding) capabilities for the web (including Shine syntax using `<=>` and `<=` for bidirectional [two-way] and unidirectional [one-way] data-binding respectively).
(note that auto-webification of desktop apps that involve multiple threads might involve extra changes to the code to utilize web async calls due to the async nature of transpiled JavaScript code)
#### Hello, Table! Sample
Code: [lib/glimmer-dsl-opal/samples/hello/hello_table.rb](lib/glimmer-dsl-opal/samples/hello/hello_table.rb)
Glimmer GUI code from [glimmer-dsl-opal/samples/hello/hello_table.rb](lib/glimmer-dsl-opal/samples/hello/hello_table.rb):
```ruby
# ...
shell {
grid_layout
text 'Hello, Table!'
background_image File.expand_path('hello_table/baseball_park.png', __dir__)
image File.expand_path('hello_table/baseball_park.png', __dir__)
label {
layout_data :center, :center, true, false
text 'BASEBALL PLAYOFF SCHEDULE'
background :transparent if OS.windows?
foreground rgb(94, 107, 103)
font name: 'Optima', height: 38, style: :bold
}
combo(:read_only) {
layout_data :center, :center, true, false
selection <=> [BaseballGame, :playoff_type]
font height: 14
}
table(:editable) { |table_proxy|
layout_data :fill, :fill, true, true
table_column {
text 'Game Date'
width 150
sort_property :date # ensure sorting by real date value (not `game_date` string specified in items below)
editor :date_drop_down, property: :date_time
}
table_column {
text 'Game Time'
width 150
sort_property :time # ensure sorting by real time value (not `game_time` string specified in items below)
editor :time, property: :date_time
}
table_column {
text 'Ballpark'
width 180
editor :none
}
table_column {
text 'Home Team'
width 150
editor :combo, :read_only # read_only is simply an SWT style passed to combo widget
}
table_column {
text 'Away Team'
width 150
editor :combo, :read_only # read_only is simply an SWT style passed to combo widget
}
table_column {
text 'Promotion'
width 150
# default text editor is used here
}
# Data-bind table items (rows) to a model collection property, specifying column properties ordering per nested model
items <=> [BaseballGame, :schedule, column_attributes: [:game_date, :game_time, :ballpark, :home_team, :away_team, :promotion]]
# Data-bind table selection
selection <=> [BaseballGame, :selected_game]
# Default initial sort property
sort_property :date
# Sort by these additional properties after handling sort by the column the user clicked
additional_sort_properties :date, :time, :home_team, :away_team, :ballpark, :promotion
menu {
menu_item {
text 'Book'
on_widget_selected {
book_selected_game
}
}
}
}
button {
text 'Book Selected Game'
layout_data :center, :center, true, false
font height: 14
enabled <= [BaseballGame, :selected_game]
on_widget_selected {
book_selected_game
}
}
}
# ...
```
**Hello, Table! originally running on the desktop (using the [glimmer-dsl-swt](https://github.com/AndyObtiva/glimmer-dsl-swt) gem):**

**Hello, Table! (same GUI code) running on the web via Opal on Rails (using the [glimmer-dsl-opal](https://rubygems.org/gems/glimmer-dsl-opal) gem):**

Hello, Table! Editing Game Date

Hello, Table! Editing Game Time

Hello, Table! Editing Home Team

Hello, Table! Sorted Game Date Ascending

Hello, Table! Sorted Game Date Descending

Hello, Table! Playoff Type Combo

Hello, Table! Playoff Type Changed

Hello, Table! Game Booked

NOTE: Glimmer DSL for Opal is an alpha project (only about 76% complete). If you want it developed faster, then [open an issue report](https://github.com/AndyObtiva/glimmer-dsl-opal/issues/new). I have completed some GitHub project features much faster before due to [issue reports](https://github.com/AndyObtiva/glimmer-dsl-opal/issues) and [pull requests](https://github.com/AndyObtiva/glimmer-dsl-opal/pulls). Please help make better by contributing, adopting for small or low risk projects, and providing feedback. It is still an early alpha, so the more feedback and issues you report the better.
**Alpha Version** 0.29.0 only supports bare-minimum capabilities for the included [samples](https://github.com/AndyObtiva/glimmer-dsl-opal#samples) (originally written for [glimmer-dsl-swt](https://github.com/AndyObtiva/glimmer-dsl-swt)).
Learn more about the differences between various [Glimmer](https://github.com/AndyObtiva/glimmer) DSLs by looking at the **[Glimmer DSL Comparison Table](https://github.com/AndyObtiva/glimmer#glimmer-dsl-comparison-table)**.
## Table of Contents
- [Glimmer DSL for Opal [Alpha] (Pure Ruby Web GUI)](#-glimmer-dsl-for-opal-alpha-pure-ruby-web-gui)
- [Principles](#principles)
- [Background](#background)
- [Pre-requisites](#pre-requisites)
- [Setup](#setup)
- [Supported Glimmer DSL Keywords](#supported-glimmer-dsl-keywords)
- [Samples](#samples)
- [Hello Samples](#hello-samples)
- [Hello, World!](#hello-world)
- [Hello, Combo!](#hello-combo)
- [Hello, Composite!](#hello-composite)
- [Hello, Computed!](#hello-computed)
- [Hello, Cursor!](#hello-cursor)
- [Hello, Label!](#hello-label)
- [Hello, Layout!](#hello-layout)
- [Hello, List Single Selection!](#hello-list-single-selection)
- [Hello, List Multi Selection!](#hello-list-multi-selection)
- [Hello, Browser!](#hello-browser)
- [Hello, Tab!](#hello-tab)
- [Hello, Custom Widget!](#hello-custom-widget)
- [Hello, Custom Shell!](#hello-custom-shell)
- [Hello, Radio!](#hello-radio)
- [Hello, Radio Group!](#hello-radio-group)
- [Hello, Group!](#hello-group)
- [Hello, Canvas!](#hello-canvas)
- [Hello, C Combo!](#hello-c-combo)
- [Hello, C Tab!](#hello-c-tab)
- [Hello, Checkbox!](#hello-checkbox)
- [Hello, Checkbox Group!](#hello-checkbox-group)
- [Hello, Date Time!](#hello-date-time)
- [Hello, Table!](#hello-table)
- [Hello, Text!](#hello-text)
- [Hello, Button!](#hello-button)
- [Hello, Arrow!](#hello-arrow)
- [Hello, Message Box!](#hello-message-box)
- [Hello, Pop Up Context Menu!](#hello-pop-up-context-menu)
- [Hello, Print!](#hello-print)
- [Hello, Progress Bar!](#hello-progress-bar)
- [Hello, Menu Bar!](#hello-menu-bar)
- [Hello, Dialog!](#hello-dialog)
- [Elaborate Samples](#elaborate-samples)
- [Login](#login)
- [Contact Manager](#contact-manager)
- [Tetris](#tetris)
- [Tic Tac Toe](#tic-tac-toe)
- [User Profile](#user-profile)
- [Weather](#weather)
- [External Samples](#external-samples)
- [Glimmer Calculator](#glimmer-calculator)
- [Glimmer Supporting Libraries](#glimmer-supporting-libraries)
- [Glimmer Process](#glimmer-process)
- [Help](#help)
- [Issues](#issues)
- [Chat](#chat)
- [Feature Suggestions](#feature-suggestions)
- [Change Log](#change-log)
- [Contributing](#contributing)
- [Contributors](#contributors)
- [License](#license)
## Principles
- **Live purely in Rubyland via the Glimmer GUI DSL**, completely oblivious to web browser technologies, thanks to [Opal](https://opalrb.com/).
- **HTML is for creating documents not interactive applications**. As such, software engineers can avoid it and focus on creating web applications more productively with Glimmer DSL for Opal in pure Ruby instead (just like they do in desktop development) while content creators and web designers can be the ones responsible for creating HTML documents for web content purposes only as HTML was originally intended. That way, Glimmer web GUI is used and embedded in web pages when providing users with applications while the rest of the web pages are maintained by non-engineers as pure HTML. This achieves a correct separation of responsibilities and better productivity and maintainability.
- **Approximate styles by developers via the Glimmer GUI DSL. Perfect styles by designers via pure CSS**. Developers can simply build GUI with approximate styling similar to desktop GUI and mockups without worrying about pixel-perfect aesthetics. Web designers can take styling further with pure CSS since every HTML element auto-generated by [Glimmer DSL for Opal](https://rubygems.org/gems/glimmer-dsl-opal) (using [Glimmer DSL for XML & HTML](https://rubygems.org/gems/glimmer-dsl-xml)) has a predictable ID and CSS class. This achieves a proper separation of responsibilities between developers and designers.
- **Web servers are used just like servers in traditional client/server architecture**, meaning they simply provide RMI services to enable centralizing some of the application logic and data in the cloud to make available everywhere and enable data-sharing with others.
- **Forget Routers!** [Glimmer DSL for Opal](https://rubygems.org/gems/glimmer-dsl-opal) supports auto-routing of custom shells (windows), which are opened as separate tabs in a web browser with automatically generated routes and bookmarkable URLs.
- **Images Are Local** Desktop apps typically display local images included in app files. When running a desktop app on the web, Glimmer DSL for Opal automatically copies application images to the assets directory and exposes them as download links. Desktop image Ruby code that uses `File.expand_path` or `File.join` automatically detects available image web URLs and matches them to corresponding desktop image paths behind the scenes, so desktop app images show up on the web without any extra effort! ([Hello, Table!](#hello-table-sample) and [Hello, Label!](#hello-label-sample) are good examples of that) (note that this works in Rails 5 on Heroku, but does not work in Rails 6-7 on Heroku though it works outside of it in Rails 6-7)
## Background
The original idea behind Glimmer DSL for Opal (which [later evolved](#principles)) was that you start by having a [Glimmer DSL for SWT](https://github.com/AndyObtiva/glimmer-dsl-swt) desktop app that communicates with a Rails API for any web/cloud concerns. The pure Ruby [Glimmer DSL for SWT](https://github.com/AndyObtiva/glimmer-dsl-swt) is very simple, so it is more productive to build GUI in it since it does not go through a server/client request/response cycle and can be iterated on locally with a much shorter feedback cycle. Once the GUI and the rest of the app is built. You simply embed it in a Rails app as a one line require statement, and BOOM, it just works on the web inside a web browser with the same server/client communication you had in the desktop app (I am working on adding minimal support for net/http in Opal so that desktop apps that use it continue to work in a web browser. Until then, just use [Opal-jQuery](https://github.com/opal/opal-jquery) http support). That way, you get two apps for one: desktop and web.
Part of the idea is that web browsers just render GUI widgets similar to those of a desktop app (after all a web browser is a desktop app), so whether you run your GUI on the desktop or on the web should just be a low-level concern, hopefully automated completely with Glimmer DSL for Opal.
Last but not least, you would likely want some special branding on the web, so you can push that off to a web designer who would be more than happy to do the web graphic design and customize the look and feel with pure CSS (no need for programming with Ruby or JavaScript). This enables a clean separation of concerns and distribution of tasks among developers and designers, let alone saving effort on the web GUI by reusing the desktop GUI as a base right off the bat.
Alternatively, web developers may directly use [Glimmer DSL for Opal](https://rubygems.org/gems/glimmer-dsl-opal) to build the GUI of web apps since it is as simple as desktop development, thus requiring a lot less code that is in pure Ruby only (as demonstrated in examples below) and avoiding opaque web concepts like 'render' and 'reactive' due to treating GUI as persistent just like desktop apps do. No HTML/JS/CSS skills are even required. Still, web designers may be involved with CSS only if needed, thanks to the clean semantic markup [Glimmer DSL for Opal](https://rubygems.org/gems/glimmer-dsl-opal) automatically produces.
## Pre-requisites
- Rails 5-7: [https://github.com/rails/rails](https://github.com/rails/rails)
- Opal 1.4.1 for Rails 6-7 or Opal 1.0.5 for Rails 5: [https://github.com/opal/opal](https://github.com/opal/opal)
- Opal-Rails 2.0.2 for Rails 6-7 or Opal-Rails 1.1.2 for Rails 5: [https://github.com/opal/opal-rails](https://github.com/opal/opal-rails)
- jQuery 3 (included): [https://code.jquery.com/](https://code.jquery.com/) (jQuery 3.6.0 is included in the [glimmer-dsl-opal](https://rubygems.org/gems/glimmer-dsl-opal) gem)
- jQuery-UI 1 (included): [https://code.jquery.com/](https://jqueryui.com/) (jQuery-UI 1.13.1 is included in the [glimmer-dsl-opal](https://rubygems.org/gems/glimmer-dsl-opal) gem)
- jQuery-UI Timepicker 0.3 (included): [https://code.jquery.com/](https://fgelinas.com/code/timepicker/) (jQuery-UI Timepicker 0.3.3 is included in the [glimmer-dsl-opal](https://rubygems.org/gems/glimmer-dsl-opal) gem)
## Setup
**Note: This project has been superseded by [Glimmer DSL for Web](https://github.com/AndyObtiva/glimmer-dsl-web), which you should check out for more serious usage of Glimmer on the Web going forward! Glimmer DSL for Opal was a great experiment that proved a Glimmer GUI DSL can work on the Web by rendering HTML in web browsers using Ruby as the frontend language of Rails applications instead of JavaScript, allowing both declarative programming of user interface structure and imperative programming of user interface logic to happen more productively in one language instead of the awkward and unproductive mixing of multiple languages (HTML, JS, JSX, etc...) on the Web. [Glimmer DSL for Web](https://github.com/AndyObtiva/glimmer-dsl-web) offers a more web-like approach to the Glimmer GUI DSL that better leverages existing HTML/CSS/JS skills, and will be maintained in place of this project going forward.**
(NOTE: Keep in mind this is a very early experimental and incomplete **alpha**. If you run into issues, try to go back to a [previous revision](https://rubygems.org/gems/glimmer-dsl-opal/versions). Also, there is a slight chance any issues you encounter are fixed in master or some other branch that you could check out instead)
The [glimmer-dsl-opal](https://rubygems.org/gems/glimmer-dsl-opal) gem is a [Rails Engine](https://guides.rubyonrails.org/engines.html) gem that includes assets.
### Rails 7
Please follow the following steps to setup.
Install a Rails 7 gem:
```
gem install rails -v7.0.1
```
Start a new Rails 7 app:
```
rails new glimmer_app_server
```
Add the following to `Gemfile`:
```
gem 'opal', '1.4.1'
gem 'opal-rails', '2.0.2'
gem 'opal-async', '~> 1.4.0'
gem 'opal-jquery', '~> 0.4.6'
gem 'glimmer-dsl-opal', '~> 0.29.0'
gem 'glimmer-dsl-xml', '~> 1.3.1', require: false
gem 'glimmer-dsl-css', '~> 1.2.1', require: false
```
Run:
```
bundle
```
Follow [opal-rails](https://github.com/opal/opal-rails) instructions, basically running:
```
bin/rails g opal:install
```
Edit `config/initializers/assets.rb` and add the following at the bottom:
```
Opal.use_gem 'glimmer-dsl-opal'
```
Run:
```
rails g scaffold welcome
```
Run:
```
rails db:migrate
```
Add the following to `config/routes.rb` inside the `Rails.application.routes.draw` block:
```ruby
mount Glimmer::Engine => "/glimmer" # add on top
root to: 'welcomes#index'
```
Edit `app/views/layouts/application.html.erb` and add the following below other `stylesheet_link_tag` declarations:
```erb
<%= stylesheet_link_tag 'glimmer/glimmer', media: 'all', 'data-turbolinks-track': 'reload' %>
```
Clear the file `app/views/welcomes/index.html.erb` completely from all content.
Delete `app/javascript/application.js`
Edit and replace `app/assets/javascript/application.js.rb` content with code below (optionally including a require statement for one of the [samples](#samples) below):
```ruby
require 'glimmer-dsl-opal' # brings opal and other dependencies automatically
# Add more require-statements or Glimmer GUI DSL code
```
Example to confirm setup is working:
```ruby
require 'glimmer-dsl-opal'
include Glimmer
shell {
fill_layout
text 'Example to confirm setup is working'
label {
text "Welcome to Glimmer DSL for Opal!"
foreground :red
font height: 24
}
}.open
```
Start the Rails server:
```
rails s
```
Visit `http://localhost:3000`
You should see:

If you run into any issues in setup, refer to the [Sample Glimmer DSL for Opal Rails 7 App](https://github.com/AndyObtiva/sample-glimmer-dsl-opal-rails7-app) project (in case I forgot to include some setup steps by mistake). It is also hosted online (proving that it works): https://sample-glimmer-dsl-opal-rails7.herokuapp.com/
Otherwise, if you still cannot setup successfully (even with the help of the sample project, or if the sample project stops working), please do not hesitate to report an [Issue request](https://github.com/AndyObtiva/glimmer-dsl-opal/issues) or fix and submit a [Pull Request](https://github.com/AndyObtiva/glimmer-dsl-opal/pulls).
### Rails 6
Please follow the following steps to setup.
Install a Rails 6 gem:
```
gem install rails -v6.1.4.6
```
Start a new Rails 6 app (skipping webpack):
```
rails new glimmer_app_server --skip-webpack-install
```
Disable the `webpacker` gem line in `Gemfile`:
```ruby
# gem 'webpacker', '~> 5.0'
```
Add the following to `Gemfile`:
```ruby
gem 'opal', '1.4.1'
gem 'opal-rails', '2.0.2'
gem 'opal-async', '~> 1.4.0'
gem 'opal-jquery', '~> 0.4.6'
gem 'glimmer-dsl-opal', '~> 0.29.0'
gem 'glimmer-dsl-xml', '~> 1.3.1', require: false
gem 'glimmer-dsl-css', '~> 1.2.1', require: false
```
Run:
```
bundle
```
Follow [opal-rails](https://github.com/opal/opal-rails) instructions, basically running:
```
bin/rails g opal:install
```
Edit `config/initializers/assets.rb` and add the following at the bottom:
```
Opal.use_gem 'glimmer-dsl-opal'
```
Run:
```
rails g scaffold welcome
```
Run:
```
rails db:migrate
```
Add the following to `config/routes.rb` inside the `Rails.application.routes.draw` block:
```ruby
mount Glimmer::Engine => "/glimmer" # add on top
root to: 'welcomes#index'
```
Edit `app/views/layouts/application.html.erb` and add the following below other `stylesheet_link_tag` declarations:
```erb
<%= stylesheet_link_tag 'glimmer/glimmer', media: 'all', 'data-turbolinks-track': 'reload' %>
```
Also, delete the following line:
```erb
<%= javascript_pack_tag 'application', 'data-turbolinks-track': 'reload' %>
```
Clear the file `app/views/welcomes/index.html.erb` completely from all content.
Edit and replace `app/assets/javascript/application.js.rb` content with code below (optionally including a require statement for one of the [samples](#samples) below):
```ruby
require 'glimmer-dsl-opal' # brings opal and other dependencies automatically
# Add more require-statements or Glimmer GUI DSL code
```
Example to confirm setup is working:
```ruby
require 'glimmer-dsl-opal'
include Glimmer
shell {
fill_layout
text 'Example to confirm setup is working'
label {
text "Welcome to Glimmer DSL for Opal!"
foreground :red
font height: 24
}
}.open
```
Start the Rails server:
```
rails s
```
Visit `http://localhost:3000`
You should see:

If you run into any issues in setup, refer to the [Sample Glimmer DSL for Opal Rails 6 App](https://github.com/AndyObtiva/sample-glimmer-dsl-opal-rails6-app) project (in case I forgot to include some setup steps by mistake). It is also hosted online (proving that it works): https://sample-glimmer-dsl-opal-rails6.herokuapp.com/
Otherwise, if you still cannot setup successfully (even with the help of the sample project, or if the sample project stops working), please do not hesitate to report an [Issue request](https://github.com/AndyObtiva/glimmer-dsl-opal/issues) or fix and submit a [Pull Request](https://github.com/AndyObtiva/glimmer-dsl-opal/pulls).
### Rails 5
Please follow the following steps to setup.
Install a Rails 5 gem:
```
gem install rails -v5.2.6
```
Start a new Rails 5 app:
```
rails new glimmer_app_server
```
Add the following to `Gemfile`:
```
gem 'opal', '1.0.5'
gem 'opal-rails', '1.1.2'
gem 'opal-async', '~> 1.4.0'
gem 'opal-jquery', '~> 0.4.4'
gem 'glimmer-dsl-opal', '~> 0.29.0'
gem 'glimmer-dsl-xml', '~> 1.2.0', require: false
gem 'glimmer-dsl-css', '~> 1.2.0', require: false
```
Run:
```
bundle
```
Follow [opal-rails](https://github.com/opal/opal-rails) instructions, basically the configuration of: `config/initializers/assets.rb`
Edit `config/initializers/assets.rb` and add the following at the bottom:
```
Opal.use_gem 'glimmer-dsl-opal'
```
Run:
```
rails g scaffold welcome
```
Run:
```
rails db:migrate
```
Add the following to `config/routes.rb` inside the `Rails.application.routes.draw` block:
```ruby
mount Glimmer::Engine => "/glimmer" # add on top
root to: 'welcomes#index'
```
Edit `app/views/layouts/application.html.erb` and add the following below other `stylesheet_link_tag` declarations:
```erb
<%= stylesheet_link_tag 'glimmer/glimmer', media: 'all', 'data-turbolinks-track': 'reload' %>
```
Clear the file `app/views/welcomes/index.html.erb` completely from all content.
Delete `app/assets/javascripts/application.js`
Create an empty `app/assets/javascripts/application.rb`, and add Glimmer GUI DSL code or a require statement for one of the [samples](#samples) below.
```ruby
require 'glimmer-dsl-opal' # brings opal and other dependencies automatically
# Add more require-statements or Glimmer GUI DSL code
```
Example to confirm setup is working:
```ruby
require 'glimmer-dsl-opal'
include Glimmer
shell {
fill_layout
text 'Example to confirm setup is working'
label {
text "Welcome to Glimmer DSL for Opal!"
foreground :red
font height: 24
}
}.open
```
Start the Rails server:
```
rails s
```
Visit `http://localhost:3000`
You should see:

If you run into any issues in setup, refer to the [Sample Glimmer DSL for Opal Rails App](https://github.com/AndyObtiva/sample-glimmer-dsl-opal-rails-app) project (in case I forgot to include some setup steps by mistake). It is also hosted online (proving that it works): https://sample-glimmer-dsl-opal-app.herokuapp.com/
Otherwise, if you still cannot setup successfully (even with the help of the sample project, or if the sample project stops working), please do not hesitate to report an [Issue request](https://github.com/AndyObtiva/glimmer-dsl-opal/issues) or fix and submit a [Pull Request](https://github.com/AndyObtiva/glimmer-dsl-opal/pulls).
## Supported Glimmer DSL Keywords
The following keywords from [glimmer-dsl-swt](https://github.com/AndyObtiva/glimmer-dsl-swt) have fully functional partial support in Opal:
Widgets:
- `arrow`: featured in [Hello, Arrow!](#hello-arrow)
- `button`: featured in [Hello, Checkbox!](#hello-checkbox) / [Hello, Button!](#hello-button) / [Hello, Table!](#hello-table) / [Hello, Radio Group!](#hello-radio-group) / [Hello, Radio!](#hello-radio) / [Hello, Message Box!](#hello-message-box) / [Hello, List Single Selection!](#hello-list-single-selection) / [Hello, List Multi Selection!](#hello-list-multi-selection) / [Hello, Group!](#hello-group) / [Hello, Combo!](#hello-combo) / [Hello, Checkbox Group!](#hello-checkbox-group) / [Contact Manager](#contact-manager) / [Tic Tac Toe](#tic-tac-toe) / [Login](#login)
- `browser`: featured in [Hello, Browser!](#hello-browser)
- `calendar`: featured in [Hello, Date Time!](#hello-date-time)
- `checkbox`: featured in [Hello, Checkbox Group!](#hello-checkbox-group) / [Hello, Checkbox!](#hello-checkbox)
- `checkbox_group`: featured in [Hello, Checkbox Group!](#hello-checkbox-group)
- `combo`: featured in [Hello, Table!](#hello-table) / [Hello, Combo!](#hello-combo)
- `composite`: featured in [Hello, Radio!](#hello-radio) / [Hello, Computed!](#hello-computed) / [Hello, Checkbox!](#hello-checkbox) / [Tic Tac Toe](#tic-tac-toe) / [Login](#login) / [Contact Manager](#contact-manager)
- `date`: featured in [Hello, Table!](#hello-table) / [Hello, Date Time!](#hello-date-time) / [Hello, Custom Shell!](#hello-custom-shell) / [Tic Tac Toe](#tic-tac-toe)
- `date_drop_down`: featured in [Hello, Table!](#hello-table) / [Hello, Date Time!](#hello-date-time)
- `dialog`: featured in [Hello, Dialog!](#hello-dialog)
- `group`: featured in [Hello, Group!](#hello-group) / [Contact Manager](#contact-manager)
- `label`: featured in [Hello, Computed!](#hello-computed) / [Hello, Checkbox Group!](#hello-checkbox-group) / [Hello, Checkbox!](#hello-checkbox) / [Hello, World!](#hello-world) / [Hello, Table!](#hello-table) / [Hello, Tab!](#hello-tab) / [Hello, Radio Group!](#hello-radio-group) / [Hello, Radio!](#hello-radio) / [Hello, Pop Up Context Menu!](#hello-pop-up-context-menu) / [Hello, Menu Bar!](#hello-menu-bar) / [Hello, Date Time!](#hello-date-time) / [Hello, Custom Widget!](#hello-custom-widget) / [Hello, Custom Shell!](#hello-custom-shell) / [Contact Manager](#contact-manager) / [Login](#login)
- `list` (w/ optional `:multi` SWT style): featured in [Hello, List Single Selection!](#hello-list-single-selection) / [Hello, List Multi Selection!](#hello-list-multi-selection) / [Contact Manager](#contact-manager)
- `menu`: featured in [Hello, Menu Bar!](#hello-menu-bar) / [Hello, Pop Up Context Menu!](#hello-pop-up-context-menu) / [Hello, Table!](#hello-table)
- `menu_bar`: featured in [Hello, Menu Bar!](#hello-menu-bar)
- `menu_item`: featured in [Hello, Table!](#hello-table) / [Hello, Pop Up Context Menu!](#hello-pop-up-context-menu) / [Hello, Menu Bar!](#hello-menu-bar)
- `message_box`: featured in [Hello, Table!](#hello-table) / [Hello, Pop Up Context Menu!](#hello-pop-up-context-menu) / [Hello, Message Box!](#hello-message-box) / [Hello, Menu Bar!](#hello-menu-bar)
- `radio`: featured in [Hello, Radio!](#hello-radio) / [Hello, Group!](#hello-group)
- `radio_group`: featured in [Hello, Radio Group!](#hello-radio-group)
- `scrolled_composite`
- `shell`: featured in [Hello, Checkbox!](#hello-checkbox) / [Hello, Button!](#hello-button) / [Hello, Table!](#hello-table) / [Hello, Tab!](#hello-tab) / [Hello, Radio Group!](#hello-radio-group) / [Hello, Radio!](#hello-radio) / [Hello, List Single Selection!](#hello-list-single-selection) / [Hello, List Multi Selection!](#hello-list-multi-selection) / [Hello, Group!](#hello-group) / [Hello, Date Time!](#hello-date-time) / [Hello, Custom Shell!](#hello-custom-shell) / [Hello, Computed!](#hello-computed) / [Hello, Combo!](#hello-combo) / [Hello, Checkbox Group!](#hello-checkbox-group) / [Contact Manager](#contact-manager) / [Tic Tac Toe](#tic-tac-toe) / [Login](#login)
- `tab_folder`: featured in [Hello, Tab!](#hello-tab)
- `tab_item`: featured in [Hello, Tab!](#hello-tab)
- `c_tab_folder`: featured in [Hello, C Tab!](#hello-c-tab)
- `c_tab_item`: featured in [Hello, C Tab!](#hello-c-tab)
- `table`: featured in [Hello, Custom Shell!](#hello-custom-shell) / [Hello, Table!](#hello-table) / [Contact Manager](#contact-manager)
- `table_column`: featured in [Hello, Table!](#hello-table) / [Hello, Custom Shell!](#hello-custom-shell) / [Contact Manager](#contact-manager)
- `text`: featured in [Hello, Computed!](#hello-computed) / [Login](#login) / [Contact Manager](#contact-manager)
- `time`: featured in [Hello, Table!](#hello-table) / [Hello, Date Time!](#hello-date-time)
- Glimmer::UI::CustomWidget: ability to define any keyword as a custom widget - featured in [Hello, Custom Widget!](#hello-custom-widget)
- Glimmer::UI::CustomShell: ability to define any keyword as a custom shell (aka custom window) that opens in a new browser window (tab) automatically unless there is no shell open in the current browser window (tab) - featured in [Hello, Custom Shell!](#hello-custom-shell)
Layouts:
- `grid_layout`: featured in [Hello, Custom Shell!](#hello-custom-shell) / [Hello, Computed!](#hello-computed) / [Hello, Table!](#hello-table) / [Hello, Pop Up Context Menu!](#hello-pop-up-context-menu) / [Hello, Menu Bar!](#hello-menu-bar) / [Hello, List Single Selection!](#hello-list-single-selection) / [Hello, List Multi Selection!](#hello-list-multi-selection) / [Contact Manager](#contact-manager) / [Login](#login) / [Tic Tac Toe](#tic-tac-toe)
- `row_layout`: featured in [Hello, Radio Group!](#hello-radio-group) / [Hello, Radio!](#hello-radio) / [Hello, Group!](#hello-group) / [Hello, Date Time!](#hello-date-time) / [Hello, Combo!](#hello-combo) / [Hello, Checkbox Group!](#hello-checkbox-group) / [Hello, Checkbox!](#hello-checkbox) / [Contact Manager](#contact-manager)
- `fill_layout`: featured in [Hello, Custom Widget!](#hello-custom-widget)
- `layout_data`: featured in [Hello, Table!](#hello-table) / [Hello, Custom Shell!](#hello-custom-shell) / [Hello, Computed!](#hello-computed) / [Tic Tac Toe](#tic-tac-toe) / [Contact Manager](#contact-manager)
Graphics/Style:
- `color`: featured in [Hello, Custom Widget!](#hello-custom-widget) / [Hello, Menu Bar!](#hello-menu-bar)
- `font`: featured in [Hello, Checkbox Group!](#hello-checkbox-group) / [Hello, Checkbox!](#hello-checkbox) / [Hello, Table!](#hello-table) / [Hello, Radio Group!](#hello-radio-group) / [Hello, Radio!](#hello-radio) / [Hello, Pop Up Context Menu!](#hello-pop-up-context-menu) / [Hello, Menu Bar!](#hello-menu-bar) / [Hello, Group!](#hello-group) / [Hello, Date Time!](#hello-date-time) / [Hello, Custom Widget!](#hello-custom-widget) / [Hello, Custom Shell!](#hello-custom-shell) / [Contact Manager](#contact-manager) / [Tic Tac Toe](#tic-tac-toe)
- `Point` class used in setting location on widgets
- `swt` and `SWT` class to set SWT styles on widgets - featured in [Hello, Custom Shell!](#hello-custom-shell) / [Login](#login) / [Contact Manager](#contact-manager)
Data-Binding/Observers:
- `bind`: featured in [Hello, Computed!](#hello-computed) / [Hello, Combo!](#hello-combo) / [Hello, Checkbox Group!](#hello-checkbox-group) / [Hello, Checkbox!](#hello-checkbox) / [Hello, Button!](#hello-button) / [Hello, Table!](#hello-table) / [Hello, Radio Group!](#hello-radio-group) / [Hello, Radio!](#hello-radio) / [Hello, List Single Selection!](#hello-list-single-selection) / [Hello, List Multi Selection!](#hello-list-multi-selection) / [Hello, Group!](#hello-group) / [Hello, Date Time!](#hello-date-time) / [Hello, Custom Widget!](#hello-custom-widget) / [Hello, Custom Shell!](#hello-custom-shell) / [Login](#login) / [Contact Manager](#contact-manager) / [Tic Tac Toe](#tic-tac-toe)
- `observe`: featured in [Hello, Table!](#hello-table) / [Tic Tac Toe](#tic-tac-toe)
- `on_widget_selected`: featured in [Hello, Combo!](#hello-combo) / [Hello, Checkbox Group!](#hello-checkbox-group) / [Hello, Checkbox!](#hello-checkbox) / [Hello, Button!](#hello-button) / [Hello, Table!](#hello-table) / [Hello, Radio Group!](#hello-radio-group) / [Hello, Radio!](#hello-radio) / [Hello, Pop Up Context Menu!](#hello-pop-up-context-menu) / [Hello, Message Box!](#hello-message-box) / [Hello, Menu Bar!](#hello-menu-bar) / [Hello, List Single Selection!](#hello-list-single-selection) / [Hello, List Multi Selection!](#hello-list-multi-selection) / [Hello, Group!](#hello-group) / [Contact Manager](#contact-manager) / [Login](#login) / [Tic Tac Toe](#tic-tac-toe)
- `on_modify_text`
- `on_key_pressed` (and SWT alias `on_swt_keydown`) - featured in [Login](#login) / [Contact Manager](#contact-manager)
- `on_key_released` (and SWT alias `on_swt_keyup`)
- `on_mouse_down` (and SWT alias `on_swt_mousedown`)
- `on_mouse_up` (and SWT alias `on_swt_mouseup`) - featured in [Hello, Custom Shell!](#hello-custom-shell) / [Contact Manager](#contact-manager)
Event loop:
- `display`: featured in [Tic Tac Toe](#tic-tac-toe)
- `async_exec`: featured in [Hello, Custom Widget!](#hello-custom-widget) / [Hello, Custom Shell!](#hello-custom-shell)
Canvas Shape DSL:
- `line`
- `point`
- `oval`
- `polygon`
- `polyline`
- `rectangle`
- `string`
- `text`
## Samples
Follow the instructions below to try out [glimmer-dsl-swt](https://github.com/AndyObtiva/glimmer-dsl-swt) samples webified via [glimmer-dsl-opal](https://rubygems.org/gems/glimmer-dsl-opal)
The [Hello samples](#hello-samples) demonstrate tiny building blocks (widgets) for building full fledged applications.
The [Elaborate samples](#elaborate-samples) demonstrate more advanced sample applications that assemble multiple building blocks.
This external sample app contains all the samples mentioned below configured inside a Rails [Opal](https://opalrb.com/) app with all the pre-requisites ready to go for convenience:
https://github.com/AndyObtiva/sample-glimmer-dsl-opal-rails7-app
https://github.com/AndyObtiva/sample-glimmer-dsl-opal-rails-app
You may visit a Heroku hosted version at:
https://sample-glimmer-dsl-opal-rails7.herokuapp.com/
https://sample-glimmer-dsl-opal-app.herokuapp.com/
Note: Some of the screenshots might be out of date with updates done to samples in both [glimmer-dsl-swt](https://github.com/AndyObtiva/glimmer-dsl-swt) and [glimmer-dsl-opal](https://github.com/AndyObtiva/glimmer-dsl-opal).
### Hello Samples
#### Hello, World!
Add the following require statement to `app/assets/javascripts/application.rb`
```ruby
require 'glimmer-dsl-opal/samples/hello/hello_world'
```
Or add the Glimmer code directly if you prefer to play around with it:
```ruby
include Glimmer
shell {
text 'Glimmer'
label {
text 'Hello, World!'
}
}.open
```
Glimmer app on the desktop (using [`glimmer-dsl-swt`](https://github.com/AndyObtiva/glimmer-dsl-swt) gem):

Glimmer app on the web (using `glimmer-dsl-opal` gem):
Start the Rails server:
```
rails s
```
Visit `http://localhost:3000`
You should see "Hello, World!"

#### Hello, Combo!
Add the following require statement to `app/assets/javascripts/application.rb`
```ruby
require 'glimmer-dsl-opal/samples/hello/hello_combo'
```
Or add the Glimmer code directly if you prefer to play around with it:
```ruby
class HelloCombo
class Person
attr_accessor :country, :country_options
def initialize
self.country_options = ['', 'Canada', 'US', 'Mexico']
reset_country!
end
def reset_country!
self.country = 'Canada'
end
end
include Glimmer::UI::CustomShell
before_body do
@person = Person.new
end
body {
shell {
row_layout(:vertical) {
fill true
}
text 'Hello, Combo!'
combo(:read_only) {
selection <=> [@person, :country] # also binds to country_options by convention
}
button {
text 'Reset Selection'
on_widget_selected do
@person.reset_country!
end
}
}
}
end
HelloCombo.launch
```
Glimmer app on the desktop (using [`glimmer-dsl-swt`](https://github.com/AndyObtiva/glimmer-dsl-swt) gem):

Glimmer app on the web (using `glimmer-dsl-opal` gem):
Start the Rails server:
```
rails s
```
Visit `http://localhost:3000`
You should see "Hello, Combo!"

#### Hello, Composite!
Add the following require statement to `app/assets/javascripts/application.rb`
```ruby
require 'glimmer-dsl-opal/samples/hello/hello_composite'
```
Glimmer app on the desktop (using [`glimmer-dsl-swt`](https://github.com/AndyObtiva/glimmer-dsl-swt) gem):

Glimmer app on the web (using `glimmer-dsl-opal` gem):
Start the Rails server:
```
rails s
```
Visit `http://localhost:3000`
You should see "Hello, Composite!"

#### Hello, Computed!
Add the following require statement to `app/assets/javascripts/application.rb`
```ruby
require 'glimmer-dsl-opal/samples/hello/hello_computed'
```
Or add the Glimmer code directly if you prefer to play around with it:
```ruby
class HelloComputed
class Contact
attr_accessor :first_name, :last_name, :year_of_birth
def initialize(attribute_map)
@first_name = attribute_map[:first_name]
@last_name = attribute_map[:last_name]
@year_of_birth = attribute_map[:year_of_birth]
end
def name
"#{last_name}, #{first_name}"
end
def age
Time.now.year - year_of_birth.to_i
rescue
0
end
end
include Glimmer::UI::CustomShell
before_body do
@contact = Contact.new(
first_name: 'Barry',
last_name: 'McKibbin',
year_of_birth: 1985
)
end
body {
shell {
text 'Hello, Computed!'
composite {
grid_layout {
num_columns 2
make_columns_equal_width true
horizontal_spacing 20
vertical_spacing 10
}
label {text 'First &Name: '}
text {
fill_horizontally_layout_data
text <=> [@contact, :first_name]
}
label {text '&Last Name: '}
text {
fill_horizontally_layout_data
text <=> [@contact, :last_name]
}
label {text '&Year of Birth: '}
text {
fill_horizontally_layout_data
text <=> [@contact, :year_of_birth]
}
label {text 'Name: '}
label {
fill_horizontally_layout_data
text <= [@contact, :name, computed_by: [:first_name, :last_name]]
}
label {text 'Age: '}
label {
fill_horizontally_layout_data
text <= [@contact, :age, on_write: :to_i, computed_by: [:year_of_birth]]
}
}
}
}
def fill_horizontally_layout_data
layout_data {
horizontal_alignment :fill
grab_excess_horizontal_space true
}
end
end
HelloComputed.launch
```
Glimmer app on the desktop (using [`glimmer-dsl-swt`](https://github.com/AndyObtiva/glimmer-dsl-swt) gem):

Glimmer app on the web (using `glimmer-dsl-opal` gem):
Start the Rails server:
```
rails s
```
Visit `http://localhost:3000`
You should see "Hello, Computed!"

#### Hello, Cursor!
Add the following require statement to `app/assets/javascripts/application.rb`
```ruby
require 'glimmer-dsl-opal/samples/hello/hello_cursor'
```
Glimmer app on the desktop (using [`glimmer-dsl-swt`](https://github.com/AndyObtiva/glimmer-dsl-swt) gem):

Glimmer app on the web (using `glimmer-dsl-opal` gem):
Start the Rails server:
```
rails s
```
Visit `http://localhost:3000`
You should see "Hello, Cursor!"

#### Hello, Label!
Add the following require statement to `app/assets/javascripts/application.rb`
```ruby
require 'glimmer-dsl-opal/samples/hello/hello_label'
```
Glimmer app on the desktop (using [`glimmer-dsl-swt`](https://github.com/AndyObtiva/glimmer-dsl-swt) gem):


Glimmer app on the web (using `glimmer-dsl-opal` gem):
Start the Rails server:
```
rails s
```
Visit `http://localhost:3000`
You should see "Hello, Label!"


#### Hello, Layout!
Add the following require statement to `app/assets/javascripts/application.rb`
```ruby
require 'glimmer-dsl-opal/samples/hello/hello_layout'
```
Glimmer app on the desktop (using [`glimmer-dsl-swt`](https://github.com/AndyObtiva/glimmer-dsl-swt) gem):


Glimmer app on the web (using `glimmer-dsl-opal` gem):
Start the Rails server:
```
rails s
```
Visit `http://localhost:3000`
You should see "Hello, Layout!"


#### Hello, List Single Selection!
Add the following require statement to `app/assets/javascripts/application.rb`
```ruby
require 'glimmer-dsl-opal/samples/hello/hello_list_single_selection'
```
Glimmer app on the desktop (using [`glimmer-dsl-swt`](https://github.com/AndyObtiva/glimmer-dsl-swt) gem):

Glimmer app on the web (using `glimmer-dsl-opal` gem):
Start the Rails server:
```
rails s
```
Visit `http://localhost:3000`
You should see "Hello, List Single Selection!"

#### Hello, List Multi Selection!
Add the following require statement to `app/assets/javascripts/application.rb`
```ruby
require 'glimmer-dsl-opal/samples/hello/hello_list_multi_selection'
```
Glimmer app on the desktop (using [`glimmer-dsl-swt`](https://github.com/AndyObtiva/glimmer-dsl-swt) gem):

Glimmer app on the web (using `glimmer-dsl-opal` gem):
Start the Rails server:
```
rails s
```
Visit `http://localhost:3000`
You should see "Hello, List Multi Selection!"

#### Hello, Arrow!
Add the following require statement to `app/assets/javascripts/application.rb`
```ruby
require 'glimmer-dsl-opal/samples/hello/hello_arrow'
```
Glimmer app on the desktop (using [`glimmer-dsl-swt`](https://github.com/AndyObtiva/glimmer-dsl-swt) gem):


Glimmer app on the web (using `glimmer-dsl-opal` gem):
Start the Rails server:
```
rails s
```
Visit `http://localhost:3000`
You should see "Hello, Arrow!"


#### Hello, Scale!
Add the following require statement to `app/assets/javascripts/application.rb`
```ruby
require 'glimmer-dsl-opal/samples/hello/hello_scale'
```
Glimmer app on the desktop (using [`glimmer-dsl-swt`](https://github.com/AndyObtiva/glimmer-dsl-swt) gem):

Glimmer app on the web (using `glimmer-dsl-opal` gem):
Start the Rails server:
```
rails s
```
Visit `http://localhost:3000`
You should see "Hello, Scale!"

#### Hello, Slider!
Add the following require statement to `app/assets/javascripts/application.rb`
```ruby
require 'glimmer-dsl-opal/samples/hello/hello_slider'
```
Glimmer app on the desktop (using [`glimmer-dsl-swt`](https://github.com/AndyObtiva/glimmer-dsl-swt) gem):

Glimmer app on the web (using `glimmer-dsl-opal` gem):
Start the Rails server:
```
rails s
```
Visit `http://localhost:3000`
You should see "Hello, Slider!"

#### Hello, Spinner!
Add the following require statement to `app/assets/javascripts/application.rb`
```ruby
require 'glimmer-dsl-opal/samples/hello/hello_spinner'
```
Glimmer app on the desktop (using [`glimmer-dsl-swt`](https://github.com/AndyObtiva/glimmer-dsl-swt) gem):

Glimmer app on the web (using `glimmer-dsl-opal` gem):
Start the Rails server:
```
rails s
```
Visit `http://localhost:3000`
You should see "Hello, Spinner!"

#### Hello, Browser!
Add the following require statement to `app/assets/javascripts/application.rb`
```ruby
require 'glimmer-dsl-opal/samples/hello/hello_browser'
```
Glimmer app on the desktop (using [`glimmer-dsl-swt`](https://github.com/AndyObtiva/glimmer-dsl-swt) gem):

Glimmer app on the web (using `glimmer-dsl-opal` gem):
Start the Rails server:
```
rails s
```
Visit `http://localhost:3000`
You should see "Hello, Browser!"

#### Hello, Tab!
Add the following require statement to `app/assets/javascripts/application.rb`
```ruby
require 'glimmer-dsl-opal/samples/hello/hello_tab'
```
Or add the Glimmer code directly if you prefer to play around with it:
```ruby
class HelloTab
include Glimmer
def launch
shell {
text "Hello, Tab!"
tab_folder {
tab_item {
text "English"
label {
text "Hello, World!"
}
}
tab_item {
text "French"
label {
text "Bonjour, Univers!"
}
}
}
}.open
end
end
HelloTab.new.launch
```
Glimmer app on the desktop (using [`glimmer-dsl-swt`](https://github.com/AndyObtiva/glimmer-dsl-swt) gem):


Glimmer app on the web (using `glimmer-dsl-opal` gem):
Start the Rails server:
```
rails s
```
Visit `http://localhost:3000`
You should see "Hello, Tab!"


#### Hello, Custom Widget!
Add the following require statement to `app/assets/javascripts/application.rb`
```ruby
require 'glimmer-dsl-opal/samples/hello/hello_custom_widget'
```
Or add the Glimmer code directly if you prefer to play around with it (note that the Opal version needs `Array#async_cycle` from the opal-async gem instead of `Array#cycle` due to the async nature of JavaScript):
```ruby
# This class declares a `greeting_label` custom widget (by convention)
class GreetingLabel
include Glimmer::UI::CustomWidget
# multiple options without default values
options :name, :colors
# single option with default value
option :greeting, default: 'Hello'
# internal attribute (not a custom widget option)
attr_accessor :color
before_body {
@font = {height: 24, style: :bold}
@color = :black
}
after_body {
return if colors.nil?
Thread.new { # imported from Glimmer DSL for SWT. In Opal, avoid Threads and sleep to avoid blocking GUI.
colors.async_cycle { |color|
async_exec {
self.color = color
}
sleep(1)
}
}
}
body {
# pass received swt_style through to label to customize (e.g. :center to center text)
label(swt_style) {
text "#{greeting}, #{name}!"
font @font
foreground <=> [self, :color]
}
}
end
# including Glimmer enables the Glimmer DSL syntax, including auto-discovery of the `greeting_label` custom widget
include Glimmer
shell {
fill_layout :vertical
minimum_size 215, 215
text 'Hello, Custom Widget!'
# custom widget options are passed in a hash
greeting_label(name: 'Sean')
# pass :center SWT style followed by custom widget options hash
greeting_label(:center, name: 'Laura', greeting: 'Aloha') #
greeting_label(:right, name: 'Rick') {
# you can nest attributes under custom widgets just like any standard widget
foreground :red
}
# the colors option cycles between colors for the label foreground every second
greeting_label(:center, name: 'Mary', greeting: 'Aloha', colors: [:red, :dark_green, :blue])
}.open
```
Glimmer app on the desktop (using [`glimmer-dsl-swt`](https://github.com/AndyObtiva/glimmer-dsl-swt) gem):

Glimmer app on the web (using `glimmer-dsl-opal` gem):
Start the Rails server:
```
rails s
```
Visit `http://localhost:3000`
You should see "Hello, Custom Widget!"

#### Hello, Custom Shell!
This sample demonstrates Glimmer DSL for Opal's ability to open multiple shells (windows) as web browser tabs.
It automatically handles routing so that tab URLs are bookmarkable. Web developers do not have to do any routing configuration manually.
Add the following require statement to `app/assets/javascripts/application.rb`
```ruby
require 'glimmer-dsl-opal/samples/hello/hello_custom_shell'
```
Or add the Glimmer code directly if you prefer to play around with it:
```ruby
require 'date'
# This class declares an `email_shell` custom shell, aka custom window (by convention)
# Used to view an email message
class EmailShell
include Glimmer::UI::CustomShell
# multiple options without default values
options :date, :subject, :from, :message
# single option with default value
option :to, default: '"John Irwin" '
before_body {
@swt_style |= swt(:shell_trim, :modeless)
}
body {
# pass received swt_style through to shell to customize it (e.g. :dialog_trim for a blocking shell)
shell(swt_style) {
grid_layout(2, false)
text subject
label {
text 'Date:'
}
label {
text date
}
label {
text 'From:'
}
label {
text from
}
label {
text 'To:'
}
label {
text to
}
label {
text 'Subject:'
}
label {
text subject
}
label {
layout_data(:fill, :fill, true, true) {
horizontal_span 2 #TODO implement
vertical_indent 10
}
background :white
text message
}
}
}
end
class HelloCustomShell
# including Glimmer enables the Glimmer DSL syntax, including auto-discovery of the `email_shell` custom widget
include Glimmer
Email = Struct.new(:date, :subject, :from, :message, keyword_init: true)
EmailSystem = Struct.new(:emails, keyword_init: true)
def initialize
@email_system = EmailSystem.new(
emails: [
Email.new(date: DateTime.new(2029, 10, 22, 11, 3, 0).strftime('%F %I:%M %p'), subject: '3rd Week Report', from: '"Dianne Tux" ', message: "Hello,\n\nI was wondering if you'd like to go over the weekly report sometime this afternoon.\n\nDianne"),
Email.new(date: DateTime.new(2029, 10, 21, 8, 1, 0).strftime('%F %I:%M %p'), subject: 'Glimmer Upgrade v100.0', from: '"Robert McGabbins" ', message: "Team,\n\nWe are upgrading to Glimmer version 100.0.\n\nEveryone pull the latest code!\n\nRegards,\n\nRobert McGabbins"),
Email.new(date: DateTime.new(2029, 10, 19, 16, 58, 0).strftime('%F %I:%M %p'), subject: 'Christmas Party', from: '"Lisa Ferreira" ', message: "Merry Christmas,\n\nAll office Christmas Party arrangements have been set\n\nMake sure to bring a Secret Santa gift\n\nBest regards,\n\nLisa Ferreira"),
Email.new(date: DateTime.new(2029, 10, 16, 9, 43, 0).strftime('%F %I:%M %p'), subject: 'Glimmer Upgrade v99.0', from: '"Robert McGabbins" ', message: "Team,\n\nWe are upgrading to Glimmer version 99.0.\n\nEveryone pull the latest code!\n\nRegards,\n\nRobert McGabbins"),
Email.new(date: DateTime.new(2029, 10, 15, 11, 2, 0).strftime('%F %I:%M %p'), subject: '2nd Week Report', from: '"Dianne Tux" ', message: "Hello,\n\nI was wondering if you'd like to go over the weekly report sometime this afternoon.\n\nDianne"),
Email.new(date: DateTime.new(2029, 10, 2, 10, 34, 0).strftime('%F %I:%M %p'), subject: 'Glimmer Upgrade v98.0', from: '"Robert McGabbins" ', message: "Team,\n\nWe are upgrading to Glimmer version 98.0.\n\nEveryone pull the latest code!\n\nRegards,\n\nRobert McGabbins"),
]
)
end
def launch
shell {
grid_layout
text 'Hello, Custom Shell!'
label {
font height: 24, style: :bold
text 'Emails:'
}
label {
font height: 18
text 'Click an email to view its message'
}
table {
layout_data :fill, :fill, true, true
table_column {
text 'Date:'
width 180
}
table_column {
text 'Subject:'
width 180
}
table_column {
text 'From:'
width 360
}
items bind(@email_system, :emails), column_properties(:date, :subject, :from)
on_mouse_up { |event|
email = event.table_item.get_data
Thread.new do
async_exec {
email_shell(date: email.date, subject: email.subject, from: email.from, message: email.message).open
}
end
}
}
}.open
end
end
HelloCustomShell.new.launch
```
Glimmer app on the desktop (using [`glimmer-dsl-swt`](https://github.com/AndyObtiva/glimmer-dsl-swt) gem):


Glimmer app on the web (using `glimmer-dsl-opal` gem):
Start the Rails server:
```
rails s
```
Visit `http://localhost:3000`
You should see "Hello, Custom Widget!"


#### Hello, Radio!
This is the low level way of using `radio`
Add the following require statement to `app/assets/javascripts/application.rb`
```ruby
require 'glimmer-dsl-opal/samples/hello/hello_radio'
```
Glimmer app on the desktop (using [`glimmer-dsl-swt`](https://github.com/AndyObtiva/glimmer-dsl-swt) gem):

Glimmer app on the web (using `glimmer-dsl-opal` gem):
Start the Rails server:
```
rails s
```
Visit `http://localhost:3000`
You should see "Hello, Radio!"

#### Hello, Radio Group!
`radio_group` is a level higher than `radio` in abstraction. It generates a group of radio widgets based on available options in model `attribute_options` methods.
Add the following require statement to `app/assets/javascripts/application.rb`
```ruby
require 'glimmer-dsl-opal/samples/hello/hello_radio_group'
```
Or add the Glimmer code directly if you prefer to play around with it:
```ruby
class HelloRadioGroup
class Person
attr_accessor :gender, :age_group
def initialize
reset!
end
def gender_options
['Male', 'Female']
end
def age_group_options
['Child', 'Teen', 'Adult', 'Senior']
end
def reset!
self.gender = nil
self.age_group = 'Adult'
end
end
include Glimmer::UI::CustomShell
before_body {
@person = Person.new
}
body {
shell {
text 'Hello, Radio Group!'
row_layout :vertical
label {
text 'Gender:'
font style: :bold
}
radio_group {
row_layout :horizontal
selection <=> [@person, :gender]
}
label {
text 'Age Group:'
font style: :bold
}
radio_group {
row_layout :horizontal
selection <=> [@person, :age_group]
}
button {
text 'Reset'
on_widget_selected do
@person.reset!
end
}
}
}
end
HelloRadioGroup.launch
```
Glimmer app on the desktop (using [`glimmer-dsl-swt`](https://github.com/AndyObtiva/glimmer-dsl-swt) gem):

Glimmer app on the web (using `glimmer-dsl-opal` gem):
Start the Rails server:
```
rails s
```
Visit `http://localhost:3000`
You should see "Hello, Radio Group!"

#### Hello, Group!
Not to be confused with `radio_group` or `checkbox_group`, `group` simply groups arbitrary widgets together and adds a title header above them.
Add the following require statement to `app/assets/javascripts/application.rb`
```ruby
require 'glimmer-dsl-opal/samples/hello/hello_group'
```
Glimmer app on the desktop (using [`glimmer-dsl-swt`](https://github.com/AndyObtiva/glimmer-dsl-swt) gem):

Glimmer app on the web (using `glimmer-dsl-opal` gem):
Start the Rails server:
```
rails s
```
Visit `http://localhost:3000`
You should see "Hello, Group!"

#### Hello, Canvas!
This is a minimal initial version of the [Hello, Canvas! sample included in Glimmer DSL for SWT](https://github.com/AndyObtiva/glimmer-dsl-swt/blob/master/docs/reference/GLIMMER_SAMPLES.md#hello-canvas).
It [supports](#supported-glimmer-dsl-keywords) all shapes and attribute data-binding, but no shape nesting or gradient support yet.
Add the following require statement to `app/assets/javascripts/application.rb`
```ruby
require 'glimmer-dsl-opal/samples/hello/hello_canvas'
```
Glimmer app on the desktop (using [`glimmer-dsl-swt`](https://github.com/AndyObtiva/glimmer-dsl-swt) gem):

Glimmer app on the web (using `glimmer-dsl-opal` gem):
Start the Rails server:
```
rails s
```
Visit `http://localhost:3000`
You should see "Hello, Canvas!"

#### Hello, C Combo!
This is the low level way of using `c_combo`
Add the following require statement to `app/assets/javascripts/application.rb`
```ruby
require 'glimmer-dsl-opal/samples/hello/hello_c_combo'
```
Glimmer app on the desktop (using [`glimmer-dsl-swt`](https://github.com/AndyObtiva/glimmer-dsl-swt) gem):


Glimmer app on the web (using `glimmer-dsl-opal` gem):
Start the Rails server:
```
rails s
```
Visit `http://localhost:3000`
You should see "Hello, C Combo!"


#### Hello, C Tab!
This is the low level way of using `c_tab_folder`/`c_tab_item`
Add the following require statement to `app/assets/javascripts/application.rb`
```ruby
require 'glimmer-dsl-opal/samples/hello/hello_c_tab'
```
Glimmer app on the desktop (using [`glimmer-dsl-swt`](https://github.com/AndyObtiva/glimmer-dsl-swt) gem):


Glimmer app on the web (using `glimmer-dsl-opal` gem):
Start the Rails server:
```
rails s
```
Visit `http://localhost:3000`
You should see "Hello, C Tab!"


#### Hello, Checkbox!
This is the low level way of using `checkbox`
Add the following require statement to `app/assets/javascripts/application.rb`
```ruby
require 'glimmer-dsl-opal/samples/hello/hello_checkbox'
```
Glimmer app on the desktop (using [`glimmer-dsl-swt`](https://github.com/AndyObtiva/glimmer-dsl-swt) gem):

Glimmer app on the web (using `glimmer-dsl-opal` gem):
Start the Rails server:
```
rails s
```
Visit `http://localhost:3000`
You should see "Hello, Checkbox!"

#### Hello, Checkbox Group!
`checkbox_group` is a level higher than `checkbox` in abstraction. It generates a group of checkbox widgets based on available options in model `attribute_options` methods.
Add the following require statement to `app/assets/javascripts/application.rb`
```ruby
require 'glimmer-dsl-opal/samples/hello/hello_checkbox_group'
```
Or add the Glimmer code directly if you prefer to play around with it:
```ruby
class HelloCheckboxGroup
class Person
attr_accessor :activities
def initialize
reset_activities
end
def activities_options
['Skiing', 'Snowboarding', 'Snowmobiling', 'Snowshoeing']
end
def reset_activities
self.activities = ['Snowboarding']
end
end
include Glimmer::UI::CustomShell
before_body {
@person = Person.new
}
body {
shell {
text 'Hello, Checkbox Group!'
row_layout :vertical
label {
text 'Check all snow activities you are interested in:'
font style: :bold
}
checkbox_group {
selection <=> [@person, :activities]
}
button {
text 'Reset Activities'
on_widget_selected do
@person.reset_activities
end
}
}
}
end
HelloCheckboxGroup.launch
```
Glimmer app on the desktop (using [`glimmer-dsl-swt`](https://github.com/AndyObtiva/glimmer-dsl-swt) gem):

Glimmer app on the web (using `glimmer-dsl-opal` gem):
Start the Rails server:
```
rails s
```
Visit `http://localhost:3000`
You should see "Hello, Checkbox Group!"

#### Hello, Date Time!
Add the following require statement to `app/assets/javascripts/application.rb`
```ruby
require 'glimmer-dsl-opal/samples/hello/hello_date_time'
```
Glimmer app on the desktop (using [`glimmer-dsl-swt`](https://github.com/AndyObtiva/glimmer-dsl-swt) gem):

Glimmer app on the web (using `glimmer-dsl-opal` gem):
Start the Rails server:
```
rails s
```
Visit `http://localhost:3000`
You should see "Hello, Date Time!"

#### Hello, Table!
Note: This [Glimmer DSL for SWT](https://github.com/AndyObtiva/glimmer-dsl-swt) sample has near-complete support, but is missing table context menus at the moment.
Add the following require statement to `app/assets/javascripts/application.rb`
```ruby
require 'glimmer-dsl-opal/samples/hello/hello_table'
```
Glimmer app on the desktop (using [`glimmer-dsl-swt`](https://github.com/AndyObtiva/glimmer-dsl-swt) gem):

Hello, Table! Editing Game Date

Hello, Table! Editing Game Time

Hello, Table! Editing Home Team

Hello, Table! Sorted Game Date Ascending

Hello, Table! Sorted Game Date Descending

Hello, Table! Playoff Type Combo

Hello, Table! Playoff Type Changed

Hello, Table! Game Booked

Glimmer app on the web (using `glimmer-dsl-opal` gem):
Start the Rails server:
```
rails s
```
Visit `http://localhost:3000`
You should see "Hello, Date Time!"

Hello, Table! Editing Game Date

Hello, Table! Editing Game Time

Hello, Table! Editing Home Team

Hello, Table! Sorted Game Date Ascending

Hello, Table! Sorted Game Date Descending

Hello, Table! Playoff Type Combo

Hello, Table! Playoff Type Changed

Hello, Table! Game Booked

#### Hello, Text!
Add the following require statement to `app/assets/javascripts/application.rb`
```ruby
require 'glimmer-dsl-opal/samples/hello/hello_text'
```
Glimmer app on the desktop (using [`glimmer-dsl-swt`](https://github.com/AndyObtiva/glimmer-dsl-swt) gem):

Glimmer app on the web (using `glimmer-dsl-opal` gem):
Start the Rails server:
```
rails s
```
Visit `http://localhost:3000`
You should see "Hello, Text!"

#### Hello, Button!
Add the following require statement to `app/assets/javascripts/application.rb`
```ruby
require 'glimmer-dsl-opal/samples/hello/hello_button'
```
Or add the Glimmer code directly if you prefer to play around with it:
```ruby
class HelloButton
include Glimmer::UI::CustomShell
attr_accessor :count
before_body {
@count = 0
}
body {
shell {
text 'Hello, Button!'
button {
text <= [self, :count, on_read: ->(value) { "Click To Increment: #{value} " }]
on_widget_selected {
self.count += 1
}
}
}
}
end
HelloButton.launch
```
Glimmer app on the desktop (using [`glimmer-dsl-swt`](https://github.com/AndyObtiva/glimmer-dsl-swt) gem):


Glimmer app on the web (using `glimmer-dsl-opal` gem):
Start the Rails server:
```
rails s
```
Visit `http://localhost:3000`
You should see "Hello, Button!"


#### Hello, Message Box!
Add the following require statement to `app/assets/javascripts/application.rb`
```ruby
require 'glimmer-dsl-opal/samples/hello/hello_message_box'
```
Or add the Glimmer code directly if you prefer to play around with it:
```ruby
include Glimmer
shell {
text 'Hello, Message Box!'
button {
text 'Please Click To Win a Surprise'
on_widget_selected {
message_box {
text 'Surprise'
message "Congratulations!\n\nYou won $1,000,000!"
}.open
}
}
}.open
```
Glimmer app on the desktop (using [`glimmer-dsl-swt`](https://github.com/AndyObtiva/glimmer-dsl-swt) gem):


Glimmer app on the web (using `glimmer-dsl-opal` gem):
Start the Rails server:
```
rails s
```
Visit `http://localhost:3000`
You should see "Hello, Message Box!"


#### Hello, Print!
Add the following require statement to `app/assets/javascripts/application.rb`
```ruby
require 'glimmer-dsl-opal/samples/hello/hello_print'
```
Glimmer app on the desktop (using [`glimmer-dsl-swt`](https://github.com/AndyObtiva/glimmer-dsl-swt) gem):

Glimmer app on the web (using `glimmer-dsl-opal` gem):
Start the Rails server:
```
rails s
```
Visit `http://localhost:3000`
You should see "Hello, Print!"
#### Hello, Progress Bar!
Add the following require statement to `app/assets/javascripts/application.rb`
```ruby
require 'glimmer-dsl-opal/samples/hello/hello_progress_bar'
```
Glimmer app on the desktop (using [`glimmer-dsl-swt`](https://github.com/AndyObtiva/glimmer-dsl-swt) gem):

Glimmer app on the web (using `glimmer-dsl-opal` gem):
Start the Rails server:
```
rails s
```
Visit `http://localhost:3000`
You should see "Hello, Progress Bar!"

#### Hello, Pop Up Context Menu!
Add the following require statement to `app/assets/javascripts/application.rb`
```ruby
require 'glimmer-dsl-opal/samples/hello/hello_pop_up_context_menu'
```
Or add the Glimmer code directly if you prefer to play around with it:
```ruby
include Glimmer
shell {
grid_layout {
margin_width 0
margin_height 0
}
text 'Hello, Pop Up Context Menu!'
label {
text "Right-Click on the Text to\nPop Up a Context Menu"
font height: 50
menu {
menu {
text '&History'
menu {
text '&Recent'
menu_item {
text 'File 1'
on_widget_selected {
message_box {
text 'File 1'
message 'File 1 Contents'
}.open
}
}
menu_item {
text 'File 2'
on_widget_selected {
message_box {
text 'File 2'
message 'File 2 Contents'
}.open
}
}
}
menu {
text '&Archived'
menu_item {
text 'File 3'
on_widget_selected {
message_box {
text 'File 3'
message 'File 3 Contents'
}.open
}
}
menu_item {
text 'File 4'
on_widget_selected {
message_box {
text 'File 4'
message 'File 4 Contents'
}.open
}
}
}
}
}
}
}.open
```
Glimmer app on the desktop (using [`glimmer-dsl-swt`](https://github.com/AndyObtiva/glimmer-dsl-swt) gem):


Glimmer app on the web (using `glimmer-dsl-opal` gem):
Start the Rails server:
```
rails s
```
Visit `http://localhost:3000`
You should see "Hello, Pop Up Context Menu!"


#### Hello, Menu Bar!
This sample demonstrates a menu bar similar to the File menu bar you see at the top of desktop applications.
In web applications, it is typically used to provide website information architecture by denoting things like Products, News, Careers, and About.
In web applications, it is also typically styled by CSS with margin/padding around every menu, distancing it from the top.
When auto-webifying a pre-existing desktop application, the menu bar can be hidden with CSS if not needed, or simply shown on hover only. Web designers could decide these things to their heart's content with pure CSS independently of the developers' code.
Add the following require statement to `app/assets/javascripts/application.rb`
```ruby
require 'glimmer-dsl-opal/samples/hello/hello_menu_bar'
```
Or add the Glimmer code directly if you prefer to play around with it:
```ruby
include Glimmer
COLORS = [:white, :red, :yellow, :green, :blue, :magenta, :gray, :black]
shell {
grid_layout {
margin_width 0
margin_height 0
}
text 'Hello, Menu Bar!'
@label = label(:center) {
font height: 50
text 'Check Out The Menu Bar Above!'
}
menu_bar {
menu {
text '&File'
menu_item {
text '&New'
accelerator :command, :N
on_widget_selected {
message_box {
text 'New'
message 'New file created.'
}.open
}
}
menu_item {
text '&Open...'
accelerator :command, :O
on_widget_selected {
message_box {
text 'Open'
message 'Opening File...'
}.open
}
}
menu {
text 'Open &Recent'
menu_item {
text 'File 1'
on_widget_selected {
message_box {
text 'File 1'
message 'File 1 Contents'
}.open
}
}
menu_item {
text 'File 2'
on_widget_selected {
message_box {
text 'File 2'
message 'File 2 Contents'
}.open
}
}
}
menu_item(:separator)
menu_item {
text 'E&xit'
on_widget_selected {
exit(0)
}
}
}
menu {
text '&Edit'
menu_item {
text 'Cut'
accelerator :command, :X
}
menu_item {
text 'Copy'
accelerator :command, :C
}
menu_item {
text 'Paste'
accelerator :command, :V
}
}
menu {
text '&Options'
menu_item(:radio) {
text '&Enabled'
on_widget_selected {
@select_one_menu.enabled = true
@select_multiple_menu.enabled = true
}
}
@select_one_menu = menu {
text '&Select One'
enabled false
menu_item(:radio) {
text 'Option 1'
}
menu_item(:radio) {
text 'Option 2'
}
menu_item(:radio) {
text 'Option 3'
}
}
@select_multiple_menu = menu {
text '&Select Multiple'
enabled false
menu_item(:check) {
text 'Option 4'
}
menu_item(:check) {
text 'Option 5'
}
menu_item(:check) {
text 'Option 6'
}
}
}
menu {
text '&Format'
menu {
text '&Background Color'
COLORS.each { |color_style|
menu_item(:radio) {
text color_style.to_s.split('_').map(&:capitalize).join(' ')
on_widget_selected {
@label.background = color_style
}
}
}
}
menu {
text 'Foreground &Color'
COLORS.each { |color_style|
menu_item(:radio) {
text color_style.to_s.split('_').map(&:capitalize).join(' ')
on_widget_selected {
@label.foreground = color_style
}
}
}
}
}
menu {
text '&View'
menu_item(:radio) {
text 'Small'
on_widget_selected {
@label.font = {height: 25}
@label.parent.pack
}
}
menu_item(:radio) {
text 'Medium'
selection true
on_widget_selected {
@label.font = {height: 50}
@label.parent.pack
}
}
menu_item(:radio) {
text 'Large'
on_widget_selected {
@label.font = {height: 75}
@label.parent.pack
}
}
}
menu {
text '&Help'
menu_item {
text '&Manual'
accelerator :command, :shift, :M
on_widget_selected {
message_box {
text 'Manual'
message 'Manual Contents'
}.open
}
}
menu_item {
text '&Tutorial'
accelerator :command, :shift, :T
on_widget_selected {
message_box {
text 'Tutorial'
message 'Tutorial Contents'
}.open
}
}
menu_item(:separator)
menu_item {
text '&Report an Issue...'
on_widget_selected {
message_box {
text 'Report an Issue'
message 'Reporting an issue...'
}.open
}
}
}
}
}.open
```
Glimmer app on the desktop (using [`glimmer-dsl-swt`](https://github.com/AndyObtiva/glimmer-dsl-swt) gem):


Glimmer app on the web (using `glimmer-dsl-opal` gem):
Start the Rails server:
```
rails s
```
Visit `http://localhost:3000`
You should see "Hello, Menu Bar!"


#### Hello, Dialog!
This sample demonstrates a modal dialog similar to message_box, but allows adding arbitrary widgets, not just a message.
Add the following require statement to `app/assets/javascripts/application.rb`
```ruby
require 'glimmer-dsl-opal/samples/hello/hello_dialog'
```
Or add the Glimmer code directly if you prefer to play around with it:
```ruby
include Glimmer
shell {
row_layout :vertical
text 'Hello, Dialog!'
7.times { |n|
dialog_number = n + 1
button {
layout_data {
width 200
height 50
}
text "Dialog #{dialog_number}"
on_widget_selected {
dialog { |dialog_proxy|
row_layout(:vertical) {
center true
}
text "Dialog #{dialog_number}"
label {
text "Given `dialog` is modal, you cannot interact with the main window till the dialog is closed."
}
composite {
row_layout {
margin_height 0
margin_top 0
margin_bottom 0
}
label {
text "Unlike `message_box`, `dialog` can contain arbitrary widgets:"
}
radio {
text 'Radio'
}
checkbox {
text 'Checkbox'
}
}
button {
text 'Close'
on_widget_selected {
dialog_proxy.close
}
}
}.open
}
}
}
}.open
```
Glimmer app on the desktop (using [`glimmer-dsl-swt`](https://github.com/AndyObtiva/glimmer-dsl-swt) gem):


Glimmer app on the web (using `glimmer-dsl-opal` gem):
Start the Rails server:
```
rails s
```
Visit `http://localhost:3000`
You should see "Hello, Dialog!"


### Elaborate Samples
#### Login
Add the following require statement to `app/assets/javascripts/application.rb`
```ruby
require 'glimmer-dsl-opal/samples/elaborate/login'
```
Or add the Glimmer code directly if you prefer to play around with it:
```ruby
require "observer"
class LoginPresenter
attr_accessor :user_name
attr_accessor :password
attr_accessor :status
def initialize
@user_name = ""
@password = ""
@status = "Logged Out"
end
def status=(status)
@status = status
notify_observers("logged_in")
notify_observers("logged_out")
end
def valid?
!@user_name.to_s.strip.empty? && [email protected]_s.strip.empty?
end
def logged_in
self.status == "Logged In"
end
def logged_out
!self.logged_in
end
def login
return unless valid?
self.status = "Logged In"
end
def logout
self.user_name = ""
self.password = ""
self.status = "Logged Out"
end
end
class Login
include Glimmer::UI::CustomShell
before_body {
@presenter = LoginPresenter.new
}
body {
shell {
text "Login"
composite {
grid_layout 2, false #two columns with differing widths
label { text "Username:" } # goes in column 1
@user_name_text = text { # goes in column 2
text <=> [@presenter, :user_name]
enabled <= [@presenter, :logged_out?, computed_by: :status]
on_key_pressed { |event|
@password_text.set_focus if event.keyCode == swt(:cr)
}
}
label { text "Password:" }
@password_text = text(:password, :border) {
text <=> [@presenter, :password]
enabled <= [@presenter, :logged_out?, computed_by: :status]
on_key_pressed { |event|
@presenter.login! if event.keyCode == swt(:cr)
}
}
label { text "Status:" }
label { text <= [@presenter, :status] }
button {
text "Login"
enabled <= [@presenter, :logged_out?, computed_by: :status]
on_widget_selected { @presenter.login! }
on_key_pressed { |event|
if event.keyCode == swt(:cr)
@presenter.login!
end
}
}
button {
text "Logout"
enabled <= [@presenter, :logged_in?, computed_by: :status]
on_widget_selected { @presenter.logout! }
on_key_pressed { |event|
if event.keyCode == swt(:cr)
@presenter.logout!
@user_name_text.set_focus
end
}
}
}
}
}
end
Login.launch
```
Glimmer app on the desktop (using [`glimmer-dsl-swt`](https://github.com/AndyObtiva/glimmer-dsl-swt) gem):


Glimmer app on the web (using `glimmer-dsl-opal` gem):
Start the Rails server:
```
rails s
```
Visit `http://localhost:3000`
You should see "Login" dialog


#### Contact Manager
Add the following require statement to `app/assets/javascripts/application.rb`
```ruby
require 'glimmer-dsl-opal/samples/elaborate/contact_manager'
```
Glimmer app on the desktop (using [`glimmer-dsl-swt`](https://github.com/AndyObtiva/glimmer-dsl-swt) gem):
Glimmer DSL for SWT Contact Manager

Glimmer DSL for SWT Contact Manager Find

Glimmer DSL for SWT Contact Manager Edit Started

Glimmer DSL for SWT Contact Manager Edit In Progress

Glimmer DSL for SWT Contact Manager Edit Done

Glimmer app on the web (using `glimmer-dsl-opal` gem):
Start the Rails server:
```
rails s
```
Visit `http://localhost:3000`
You should see "Contact Manager"
Glimmer DSL for Opal Contact Manager

Glimmer DSL for Opal Contact Manager Find

Glimmer DSL for Opal Contact Manager Edit Started

Glimmer DSL for Opal Contact Manager Edit In Progress

Glimmer DSL for Opal Contact Manager Edit Done

#### Tetris
This is a slightly minimal version of the [Tetris seen in Glimmer DSL for SWT](https://github.com/AndyObtiva/glimmer-dsl-swt/blob/master/docs/reference/GLIMMER_SAMPLES.md#glimmer-tetris).
Note that while the Glimmer GUI DSL code is mostly the same, some of the behavioral code around threads is changed
into async Opal code via the [opal-async](https://github.com/AndyObtiva/opal-async) gem due to the async nature of transpiled JavaScript.
Still, this sample has done the remarkable feat of reusing all of the Tetris model/view logic from Glimmer DSL for SWT mostly unchanged.
Add the following require statement to `app/assets/javascripts/application.rb`
```ruby
require 'glimmer-dsl-opal/samples/elaborate/tetris'
```
Glimmer app on the desktop (using [`glimmer-dsl-swt`](https://github.com/AndyObtiva/glimmer-dsl-swt) gem):

Glimmer app on the web (using `glimmer-dsl-opal` gem):
Start the Rails server:
```
rails s
```
Visit `http://localhost:3000`
You should see "Tetris" (a minimal version of the one in Glimmer DSL for SWT)


#### Tic Tac Toe
Add the following require statement to `app/assets/javascripts/application.rb`
```ruby
require 'glimmer-dsl-opal/samples/elaborate/tic_tac_toe'
```
Glimmer app on the desktop (using [`glimmer-dsl-swt`](https://github.com/AndyObtiva/glimmer-dsl-swt) gem):


Glimmer app on the web (using `glimmer-dsl-opal` gem):
Start the Rails server:
```
rails s
```
Visit `http://localhost:3000`
You should see "Tic Tac Toe"


#### User Profile
Code: [lib/glimmer-dsl-opal/samples/elaborate/user_profile](lib/glimmer-dsl-opal/samples/elaborate/user_profile.rb)
Add the following require statement to `app/assets/javascripts/application.rb`
```ruby
require 'glimmer-dsl-opal/samples/elaborate/user_profile'
```
Glimmer app on the desktop (using [`glimmer-dsl-swt`](https://github.com/AndyObtiva/glimmer-dsl-swt) gem):

Glimmer app on the web (using `glimmer-dsl-opal` gem):
Start the Rails server:
```
rails s
```
Visit `http://localhost:3000`
You should see "User Profile"

#### Weather
This sample does everything the desktop sample does except for the Canvas Shape DSL rectangle decoration (until supported).
Code: [lib/glimmer-dsl-opal/samples/elaborate/weather](lib/glimmer-dsl-opal/samples/elaborate/weather.rb)
Add the following require statement to `app/assets/javascripts/application.rb`
```ruby
require 'glimmer-dsl-opal/samples/elaborate/weather'
```
Glimmer app on the desktop (using [`glimmer-dsl-swt`](https://github.com/AndyObtiva/glimmer-dsl-swt) gem):


Glimmer app on the web (using `glimmer-dsl-opal` gem):
Start the Rails server:
```
rails s
```
Visit `http://localhost:3000`
You should see "Weather"


### External Samples
#### Glimmer Calculator
Add the [glimmer-cs-calculator](https://github.com/AndyObtiva/glimmer-cs-calculator) gem to `Gemfile` (without requiring):
```
gem 'glimmer-cs-calculator', require: false
```
Add the following require statement to `app/assets/javascripts/application.rb`
```ruby
require 'glimmer-cs-calculator/launch'
```
Glimmer app on the desktop (using the [`glimmer-dsl-swt`](https://github.com/AndyObtiva/glimmer-dsl-swt) gem):
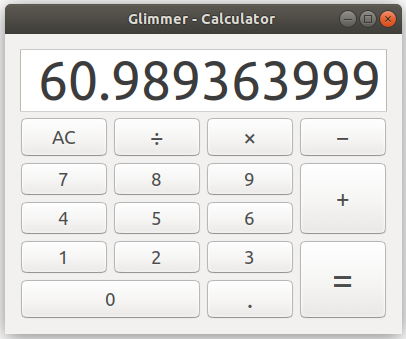
Glimmer app on the web (using `glimmer-dsl-opal` gem):
Start the Rails server:
```
rails s
```
Visit `http://localhost:3000`
(or visit: http://glimmer-cs-calculator-server.herokuapp.com)
You should see "Glimmer Calculator"
[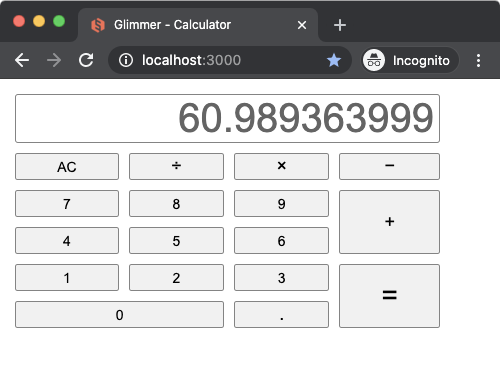](http://glimmer-cs-calculator-server.herokuapp.com)
Here is an Apple Calculator CSS themed version (with [CSS only](https://github.com/AndyObtiva/glimmer-cs-calculator/blob/master/server/glimmer-cs-calculator-server/app/assets/stylesheets/welcomes_apple.scss), no app code changes):
Visit http://glimmer-cs-calculator-server.herokuapp.com/welcomes/apple
You should see "Apple Calculator Theme"
[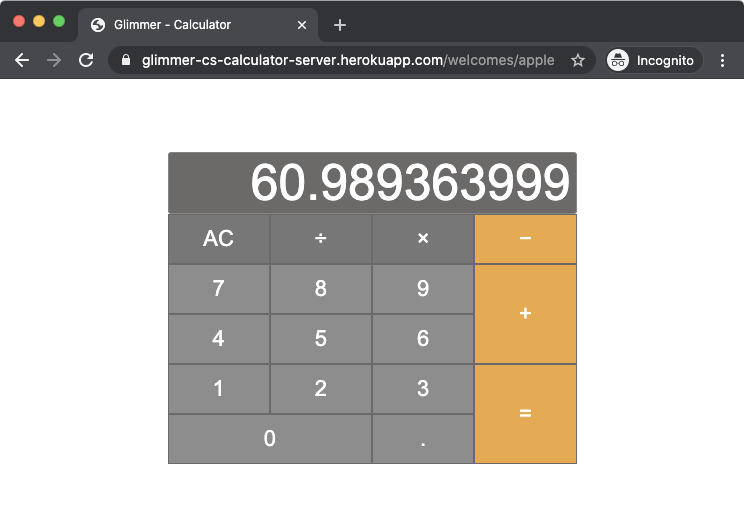](http://glimmer-cs-calculator-server.herokuapp.com/welcomes/apple)
## Glimmer Supporting Libraries
Here is a list of notable 3rd party gems used by Glimmer DSL for Opal:
- [glimmer-dsl-xml](https://github.com/AndyObtiva/glimmer-dsl-xml): Glimmer DSL for XML & HTML in pure Ruby.
- [glimmer-dsl-css](https://github.com/AndyObtiva/glimmer-dsl-css): Glimmer DSL for CSS (Cascading Style Sheets) in pure Ruby.
- [opal-async](https://github.com/AndyObtiva/opal-async): Non-blocking tasks and enumerators for Opal.
- [to_collection](https://github.com/AndyObtiva/to_collection): Treat an array of objects and a singular object uniformly as a collection of objects.
## Glimmer Process
[Glimmer Process](https://github.com/AndyObtiva/glimmer/blob/master/PROCESS.md) is the lightweight software development process used for building Glimmer libraries and Glimmer apps, which goes beyond Agile, rendering all Agile processes obsolete. [Glimmer Process](https://github.com/AndyObtiva/glimmer/blob/master/PROCESS.md) is simply made up of 7 guidelines to pick and choose as necessary until software development needs are satisfied.
Learn more by reading the [GPG](https://github.com/AndyObtiva/glimmer/blob/master/PROCESS.md) (Glimmer Process Guidelines)
## Help
### Issues
You may submit [issues](https://github.com/AndyObtiva/glimmer-dsl-opal/issues) on [GitHub](https://github.com/AndyObtiva/glimmer-dsl-opal/issues).
[Click here to submit an issue.](https://github.com/AndyObtiva/glimmer-dsl-opal/issues)
### Chat
If you need live help, try to [](https://gitter.im/AndyObtiva/glimmer?utm_source=badge&utm_medium=badge&utm_campaign=pr-badge&utm_content=badge)
## Feature Suggestions
These features have been suggested. You might see them in a future version of Glimmer. You are welcome to contribute more feature suggestions.
[TODO.md](TODO.md)
## Change Log
[CHANGELOG.md](CHANGELOG.md)
## Contributing
[CONTRIBUTING.md](CONTRIBUTING.md)
## Contributors
* [Andy Maleh](https://github.com/AndyObtiva) (Founder)
[Click here to view contributor commits.](https://github.com/AndyObtiva/glimmer-dsl-opal/graphs/contributors)
## License
[MIT](https://opensource.org/licenses/MIT)
Copyright (c) 2020-2022 - Andy Maleh.
See [LICENSE.txt](LICENSE.txt) for further details.
--
[](https://github.com/AndyObtiva/glimmer) Built for [Glimmer](https://github.com/AndyObtiva/glimmer) (DSL Framework).