Ecosyste.ms: Awesome
An open API service indexing awesome lists of open source software.
https://github.com/LJP-TW/Windows-Pwn-Step-by-Step
Let's get familiar with Windows pwn 😎
https://github.com/LJP-TW/Windows-Pwn-Step-by-Step
Last synced: 3 months ago
JSON representation
Let's get familiar with Windows pwn 😎
- Host: GitHub
- URL: https://github.com/LJP-TW/Windows-Pwn-Step-by-Step
- Owner: LJP-TW
- Created: 2020-02-24T04:10:31.000Z (over 4 years ago)
- Default Branch: master
- Last Pushed: 2020-02-24T04:36:46.000Z (over 4 years ago)
- Last Synced: 2024-01-16T23:25:17.344Z (5 months ago)
- Language: Python
- Size: 7.81 MB
- Stars: 38
- Watchers: 2
- Forks: 5
- Open Issues: 0
-
Metadata Files:
- Readme: README.md
Lists
- awesome-stars - LJP-TW/Windows-Pwn-Step-by-Step - Let's get familiar with Windows pwn 😎 (Python)
README
Windows Pwn Step-by-Step
===
- [Intro](#Goal)
- [Environment](#Environment)
- [Tools](#Tools)
- [ExploitMe_1](#ExploitMe_1)
- [Reference](#Reference)
# Intro
In Linux pwn, I often need to debug dynamically between chal and exploit script
The steps are:
1. Add a `raw_input('>')` to exploit python script
2. Run exploit script
3. Find out chal process `pid`
- Linux
- `pidof chal`
- Windows
- Use tools (e.g. 火絨劍, Process Explorer)
4. Attach debugger to this process with the `pid`
- Linux
- `gdb at $(pidof chal)`
- Windows
- Use tools (e.g. WinDbg)
5. The debugger stops at internal of something like `read()` of standard lib
- Windows
- There are many threads in process, and debugger may not stop at the thread executing `read()`
- Switch to this thread with command like `~0s`
6. Input `finish` (command of gdb), until the process return to some function like `main()`
- Windows WinDbg
- `Shift` + `F11`
7. Check whether my exploit script writes bytes to memeory correctly
- gdb
- `x/10xg $ebp-0x20`
- WinDbg
- `d @esp-0x20`
Check out ExploitMe Demo ;)
# Environment
Version 1909 (OS Build 18363.657)
# Tools
## [pwintools](https://github.com/masthoon/pwintools)
Basic pwntools for Windows written in python 2.7
### Deps
- [PythonForWindows](https://github.com/hakril/PythonForWindows)
```
git clone https://github.com/hakril/PythonForWindows.git
python setup.py install
```
- [capstone](https://www.capstone-engine.org/download.html)
```
pip install capstone
```
### Install
```
git clone https://github.com/masthoon/pwintools.git
```
- Revise [setup.py](#) from
```
install_requires=[
'PythonForWindows==0.4',
],
```
to
```
install_requires=[
'PythonForWindows==0.5',
],
```
```
python setup.py
```
## WinDbg
Install `WinDbg Preview` in Microsoft $tore
## ncat
`ncat` is part of `nmap`
Install [nmap](https://nmap.org/download.html)
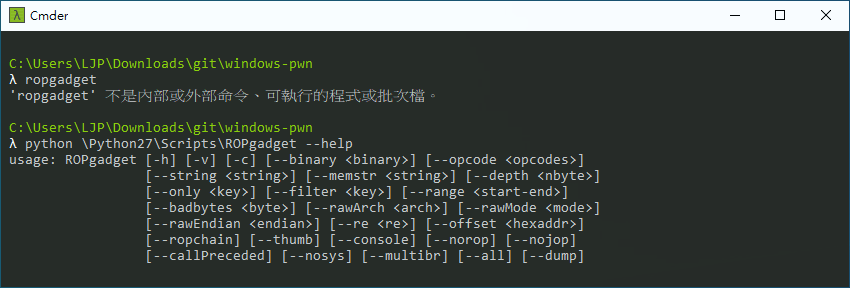
## ROPgadget
Install [ROPgadget](https://github.com/JonathanSalwan/ROPgadget)
```
pip install ropgadget
```
The path is `C:\Python27\Scripts\ROPgadget`
## 火絨劍
You can use other process explorer tools as a alter
- 火絨劍: http://bbs.huorong.cn/thread-7800-1-1.html
## PE-bear
Install [PE-bear](https://hshrzd.wordpress.com/pe-bear/)
# ExploitMe_1
`ExploitMe_1.exe` is a simple program with buffer overflow vuln
This is a similar example of [this book](https://docs.alexomar.com/biblioteca/Modern%20Windows%20Exploit%20Development.pdf), at page 89
The book also teaches you to build shellcode ;)
## Disable mitigation
- Disable `DEP`
Set VS2019 project property
- Linker
- Advanced
- Data Execution Prevention (DEP): No (/NXCOMPAT:NO)
- Disable `GS`
Set VS2019 project property
- Configuration Properties
- C/C++
- Code Generation
- Security Check: Disable Security Check (/GS-)
- Disable `ASLR`
Run [setting.bat](#)
## Demo
First, let's disable `ASLR`
```
.\setting.bat
```

### Debug
1. Edit `exploit.py`
Add `raw_input('>')` at line7

2. Run `exploit.py`

3. Find `pid`
In this demo, it's `3168`

4. Attach to this process with WinDbg
- Check `Show processes from all users`


- command `k`: Display the stack frame
- There is no something like `main`

- command `~`: See a list of all threads

- Switch to thread 0: `~0s`

- Display the stack frame again
- `ExploitMe_1!main+0x4d` that's what I want to see!

5. Return to main
- `Shift` + `F11`
WinDbg is stuck, waiting for input

- Press Enter at exploit

- `Shift` + `F11` until return to main

6. Check memory

7. Continue process
- `F10`


#### Find gadget
1. Use ROPgadget to find gadgets in kernel32.dll
- In this demo we disable ASLR, so we can use gadget in dll
```
python \Python27\Scripts\ROPgadget --binary \Windows\SysWoW64\kernel32.dll > gadget
```
2. Find `push esp ; ret`
```
0x6b86ade5 : push esp ; ret
```
3. Find Image base of `\Windows\SysWoW64\kernel32.dll`
- Use PE-bear
- Find out the Image base is `0x6b800000`

- So the offset of `push esp ; ret` gadget is `0x6b86ade5 - 0x6b800000 = 0x6ade5`
4. Do the steps of debug to step 5 again
- Then find out the where Kernel32 starts
- command `lm`: List modules
- Find out the base is `0x76f70000`

- So the gadget address is `0x76f70000 + 0x6ade5 = 0x76fdade5`
5. Check gadget

- Remember to revise exploit script
### Pwn

# Reference
- [Modern Windows Exploit Development](https://docs.alexomar.com/biblioteca/Modern%20Windows%20Exploit%20Development.pdf)
- https://stackoverflow.com/questions/4946685/good-tutorial-for-windbg
###### tags: `security`