Ecosyste.ms: Awesome
An open API service indexing awesome lists of open source software.
https://github.com/lemariva/uPySteppers
DIY rotating platform using an ESP32 connected to Wi-Fi
https://github.com/lemariva/uPySteppers
diy-project esp32 m5stack micropython rotating-objects
Last synced: 2 months ago
JSON representation
DIY rotating platform using an ESP32 connected to Wi-Fi
- Host: GitHub
- URL: https://github.com/lemariva/uPySteppers
- Owner: lemariva
- License: apache-2.0
- Created: 2020-05-31T16:39:52.000Z (about 4 years ago)
- Default Branch: master
- Last Pushed: 2020-05-31T20:30:02.000Z (about 4 years ago)
- Last Synced: 2024-01-27T08:10:58.945Z (5 months ago)
- Topics: diy-project, esp32, m5stack, micropython, rotating-objects
- Language: Python
- Homepage: https://lemariva.com/blog/2020/06/micropython-diy-rotating-platform-wifi
- Size: 24.4 KB
- Stars: 11
- Watchers: 4
- Forks: 3
- Open Issues: 0
-
Metadata Files:
- Readme: README.md
- License: LICENSE
Lists
- awesome-micropython - uPySteppers - DIY rotating platform using an ESP32 connected to WiFi. (Libraries / Motion)
README
# uPySteppers
This code is for a DIY rotating platform. The angle, speed, and direction of rotation are controlled using an ESP32 connected to Wi-Fi. The ESP32 is wired to an L298N that drives a bipolar stepper motor. The ESP32 is programmed using MicroPython and hosts a website that allows you to configure and start the rotation remotely.
## Check the project
[MicroPython: DIY rotating platform using an ESP32 connected to Wi-Fi](https://lemariva.com/blog/2020/06/micropython-diy-rotating-platform-wifi)
## Preview
[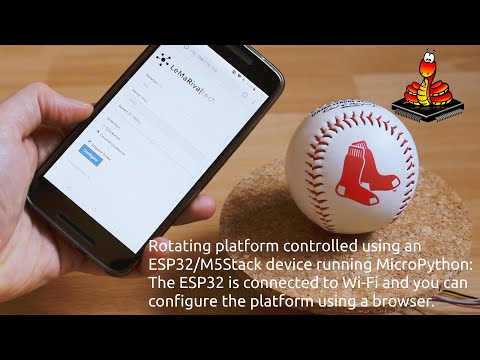](https://www.youtube.com/watch?v=ZLaloms90uk)
## DIY
I used a bipolar stepper motor to rotate the plate. The L298N is a friendly motor driver and works well with the bipolar stepper motor. You can also use an L293D. However, the L293D can drive a motor with up to 600mA, while the L298N supports up to 2A. Both ICs can be used for brushed motor, bipolar and unipolar stepper motors.
To build the rotating platform, follow these steps:
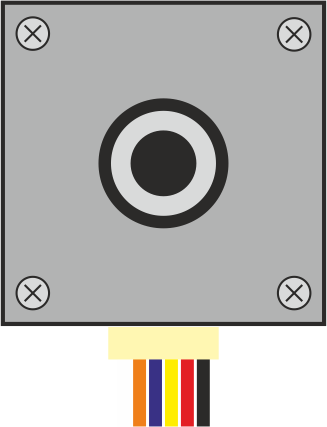
1. Connect the bipolar stepper motor to the L298N board. Check the cable colors in Figs. 1 and 2. to see how to connect the bipolar stepper motor cables.
2. Connect the L298N board to the ESP32 board. I connected the INx pins following this table:
| | |
|:--|:--|
| **L298N** | **ESP32** |
|`In1`| `32`|
|`In2`|`33`|
|`In3`|`26`|
|`In4`|`25`|
|`GND`|`GND`|
but you can change this inside the `config.py` file.
3. Bridge the jumpers `ENA` and `ENB`.
4. Bridge the `12V` jumper, if your motor needs `12V` and connect an external power supply to the terminal board. Otherwise, you can use `5V`. If you've 12V stepper motors, you'll need another power supply for the ESP32.
5. Clone the repository `lemariva/uPySteppers`
```
git clone https://github.com/lemariva/uPySteppers.git
```
6. Rename the file `config.sample.py` to `config.py` and configure your Wi-Fi credentials. If you've changed the pins to connect to the L298N, modify the `motor_config` variable too. Configure the `number_of_steps` and `max_speed` of your motor. In my case, the motor has a resolution of 1.8°, which means it needs 200 steps to achieve a 360° rotation. Thus, 200 is `number_of_steps`. The `max_speed` parameter unit is steps/second. My motor can run up to 80 steps/second with the actual moment of inertia of my projects (battery + boards + etc.). If you set this parameter too high, the magnetic field rotates, but it won't be followed by the rotor. Therefore, it doesn't rotate.
7. Flash MicroPython on the ESP32. If you are new with this, follow the steps in this tutorial: [Tutorial: Getting Started with MicroPython on ESP32, M5Stack, and ESP8266](https://lemariva.com/blog/2020/03/tutorial-getting-started-micropython-v20).
8. Upload the project code to the ESP32 using [VSCode and the PyMakr extension](https://lemariva.com/blog/2018/12/micropython-visual-studio-code-as-ide).
9. Connect to the ESP32 using a browser. You should get something like in the video. Have fun! :)
| | |
|:------|:------|
| |
| |
|
|Fig. 1: Bipolar Stepper Motor schematic.| Fig. 2: L298N board schematic. |