Ecosyste.ms: Awesome
An open API service indexing awesome lists of open source software.
https://github.com/claws/BH1750
An Arduino library for the digital light sensor breakout boards containing the BH1750FVI IC
https://github.com/claws/BH1750
arduino arduino-library light lux sensor
Last synced: 8 days ago
JSON representation
An Arduino library for the digital light sensor breakout boards containing the BH1750FVI IC
- Host: GitHub
- URL: https://github.com/claws/BH1750
- Owner: claws
- License: mit
- Created: 2013-03-29T03:25:38.000Z (over 11 years ago)
- Default Branch: master
- Last Pushed: 2023-08-18T20:16:03.000Z (11 months ago)
- Last Synced: 2024-03-10T06:33:44.750Z (4 months ago)
- Topics: arduino, arduino-library, light, lux, sensor
- Language: C++
- Size: 371 KB
- Stars: 240
- Watchers: 20
- Forks: 106
- Open Issues: 16
-
Metadata Files:
- Readme: README.md
- License: LICENSE
Lists
- Awesome-arduino - BH1750 - An Arduino library for the digital light sensor BH1750FVI (Libraries)
- awesome-arduino - BH1750 - An Arduino library for the digital light sensor BH1750FVI (Libraries)
README
# BH1750
[](https://github.com/claws/BH1750/actions)
This package contains an Arduino library for digital light sensor breakout boards containing the
BH1750FVI IC.
The BH1750 board uses I2C for communication which requires two pins to
communicate with the device. Configuring the I2C bus must be done in user code
(not library code). This approach has been adopted so it can be done once and
will better support the various options for different platforms.
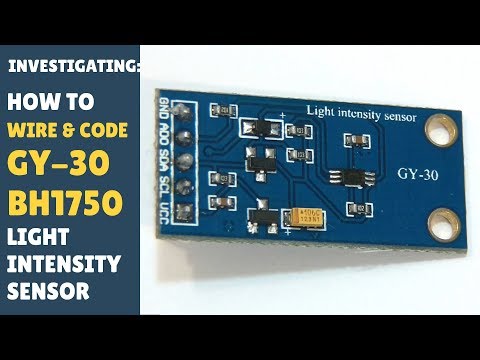
A common module containing the BH1750 component is the GY-30 shown below.

## Overview
The BH1750 has six different measurement modes which are divided in two groups;
continuous and one-time measurements. In continuous mode the sensor
continuously measures lightness value. In one-time mode, the sensor makes only
one measurement and then goes into Power Down mode.
Each mode has three different precisions:
- Low Resolution Mode - (4 lx precision, 16ms measurement time)
- High Resolution Mode - (1 lx precision, 120ms measurement time)
- High Resolution Mode 2 - (0.5 lx precision, 120ms measurement time)
By default, this library uses Continuous High Resolution Mode, but you can
change this to a different mode by passing the mode argument to
BH1750.begin().
When the One-Time mode is used your sensor will go into Power Down mode when
it completes the measurement and you've read it. When the sensor is powered up
again it returns to the default mode which means it needs to be reconfigured
back into One-Time mode. This library has been implemented to automatically
reconfigure the sensor when you next attempt a measurement so you should not
have to worry about such low level details.
Usually you will get an integer value which represent the lux equivalent.
- Low Resolution Mode - (generic range: 0.0 up to 54612.5 lux)
- High Resolution Mode - (generic range: 0.0 up to 54612.5 lux)
- High Resolution Mode 2 - (generic range: 0.0 up to 27306.25 lux)
The sensor itself returns a 16 bit unsigned integer. Therefore the maximum value is limited in general.
The standard conversion between the so called 'counts' to lux is 1/1.2, that means you get a smaller value.
As we use float, if an error occurs you will get a negative value.
- -1 no valid data was transmitted from the sensor
- -2 device is not configured
Otherwise the measured counts are converted to lux and returned. If no advanced parameters are changed the maximum lux value is 54612.5 lx.
As the sensor counts impact of light in a specific time frame you could change this time frame.
This is needed if you use an overlay window or compensate for environmental influence like darkness.
This time frame is defined by a register which is called MTreg. Therefore you could choose a value between 32 and 254.
The default value is 69; keep in mind that the measurement time is changed accordingly.
The datasheet for the BH1750 chip can be obtained
[here](https://www.mouser.de/datasheet/2/348/Rohm_11162017_ROHMS34826-1-1279292.pdf)[2011.11 Rev.D]
## Installation [](https://www.ardu-badge.com/BH1750)
- **(For Arduino >= 1.5.x)** Install this package by searching for it in the
Arduino Library Manager and then clicking ``install``. Alternatively, this
library can be installed manually by clicking "Clone or download" -> "Download ZIP"
button. Then open Arduino IDE, click `Sketch -> Include library -> Add .ZIP library`
and select the downloaded archive.
- **(For Arduino < 1.5.x)** Download this package as an archive by clicking
"Clone or download" -> "Download ZIP" button. Then extract the archive to
``/My Documents/Arduino/libraries/`` folder and rename
it to `BH1750`. Restart IDE.
The following YouTube [video](https://youtu.be/ACTMQvPVMLs) (specifically from
7:20 onwards) provides a good overview of manually installing this library and
loading an example using the Arduino IDE.
[](https://youtu.be/ACTMQvPVMLs?t=437)
Information about the library installation process - https://www.arduino.cc/en/Guide/Libraries
## Example
An example using the BH1750 library in conjunction with the GY-30 board
(which contains the BH1750 component) is presented below. The example
code uses the BH1750 library in the default continuous high precision
mode when making light measurements.
### Wiring
Connections:
- VCC -> 3V3 or 5V
- GND -> GND
- SCL -> SCL (A5 on Arduino Nano, Uno, Leonardo, etc or 21 on Mega and Due, on esp8266 free selectable)
- SDA -> SDA (A4 on Arduino Nano, Uno, Leonardo, etc or 20 on Mega and Due, on esp8266 free selectable)
- ADD -> NC/GND or VCC (see below)
The ADD pin is used to set the sensor I2C address. By default (if ADD voltage
less than 0.7 * VCC) the sensor address will be 0x23. If it has voltage
greater or equal to 0.7VCC voltage (e.g. you've connected it to VCC) the
sensor address will be 0x5C.
Wiring up the GY-30 sensor board to an Arduino is shown in the diagram below.

*The image above was created using [Fritzing](http://fritzing.org/home/) and
the GY-30 module was obtained from [here](http://omnigatherum.ca/wp/?p=6)*.
### Code
Upload the BH1750 test code to your Arduino.
``` c++
#include
#include
BH1750 lightMeter;
void setup(){
Serial.begin(9600);
// Initialize the I2C bus (BH1750 library doesn't do this automatically)
// On esp8266 devices you can select SCL and SDA pins using Wire.begin(D4, D3);
Wire.begin();
lightMeter.begin();
Serial.println(F("BH1750 Test"));
}
void loop() {
float lux = lightMeter.readLightLevel();
Serial.print("Light: ");
Serial.print(lux);
Serial.println(" lx");
delay(1000);
}
```
### Output
Moving the sensor to face more light results in the lux measurements increasing.
```
BH1750 Test
Light: 70.0 lx
Light: 70.0 lx
Light: 59.0 lx
Light: 328.0 lx
Light: 333.0 lx
Light: 335.0 lx
Light: 332.0 lx
```
### More Examples
The ``examples`` directory contains more advanced use cases such as using different modes, I2C addresses and multiple Wire instances.
## Developers
The following information is for developers of this library.
### Code Format
The code in this project is formatted using ``clang-format`` tool.
Good instructions for installing ``clang-format`` can be found
[here](https://learn.adafruit.com/the-well-automated-arduino-library/formatting-with-clang-format)
Once the ``clang-format`` tool has been install you can then run the
convenience script (``ci/code-format.bash``) to check or apply the code
formatting. The script should be run from the repo's top level directory.
```shell
$ ./ci/code-format.bash
```
This script is also run as part of the project's continuous integration
checks.
If you make changes to code files then the code format can be applied
by simply passing *apply* as an argument to the script.
```shell
$ ./ci/code-format.bash apply
```
### Code Linting
The code in this project is linted using ``arduino-lint``. The tool can be
installed using the instructions [here](https://arduino.github.io/arduino-lint/latest/installation/).
To run the linter over the project use the command below.
```shell
$ arduino-lint --library-manager update --compliance strict
```
The same command is run as part of the project's continuous integration
checks.
If errors or warnings are reported then fix them and re-run the script
until they are resolved.
### Build Locally
The code in this project can be built locally using the ``arduino-cli`` tool.
The tool can be installed using the instructions [here](https://github.com/arduino/arduino-cli#quickstart). Once you have the tool installed you can compile the
examples scripts using the convenience script (``ci/compile-examples.bash``).
```shell
$ ./ci/compile-examples.bash
```
This script performs the same actions as the project's continuous integration
compile checks.
### Release Process
- Update ``library.json`` and ``library.properties`` version strings.
- Create a new project release and use the new version number as tag. Click Publish.
- Now wait about an hour for it to appear in the Arduino library manager.