Ecosyste.ms: Awesome
An open API service indexing awesome lists of open source software.
https://github.com/evermeer/AttributedTextView
Easiest way to create an attributed UITextView (with support for multiple links and from html)
https://github.com/evermeer/AttributedTextView
attributedstring links paragraph-styling styling swift uitextview
Last synced: about 2 months ago
JSON representation
Easiest way to create an attributed UITextView (with support for multiple links and from html)
- Host: GitHub
- URL: https://github.com/evermeer/AttributedTextView
- Owner: evermeer
- License: other
- Created: 2016-11-30T22:31:40.000Z (over 7 years ago)
- Default Branch: master
- Last Pushed: 2023-10-12T14:57:57.000Z (8 months ago)
- Last Synced: 2024-03-29T21:22:06.396Z (3 months ago)
- Topics: attributedstring, links, paragraph-styling, styling, swift, uitextview
- Language: Swift
- Homepage:
- Size: 618 KB
- Stars: 438
- Watchers: 8
- Forks: 54
- Open Issues: 6
-
Metadata Files:
- Readme: Readme.md
- License: LICENSE
Lists
- awesome-swift - AttributedTextView - Easiest way to create an attributed UITextView with support for multiple links, hashtags and mentions. (Libs / Text)
- awesome-swift - AttributedTextView - Easiest way to create an attributed UITextView with support for multiple links, hashtags and mentions. (Libs / Text)
- awesome-swifty - AttributedTextView - Easiest way to create an attributed UITextView with support for multiple links, hashtags and mentions. (Libs / Text)
- awesome-swift4 - AttributedTextView - Easiest way to create an attributed UITextView with support for multiple links, hashtags and mentions. (Libs / Text)
- awesome-ios-ui - AttributedTextView - Easiest way to create an attributed UITextView with support for multiple links (including hashtags and mentions). (UI / Layout)
- awesome-ios2 - AttributedTextView - Easiest way to create an attributed UITextView with support for multiple links (including hashtags and mentions). (Text / Other free courses)
- awesome-ios - AttributedTextView - Easiest way to create an attributed UITextView with support for multiple links (including hashtags and mentions). (Text / Other free courses)
- awesome-swiftxx - AttributedTextView - Easiest way to create an attributed UITextView with support for multiple links, hashtags and mentions. (Libs / Text)
- awesome-ios-star - AttributedTextView - Easiest way to create an attributed UITextView with support for multiple links (including hashtags and mentions). (Text / Other Testing)
- awesome-ios - AttributedTextView - Easiest way to create an attributed UITextView with support for multiple links (including hashtags and mentions). (Text / Other free courses)
- fucking-awesome-swift - AttributedTextView - Easiest way to create an attributed UITextView with support for multiple links, hashtags and mentions. (Libs / Text)
- awesome-swifte - AttributedTextView - Easiest way to create an attributed UITextView with support for multiple links, hashtags and mentions. (Libs / Text)
- awesome-swiftqq - AttributedTextView - Easiest way to create an attributed UITextView with support for multiple links, hashtags and mentions. (Libs / Text)
- awesome-swift - AttributedTextView - Easiest way to create an attributed UITextView with support for multiple links, hashtags and mentions. (Libs / Text)
- awesome-xamarin-forms - AttributedTextView - Easiest way to create an attributed UITextView with support for multiple links (including hashtags and mentions). (Text)
- awesome-ios - AttributedTextView - Easiest way to create an attributed UITextView with support for multiple links (including hashtags and mentions). (Text / Keychain)
- awesome-ios - AttributedTextView - Easiest way to create an attributed UITextView with support for multiple links (including hashtags and mentions). (Text / Keychain)
- awesome-ios - AttributedTextView - Easiest way to create an attributed UITextView with support for multiple links (including hashtags and mentions). (Text / Other free courses)
- awesome-iosx - AttributedTextView - Easiest way to create an attributed UITextView with support for multiple links (including hashtags and mentions). (Text / Keychain)
- awesome-ios - AttributedTextView - Easiest way to create an attributed UITextView with support for multiple links (including hashtags and mentions). (Text / Keychain)
- awesome-iosr - AttributedTextView - Easiest way to create an attributed UITextView with support for multiple links (including hashtags and mentions). (Text / Keychain)
- learn.awesome-iOS - AttributedTextView - Easiest way to create an attributed UITextView with support for multiple links (including hashtags and mentions). (Text)
- learn.awesome.ios - AttributedTextView - Easiest way to create an attributed UITextView with support for multiple links (including hashtags and mentions). (Text / Keychain)
- awesome-ios - AttributedTextView - Easiest way to create an attributed UITextView with support for multiple links (including hashtags and mentions). (Text / Keychain)
- awesome-ios - AttributedTextView - Easiest way to create an attributed UITextView with support for multiple links (including hashtags and mentions). (Text / Other Testing)
- awesome-swift - AttributedTextView - Easiest way to create an attributed UITextView (with support for multiple links and from html) ` 📝 2 years ago ` (Text [🔝](#readme))
README
## AttributedTextView
[](https://github.com/evermeer/AttributedTextView/issues)
[](http://cocoadocs.org/docsets/AttributedTextView)
[](https://github.com/evermeer/AttributedTextView/stargazers)
[](http://cocoadocs.org/docsets/AttributedTextView)
[](https://github.com/apple/swift-package-manager)
[](https://github.com/Carthage/Carthage)
[](https://developer.apple.com/swift)
[](http://cocoadocs.org/docsets/AttributedTextView)
[](http://cocoadocs.org/docsets/AttributedTextView)
[](https://github.com/evermeer)
[](http://twitter.com/evermeer)
[](http://nl.linkedin.com/in/evermeer/en)
[](http://evict.nl)
[](mailto:[email protected]?SUBJECT=About%20EVReflection)
Easiest way to create an attributed UITextView (with support for multiple links and html).
See the demo app and the playground for detailed information how to use AttributedTextView
- [Requirements](#requirements)
- [Usage](#usage)
- [General usage](#general-usage)
- [Paragraph styling](#paragraph-styling)
- [The active range](#the-active-range)
- [Sample code](#sample-code)
- [Use the attributedtext functionality on a UILabel](#use-the-attributedtext-functionality-on-a-uilabel)
- [Extending AttributedTextView](#extending-attributedtextview)
- [Decorating the Attributed object](#decorating-the-attributed-object)
- [Creating your own custom label](#creating-your-own-custom-label)
- [Creating your own custom textview](#creating-your-own-custom-textview)
- [Installation](#installation)
- [License](#license)
- [My other libraries](#My-other-libraries)
## Requirements
- iOS 8.0+
- Xcode 8.0+
## Usage
### General usage
In interfacebuilder put an UITextView on the canvas and set the base class to AttributedTextView and create a referencing outlet to the a property in your viewController. In the samples below we have called this property textView1. Always assign to the attributer property when you want to set something.
### Paragraph styling
You do have to be aware that the paragraph functions will only be applied after calling the .paragraphApplyStyling function. On start the paragraph styling will use default styling. After each range change (what happens after .all, .match* or .append) the styling will be reset to the default.
### The active range
Styling will always be applied on the active range. When executing a function on a string, then that complete string will become the active range. If you use .append to add an other string, then that latest string will become the active range. When using the + sign then that will replaced by an append on 2 Attributer objects. All functions on those objects will first be performed before the append will be executed. So if you do an .all then still only one of the strings will be tha active range. You can use brackets to influence the order of execution.
For instance here all text will be size 20
```swift
("red".red + "blue".blue).all.size(20)
```
And here only the text blue will be size 20
```swift
"red".red + "blue".blue.all.size(20)
```
And like this all text will be size 20
```swift
"red".red.append("blue").blue.all.size(20)
```
### Clickable links
When using AttributedTextView and creating links with .makeInteract, then you have to be aware that it will also automatically set the following properties which are needed for links to work.
```swift
isUserInteractionEnabled = true
isSelectable = true
isEditable = false
```
### Sample code
Here is a sample of some basic functions:
```swift
textView1.attributer =
"1. ".red
.append("This is the first test. ").green
.append("Click on ").black
.append("evict.nl").makeInteract { _ in
UIApplication.shared.open(URL(string: "http://evict.nl")!, options: [:], completionHandler: { completed in })
}.underline
.append(" for testing links. ").black
.append("Next test").underline.makeInteract { _ in
print("NEXT")
}
.all.font(UIFont(name: "SourceSansPro-Regular", size: 16))
.setLinkColor(UIColor.purple)
```

Some more attributes and now using + instead of .append:
```swift
textView1.attributer =
"2. red, ".red.underline.underline(0x00ff00)
+ "green, ".green.fontName("Helvetica").size(30)
+ "cyan, ".cyan.size(22)
+ "orange, ".orange.kern(10)
+ "blue, ".blue.strikethrough(3).baselineOffset(8)
+ "black.".shadow(color: UIColor.gray, offset: CGSize(width: 2, height: 3), blurRadius: 3.0)
```

A match and matchAll sample:
```swift
textView1.attributer = "It is this or it is that where the word is is selected".size(20)
.match("is").underline.underline(UIColor.red)
.matchAll("is").strikethrough(4)
```

A hashtags and mentions sample:
```swift
textView1.attributer = "@test: What #hashtags do we have in @evermeer #AtributedTextView library"
.matchHashtags.underline
.matchMentions
.makeInteract { link in
UIApplication.shared.open(URL(string: "https://twitter.com\(link.replacingOccurrences(of: "@", with: ""))")!, options: [:], completionHandler: { completed in })
}
```

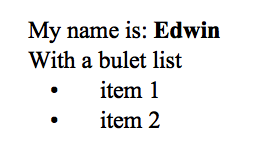
A html sample:
```swift
textView1.attributer = "My name is: Edwin
With a bulet list
- item 1
- item 2
```
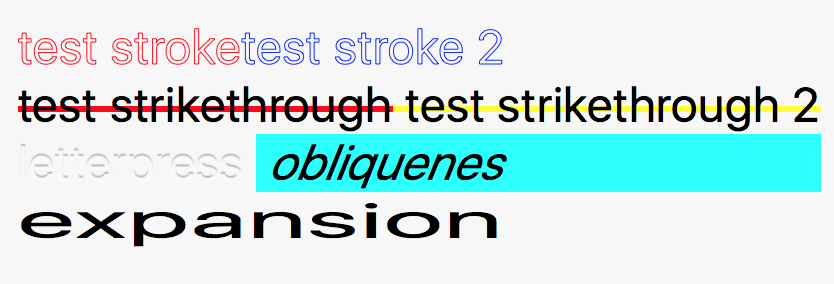
Some other text formating samples:
```swift
textView1.attributer = (
"test stroke".strokeWidth(2).strokeColor(UIColor.red)
+ "test stroke 2\n".strokeWidth(2).strokeColor(UIColor.blue)
+ "test strikethrough".strikethrough(2).strikethroughColor(UIColor.red)
+ " test strikethrough 2\n".strikethrough(2).strikethroughColor(UIColor.yellow)
+ "letterpress ".letterpress
+ " obliquenes\n".obliqueness(0.4).backgroundColor(UIColor.cyan)
+ "expansion\n".expansion(0.8)
).all.size(24)
```
Paragraph formatting:
```swift
textView1.attributer = (
"The quick brown fox jumps over the lazy dog.\nPack my box with five dozen liquor jugs.\nSeveral fabulous dixieland jazz groups played with quick tempo."
.paragraphLineHeightMultiple(5)
.paragraphLineSpacing(6)
.paragraphMinimumLineHeight(15)
.paragraphMaximumLineHeight(50)
.paragraphLineSpacing(10)
.paragraphLineBreakModeWordWrapping
.paragraphFirstLineHeadIndent(20)
.paragraphApplyStyling
).all.size(12)
```
### Use the attributedText functionality on a UILabel
You can also use the Attributer for your UILabel. You only can't use the makeInteract function:
```swift
let myUILabel = UILabel()
myUILabel.attributedText = ("Just ".red + "some ".green + "text.".orange).attributedText
```
### Extending AttributedTextView
In the demo app you can see how you can extend the AttributedTextView with a custom property / function that will perform multiple actions. Here is a simple sample that will show you how you can create a myTitle property that will set multiple attributes:
```swift
extension Attributer {
open var myTitle: Attributer {
get {
return self.fontName("Arial").size(28).color(0xffaa66).kern(5)
}
}
}
public extension String {
var myTitle: Attributer {
get {
return attributer.myTitle
}
}
}
```
### Decorating the Attributed object
In the demo app there is also a sample that shows you how you could decorate an Attributed object with default styling.
```swift
attributedTextView.attributer = decorate(4) { content in return content
+ "This is our custom title".myTitle
}
```
The decorate function can then look something like this:
```swift
func decorate(_ id: Int, _ builder: ((_ content: Attributer) -> Attributer)) -> Attributer {
var b = "Sample \(id + 1):\n\n".red
b = builder(b) // Now add the content
return b
}
```
### Creating your own custom label
There is also an AttributedLabel class which derives from UILabel which makes it easy to create your own custom control that includes support for interfacebuilder. If you put a lable on a form in interfacebuilder and set it's class to your subclass (AttributedLabelSubclassDemo in the sample below) Then you will see the text formated in interface building according to what you have implemented in the configureAttributedLabel function. Here is a sample where a highlightText property is added so that a text can be constructed where that part is highlighted.
```swift
import AttributedTextView
import UIKit
@IBDesignable open class AttributedLabelSubclassDemo: AttributedLabel {
// Add this field in interfacebuilder and make sure the interface is updated after changes
@IBInspectable var highlightText: String? {
didSet { configureAttributedLabel() }
}
// Configure our custom styling.
override open func configureAttributedLabel() {
self.numberOfLines = 0
if let highlightText = self.highlightText {
self.attributedText = self.text?.green.match(highlightText).red.attributedText
} else {
self.attributedText = self.text?.green.attributedText
}
layoutIfNeeded()
}
}
```
In the demo app there is also a lable subclass for an icon list like this:
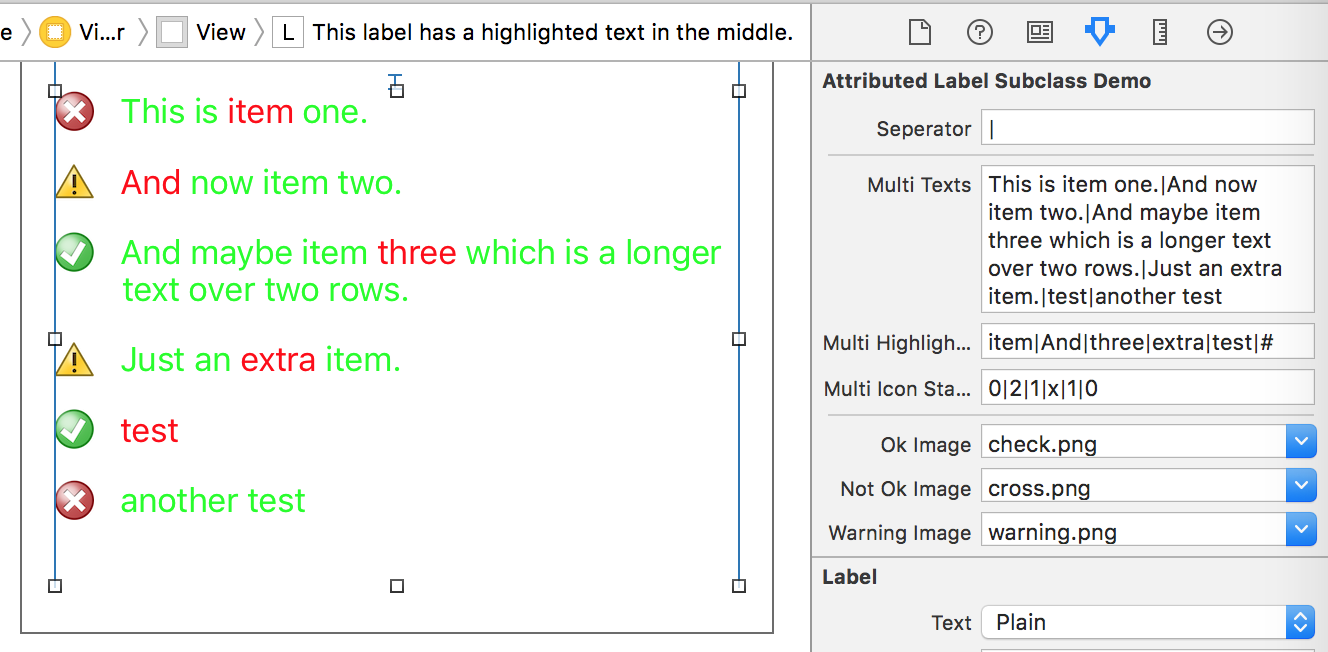
You can find the code here:
[Icon bulet list code](https://github.com/evermeer/AttributedTextView/blob/master/Demo/AttributedLabelSubclassDemo.swift#L52)
### Creating your own custom textview
You could do the same as a label with the AttributedTextView (see previous paragraph). In the sample below 2 properties are entered into interfacebuilder the linkText is the part of the text what will be clickable and linkUrl will be the webpage that will be opened.
```swift
import AttributedTextView
import UIKit
@IBDesignable class AttributedTextViewSubclassDemo: AttributedTextView {
// Add this field in interfacebuilder and make sure the interface is updated after changes
@IBInspectable var linkText: String? {
didSet { configureAttributedTextView() }
}
// Add this field in interfacebuilder and make sure the interface is updated after changes
@IBInspectable var linkUrl: String? {
didSet { configureAttributedTextView() }
}
// Configure our custom styling.
override func configureAttributedTextView() {
if let text = self.text, let linkText = self.linkText, let linkUrl = self.linkUrl {
self.attributer = text.green.match(linkText).makeInteract { _ in
UIApplication.shared.open(URL(string: linkUrl)!, options: [:], completionHandler: { completed in })
}
} else {
self.attributer = (self.text ?? "").green
}
layoutIfNeeded()
}
}
```
## Installation
### CocoaPods
[CocoaPods](http://cocoapods.org) is a dependency manager for Cocoa projects. You can install it with the following command:
```bash
$ gem install cocoapods
```
> CocoaPods 1.1.0+ is required to build AttributedTextView 0.1.0+.
To integrate AttributedTextView into your Xcode project using CocoaPods, specify it in your `Podfile`:
```ruby
source 'https://github.com/CocoaPods/Specs.git'
platform :ios, '8.0'
use_frameworks!
pod 'AttributedTextView', '~> 0.5.1'
```
Then, run the following command:
```bash
$ pod install
```
### Carthage
[Carthage](https://github.com/Carthage/Carthage) is a decentralized dependency manager that automates the process of adding frameworks to your Cocoa application.
You can install Carthage with [Homebrew](http://brew.sh/) using the following command:
```bash
$ brew update
$ brew install carthage
```
To integrate AttributedTextView into your Xcode project using Carthage, specify it in your `Cartfile`:
```ogdl
github "evermeer/AttributedTextView" ~> 0.5.1
```
### Swift Package Manager
To use AttributedTextView as a [Swift Package Manager](https://swift.org/package-manager/) package just add the following URL in your project file:
```
https://github.com/evermeer/AttributedTextView
```
And specify a version from `1.4.1` and onwards.
### Manually
If you prefer not to use either of the aforementioned dependency managers, you can integrate AttributedTextView into your project manually.
#### Git Submodules
- Open up Terminal, `cd` into your top-level project directory, and run the following command "if" your project is not initialized as a git repository:
```bash
$ git init
```
- Add AttributedTextView as a git [submodule](http://git-scm.com/docs/git-submodule) by running the following command:
```bash
$ git submodule add https://github.com/evermeer/AttributedTextView.git
$ git submodule update --init --recursive
```
- Open the new `AttributedTextView` folder, and drag the `AttributedTextView.xcodeproj` into the Project Navigator of your application's Xcode project.
> It should appear nested underneath your application's blue project icon. Whether it is above or below all the other Xcode groups does not matter.
- Select the `AttributedTextView.xcodeproj` in the Project Navigator and verify the deployment target matches that of your application target.
- Next, select your application project in the Project Navigator (blue project icon) to navigate to the target configuration window and select the application target under the "Targets" heading in the sidebar.
- In the tab bar at the top of that window, open the "General" panel.
- Click on the `+` button under the "Embedded Binaries" section.
- You will see two different `AttributedTextView.xcodeproj` folders each with two different versions of the `AttributedTextView.framework` nested inside a `Products` folder.
> It does not matter which `Products` folder you choose from.
- Select the `AttributedTextView.framework`.
- And that's it!
> The `AttributedTextView.framework` is automagically added as a target dependency, linked framework and embedded framework in a copy files build phase which is all you need to build on the simulator and a device.
#### Embeded Binaries
- Download the latest release from https://github.com/evermeer/AttributedTextView/releases
- Next, select your application project in the Project Navigator (blue project icon) to navigate to the target configuration window and select the application target under the "Targets" heading in the sidebar.
- In the tab bar at the top of that window, open the "General" panel.
- Click on the `+` button under the "Embedded Binaries" section.
- Add the downloaded `AttributedTextView.framework`.
- And that's it!
## License
AttributedTextView is released under the MIT license. See [LICENSE](https://github.com/evermeer/AttributedTextView/blob/master/LICENSE) for details.
## My other libraries:
Also see my other public source iOS libraries:
- [EVReflection](https://github.com/evermeer/EVReflection) - Reflection based (Dictionary, CKRecord, JSON and XML) object mapping with extensions for Alamofire and Moya with RxSwift or ReactiveSwift
- [EVCloudKitDao](https://github.com/evermeer/EVCloudKitDao) - Simplified access to Apple's CloudKit
- [EVFaceTracker](https://github.com/evermeer/EVFaceTracker) - Calculate the distance and angle of your device with regards to your face in order to simulate a 3D effect
- [EVURLCache](https://github.com/evermeer/EVURLCache) - a NSURLCache subclass for handling all web requests that use NSURLReques
- [AlamofireOauth2](https://github.com/evermeer/AlamofireOauth2) - A swift implementation of OAuth2 using Alamofire
- [EVWordPressAPI](https://github.com/evermeer/EVWordPressAPI) - Swift Implementation of the WordPress (Jetpack) API using AlamofireOauth2, AlomofireJsonToObjects and EVReflection (work in progress)
- [PassportScanner](https://github.com/evermeer/PassportScanner) - Scan the MRZ code of a passport and extract the firstname, lastname, passport number, nationality, date of birth, expiration date and personal numer.
- [AttributedTextView](https://github.com/evermeer/AttributedTextView) - Easiest way to create an attributed UITextView with support for multiple links (url, hashtags, mentions).