Ecosyste.ms: Awesome
An open API service indexing awesome lists of open source software.
https://github.com/sparkfun/pxt-gamer-bit
SparkFun gamer:bit package for Microsoft MakeCode - beta
https://github.com/sparkfun/pxt-gamer-bit
microbit pxt sparkfun
Last synced: 3 months ago
JSON representation
SparkFun gamer:bit package for Microsoft MakeCode - beta
- Host: GitHub
- URL: https://github.com/sparkfun/pxt-gamer-bit
- Owner: sparkfun
- License: mit
- Created: 2017-06-14T21:55:04.000Z (about 7 years ago)
- Default Branch: master
- Last Pushed: 2024-04-03T14:06:46.000Z (3 months ago)
- Last Synced: 2024-04-03T15:30:02.327Z (3 months ago)
- Topics: microbit, pxt, sparkfun
- Language: TypeScript
- Homepage: https://makecode.microbit.org/pkg/sparkfun/pxt-gamer-bit
- Size: 78.1 KB
- Stars: 4
- Watchers: 33
- Forks: 13
- Open Issues: 4
-
Metadata Files:
- Readme: README.md
Lists
- awesome-microbit-zh - gamer:bit - SparkFun gamer:bit扩展板(microbit驱动的游戏手柄)的pxt驱动. (编程 / JavaScript 和 MakeCode)
README
# gamer:bit
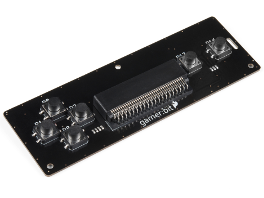
The package adds support for the controller:bit and **gamer:bit** add-on board from SparkFun.
To use this package, go to https://makecode.microbit.org, click ``Add package`` and search for **gamerbit**.
### ~ hint
This package is still under development and subject to changes.
### ~
## Usage
* Button pins are named to function.
* Provides button state detection block.
* Runs user code on button changed events.
* Configures pins to pull-up.
### Pin names
The micro:bit pins are named to match gamepad functions:
* ``P0`` -- D-PAD up
* ``P1`` -- D-PAD left
* ``P2`` -- D-PAD right
* ``P8`` -- D-PAD down
* ``P12`` -- Y button (right-hand, left button)
* ``P16`` -- X button (right-hand, right button)
* ``P5`` -- A button (micro:bit, left button)
* ``P11`` -- B button (micro:bit, right button)
The button pins are automatically configured as pull-up when using the package.
### Reading button states
Use the logical plug-in blocks to read if the button is pressed.
```blocks
if (gamerbit.isPressed(GamerBitPin.P0)) {
led.plot(0, 0)
} else {
led.unplot(0, 0)
}
```
*Example turns on LED when button is pressed*
### Button events
Custom code can be run when a button event happens.
They can be triggered on:
* down (pressed)
* up (released)
* clicked (pressed then released)
```blocks
gamerbit.onEvent(GamerBitPin.P0, GamerBitEvent.Down, () => {
led.plot(0, 0)
})
gamerbit.onEvent(GamerBitPin.P0, GamerBitEvent.Up, () => {
led.unplot(0, 0)
})
```
*Example turns on LED when button is pressed*
## Examples
### Example: Remote controlled a microservo
This program uses the left, right, up buttons
and sends the servo angle over radio.
```blocks
// gamer:bit code
gamerbit.onEvent(GamerBitPin.P0, GamerBitEvent.Down, () => {
// go straight
radio.sendNumber(90)
});
gamerbit.onEvent(GamerBitPin.P1, GamerBitEvent.Down, () => {
// turn left
radio.sendNumber(45)
});
gamerbit.onEvent(GamerBitPin.P2, GamerBitEvent.Down, () => {
// turn right
radio.sendNumber(135)
});
// robot code
radio.onDataPacketReceived( ({ receivedNumber }) => {
pins.servoWritePin(AnalogPin.P0, receivedNumber)
})
```
### Example: Sending a packet of data over wireless
The following program creates a bit field from the state of the buttons on the gamer:bit and sends it with the radio. This is meant to be decoded with the moto:bit example to make a simple RC robot.
```blocks
let packet = 0
basic.forever(() => {
packet = 0
if (gamerbit.isPressed(GamerBitPin.P0)) {
led.plot(1, 0)
packet = packet + 128
} else {
led.unplot(1, 0)
}
if (gamerbit.isPressed(GamerBitPin.P1)) {
led.plot(0, 1)
packet = packet + 64
} else {
led.unplot(0, 1)
}
if (gamerbit.isPressed(GamerBitPin.P2)) {
led.plot(2, 1)
packet = packet + 32
} else {
led.unplot(2, 1)
}
if (gamerbit.isPressed(GamerBitPin.P8)) {
led.plot(1, 2)
packet = packet + 16
} else {
led.unplot(1, 2)
}
if (gamerbit.isPressed(GamerBitPin.P12)) {
led.plot(3, 2)
packet = packet + 8
} else {
led.unplot(3, 2)
}
if (gamerbit.isPressed(GamerBitPin.P16)) {
led.plot(4, 2)
packet = packet + 4
} else {
led.unplot(4, 2)
}
if (gamerbit.isPressed(GamerBitPin.P5)) {
led.plot(3, 0)
packet = packet + 2
} else {
led.unplot(3, 0)
}
if (gamerbit.isPressed(GamerBitPin.P11)) {
led.plot(4, 0)
packet = packet + 1
} else {
led.unplot(4, 0)
}
radio.sendNumber(packet)
})
radio.setGroup(13)
```
## License
MIT
## Supported targets
* for PXT/microbit