Ecosyste.ms: Awesome
An open API service indexing awesome lists of open source software.
https://github.com/mikestefanello/pagoda
Rapid, easy full-stack web development starter kit in Go
https://github.com/mikestefanello/pagoda
framework full-stack go golang htmx mvc starter starter-kit web web-development web-framework
Last synced: 24 days ago
JSON representation
Rapid, easy full-stack web development starter kit in Go
- Host: GitHub
- URL: https://github.com/mikestefanello/pagoda
- Owner: mikestefanello
- License: mit
- Created: 2021-12-03T11:04:30.000Z (over 2 years ago)
- Default Branch: main
- Last Pushed: 2024-04-27T20:30:47.000Z (25 days ago)
- Last Synced: 2024-04-27T21:26:40.639Z (25 days ago)
- Topics: framework, full-stack, go, golang, htmx, mvc, starter, starter-kit, web, web-development, web-framework
- Language: Go
- Homepage:
- Size: 584 KB
- Stars: 1,291
- Watchers: 21
- Forks: 93
- Open Issues: 9
-
Metadata Files:
- Readme: README.md
- License: LICENSE
Lists
- awesome-go - pagoda - Rapid, easy full-stack web development starter kit built in Go. (Miscellaneous / Project Layout)
- awesome-go - pagoda - Rapid, easy full-stack web development starter kit built in Go. (Miscellaneous / Project Layout)
- awesome-htmx - pagoda - Rapid, easy full-stack web development starter kit in Go with HTMX support and examples. (Examples by Back-end / Go)
- awesome-go-extra - pagoda - stack web development starter kit in Go|399|19|2|2021-12-03T11:04:30Z|2022-07-08T13:59:14Z| (Microsoft Office / Project Layout)
- awesome-stars - mikestefanello/pagoda - Rapid, easy full-stack web development starter kit in Go (Go)
- awesome-go - pagoda - Rapid, easy full-stack web development starter kit built in Go. (Miscellaneous / Project Layout)
- awesome-go - pagoda - Rapid, easy full-stack web development starter kit built in Go. Stars:`1.3K`. (Miscellaneous / Project Layout)
- awesome-go-cn - pagoda
- awesome-go - pagoda - Rapid, easy full-stack web development starter kit built in Go. (Miscellaneous / Project Layout)
- awesome-go - pagoda - Rapid, easy full-stack web development starter kit built in Go. (Miscellaneous / Project Layout)
- awesome-go-cn - pagoda
- zero-alloc-awesome-go - pagoda - Rapid, easy full-stack web development starter kit built in Go. (Miscellaneous / Project Layout)
- awesome-go-zh - pagoda
- awesome-go-with-stars - pagoda - Rapid, easy full-stack web development starter kit built in Go. (Miscellaneous / Project Layout)
- repo-1316-awesome-go-cn - pagoda
- repo-1211-awesome-go-cn - pagoda
- Go-awesome - pagoda - Rapid, easy full-stack web development starter kit built in Go. (Miscellaneous / Project Layout)
- awesome-go-stars - pagoda - Rapid, easy full-stack web development starter kit built in Go. (Miscellaneous / Project Layout)
- awesome-go - pagoda - Rapid, easy full-stack web development starter kit built in Go. (Miscellaneous / Project Layout)
- awesome-go - pagoda - Rapid, easy full-stack web development starter kit built in Go. (Miscellaneous / Project Layout)
- awesome-go - pagoda - Rapid, easy full-stack web development starter kit built in Go. (Miscellaneous / Project Layout)
README
## Pagoda: Rapid, easy full-stack web development starter kit in Go
[](https://goreportcard.com/report/github.com/mikestefanello/pagoda)
[](https://github.com/mikestefanello/pagoda/actions/workflows/test.yml)
[](https://opensource.org/licenses/MIT)
[](https://pkg.go.dev/github.com/mikestefanello/pagoda)
[](https://go.dev)
[](https://github.com/avelino/awesome-go)

## Table of Contents
* [Introduction](#introduction)
* [Overview](#overview)
* [Foundation](#foundation)
* [Backend](#backend)
* [Frontend](#frontend)
* [Storage](#storage)
* [Screenshots](#screenshots)
* [Getting started](#getting-started)
* [Dependencies](#dependencies)
* [Start the application](#start-the-application)
* [Running tests](#running-tests)
* [Clients](#clients)
* [Service container](#service-container)
* [Dependency injection](#dependency-injection)
* [Test dependencies](#test-dependencies)
* [Configuration](#configuration)
* [Environment overrides](#environment-overrides)
* [Environments](#environments)
* [Database](#database)
* [Auto-migrations](#auto-migrations)
* [Separate test database](#separate-test-database)
* [ORM](#orm)
* [Entity types](#entity-types)
* [New entity type](#new-entity-type)
* [Sessions](#sessions)
* [Encryption](#encryption)
* [Authentication](#authentication)
* [Login / Logout](#login--logout)
* [Forgot password](#forgot-password)
* [Registration](#registration)
* [Authenticated user](#authenticated-user)
* [Middleware](#middleware)
* [Email verification](#email-verification)
* [Routes](#routes)
* [Custom middleware](#custom-middleware)
* [Controller / Dependencies](#controller--dependencies)
* [Patterns](#patterns)
* [Errors](#errors)
* [Testing](#testing)
* [HTTP server](#http-server)
* [Request / Request helpers](#request--response-helpers)
* [Goquery](#goquery)
* [Controller](#controller)
* [Page](#page)
* [Flash messaging](#flash-messaging)
* [Pager](#pager)
* [CSRF](#csrf)
* [Automatic template parsing](#automatic-template-parsing)
* [Cached responses](#cached-responses)
* [Cache tags](#cache-tags)
* [Cache middleware](#cache-middleware)
* [Data](#data)
* [Forms](#forms)
* [Submission processing](#submission-processing)
* [Inline validation](#inline-validation)
* [Headers](#headers)
* [Status code](#status-code)
* [Metatags](#metatags)
* [URL and link generation](#url-and-link-generation)
* [HTMX support](#htmx-support)
* [Rendering the page](#rendering-the-page)
* [Template renderer](#template-renderer)
* [Custom functions](#custom-functions)
* [Caching](#caching)
* [Hot-reload for development](#hot-reload-for-development)
* [File configuration](#file-configuration)
* [Funcmap](#funcmap)
* [Cache](#cache)
* [Set data](#set-data)
* [Get data](#get-data)
* [Flush data](#flush-data)
* [Flush tags](#flush-tags)
* [Tasks](#tasks)
* [Queues](#queues)
* [Scheduled tasks](#scheduled-tasks)
* [Worker](#worker)
* [Monitoring](#monitoring)
* [Static files](#static-files)
* [Cache control headers](#cache-control-headers)
* [Cache-buster](#cache-buster)
* [Email](#email)
* [HTTPS](#https)
* [Logging](#logging)
* [Roadmap](#roadmap)
* [Credits](#credits)
## Introduction
### Overview
_Pagoda_ is not a framework but rather a base starter-kit for rapid, easy full-stack web development in Go, aiming to provide much of the functionality you would expect from a complete web framework as well as establishing patterns, procedures and structure for your web application.
Built on a solid [foundation](#foundation) of well-established frameworks and modules, _Pagoda_ aims to be a starting point for any web application with the benefit over a mega-framework in that you have full control over all of the code, the ability to easily swap any frameworks or modules in or out, no strict patterns or interfaces to follow, and no fear of lock-in.
While separate JavaScript frontends have surged in popularity, many prefer the reliability, simplicity and speed of a full-stack approach with server-side rendered HTML. Even the popular JS frameworks all have SSR options. This project aims to highlight that _Go_ templates can be powerful and easy to work with, and interesting [frontend](#frontend) libraries can provide the same modern functionality and behavior without having to write any JS at all.
### Foundation
While many great projects were used to build this, all of which are listed in the [credits](#credits) section, the following provide the foundation of the back and frontend. It's important to note that you are **not required to use any of these**. Swapping any of them out will be relatively easy.
#### Backend
- [Echo](https://echo.labstack.com/): High performance, extensible, minimalist Go web framework.
- [Ent](https://entgo.io/): Simple, yet powerful ORM for modeling and querying data.
#### Frontend
Go server-side rendered HTML combined with the projects below enable you to create slick, modern UIs without writing any JavaScript or CSS.
- [HTMX](https://htmx.org/): Access AJAX, CSS Transitions, WebSockets and Server Sent Events directly in HTML, using attributes, so you can build modern user interfaces with the simplicity and power of hypertext.
- [Alpine.js](https://alpinejs.dev/): Rugged, minimal tool for composing behavior directly in your markup. Think of it like jQuery for the modern web. Plop in a script tag and get going.
- [Bulma](https://bulma.io/): Provides ready-to-use frontend components that you can easily combine to build responsive web interfaces. No JavaScript dependencies.
#### Storage
- [PostgreSQL](https://www.postgresql.org/): The world's most advanced open source relational database.
- [Redis](https://redis.io/): In-memory data structure store, used as a database, cache, and message broker.
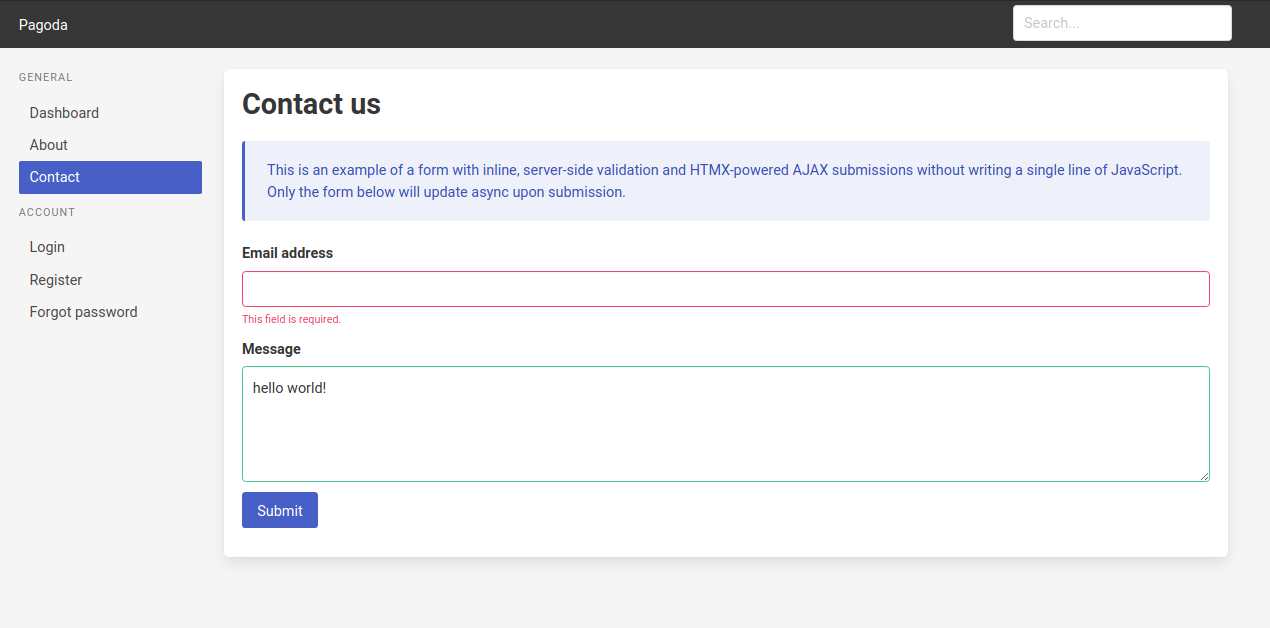
### Screenshots
#### Inline form validation
#### Switch layout templates, user registration

#### Alpine.js modal, HTMX AJAX request

## Getting started
### Dependencies
Ensure the following are installed on your system:
- [Go](https://go.dev/)
- [Docker](https://www.docker.com/)
- [Docker Compose](https://docs.docker.com/compose/install/)
### Start the application
After checking out the repository, from within the root, start the Docker containers for the database and cache by executing `make up`:
```
git clone [email protected]:mikestefanello/pagoda.git
cd pagoda
make up
```
Since this repository is a _template_ and not a Go _library_, you **do not** use `go get`.
Once that completes, you can start the application by executing `make run`. By default, you should be able to access the application in your browser at `localhost:8000`.
If you ever want to quickly drop the Docker containers and restart them in order to wipe all data, execute `make reset`.
### Running tests
To run all tests in the application, execute `make test`. This ensures that the tests from each package are not run in parallel. This is required since many packages contain tests that connect to the test database which is dropped and recreated automatically for each package.
### Clients
The following _make_ commands are available to make it easy to connect to the database and cache.
- `make db`: Connects to the primary database
- `make db-test`: Connects to the test database
- `make cache`: Connects to the primary cache
- `make cache-test`: Connects to the test cache
## Service container
The container is located at `pkg/services/container.go` and is meant to house all of your application's services and/or dependencies. It is easily extensible and can be created and initialized in a single call. The services currently included in the container are:
- Configuration
- Cache
- Database
- ORM
- Web
- Validator
- Authentication
- Mail
- Template renderer
- Tasks
A new container can be created and initialized via `services.NewContainer()`. It can be later shutdown via `Shutdown()`.
### Dependency injection
The container exists to faciliate easy dependency-injection both for services within the container as well as areas of your application that require any of these dependencies. For example, the container is passed to and stored within the `Controller`
so that the controller and the route using it have full, easy access to all services.
### Test dependencies
It is common that your tests will require access to dependencies, like the database, or any of the other services available within the container. Keeping all services in a container makes it especially easy to initialize everything within your tests. You can see an example pattern for doing this [here](#environments).
## Configuration
The `config` package provides a flexible, extensible way to store all configuration for the application. Configuration is added to the `Container` as a _Service_, making it accessible across most of the application.
Be sure to review and adjust all of the default configuration values provided in `config/config.yaml`.
### Environment overrides
Leveraging the functionality of [viper](https://github.com/spf13/viper) to manage configuration, all configuration values can be overridden by environment variables. The name of the variable is determined by the set prefix and the name of the configuration field in `config/config.yaml`.
In `config/config.go`, the prefix is set as `pagoda` via `viper.SetEnvPrefix("pagoda")`. Nested fields require an underscore between levels. For example:
```yaml
cache:
port: 1234
```
can be overridden by setting an environment variable with the name `PAGODA_CACHE_PORT`.
### Environments
The configuration value for the current _environment_ (`Config.App.Environment`) is an important one as it can influence some behavior significantly (will be explained in later sections).
A helper function (`config.SwitchEnvironment`) is available to make switching the environment easy, but this must be executed prior to loading the configuration. The common use-case for this is to switch the environment to `Test` before tests are executed:
```go
func TestMain(m *testing.M) {
// Set the environment to test
config.SwitchEnvironment(config.EnvTest)
// Start a new container
c = services.NewContainer()
// Run tests
exitVal := m.Run()
// Shutdown the container
if err := c.Shutdown(); err != nil {
panic(err)
}
os.Exit(exitVal)
}
```
## Database
The database currently used is [PostgreSQL](https://www.postgresql.org/) but you are free to use whatever you prefer. If you plan to continue using [Ent](https://entgo.io/), the incredible ORM, you can check their supported databases [here](https://entgo.io/docs/dialects). The database-driver and client is provided by [pgx](https://github.com/jackc/pgx/tree/v4) and included in the `Container`.
Database configuration can be found and managed within the `config` package.
### Auto-migrations
[Ent](https://entgo.io/) provides automatic migrations which are executed on the database whenever the `Container` is created, which means they will run when the application starts.
### Separate test database
Since many tests can require a database, this application supports a separate database specifically for tests. Within the `config`, the test database name can be specified at `Config.Database.TestDatabase`.
When a `Container` is created, if the [environment](#environments) is set to `config.EnvTest`, the database client will connect to the test database instead, drop the database, recreate it, and run migrations so your tests start with a clean, ready-to-go database. Another benefit is that after the tests execute in a given package, you can connect to the test database to audit the data which can be useful for debugging.
## ORM
As previously mentioned, [Ent](https://entgo.io/) is the supplied ORM. It can swapped out, but I highly recommend it. I don't think there is anything comparable for Go, at the current time. If you're not familiar with Ent, take a look through their top-notch [documentation](https://entgo.io/docs/getting-started).
An Ent client is included in the `Container` to provide easy access to the ORM throughout the application.
Ent relies on code-generation for the entities you create to provide robust, type-safe data operations. Everything within the `ent` package in this repository is generated code for the two entity types listed below with the exception of the schema declaration.
### Entity types
The two included entity types are:
- User
- PasswordToken
### New entity type
While you should refer to their [documentation](https://entgo.io/docs/getting-started) for detailed usage, it's helpful to understand how to create an entity type and generate code. To make this easier, the `Makefile` contains some helpers.
1. Ensure all Ent code is downloaded by executing `make ent-install`.
2. Create the new entity type by executing `make ent-new name=User` where `User` is the name of the entity type. This will generate a file like you can see in `ent/schema/user.go` though the `Fields()` and `Edges()` will be left empty.
3. Populate the `Fields()` and optionally the `Edges()` (which are the relationships to other entity types).
4. When done, generate all code by executing `make ent-gen`.
The generated code is extremely flexible and impressive. An example to highlight this is one used within this application:
```go
entity, err := c.ORM.PasswordToken.
Query().
Where(passwordtoken.ID(tokenID)).
Where(passwordtoken.HasUserWith(user.ID(userID))).
Where(passwordtoken.CreatedAtGTE(expiration)).
Only(ctx.Request().Context())
```
This executes a database query to return the _password token_ entity with a given ID that belong to a user with a given ID and has a _created at_ timestamp field that is greater than or equal to a given time.
## Sessions
Sessions are provided and handled via [Gorilla sessions](https://github.com/gorilla/sessions) and configured as middleware in the router located at `pkg/routes/router.go`. Session data is currently stored in cookies but there are many [options](https://github.com/gorilla/sessions#store-implementations) available if you wish to use something else.
Here's a simple example of loading data from a session and saving new values:
```go
func SomeFunction(ctx echo.Context) error {
sess, err := session.Get("some-session-key", ctx)
if err != nil {
return err
}
sess.Values["hello"] = "world"
sess.Values["isSomething"] = true
return sess.Save(ctx.Request(), ctx.Response())
}
```
### Encryption
Session data is encrypted for security purposes. The encryption key is stored in [configuration](#configuration) at `Config.App.EncryptionKey`. While the default is fine for local development, it is **imperative** that you change this value for any live environment otherwise session data can be compromised.
## Authentication
Included are standard authentication features you expect in any web application. Authentication functionality is bundled as a _Service_ within `services/AuthClient` and added to the `Container`. If you wish to handle authentication in a different manner, you could swap this client out or modify it as needed.
Authentication currently requires [sessions](#sessions) and the session middleware.
### Login / Logout
The `AuthClient` has methods `Login()` and `Logout()` to log a user in or out. To track a user's authentication state, data is stored in the session including the user ID and authentication status.
Prior to logging a user in, the method `CheckPassword()` can be used to determine if a user's password matches the hash stored in the database and on the `User` entity.
Routes are provided for the user to login and logout at `user/login` and `user/logout`.
### Forgot password
Users can reset their password in a secure manner by issuing a new password token via the method `GeneratePasswordResetToken()`. This creates a new `PasswordToken` entity in the database belonging to the user. The actual token itself, however, is not stored in the database for security purposes. It is only returned via the method so it can be used to build the reset URL for the email. Rather, a hash of the token is stored, using `bcrypt` the same package used to hash user passwords. The reason for doing this is the same as passwords. You do not want to store a plain-text value in the database that can be used to access an account.
Tokens have a configurable expiration. By default, they expire within 1 hour. This can be controlled in the `config` package. The expiration of the token is not stored in the database, but rather is used only when tokens are loaded for potential usage. This allows you to change the expiration duration and affect existing tokens.
Since the actual tokens are not stored in the database, the reset URL must contain the user and password token ID. Using that, `GetValidPasswordToken()` will load a matching, non-expired _password token_ entity belonging to the user, and use `bcrypt` to determine if the token in the URL matches stored hash of the password token entity.
Once a user claims a valid password token, all tokens for that user should be deleted using `DeletePasswordTokens()`.
Routes are provided to request a password reset email at `user/password` and to reset your password at `user/password/reset/token/:user/:password_token/:token`.
### Registration
The actual registration of a user is not handled within the `AuthClient` but rather just by creating a `User` entity. When creating a user, use `HashPassword()` to create a hash of the user's password, which is what will be stored in the database.
A route is provided for the user to register at `user/register`.
### Authenticated user
The `AuthClient` has two methods available to get either the `User` entity or the ID of the user currently logged in for a given request. Those methods are `GetAuthenticatedUser()` and `GetAuthenticatedUserID()`.
#### Middleware
Registered for all routes is middleware that will load the currently logged in user entity and store it within the request context. The middleware is located at `middleware.LoadAuthenticatedUser()` and, if authenticated, the `User` entity is stored within the context using the key `context.AuthenticatedUserKey`.
If you wish to require either authentication or non-authentication for a given route, you can use either `middleware.RequireAuthentication()` or `middleware.RequireNoAuthentication()`.
### Email verification
Most web applications require the user to verify their email address (or other form of contact information). The `User` entity has a field `Verified` to indicate if they have verified themself. When a user successfully registers, an email is sent to them containing a link with a token that will verify their account when visited. This route is currently accessible at `/email/verify/:token` and handled by `routes/VerifyEmail`.
There is currently no enforcement that a `User` must be verified in order to access the application. If that is something you desire, it will have to be added in yourself. It was not included because you may want partial access of certain features until the user verifies; or no access at all.
Verification tokens are [JSON Web Tokens](https://jwt.io/) generated and processed by the [jwt](https://github.com/golang-jwt/jwt) module. The tokens are _signed_ using the encryption key stored in [configuration](#configuration) (`Config.App.EncryptionKey`). **It is imperative** that you override this value from the default in any live environments otherwise the data can be comprimised. JWT was chosen because they are secure tokens that do not have to be stored in the database, since the tokens contain all of the data required, including built-in expirations. These were not chosen for password reset tokens because JWT cannot be withdrawn once they are issued which poses a security risk. Since these tokens do not grant access to an account, the ability to withdraw the tokens is not needed.
By default, verification tokens expire 12 hours after they are issued. This can be changed in configuration at `Config.App.EmailVerificationTokenExpiration`. There is currently not a route or form provided to request a new link.
Be sure to review the [email](#email) section since actual email sending is not fully implemented.
To generate a new verification token, the `AuthClient` has a method `GenerateEmailVerificationToken()` which creates a token for a given email address. To verify the token, pass it in to `ValidateEmailVerificationToken()` which will return the email address associated with the token and an error if the token is invalid.
## Routes
The router functionality is provided by [Echo](https://echo.labstack.com/guide/routing/) and constructed within via the `BuildRouter()` function inside `pkg/routes/router.go`. Since the _Echo_ instance is a _Service_ on the `Container` which is passed in to `BuildRouter()`, middleware and routes can be added directly to it.
### Custom middleware
By default, a middleware stack is included in the router that makes sense for most web applications. Be sure to review what has been included and what else is available within _Echo_ and the other projects mentioned.
A `middleware` package is included which you can easily add to along with the custom middleware provided.
### Controller / Dependencies
The `Controller`, which is described in a section below, serves two purposes for routes:
1) It provides base functionality which can be embedded in each route, most importantly `Page` rendering (described in the `Controller` section below)
2) It stores a pointer to the `Container`, making all _Services_ available within your route
While using the `Controller` is not required for your routes, it will certainly make development easier.
See the following section for the proposed pattern.
### Patterns
These patterns are not required, but were designed to make development as easy as possible.
To declare a new route that will have methods to handle a GET and POST request, for example, start with a new _struct_ type, that embeds the `Controller`:
```go
type home struct {
controller.Controller
}
func (c *home) Get(ctx echo.Context) error {}
func (c *home) Post(ctx echo.Context) error {}
```
Then create the route and add to the router:
```go
home := home{Controller: controller.NewController(c)}
g.GET("/", home.Get).Name = "home"
g.POST("/", home.Post).Name = "home.post"
```
Your route will now have all methods available on the `Controller` as well as access to the `Container`. It's not required to name the route methods to match the HTTP method.
**It is highly recommended** that you provide a `Name` for your routes. Most methods on the back and frontend leverage the route name and parameters in order to generate URLs.
### Errors
Routes can return errors to indicate that something wrong happened. Ideally, the error is of type `*echo.HTTPError` to indicate the intended HTTP response code. You can use `return echo.NewHTTPError(http.StatusInternalServerError)`, for example. If an error of a different type is returned, an _Internal Server Error_ is assumed.
The [error handler](https://echo.labstack.com/guide/error-handling/) is set to a provided route `pkg/routes/error.go` in the `BuildRouter()` function. That means that if any middleware or route return an error, the request gets routed there. This route conveniently constructs and renders a `Page` which uses the template `templates/pages/error.go`. The status code is passed to the template so you can easily alter the markup depending on the error type.
### Testing
Since most of your web application logic will live in your routes, being able to easily test them is important. The following aims to help facilitate that.
The test setup and helpers reside in `pkg/routes/router_test.go`.
Only a brief example of route tests were provided in order to highlight what is available. Adding full tests did not seem logical since these routes will most likely be changed or removed in your project.
#### HTTP server
When the route tests initialize, a new `Container` is created which provides full access to all of the _Services_ that will be available during normal application execution. Also provided is a test HTTP server with the router added. This means your tests can make requests and expect responses exactly as the application would behave outside of tests. You do not need to mock the requests and responses.
#### Request / Response helpers
With the test HTTP server setup, test helpers for making HTTP requests and evaluating responses are made available to reduce the amount of code you need to write. See `httpRequest` and `httpResponse` within `pkg/routes/router_test.go`.
Here is an example how to easily make a request and evaluate the response:
```go
func TestAbout_Get(t *testing.T) {
doc := request(t).
setRoute("about").
get().
assertStatusCode(http.StatusOK).
toDoc()
}
```
#### Goquery
A helpful, included package to test HTML markup from HTTP responses is [goquery](https://github.com/PuerkitoBio/goquery). This allows you to use jQuery-style selectors to parse and extract HTML values, attributes, and so on.
In the example above, `toDoc()` will return a `*goquery.Document` created from the HTML response of the test HTTP server.
Here is a simple example of how to use it, along with [testify](https://github.com/stretchr/testify) for making assertions:
```go
h1 := doc.Find("h1.title")
assert.Len(t, h1.Nodes, 1)
assert.Equal(t, "About", h1.Text())
```
## Controller
As previously mentioned, the `Controller` acts as a base for your routes, though it is optional. It stores the `Container` which houses all _Services_ (_dependencies_) but also a wide array of functionality aimed at allowing you to build complex responses with ease and consistency.
### Page
The `Page` is the major building block of your `Controller` responses. It is a _struct_ type located at `pkg/controller/page.go`. The concept of the `Page` is that it provides a consistent structure for building responses and transmitting data and functionality to the templates.
All example routes provided construct and _render_ a `Page`. It's recommended that you review both the `Page` and the example routes as they try to illustrate all included functionality.
As you develop your application, the `Page` can be easily extended to include whatever data or functions you want to provide to your templates.
Initializing a new page is simple:
```go
func (c *home) Get(ctx echo.Context) error {
page := controller.NewPage(ctx)
}
```
Using the `echo.Context`, the `Page` will be initialized with the following fields populated:
- `Context`: The passed in _context_
- `ToURL`: A function the templates can use to generate a URL with a given route name and parameters
- `Path`: The requested URL path
- `URL`: The requested URL
- `StatusCode`: Defaults to 200
- `Pager`: Initialized `Pager` (see below)
- `RequestID`: The request ID, if the middleware is being used
- `IsHome`: If the request was for the homepage
- `IsAuth`: If the user is authenticated
- `AuthUser`: The logged in user entity, if one
- `CSRF`: The CSRF token, if the middleware is being used
- `HTMX.Request`: Data from the HTMX headers, if HTMX made the request (see below)
### Flash messaging
While flash messaging functionality is provided outside of the `Controller` and `Page`, within the `msg` package, it's really only used within this context.
Flash messaging requires that [sessions](#sessions) and the session middleware are in place since that is where the messages are stored.
#### Creating messages
There are four types of messages, and each can be created as follows:
- Success: `msg.Success(ctx echo.Context, message string)`
- Info: `msg.Info(ctx echo.Context, message string)`
- Warning: `msg.Warning(ctx echo.Context, message string)`
- Danger: `msg.Danger(ctx echo.Context, message string)`
The _message_ string can contain HTML.
#### Rendering messages
When a flash message is retrieved from storage in order to be rendered, it is deleted from storage so that it cannot be rendered again.
The `Page` has a method that can be used to fetch messages for a given type from within the template: `Page.GetMessages(typ msg.Type)`. This is used rather than the _funcmap_ because the `Page` contains the request context which is required in order to access the session data. Since the `Page` is the data destined for the templates, you can use: `{{.GetMessages "success"}}` for example.
To make things easier, a template _component_ is already provided, located at `templates/components/messages.gohtml`. This will render all messages of all types simply by using `{{template "messages" .}}` either within your page or layout template.
### Pager
A very basic mechanism is provided to handle and facilitate paging located in `pkg/controller/pager.go`. When a `Page` is initialized, so is a `Pager` at `Page.Pager`. If the requested URL contains a `page` query parameter with a numeric value, that will be set as the page number in the pager.
During initialization, the _items per page_ amount will be set to the default, controlled via constant, which has a value of 20. It can be overridden by changing `Pager.ItemsPerPage` but should be done before other values are set in order to not provide incorrect calculations.
Methods include:
- `SetItems(items int)`: Set the total amount of items in the entire result-set
- `IsBeginning()`: Determine if the pager is at the beginning of the pages
- `IsEnd()`: Determine if the pager is at the end of the pages
- `GetOffset()`: Get the offset which can be useful is constructing a paged database query
There is currently no template (yet) to easily render a pager.
### CSRF
By default, all non GET requests will require a CSRF token be provided as a form value. This is provided by middleware and can be adjusted or removed in the router.
The `Page` will contain the CSRF token for the given request. There is a CSRF helper component template which can be used to easily render a hidden form element in your form which will contain the CSRF token and the proper element name. Simply include `{{template "csrf" .}}` within your form.
### Automatic template parsing
Dealing with templates can be quite tedious and annoying so the `Page` aims to make it as simple as possible with the help of the [template renderer](#template-renderer). To start, templates for _pages_ are grouped in the following directories within the `templates` directory:
- `layouts`: Base templates that provide the entire HTML wrapper/layout. This template should include a call to `{{template "content" .}}` to render the content of the `Page`.
- `pages`: Templates that are specific for a given route/page. These must contain `{{define "content"}}{{end}}` which will be injected in to the _layout_ template.
- `components`: A shared library of common components that the layout and base template can leverage.
Specifying which templates to render for a given `Page` is as easy as:
```go
page.Name = "home"
page.Layout = "main"
```
That alone will result in the following templates being parsed and executed when the `Page` is rendered:
1) `layouts/main.gohtml` as the base template
2) `pages/home.gohtml` to provide the `content` template for the layout
3) All template files located within the `components` directory
4) The entire [funcmap](#funcmap)
The [template renderer](#template-renderer) also provides caching and local hot-reloading.
### Cached responses
A `Page` can have cached enabled just by setting `Page.Cache.Enabled` to `true`. The `Controller` will automatically handle caching the HTML output, headers and status code. Cached pages are stored using a key that matches the full request URL and [middleware](#cache-middleware) is used to serve it on matching requests.
By default, the cache expiration time will be set according to the configuration value located at `Config.Cache.Expiration.Page` but it can be set per-page at `Page.Cache.Expiration`.
#### Cache tags
You can optionally specify cache tags for the `Page` by setting a slice of strings on `Page.Cache.Tags`. This provides the ability to build in cache invalidation logic in your application driven by events such as entity operations, for example.
You can use the [cache client](#cache) on the `Container` to easily [flush cache tags](#flush-tags), if needed.
#### Cache middleware
Cached pages are served via the middleware `ServeCachedPage()` in the `middleware` package.
The cache is bypassed if the requests meet any of the following criteria:
1) Is not a GET request
2) Is made by an authenticated user
Cached pages are looked up for a key that matches the exact, full URL of the given request.
### Data
The `Data` field on the `Page` is of type `any` and is what allows your route to pass whatever it requires to the templates, alongside the `Page` itself.
### Forms
The `Form` field on the `Page` is similar to the `Data` field in that it's an `any` type but it's meant to store a struct that represents a form being rendered on the page.
An example of this pattern is:
```go
type ContactForm struct {
Email string `form:"email" validate:"required,email"`
Message string `form:"message" validate:"required"`
Submission controller.FormSubmission
}
```
Then in your page:
```go
page := controller.NewPage(ctx)
page.Form = ContactForm{}
```
How the _form_ gets populated with values so that your template can render them is covered in the next section.
#### Submission processing
Form submission processing is made extremely simple by leveraging functionality provided by [Echo binding](https://echo.labstack.com/guide/binding/), [validator](https://github.com/go-playground/validator) and the `FormSubmission` struct located in `pkg/controller/form.go`.
Using the example form above, these are the steps you would take within the _POST_ callback for your route:
Start by storing a pointer to the form in the context so that your _GET_ callback can access the form values, which will be showed at the end:
```go
var form ContactForm
ctx.Set(context.FormKey, &form)
```
Parse the input in the POST data to map to the struct so it becomes populated. This uses the `form` struct tags to map form values to the struct fields.
```go
if err := ctx.Bind(&form); err != nil {
// Something went wrong...
}
```
Process the submission which uses [validator](https://github.com/go-playground/validator) to check for validation errors:
```go
if err := form.Submission.Process(ctx, form); err != nil {
// Something went wrong...
}
```
Check if the form submission has any validation errors:
```go
if !form.Submission.HasErrors() {
// All good, now execute something!
}
```
In the event of a validation error, you most likely want to re-render the form with the values provided and any error messages. Since you stored a pointer to the _form_ in the context in the first step, you can first have the _POST_ handler call the _GET_:
```go
if form.Submission.HasErrors() {
return c.Get(ctx)
}
```
Then, in your _GET_ handler, extract the form from the context so it can be passed to the templates:
```go
page := controller.NewPage(ctx)
page.Form = ContactForm{}
if form := ctx.Get(context.FormKey); form != nil {
page.Form = form.(*ContactForm)
}
```
And finally, your template:
```html
```
#### Inline validation
The `FormSubmission` makes inline validation easier because it will store all validation errors in a map, keyed by the form struct field name. It also contains helper methods that your templates can use to provide classes and extract the error messages.
While [validator](https://github.com/go-playground/validator) is a great package that is used to validate based on struct tags, the downside is that the messaging, by default, is not very human-readable or easy to override. Within `FormSubmission.setErrorMessages()` the validation errors are converted to more readable messages based on the tag that failed validation. Only a few tags are provided as an example, so be sure to expand on that as needed.
To provide the inline validation in your template, there are two things that need to be done.
First, include a status class on the element so it will highlight green or red based on the validation:
```html
```
Second, render the error messages, if there are any for a given field:
```go
{{template "field-errors" (.Form.Submission.GetFieldErrors "Email")}}
```
### Headers
HTTP headers can be set either via the `Page` or the _context_:
```go
page := controller.NewPage(ctx)
page.Headers["HeaderName"] = "header-value"
```
```go
ctx.Response().Header().Set("HeaderName", "header-value")
```
### Status code
The HTTP response status code can be set either via the `Page` or the _context_:
```go
page := controller.NewPage(ctx)
page.StatusCode = http.StatusTooManyRequests
```
```go
ctx.Response().Status = http.StatusTooManyRequests
```
### Metatags
The `Page` provides the ability to set basic HTML metatags which can be especially useful if your web application is publicly accessible. Only fields for the _description_ and _keywords_ are provided but adding additional fields is very easy.
```go
page := controller.NewPage(ctx)
page.Metatags.Description = "The page description."
page.Metatags.Keywords = []string{"Go", "Software"}
```
A _component_ template is included to render metatags in `core.gohtml` which can be used by adding `{{template "metatags" .}}` to your _layout_.
### URL and link generation
Generating URLs in the templates is made easy if you follow the [routing patterns](#patterns) and provide names for your routes. Echo provides a `Reverse` function to generate a route URL with a given route name and optional parameters. This function is made accessible to the templates via the `Page` field `ToURL`.
As an example, if you have route such as:
```go
profile := Profile{Controller: ctr}
e.GET("/user/profile/:user", profile.Get).Name = "user_profile"
```
And you want to generate a URL in the template, you can:
```go
{{call .ToURL "user_profile" 1}
```
Which will generate: `/user/profile/1`
There is also a helper function provided in the [funcmap](#funcmap) to generate links which has the benefit of adding an _active_ class if the link URL matches the current path. This is especially useful for navigation menus.
```go
{{link (call .ToURL "user_profile" .AuthUser.ID) "Profile" .Path "extra-class"}}
```
Will generate:
```html
Profile
```
Assuming the current _path_ is `/user/profile/1`; otherwise the `is-active` class will be excluded.
### HTMX support
[HTMX](https://htmx.org/) is an awesome JavaScript library allows you to access AJAX, CSS Transitions, WebSockets and Server Sent Events directly in HTML, using attributes, so you can build modern user interfaces with the simplicity and power of hypertext.
Many examples of its usage are available in the included examples:
- All navigation links use [boost](https://htmx.org/docs/#boosting) which dynamically replaces the page content with an AJAX request, providing a SPA-like experience.
- All forms use either [boost](https://htmx.org/docs/#boosting) or [hx-post](https://htmx.org/docs/#triggers) to submit via AJAX.
- The mock search autocomplete modal uses [hx-get](https://htmx.org/docs/#targets) to fetch search results from the server via AJAX and update the UI.
- The mock posts on the homepage/dashboard use [hx-get](https://htmx.org/docs/#targets) to fetch and page posts via AJAX.
All of this can be easily accomplished without writing any JavaScript at all.
Another benefit of [HTMX](https://htmx.org/) is that it's completely backend-agnostic and does not require any special tools or integrations on the backend. But to make things easier, included is a small package to read and write [HTTP headers](https://htmx.org/docs/#requests) that HTMX uses to communicate additional information and commands.
The `htmx` package contains the headers for the _request_ and _response_. When a `Page` is initialized, `Page.HTMX.Request` will also be initialized and populated with the headers that HTMX provides, if HTMX made the request. This allows you to determine if HTMX is making the given request and what exactly it is doing, which could be useful both in your _route_ as well as your _templates_.
If you need to set any HTMX headers in your `Page` response, this can be done by altering `Page.HTMX.Response`.
#### Layout template override
To facilitate easy partial rendering for HTMX requests, the `Page` will automatically change your _Layout_ template to use `htmx.gohtml`, which currently only renders `{{template "content" .}}`. This allows you to use an HTMX request to only update the content portion of the page, rather than the entire HTML.
This override only happens if the HTMX request being made is **not a boost** request because **boost** requests replace the entire `body` element so there is no need to do a partial render.
#### Conditional processing / rendering
Since HTMX communicates what it is doing with the server, you can use the request headers to conditionally process in your _route_ or render in your _template_, if needed. If your routes aren't doing multiple things, you may not need this, but it's worth knowing how flexible you can be.
A simple example of this:
```go
if page.HTMX.Request.Target == "search" {
// You know this request HTMX is fetching content just for the #search element
}
```
```go
{{if eq .HTMX.Request.Target "search"}}
// Render content for the #search element
{{end}}
```
#### CSRF token
If [CSRF](#csrf) protection is enabled, the token value will automatically be passed to HTMX to be included in all non-GET requests. This is done in the `footer` template by leveraging HTMX [events](https://htmx.org/reference/#events).
### Rendering the page
Once your `Page` is fully built, rendering it via the embedded `Controller` in your _route_ can be done simply by calling `RenderPage()`:
```go
func (c *home) Get(ctx echo.Context) error {
page := controller.NewPage(ctx)
page.Layout = templates.LayoutMain
page.Name = templates.PageHome
return c.RenderPage(ctx, page)
}
```
## Template renderer
The _template renderer_ is a _Service_ on the `Container` that aims to make template parsing and rendering easy and flexible. It is the mechanism that allows the `Page` to do [automatic template parsing](#automatic-template-parsing). The standard `html/template` is still the engine used behind the scenes. The code can be found in `pkg/services/template_renderer.go`.
Here is an example of a complex rendering that uses multiple template files as well as an entire directory of template files:
```go
buf, err = c.TemplateRenderer.
Parse().
Group("page").
Key("home").
Base("main").
Files("layouts/main", "pages/home").
Directories("components").
Execute(data)
```
This will do the following:
- [Cache](#caching) the parsed template with a _group_ of `page` and _key_ of `home` so this parse only happens once
- Set the _base template file_ as `main`
- Include the templates `templates/layout/main.gohtml` and `templates/pages/home.gohtml`
- Include all templates located within the directory `templates/components`
- Include the [funcmap](#funcmap)
- Execute the parsed template with `data` being passed in to the templates
Using the example from the [page rendering](#rendering-the-page), this is what the `Controller` will execute:
```go
buf, err = c.Container.TemplateRenderer.
Parse().
Group("page").
Key(page.Name).
Base(page.Layout).
Files(
fmt.Sprintf("layouts/%s", page.Layout),
fmt.Sprintf("pages/%s", page.Name),
).
Directories("components").
Execute(page)
```
If you have a need to _separately_ parse and cache the templates then later execute, you can separate the operations:
```go
_, err := c.TemplateRenderer.
Parse().
Group("my-group").
Key("my-key").
Base("auth").
Files("layouts/auth", "pages/login").
Directories("components").
Store()
```
```go
tpl, err := c.TemplateRenderer.Load("my-group", "my-key")
buf, err := tpl.Execute(data)
```
### Custom functions
All templates will be parsed with the [funcmap](#funcmap) so all of your custom functions as well as the functions provided by [sprig](https://github.com/Masterminds/sprig) will be available.
### Caching
Parsed templates will be cached within a `sync.Map` so the operation will only happen once per cache _group_ and _ID_. Be careful with your cache _group_ and _ID_ parameters to avoid collisions.
### Hot-reload for development
If the current [environment](#environments) is set to `config.EnvLocal`, which is the default, the cache will be bypassed and templates will be parsed every time they are requested. This allows you to have hot-reloading without having to restart the application so you can see your HTML changes in the browser immediately.
### File configuration
To make things easier and less repetitive, parameters given to the _template renderer_ must not include the `templates` directory or the template file extensions. The file extension is stored as a constant (`TemplateExt`) within the `config` package.
## Funcmap
The `funcmap` package provides a _function map_ (`template.FuncMap`) which will be included for all templates rendered with the [template renderer](#template-renderer). Aside from a few custom functions, [sprig](https://github.com/Masterminds/sprig) is included which provides over 100 commonly used template functions. The full list is available [here](http://masterminds.github.io/sprig/).
To include additional custom functions, add to the slice in `GetFuncMap()` and define the function in the package. It will then become automatically available in all templates.
## Cache
As previously mentioned, [Redis](https://redis.io/) was chosen as the cache but it can be easily swapped out for something else. [go-redis](https://github.com/go-redis/redis) is used as the underlying client but the `Container` contains a custom client wrapper (`CacheClient`) that makes typical cache operations extremely simple. This wrapper does expose the [go-redis]() client however, at `CacheClient.Client`, in case you have a need for it.
The cache functionality within the `CacheClient` is powered by [gocache](https://github.com/eko/gocache) which was chosen because it makes interfacing with the cache service much easier, and it provides a consistent interface if you were to use a cache backend other than Redis.
The built-in usage of the cache is currently only for optional [page caching](#cached-responses) but it can be used for practically anything. See examples below:
Similar to how there is a separate [test database](#separate-test-database) to avoid writing to your primary database when running tests, the cache supports a separate database as well for tests. Within the `config`, the test database number can be specified at `Config.Cache.TestDatabase`. By default, the primary database is `0` and the test database is `1`.
### Set data
**Set data with just a key:**
```go
err := c.Cache.
Set().
Key("my-key").
Data(myData).
Save(ctx)
```
**Set data within a group:**
```go
err := c.Cache.
Set().
Group("my-group").
Key("my-key").
Data(myData).
Save(ctx)
```
**Include cache tags:**
```go
err := c.Cache.
Set().
Key("my-key").
Tags("tag1", "tag2").
Data(myData).
Save(ctx)
```
**Include an expiration:**
```go
err := c.Cache.
Set().
Key("my-key").
Expiration(time.Hour * 2).
Data(myData).
Save(ctx)
```
### Get data
```go
data, err := c.Cache.
Get().
Group("my-group").
Key("my-key").
Type(myType).
Fetch(ctx)
```
The `Type` method tells the cache what type of data you stored so it can be cast afterwards with: `result, ok := data.(myType)`
### Flush data
```go
err := c.Cache.
Flush().
Group("my-group").
Key("my-key").
Execute(ctx)
```
### Flush tags
This will flush all cache entries that were tagged with the given tags.
```go
err := c.Cache.
Flush().
Tags("tag1", "tag2").
Execute(ctx)
```
## Tasks
Tasks are operations to be executed in the background, either in a queue, at a specfic time, after a given amount of time, or according to a periodic interval (like _cron_). Some examples of tasks could be long-running operations, bulk processing, cleanup, notifications, and so on.
Since we're already using [Redis](https://redis.io) as a _cache_, it's available to act as a message broker as well and handle the processing of queued tasks. [Asynq](https://github.com/hibiken/asynq) is the library chosen to interface with Redis and handle queueing tasks and processing them asynchronously with workers.
To make things even easier, a custom client (`TaskClient`) is provided as a _Service_ on the `Container` which exposes a simple interface with [asynq](https://github.com/hibiken/asynq).
For more detailed information about [asynq](https://github.com/hibiken/asynq) and it's usage, review the [wiki](https://github.com/hibiken/asynq/wiki).
### Queues
All tasks must be placed in to queues in order to be executed by the [worker](#worker). You are not required to specify a queue when creating a task, as it will be placed in the default queue if one is not provided. [Asynq](https://github.com/hibiken/asynq) supports multiple queues which allows for functionality such as [prioritization](https://github.com/hibiken/asynq/wiki/Queue-Priority).
Creating a queued task is easy and at the minimum only requires the name of the task:
```go
err := c.Tasks.
New("my_task").
Save()
```
This will add a task to the _default_ queue with a task _type_ of `my_task`. The type is used to route the task to the correct [worker](#worker).
#### Options
Tasks can be created and queued with various chained options:
```go
err := c.Tasks.
New("my_task").
Payload(taskData).
Queue("critical").
MaxRetries(5).
Timeout(30 * time.Second).
Wait(5 * time.Second).
Retain(2 * time.Hour).
Save()
```
In this example, this task will be:
- Assigned a task type of `my_task`
- The task worker will be sent `taskData` as the payload
- Put in to the `critical` queue
- Be retried up to 5 times in the event of a failure
- Timeout after 30 seconds of execution
- Wait 5 seconds before execution starts
- Retain the task data in Redis for 2 hours after execution completes
### Scheduled tasks
Tasks can be scheduled to execute at a single point in the future or at a periodic interval. These tasks can also use the options highlighted in the previous section.
**To execute a task once at a specific time:**
```go
err := c.Tasks.
New("my_task").
At(time.Date(2022, time.November, 10, 23, 0, 0, 0, time.UTC)).
Save()
```
**To execute a periodic task using a cron schedule:**
```go
err := c.Tasks.
New("my_task").
Periodic("*/10 * * * *")
Save()
```
**To execute a periodic task using a simple syntax:**
```go
err := c.Tasks.
New("my_task").
Periodic("@every 10m")
Save()
```
#### Scheduler
A service needs to run in order to add periodic tasks to the queue at the specified intervals. When the application is started, this _scheduler_ service will also be started. In `cmd/web/main.go`, this is done with the following code:
```go
go func() {
if err := c.Tasks.StartScheduler(); err != nil {
c.Web.Logger.Fatalf("scheduler shutdown: %v", err)
}
}()
```
In the event of an application restart, periodic tasks must be re-registered with the _scheduler_ in order to continue being queued for execution.
### Worker
The worker is a service that executes the queued tasks using task processors. Included is a basic implementation of a separate worker service that will listen for and execute tasks being added to the queues. If you prefer to move the worker so it runs alongside the web server, you can do that, though it's recommended to keep these processes separate for performance and scalability reasons.
The underlying functionality of the worker service is provided by [asynq](https://github.com/hibiken/asynq), so it's highly recommended that you review the documentation for that project first.
#### Starting the worker
A make target was added to allow you to start the worker service easily. From the root of the repository, execute `make worker`.
#### Understanding the service
The worker service is located in [cmd/worker/main.go](/cmd/worker/main.go) and starts with the creation of a new `*asynq.Server` provided by `asynq.NewServer()`. There are various configuration options available, so be sure to review them all.
Prior to starting the service, we need to route tasks according to their _type_ to their handlers which will process the tasks. This is done by using `async.ServeMux` much like you would use an HTTP router:
```go
mux := asynq.NewServeMux()
mux.Handle(tasks.TypeExample, new(tasks.ExampleProcessor))
```
In this example, all tasks of _type_ `tasks.TypeExample` will be routed to `ExampleProcessor` which is a struct that implements `ProcessTask()`. See the included [basic example](/pkg/tasks/example.go).
Finally, the service is started with `async.Server.Run(mux)`.
### Monitoring
[Asynq](https://github.com/hibiken/asynq) comes with two options to monitor your queues: 1) [Command-line tool](https://github.com/hibiken/asynq#command-line-tool) and 2) [Web UI](https://github.com/hibiken/asynqmon)
## Static files
Static files are currently configured in the router (`pkg/routes/router.go`) to be served from the `static` directory. If you wish to change the directory, alter the constant `config.StaticDir`. The URL prefix for static files is `/files` which is controlled via the `config.StaticPrefix` constant.
### Cache control headers
Static files are grouped separately so you can apply middleware only to them. Included is a custom middleware to set cache control headers (`middleware.CacheControl`) which has been added to the static files router group.
The cache max-life is controlled by the configuration at `Config.Cache.Expiration.StaticFile` and defaults to 6 months.
### Cache-buster
While it's ideal to use cache control headers on your static files so browsers cache the files, you need a way to bust the cache in case the files are changed. In order to do this, a function is provided in the [funcmap](#funcmap) to generate a static file URL for a given file that appends a cache-buster query. This query string is randomly generated and persisted until the application restarts.
For example, to render a file located in `static/picture.png`, you would use:
```html

```
Which would result in:
```html

```
Where `9fhe73kaf3` is the randomly-generated cache-buster.
## Email
An email client was added as a _Service_ to the `Container` but it is just a skeleton without any actual email-sending functionality. The reason is because there are a lot of ways to send email and most prefer using a SaaS solution for that. That makes it difficult to provide a generic solution that will work for most applications.
The structure in the client (`MailClient`) makes composing emails very easy and you have the option to construct the body using either a simple string or with a template by leveraging the [template renderer](#template-renderer). The standard library can be used if you wish to send email via SMTP and most SaaS providers have a Go package that can be used if you choose to go that direction. **You must** finish the implementation of `MailClient.send`.
The _from_ address will default to the configuration value at `Config.Mail.FromAddress`. This can be overridden per-email by calling `From()` on the email and passing in the desired address.
See below for examples on how to use the client to compose emails.
**Sending with a string body**:
```go
err = c.Mail.
Compose().
To("[email protected]").
Subject("Welcome!").
Body("Thank you for registering.").
Send(ctx)
```
**Sending with a template body**:
```go
err = c.Mail.
Compose().
To("[email protected]").
Subject("Welcome!").
Template("welcome").
TemplateData(templateData).
Send(ctx)
```
This will use the template located at `templates/emails/welcome.gohtml` and pass `templateData` to it.
## HTTPS
By default, the application will not use HTTPS but it can be enabled easily. Just alter the following configuration:
- `Config.HTTP.TLS.Enabled`: `true`
- `Config.HTTP.TLS.Certificate`: Full path to the certificate file
- `Config.HTTP.TLS.Key`: Full path to the key file
To use _Let's Encrypt_ follow [this guide](https://echo.labstack.com/cookbook/auto-tls/#server).
## Logging
Logging is provided by [Echo](https://echo.labstack.com/guide/customization/#logging) and is accessible within the _Echo_ instance, which is located in the `Web` field of the `Container`, or within any of the _context_ parameters, for example:
```go
func (c *home) Get(ctx echo.Context) error {
ctx.Logger().Info("something happened")
if err := someOperation(); err != nil {
ctx.Logger().Errorf("the operation failed: %v", err)
}
}
```
The logger can be swapped out for another, as long as it implements Echo's logging [interface](https://github.com/labstack/echo/blob/master/log.go). There are projects that provide this bridge for popular logging packages such as [zerolog](https://github.com/rs/zerolog).
### Request ID
By default, Echo's [request ID middleware](https://echo.labstack.com/middleware/request-id/) is enabled on the router but it only adds a request ID to the log entry for the HTTP request itself. Log entries that are created during the course of that request do not contain the request ID. `LogRequestID()` is custom middleware included which adds that request ID to all logs created throughout the request.
## Roadmap
Future work includes but is not limited to:
- Flexible pager templates
- Expanded HTMX examples and integration
- Admin section
## Credits
Thank you to all of the following amazing projects for making this possible.
- [alpinejs](https://github.com/alpinejs/alpine)
- [asynq](https://github.com/hibiken/asynq)
- [bulma](https://github.com/jgthms/bulma)
- [docker](https://www.docker.com/)
- [echo](https://github.com/labstack/echo)
- [echo-contrib](https://github.com/labstack/echo-contrib)
- [ent](https://github.com/ent/ent)
- [go](https://go.dev/)
- [gocache](https://github.com/eko/gocache)
- [goquery](https://github.com/PuerkitoBio/goquery)
- [go-redis](https://github.com/go-redis/redis)
- [htmx](https://github.com/bigskysoftware/htmx)
- [jwt](https://github.com/golang-jwt/jwt)
- [pgx](https://github.com/jackc/pgx)
- [postgresql](https://www.postgresql.org/)
- [redis](https://redis.io/)
- [sprig](https://github.com/Masterminds/sprig)
- [sessions](https://github.com/gorilla/sessions)
- [testify](https://github.com/stretchr/testify)
- [validator](https://github.com/go-playground/validator)
- [viper](https://github.com/spf13/viper)