Ecosyste.ms: Awesome
An open API service indexing awesome lists of open source software.
https://github.com/komposable/komponent
An opinionated way of organizing front-end code in Ruby on Rails, based on components
https://github.com/komposable/komponent
component-based design-systems rails5 styleguides webpacker
Last synced: about 2 months ago
JSON representation
An opinionated way of organizing front-end code in Ruby on Rails, based on components
- Host: GitHub
- URL: https://github.com/komposable/komponent
- Owner: komposable
- License: mit
- Created: 2017-12-07T12:21:15.000Z (over 6 years ago)
- Default Branch: master
- Last Pushed: 2023-11-13T15:45:53.000Z (7 months ago)
- Last Synced: 2024-04-15T09:05:08.985Z (2 months ago)
- Topics: component-based, design-systems, rails5, styleguides, webpacker
- Language: Ruby
- Homepage: http://komponent.io
- Size: 393 KB
- Stars: 426
- Watchers: 18
- Forks: 30
- Open Issues: 31
-
Metadata Files:
- Readme: README.md
- Changelog: CHANGELOG.md
- License: LICENSE.txt
- Code of conduct: CODE_OF_CONDUCT.md
Lists
- awesome-ruby - Komponent - An opinionated way of organizing front-end code in Rails, based on components. (View components)
- awesome-stars - komposable/komponent - An opinionated way of organizing front-end code in Ruby on Rails, based on components (Ruby)
- awesome-ruby - Komponent - An opinionated way of organizing front-end code in Rails, based on components. (View helpers)
- awesome-stars - komponent - end code in Ruby on Rails, based on components | komposable | 426 | (Ruby)
- awesome-ruby - Komponent - An opinionated way of organizing front-end code in Rails, based on components. (View helpers)
README
# 
[](https://github.com/komposable/komponent/actions)

[](https://codeclimate.com/github/komposable/komponent/maintainability)

**Komponent** implements an opinionated way of organizing front-end code in Ruby on Rails, based on _components_.
----
:wave: **HEADS UP!** The future of this gem is currently [being discussed](https://github.com/komposable/komponent/issues/169). Please have your say!
----
Each component has its own folder, containing a Ruby module, a partial, a stylesheet and a JavaScript file.
Komponent relies heavily on webpacker to manage dependencies and generate the production JS and CSS files.
This README examples are written in Slim, but Komponent is compatible with:
- your preferred templating language (Slim, Haml, erb)
- your stylesheet language of choice (Sass, SCSS, CSS, PostCSS)
This gem has been inspired by our Rails development practices at [Ouvrages](https://ouvrages-web.fr) and [Etamin Studio](https://etaminstudio.com), and the (excellent) [_Modern Front-end in Rails_](https://evilmartians.com/chronicles/evil-front-part-1) article from Evil Martians.
Table of Contents
- [Compatibility](#compatibility)
- [Getting started](#getting-started)
- [Usage](#usage)
- [Passing variables](#passing-variables)
- [Passing options](#passing-options)
- [Component caching](#component-caching)
- [Passing a block](#passing-a-block)
- [Properties](#properties)
- [Helpers](#helpers)
- [Component partials](#component-partials)
- [Namespacing components](#namespacing-components)
- [Stimulus integration](#stimulus-integration)
- [Internationalization](#internationalization)
- [Available locales configuration](#available-locales-configuration)
- [Styleguide](#styleguide)
- [Configuration](#configuration)
- [Change default root path](#change-default-root-path)
- [Default options for the generators](#default-options-for-the-generators)
- [Change default stylesheet engine](#change-default-stylesheet-engine)
- [Force default templating engine](#force-default-templating-engine)
- [Additional paths](#additional-paths)
- [Contributing](#contributing)
- [Releasing a new version](#releasing-a-new-version)
- [License](#license)
## Compatibility
- Ruby 2.5+
- Rails 5.0+
- Webpacker 3.0.0+
## Getting started
```ruby
# Gemfile
gem 'komponent'
```
Run the following command to set up your project instantly:
```sh
rails generate komponent:install
```
This command will:
* check that the dependencies (currently, webpacker) are installed
* rename the `app/javascript` folder to `frontend` and modify webpacker config accordingly
* create the `frontend/components` folder where you will put your component
* create the `frontend/components/index.js` file that will list your components and `import` it in `frontend/packs/application.js`
## Usage
Generate a new component with the `component` generator:
```sh
rails generate component button
```
Then, render it in your views with the `component` helper (or its alias `c`).
```slim
/ app/views/pages/home.html.slim
= component 'button'
= c 'button'
```
Or, directly from your controllers:
```ruby
# app/controllers/pages_controller.rb
def home
render html: helpers.component('home')
end
```
Make sure to include javascript pack tag and stylesheet pack tag in your application layout file, for instance:
```slim
/ app/views/layouts/application.html.slim
doctype html
html
head
= stylesheet_pack_tag 'application'
body
= yield
= javascript_pack_tag 'application'
```
Check [Webpacker documentation](https://github.com/rails/webpacker) for further information.
### Passing variables
You can pass `locals` to the helper. They are accessible within the component partial, as instance variables. Additionally, the entire `locals` hash is made available through a `properties` helper method.
```slim
/ app/views/pages/home.html.slim
= component 'button', text: 'My button'
```
```slim
/ frontend/components/button/_button.html.slim
.button
= @text
```
### Passing options
#### Component caching
Komponent relies on [Rails Low-level caching](http://guides.rubyonrails.org/caching_with_rails.html#low-level-caching).
You can cache the component by passing the `cached: true` option. The cache will expire when the locals, options or block change.
If you want better control of the cache expiration, you can provide a custom `cache_key`. When the `cache_key` changes, the cache will be cleared.
```slim
/ app/views/pages/home.html.slim
/ Cache the component based on its locals
= component "button", { text: 'Click here' }, cached: true
/ or cache the component with a specific key, such as the last update of a model
= component "button", { text: 'Click here' }, cached: true, cache_key: @product.updated_at
```
### Passing a block
The component also accepts a `block`. To render the block, just use the standard `yield`.
```slim
/ app/views/pages/home.html.slim
= component 'button'
span= 'My button'
```
```slim
/ frontend/components/button/_button.html.slim
.button
= yield
```
You can check if the component has been called with a block using the `block_given_to_component?` helper from within the component.
### Properties
Each component comes with a Ruby `module`. You can use it to set properties:
```ruby
# frontend/components/button/button_component.rb
module ButtonComponent
extend ComponentHelper
property :href, required: true
property :text, default: 'My button'
end
```
```slim
/ frontend/components/button/_button.html.slim
a.button(href=@href)
= @text
```
### Helpers
If your partial becomes too complex and you want to extract logic from it, you may want to define custom helpers in the `ButtonComponent` module:
```ruby
# frontend/components/button/button_component.rb
module ButtonComponent
extend ComponentHelper
property :href, required: true
property :text, default: 'My button'
def external_link?
@href.starts_with? 'http'
end
end
```
```slim
/ frontend/components/button/_button.html.slim
a.button(href=@href)
= @text
= ' (external link)' if external_link?
```
```slim
/ app/views/pages/home.html.slim
= component "button", text: "My button", href: "http://github.com"
```
### Component partials
You can also choose to split your component into partials. In this case, we can use the default `render` helper to render a partial, stored inside the component directory.
```slim
/ frontend/components/button/_button.html.slim
a.button(href=@href)
= @text
- if external_link?
= render 'suffix', text: 'external link'
```
```slim
/ frontend/components/button/_suffix.html.slim
= " (#{text})"
```
### Namespacing components
To organize different types of components, you can group them in namespaces when you use the generator:
```sh
rails generate component admin/header
```
This will create the component in an `admin` folder, and name its Ruby module `AdminHeaderComponent`.
### Stimulus integration
Komponent supports [Stimulus](https://github.com/stimulusjs/stimulus) >= 1.0.
You can pass `--stimulus` to both generators to use Stimulus in your components.
```sh
rails generate komponent:install --stimulus
```
This will `yarn add stimulus` and create a `stimulus_application.js` in the `frontend` folder.
```sh
rails generate component button --stimulus
```
This will create a component with an additional `button_controller.js` file, and define a `data-controller` in the generated view.
### Internationalization
In case your component will contain text strings you want to localize, you can pass the `--locale` option to generate localization files in your component directory.
```sh
rails generate component button --locale
```
This will create a `yml` file for each locale (using `I18n.available_locales`). In your component, the `t` helper will use the same ["lazy" lookup](http://guides.rubyonrails.org/i18n.html#lazy-lookup) as Rails.
```slim
/ frontend/components/button/_button.html.slim
= a.button(href=@href)
= @text
= render('suffix', text: t(".external_link")) if external_link?
```
```yml
# frontend/components/button/button.en.yml
en:
button_component:
external_link: external link
```
```yml
# frontend/components/button/button.fr.yml
fr:
button_component:
external_link: lien externe
```
#### Available locales configuration
You can whitelist the locales you use by setting this into an initializer, as explained in the ["official guide"](http://guides.rubyonrails.org/i18n.html#configure-the-i18n-module):
```ruby
I18n.available_locales = [:en, :fr]
```
> If you have the `rails-i18n` gem in your `Gemfile`, you should whitelist locales to prevent creating a lot of
> locale files when you generate a new component.
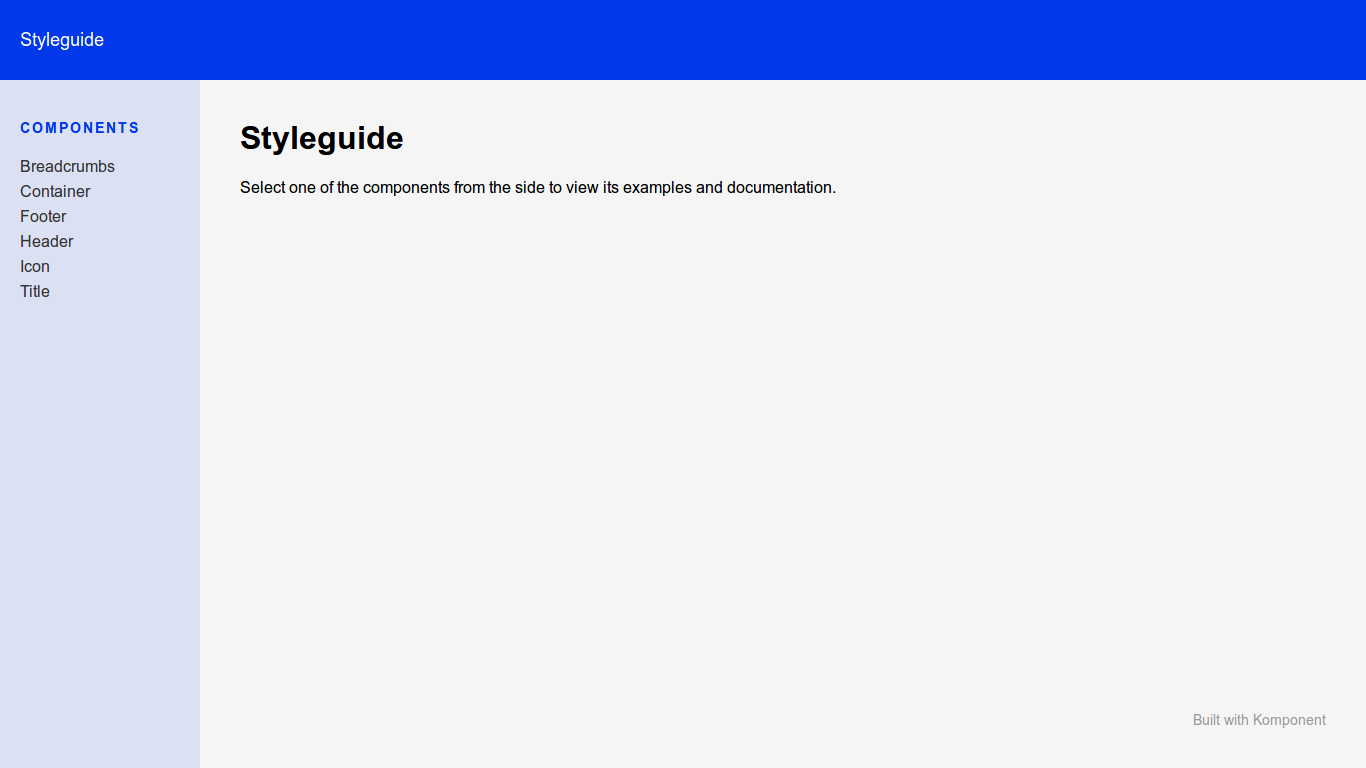
### Styleguide
Komponent includes a basic styleguide engine that you can use in your project to document your components.
To set it up, you can use the generator:
```sh
rails generate komponent:styleguide
```
This command will:
* copy the styleguide components (`komponent/container`, `komponent/footer`, `komponent/header` and `komponent/sidebar`) to your components folder, so you can customize them
* add a new `komponent.js` pack to your packs folder
* mount the engine in your routes
Then, for each component, you can describe it and render examples for each state in the `_example.html.slim` file from the component folder. The engine will then render it on the component page.
If you have existing components, you can generate all their example files at once with:
```sh
rails generate komponent:examples
```
Finally, visit `http://localhost:3000/styleguide` to access your styleguide.
### Configuration
#### Change default root path
You can change the default root path (`frontend`) to another path where Komponent should be installed and components generated. You need to change `komponent.root` in an initializer.
```rb
Rails.application.config.komponent.root = Rails.root.join('app/frontend')
```
#### Default options for the generators
You can configure the generators in an initializer or in `application.rb`, so you don't have to add `--locale` and/or `--stimulus` flags every time you generate a fresh component.
```rb
config.generators do |g|
g.komponent stimulus: true, locale: true # both are false by default
end
```
#### Change default stylesheet engine
You can configure the stylesheet engine used for generate stylesheet file, allowed values are `:css`, `:scss`, `:sass`.
```rb
Rails.application.config.komponent.stylesheet_engine = :css # default value is :css
```
#### Force default templating engine
If for some reason your preferred templating engine is not detected by Komponent, you can force it by manually defining it in your config:
```rb
Rails.application.config.generators.template_engine = :haml
```
#### Additional paths
You may want to use components in a gem, or a Rails engine, and expose them to the main app. In order to do that, you just have to configure the paths where Komponent will look for components.
From a gem:
```rb
module MyGem
class Railtie < Rails::Railtie
config.after_initialize do |app|
app.config.komponent.component_paths.append(MyGem.root.join("frontend/components"))
end
initializer "my_gem.action_dispatch" do |app|
ActiveSupport.on_load :action_controller do
ActionController::Base.prepend_view_path MyGem.root.join("frontend")
end
end
initializer 'my_gem.autoload', before: :set_autoload_paths do |app|
app.config.autoload_paths << MyGem.root.join("frontend")
end
end
private
def self.root
Pathname.new(File.dirname(__dir__))
end
end
```
or from an engine:
```rb
module MyEngine
class Engine < Rails::Engine
isolate_namespace MyEngine
config.after_initialize do |app|
app.config.komponent.component_paths.append(MyEngine::Engine.root.join("frontend/components"))
end
initializer 'my_engine.action_dispatch' do |app|
ActiveSupport.on_load :action_controller do
ActionController::Base.prepend_view_path MyEngine::Engine.root.join("frontend")
end
end
initializer 'my_engine.autoload', before: :set_autoload_paths do |app|
app.config.autoload_paths << MyEngine::Engine.root.join('frontend')
end
end
end
```
Make sure you add `komponent` to the runtime dependencies in your `gemspec`.
In order to compile packs from engine, and to use `javascript_pack_tag 'engine'`, you need to:
- Create a pack file in main app
```js
// frontend/packs/engine.js
import 'packs/engine';
```
- Append engine frontend folder to `resolved_paths` in `config/webpacker.yml` from your main app
```yml
resolved_paths:
- engine/frontend
```
## Running tests
Run all Cucumber features and unit tests with `bundle exec appraisal rake test`
Run the full test matrix with `bundle exec appraisal rake test`
## Contributing
Bug reports and pull requests are welcome on GitHub at https://github.com/komposable/komponent.
## Releasing a new version
- Update the CHANGELOG (add a title and a date for the new version)
- Update the version number in `lib/komponent/version`
- Install the `gem-release` gem if you haven't already
- Run `gem release --tag --push`
- Create or update the release on Github with the same version number and copy-paste the description from the CHANGELOG
Please note:
If you're releasing a patch version (eg. from 2.0.1 to 2.0.2) you can run `gem bump patch --release --tag --push --sign` so you don't have to manually change the version number.
If you want to release a specific version (eg. beta, RC...), you can run `gem bump 3.0.0.beta1 --release --tag --push --sign`
## License
The gem is available as open source under the terms of the [MIT License](http://opensource.org/licenses/MIT).