Ecosyste.ms: Awesome
An open API service indexing awesome lists of open source software.
https://github.com/teodorpatras/SideMenuController
A side menu controller written in Swift for iOS
https://github.com/teodorpatras/SideMenuController
Last synced: about 1 month ago
JSON representation
A side menu controller written in Swift for iOS
- Host: GitHub
- URL: https://github.com/teodorpatras/SideMenuController
- Owner: teodorpatras
- License: mit
- Archived: true
- Created: 2015-03-07T17:53:58.000Z (over 9 years ago)
- Default Branch: master
- Last Pushed: 2021-04-21T04:06:24.000Z (over 3 years ago)
- Last Synced: 2024-04-24T14:50:35.423Z (5 months ago)
- Language: Swift
- Homepage:
- Size: 9.24 MB
- Stars: 1,160
- Watchers: 41
- Forks: 294
- Open Issues: 76
-
Metadata Files:
- Readme: README.md
- License: LICENSE
Awesome Lists containing this project
- awesome-ios - SideMenuController - A side menu controller written in Swift (UI / Menu)
- awesome-ios-star - SideMenuController - A side menu controller written in Swift (UI / Menu)
README


[](http://cocoapods.org/pods/SideMenuController)
[](https://travis-ci.org/teodorpatras/SideMenuController)
[](http://cocoapods.org/pods/SideMenuController)
[](https://github.com/Carthage/Carthage)
[](http://cocoapods.org/pods/SideMenuController)
Description
--------------
`SideMenuController` is a custom container view controller written in Swift which will display the main content within a center panel and the secondary content (option menu, navigation menu, etc.) within a side panel when triggered. The side panel can be displayed either on the left or on the right side, under or over the center panel.
# Contents
1. [Features](#features)
3. [Installation](#installation)
4. [Supported OS & SDK versions](#supported-versions)
5. [Usage](#usage)
6. [Caching](#caching)
6. [Customisation](#customisation)
7. [Implementing custom transitions](#custom-transitions)
8. [Public interface](#public-interface)
9. [Delegation] (#delegation)
10. [License](#license)
11. [Contact](#contact)
## Features
- [x] Easy to use, fully customisable
- [x] Left and Right side positioning
- [x] Over and Under center positioning
- [x] Automatic orientation change adjustments.
- [x] Fully customisable transition animations
- [x] Custom status bar **behaviour** (see [Customisation](#customisation) for details):


Installation
--------------
### CocoaPods
[CocoaPods](http://cocoapods.org) is a dependency manager for Cocoa projects.
CocoaPods 0.36 adds supports for Swift and embedded frameworks. You can install it with the following command:
```bash
$ gem install cocoapods
```
To integrate `SideMenuController` into your Xcode project using CocoaPods, specify it in your `Podfile`:
```ruby
pod 'SideMenuController'
```
Then, run the following command:
```bash
$ pod install
```
### Carthage
[Carthage](https://github.com/Carthage/Carthage) is a decentralized dependency manager that builds your dependencies and provides you with binary frameworks.
You can install Carthage with [Homebrew](http://brew.sh/) using the following command:
```bash
$ brew update
$ brew install carthage
```
To integrate `SideMenuController` into your Xcode project using Carthage, specify it in your `Cartfile`:
```ogdl
github "teodorpatras/SideMenuController"
```
Run `carthage update` to build the framework and drag the built `SideMenuController.framework` into your Xcode project.
### Manually
If you prefer not to use either of the aforementioned dependency managers, you can integrate sources in the `Source` folder into your project manually.
Supported OS & SDK Versions
-----------------------------
* Supported build target - iOS 8.0+ (Xcode 7+)
Usage
--------------
You can get started using `SideMenuController` in 3 simple steps:
###Step 1
First of all, you should **add a menu button image** and **specify the position of the side panel**. Optionally, you can customise other preferences as well. This can be achieved in two ways:
### 1) If the SideMenuController subclass is the initial view controller in your main storyboard:
Subclass `SideMenuController` and override `init(coder:)` where you can change the preferences according to your own style:
```swift
class CustomSideMenuController: SideMenuController {
required init?(coder aDecoder: NSCoder) {
SideMenuController.preferences.drawing.menuButtonImage = UIImage(named: "menu")
SideMenuController.preferences.drawing.sidePanelPosition = .overCenterPanelLeft
SideMenuController.preferences.drawing.sidePanelWidth = 300
SideMenuController.preferences.drawing.centerPanelShadow = true
SideMenuController.preferences.animating.statusBarBehaviour = .showUnderlay
super.init(coder: aDecoder)
}
}
```
Next, go to the Storyboard, and change the class of the SideMenuController to the custom subclass you just created.
### 2) In all other cases:
In `AppDelegate.swift`, override `application:didFinishLaunchingWithOptions:`:
```swift
func func application(_ application: UIApplication, didFinishLaunchingWithOptions launchOptions: [UIApplicationLaunchOptionsKey: Any]?) -> Bool {
// Override point for customization after application launch.
SideMenuController.preferences.drawing.menuButtonImage = UIImage(named: "menu")
SideMenuController.preferences.drawing.sidePanelPosition = .overCenterPanelLeft
SideMenuController.preferences.drawing.sidePanelWidth = 300
SideMenuController.preferences.drawing.centerPanelShadow = true
SideMenuController.preferences.animating.statusBarBehaviour = .showUnderlay
}
```
⚠️_If you **do not** specify a menu button image, `SideMenuController` **will not add one by default** and you will have to manually add one whenever transitioning to a new center view controller._
###Step 2
`SideMenuController` can be used with storyboard segues, or you can programmatically transition to a new center view controller.
####Using storyboard segues####
``SideMenuController`` defines two custom segues:
> - `SideContainmentSegue` - which transitions to a new side controller (triggers `embedSideController`)
> - `CenterContainmentSegue` - which transitions to a new center controller (triggers `embedCenterController`)
In the storyboard file, add initially two segues from the `SideMenuController` scene, one for the center view controller, and another for the side menu view controller. Later on, you can add more `CenterContainmentSeuges` depending on how many scenes you want to transition to.
Remember to set all the appropriate attributes of each segue in the Attributes Inspector:
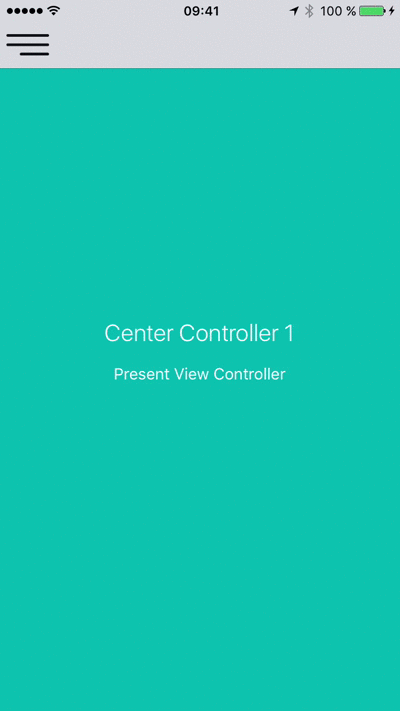
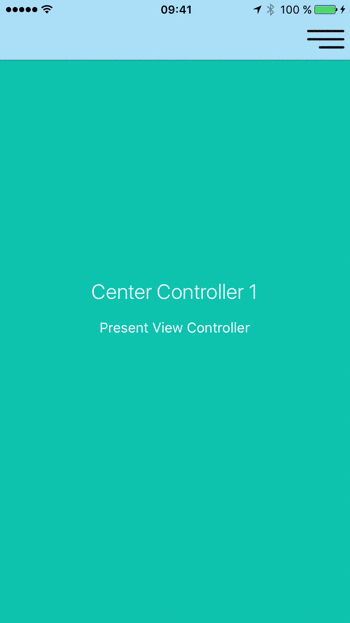
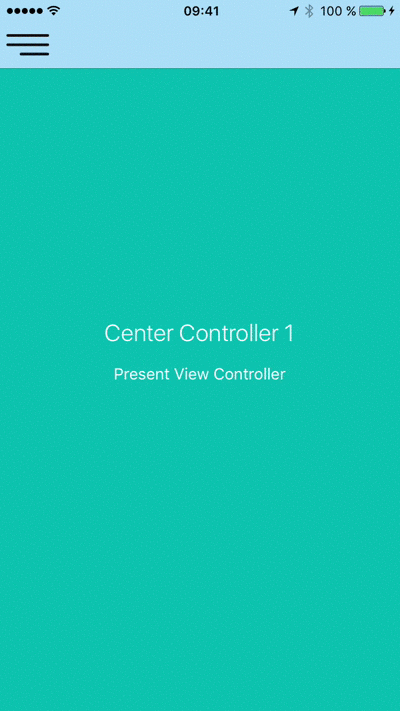
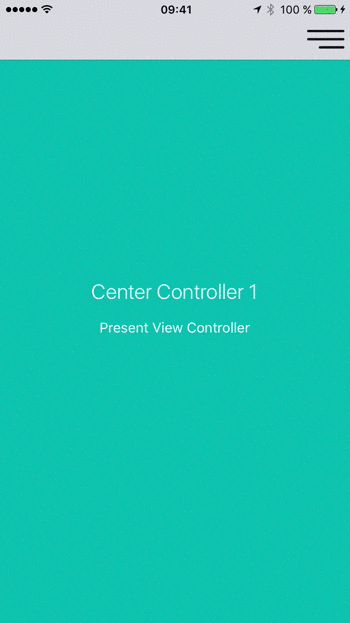
| SideContainmentSegue | CenterContainmentSegue |
|----------|:-------------:|------:|
| 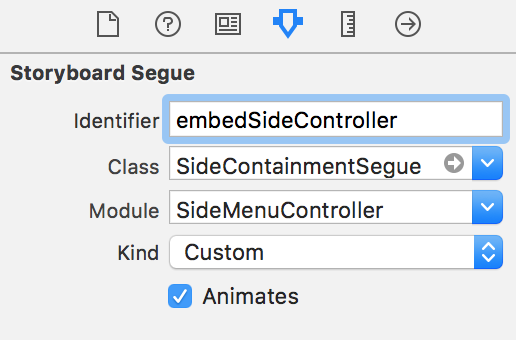 |  |
In order to embed the inital view controlles inside the `SideMenuController` you will have to call `performSegue(withIdentifier:sender:)`. Easiest way is to subclass `SideMenuController` and override `viewDidLoad`:
```swift
override func viewDidLoad() {
super.viewDidLoad()
performSegue(withIdentifier: "embedInitialCenterController", sender: nil)
performSegue(withIdentifier: "embedSideController", sender: nil)
}
```
####Programmatically####
You can perform all the above mentioned transitions programmatically, without using segues, by calling one of the two public methods:
```swift
public func embed(sideViewController: UIViewController)
public func embed(centerViewController: UViewController)
```
**Important Note:** In case you want the center view controller to be of different type than `UINavigationController`, you'll have to add the menu button to one/all of its children navigation controllers programmatically. `SideMenuController` defines an extension to `UINavigationController` in order to make it easy to do that. Just call `navigationController.addSideMenuButton()`. **Before calling that method, make sure the navigation controller is already embedded inside the `SideMenuController`'s child controller hierarchy.**
Example with `UITabBarController`:
```swift
// create the view controllers for center containment
let vc1 = UIViewController()
vc1.view.backgroundColor = UIColor.red
vc1.title = "first"
let nc1 = UINavigationController(rootViewController: vc1)
vc1.navigationItem.title = "first"
let vc2 = UIViewController()
vc2.view.backgroundColor = UIColor.yellow
vc2.title = "second"
let nc2 = UINavigationController(rootViewController: vc2)
vc2.navigationItem.title = "second"
let vc3 = UIViewController()
vc3.view.backgroundColor = UIColor.blue
vc3.title = "third"
let nc3 = UINavigationController(rootViewController: vc3)
vc3.navigationItem.title = "third"
let tabBarController = UITabBarController()
tabBarController.viewControllers = [nc1, nc2, nc3]
// create the side controller
let sideController = UITableViewController()
// embed the side and center controllers
sideMenuViewController.embed(sideViewController: sideController)
sideMenuViewController.embed(centerViewController: tabBarController)
// add the menu button to each view controller embedded in the tab bar controller
[nc1, nc2, nc3].forEach({ controller in
controller.addSideMenuButton()
})
show(sideMenuViewController, sender: nil)
```
###Step 3
You're almost set now. Last step is to know how to transition to new center view controllers.
**Important Note:** `SideMenuController` defines an extension to `UIViewController` in order to make it more accessible via the computed property `public var sideMenuController: SideMenuController?`. From any `UIViewController` instance, you can access the `SideMenuController` by typing: `self.sideMenuController`. This will return the `SideMenuController` if the caller is one of its child view controllers or otherwise `nil`.
From here onwards, whenever the user selects an option in the side menu controller, you can easily perform the segue like so:
####Using storyboard segues####
```swift
override func tableView(_ tableView: UITableView,
didSelectRowAt indexPath: IndexPath) {
sideMenuController?.performSegue(withIdentifier: segues[indexPath.row], sender: nil)
}
```
####Programmatically####
```swift
override func tableView(_ tableView: UITableView,
didSelectRowAt indexPath: IndexPath) {
sideMenuController?.embed(centerViewController: someUIViewControllerInstance)
}
```
Caching
--------------
`SideMenuController` offers you the possibility to cache center view controllers instead of always instantiating new ones when changing them.
**To transition to a new center view controller and cache it**, call ``embed(centerViewController:, cacheIdentifier:)`` on the ``SideMenuController``.
**To retrieve a cached center view controller based on a cache identifier**, call ``viewController(forCacheIdentifier:)`` on the ``SideMenuController``.
###Example
In your side view controller (a.k.a the menu controller):
```swift
override func tableView(_ tableView: UITableView,
didSelectRowAt indexPath: IndexPath) {
// retrieve your identifier
let cacheIdentifier = ...
// retrieve your view controller
let viewController = ...
if let controller = sideMenuController?.viewController(forCacheIdentifier: cacheIdentifier) {
sideMenuController?.embed(centerViewController: controller)
} else {
sideMenuController?.embed(centerViewController: UINavigationController(rootViewController: viewController), cacheIdentifier: cacheIdentifier)
}
}
```
For a more detailed example, check the Example project.
Customisation
--------------
In order to customise the `SideMenuController` appearance and behaviour, you can play with the `SideMenuController .Preferences` structure. It is split into three sub structures:
* ```Drawing``` - encapsulates custom attributes specifying how ```SideMenuController``` will adjust its layout, positioning on screen.
* ```Animating``` - encapsulates custom attributes specifying which animations will be used for different components.
* ```Interaction``` - encapsulates custom attributes specifying how the user is allowed to interract with the side panel
| `Drawing` attribute | Description |
|----------|-------------|------|
| `menuButtonImage` | In case this attribute is set, `SideMenuController` will add a button on the left or right side of the navigation bar of the center view controller (**in case it is a subclass of UINavigationController**) in order to trigger the slide animation. If the attribute is missing, or the center view controller is not a subclass of `UINavigationController`, you'll have to add the menu button by yourself to all the `UINavigationControllers` that will be embedded. |
| `sidePanelPosition` | Specifies the positioning of the side panel. This attribute can take one of the four values: `.underCenterPanelLeft`, `.underCenterPanelRight`, `.overCenterPanelLeft`, `.overCenterPanelRight` |
| `sidePanelWidth` | The width of the side panel. |
| `centerPanelOverlayColor` | When the side panel is either `.overCenterPanelLeft` or `.overCenterPanelRight`, an overlay will be shown on top of the center panel when the side is revealed. Pass the preferred color of this overlay. |
| `centerPanelShadow` | When the side panel is either `.underCenterPanelRight ` or `.underCenterPanelLeft` you can opt in or out to draw a side shadow for the center panel. |
| `Animating` attribute | Description |
|----------|-------------|------|
| `statusBarBehaviour` | The animating style of the status bar when the side panel is revealed. This can be:
**+** `.slideAnimation`: the status bar will be hidden using the `UIStatusBarAnimation.slide` animation
**+** `.fadeAnimation`: the status bar will be hidden using the `UIStatusBarAnimation.fade` animation
**+** `.horizontalPan`: the status bar will slide along with the center panel horizontally.
**+** `.showUnderlay`: a layer with the same color as the navigation bar will be displayed under the status bar |
| `reavealDuration` | Reveal animation duration. |
| `hideDuration` | Hide animation duration. |
| `transitionAnimator` | `TransitionAnimatable` subtype which defines how the new center view controller will be animated on screen. |
| `Interaction` attribute | Description | Discussion |
|----------|-------------|------|
| `panningEnabled` | Default value is `true` | When the side panel is positioned **under the center panel**, the panning is recognized on the center panel. When the side panel is positoned **over the center panel**, the panning is recognized on the side panel. |
| `swipingEnabled` | Default value is `true` | There is **no swipe gesture recognizer** instantiated when the side panel is positioned *under the center panel*. When the side panel is positioned **over the center panel**, the swipe is going to recognized on the center panel. |
| `menuButtonAccessibilityIdentifier` | Accessibility identifier to be set on the menu button. |
Implementing custom transitions
--------------
In order to implement custom transition animations for the center view controller, you have to create a `struct` that conforms to the `TransitionAnimatable` protocol and implement:
```static func performTransition(forView view: UIView, completion: () -> Void)```
Example:
```swift
public struct FadeAnimator: TransitionAnimatable {
public static func performTransition(forView view: UIView, completion: @escaping () -> Void) {
CATransaction.begin()
CATransaction.setCompletionBlock(completion)
let fadeAnimation = CABasicAnimation(keyPath: "opacity")
fadeAnimation.duration = 0.35
fadeAnimation.fromValue = 0
fadeAnimation.toValue = 1
fadeAnimation.fillMode = kCAFillModeForwards
fadeAnimation.isRemovedOnCompletion = true
view.layer.add(fadeAnimation, forKey: "fade")
CATransaction.commit()
}
}
```
For more examples, check `TransitionAnimator.swift`.
Public interface
--------------
##Public methods##
```swift
/**
Toggles the side pannel visible or not.
*/
public func toggle()
/**
Returns a view controller for the specified cache identifier
- parameter identifier: cache identifier
- returns: Cached UIViewController or nil
*/
public func viewController(forCacheIdentifier identifier: String) -> UIViewController?
/**
Embeds a new side controller
- parameter sideViewController: controller to be embedded
*/
public func embed(sideViewController controller: UIViewController)
/**
Embeds a new center controller.
- parameter centerViewController: controller to be embedded
- parameter cacheIdentifier: identifier for the view controllers cache
*/
public func embed(centerViewController controller: UIViewController, cacheIdentifier: String? = nil)
```
##Public properties##
| Property | Type | Description |
|----------|-------------|------|
|`preferences`| `SideMenuController.Preferences` | use to customise the `SideMenuController` preferences |
| `sidePanelVisible` | `Bool` | use to check at any time if the side panel is visible or not |
| `centerViewController` | `UIViewController` | use to access the currently embedded center view controller. |
| `sideViewController` | `UIViewController` | use to access the currently embedded side view controller. |
| `delegate` | `SideMenuControllerDelegate` | use to set the delegate to be notified about certain events. |
Delegation
--------------
`SideMenuController` defines a delegate protocol which you can use if you want to be announced when the side panel has been revealed or hidden:
```swift
public protocol SideMenuControllerDelegate: class {
func sideMenuControllerDidHide(_ sideMenuController: SideMenuController)
func sideMenuControllerDidReveal(_ sideMenuController: SideMenuController)
}
```
In order to receive the aforementioned callbacks, simply assign the delegate property to the `SideMenuController` instance.
License
--------------
```SideMenuController``` is developed by [Teodor Patraş](https://www.teodorpatras.com) and is released under the MIT license. See the ```LICENSE``` file for details. Logo graphic created with Logo Maker.
Contact
--------------
You can follow or drop me a line on [my Twitter account](https://twitter.com/teodorpatras). If you find any issues on the project, you can open a ticket. Pull requests are also welcome.