Ecosyste.ms: Awesome
An open API service indexing awesome lists of open source software.
https://github.com/EpicSkookumScript/SkookumScript-Plugin
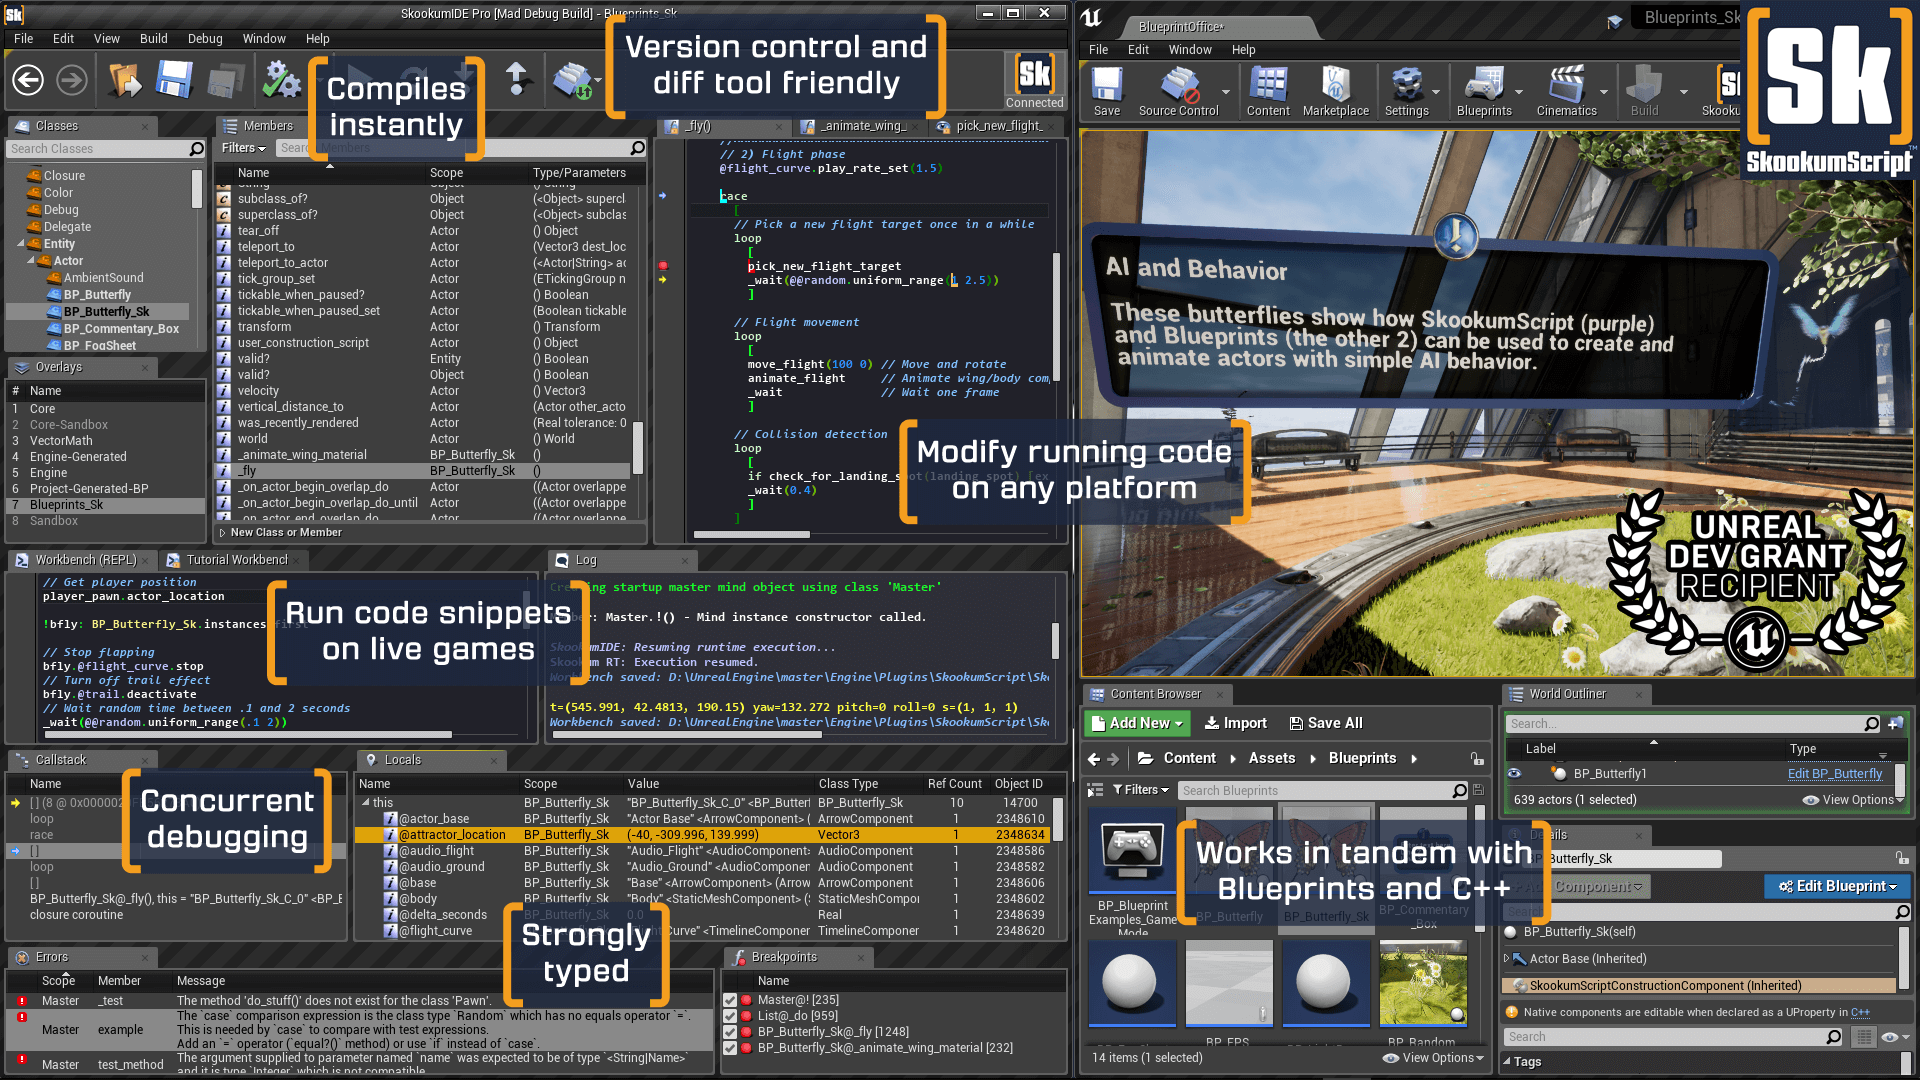
Latest full source of the SkookumScript UE4 plugin and runtime.
https://github.com/EpicSkookumScript/SkookumScript-Plugin
Last synced: 2 months ago
JSON representation
Latest full source of the SkookumScript UE4 plugin and runtime.
- Host: GitHub
- URL: https://github.com/EpicSkookumScript/SkookumScript-Plugin
- Owner: EpicSkookumScript
- License: other
- Created: 2019-11-15T03:30:51.000Z (over 4 years ago)
- Default Branch: master
- Last Pushed: 2022-07-03T04:21:31.000Z (about 2 years ago)
- Last Synced: 2024-02-01T10:25:28.999Z (5 months ago)
- Language: C++
- Homepage: https://skookumscript.com/unreal/
- Size: 2.96 MB
- Stars: 127
- Watchers: 13
- Forks: 20
- Open Issues: 30
-
Metadata Files:
- Readme: README.md
- Contributing: CONTRIBUTING.md
- License: LICENSE.md
Lists
- awesome-ue4 - SkookumScript - Plugin for integrating SkookumScript as a scripting language. (Assets / Scripting)
README
# SkookumScript Plugin
[](https://vimeo.com/133828708 "SkookumScript UE4 Plugin Intro - Click to Watch!")
SkookumScript is the superpowered scripting solution and cutting-edge command console for UE4. It is powerful and feature-rich, yet simple and easy to learn. It has native game concepts and deep integration with UE4 Blueprints and C++. SkookumScript allows the live creation of sophisticated gameplay with surprisingly few lines of code. It has been lovingly crafted over more than a decade, [battle-tested on major game titles](http://skookumscript.com/about/#sleeping-dogs) and supports all platforms. SkookumScript is made for games.
## Learning Resources
Please see the [Wiki](https://github.com/EpicSkookumScript/SkookumScript-Plugin/wiki) for a list of learning resources for SkookumScript.
## C++ Project Instructions
If you'd like to have SkookumScript see your C++ defined `UFUNCTION`s and `UPROPERTY`s then follow the steps below. Be sure to replace any instances of `YourProjectNameHere` with the name of your project as defined in your project's implementation of the primary game module. For instance, in the `CExample.cpp` below we can see that the project name is `CExample`, yours will differ:
```
IMPLEMENT_PRIMARY_GAME_MODULE( FDefaultGameModuleImpl, CExample, "CExample" );
```
1. In `YourProjectNameHere.cpp`, add the include:
```c++
#include
```
1. In `YourProjectNameHere.Build.cs` add the 3 code sections delimited in the example below, you don't need to change any names for this one, just copy/paste the sections that are marked as `Add this` to the appropriate place:
```C#
using UnrealBuildTool;
/***** Add this *****/
using System.IO;
using System.Collections.Generic;
using Tools.DotNETCommon;
/*********************/
public class CExample : ModuleRules
{
public CExample(ReadOnlyTargetRules Target) : base(Target)
{
PCHUsage = PCHUsageMode.UseExplicitOrSharedPCHs;
PublicDependencyModuleNames.AddRange(new string[] { "Core", "CoreUObject", "Engine", "InputCore" });
PrivateDependencyModuleNames.AddRange(new string[] { });
/***** Add this *****/
// Load SkookumScript.ini and add any ScriptSupportedModules specified to the list of PrivateDependencyModuleNames
PrivateDependencyModuleNames.AddRange(GetSkookumScriptModuleNames(Path.Combine(ModuleDirectory, "../..")));
/********************/
}
/***** Add this *****/
// Load SkookumScript.ini and return any ScriptSupportedModules specified
public static List GetSkookumScriptModuleNames(string PluginOrProjectRootDirectory, bool AddSkookumScriptRuntime = true)
{
List moduleList = null;
// Load SkookumScript.ini and get ScriptSupportedModules
string iniFilePath = Path.Combine(PluginOrProjectRootDirectory, "Config/SkookumScript.ini");
if (File.Exists(iniFilePath))
{
ConfigFile iniFile = new ConfigFile(new FileReference(iniFilePath), ConfigLineAction.Add);
var skookumConfig = new ConfigHierarchy(new ConfigFile[] { iniFile });
skookumConfig.GetArray("CommonSettings", "ScriptSupportedModules", out moduleList);
}
if (moduleList == null)
{
moduleList = new List();
}
// Add additional modules needed for SkookumScript to function
moduleList.Add("AgogCore");
moduleList.Add("SkookumScript");
if (AddSkookumScriptRuntime)
{
moduleList.Add("SkookumScriptRuntime");
}
return moduleList;
}
/*********************************************/
}
```
3. In your project's `Config` folder, create the file `SkookumScript.ini` and set the contents as below, be sure to replace the name of your project:
```
[CommonSettings]
+ScriptSupportedModules=YourProjectNameHere
```
4. Clean your Game project in VS and build. You should now see all your functions and properties.
## Build Instructions
### SkookumIDE (Required)
To use the source version of SkookumScript, you will also need he SkookumIDE binaries. The easiest way to acquire these is to download the [latest release](https://github.com/EpicSkookumScript/SkookumScript-Plugin/releases) and overwrite the `SkookumIDE` folder in this repo with the one from the release. You can also build the IDE from source by following [these instructions](https://github.com/EpicSkookumScript/SkookumIDE). Note that to access the SkookumIDE repo, you need to [have access to the Unreal Engine 4 repository](https://www.unrealengine.com/en-US/ue4-on-github).
### Clone the repo
#### Binary Engine
Place the SkookumScript plugin into your project's plugin folder. Example: `MyProject/Plugins/SkookumScript`.
#### Source Engine
You can choose whether to place the SkookumScript plugin into the engine's `Runtime/Plugins` folder or in your project's plugin folder.
### Build
1. Build the SkookumIDE
2. Copy the built SkookumIDE folder from the SkookumIDE project folder `Engine/Plugins/SkookumScript/SkookumIDE` to the SkookumScript Plugin folder `Plugins/SkookumScript`. Note that this will overwrite the existing `SkookumIDE` folder.
3. Regenerate project files. If you placed the plugin into the engine folder then run `GenerateProjectFiles.bat` otherwise right-click your `.uproject` and select *Generate Visual Studio Project Files*.
4. Build your project/engine as usual.