Ecosyste.ms: Awesome
An open API service indexing awesome lists of open source software.
https://github.com/mushishi78/content-editor
A web interface for editing documents on GitHub
https://github.com/mushishi78/content-editor
Last synced: about 1 month ago
JSON representation
A web interface for editing documents on GitHub
- Host: GitHub
- URL: https://github.com/mushishi78/content-editor
- Owner: mushishi78
- License: mit
- Created: 2015-08-30T00:17:15.000Z (almost 9 years ago)
- Default Branch: master
- Last Pushed: 2015-10-15T20:23:55.000Z (over 8 years ago)
- Last Synced: 2024-02-10T23:36:15.735Z (5 months ago)
- Language: JavaScript
- Homepage: https://content-editor.surge.sh
- Size: 679 KB
- Stars: 48
- Watchers: 7
- Forks: 13
- Open Issues: 4
-
Metadata Files:
- Readme: README.md
- License: LICENSE.txt
Lists
- awesome-jekyll-editors - mushishi78/content-editor - - a web interface for editing documents on GitHub ("Visual" Editors n Tools / Open Source)
- awesome-lists-awesome-jekyll-editors - mushishi78/content-editor - - a web interface for editing documents on GitHub ("Visual" Editors n Tools / Open Source)
README
Content Editor
==============
[](https://travis-ci.org/mushishi78/content-editor)
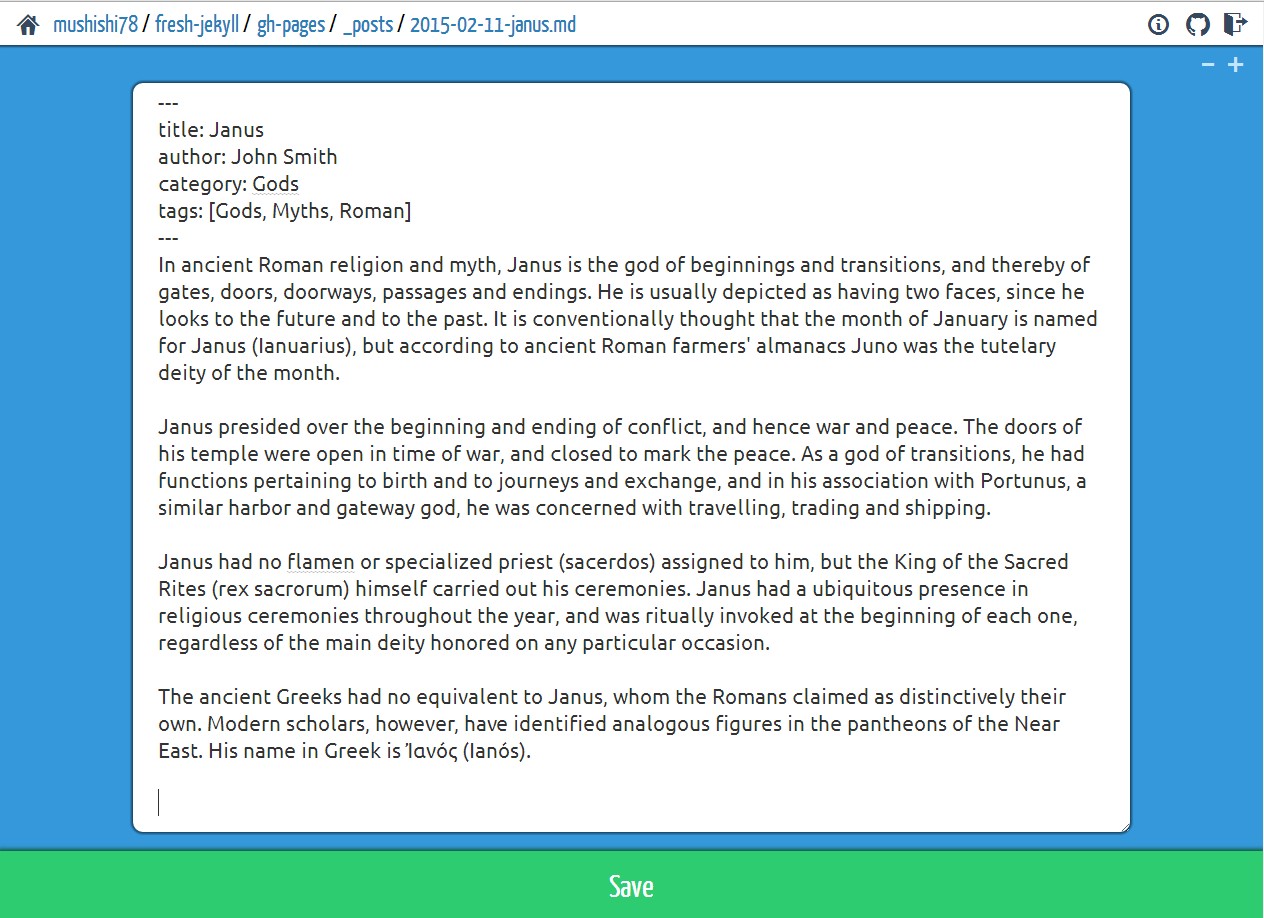
Content Editor is a web interface for editing documents on GitHub. It allows content writers to create, edit, upload, move and delete files from a web browser, lowering the amount of technical knowledge required to manage files on GitHub.
With the growth in popularity of static-site generators, it is often desirable to store content as simple text files alongside the code files that make up a website. This can present a problem for content writers, as code repositories typically use version control software to keep track of file changes which can be difficult to use and require a degree of technical know-how. By comparison, sites that use content management systems, i.e. that store content as data in a database, typically provide a web-based administration panel with a rich-text editor that is more accessible for most content authors.
Content Editor tries to plug this gap by providing a user experience that is simple and responsive, whilst at the same time respecting the difference between these architectures. There are a plethora of static-site generators: Jekyll, Hexo, Hugo, Pelican, Middleman, Metalsmith, Harp, Docpad...etc each with their own ideas about the best ways to store content. By default, Content Editor simply provides a direct text editor for content without trying to be too clever with assumptions on how the files are formatted.
[Video Tour](https://www.youtube.com/watch?v=gGA4o6dvKl8)
Screenshots
-----------

Personal Access Token
---------------------
Content Editor uses personal access tokens to authenticate requests to GitHub on a user's behalf. These tokens allow users to grant specific access permissions and to revoke access at any time. To create a token, follow the [instructions provided by GitHub](https://help.github.com/articles/creating-an-access-token-for-command-line-use/#creating-a-token).
Navigation
----------
Content Editor uses the following format for URLs, reflecting GitHub's own organisation of repositories:
https://content-editor.surge.sh/:owner:/:repo:/:branch:/:path
Each repository has an owner and a name. The owner is the user or organisation who's responsible for the repository. Whilst there may be many collaborators who have been granted permission to edit a repository, the project is still attributable to a single owner.
For each repository, there can be multiple branches. These can be different versions of the same project but with minor changes, like a new feature that someone's working on, or they can contain a completely different set of files for a purpose that run's complementary to the other branches, such as a place to keep documentation files. Most repositories tend to use the `master` branch most of the time as it's the default when creating a new repository, but it's also quite common for sites that are hosted on GitHub Pages to use the `gh-pages` branch to.
After that, the path is just made up of files and folders, just like a typical file-system.
Take this URL for an example:
https://content-editor.surge.sh/facebook/react/master/docs/_posts/2013-06-05-why-react.md
From the URL, you can see that it is a file on the master branch of the React repository that's owned by Facebook.
Contributing
------------
1. [Fork it](https://github.com/mushishi78/content-editor/fork)
2. Create your feature branch (`git checkout -b my-new-feature`)
3. Commit your changes (`git commit -am 'Add some feature'`)
4. Push to the branch (`git push origin my-new-feature`)
5. Create a new Pull Request