Ecosyste.ms: Awesome
An open API service indexing awesome lists of open source software.
https://github.com/ssborbis/ContextSearch-web-ext
Search engine manager for modern browsers
https://github.com/ssborbis/ContextSearch-web-ext
Last synced: 20 days ago
JSON representation
Search engine manager for modern browsers
- Host: GitHub
- URL: https://github.com/ssborbis/ContextSearch-web-ext
- Owner: ssborbis
- Created: 2017-12-01T00:36:35.000Z (over 6 years ago)
- Default Branch: master
- Last Pushed: 2024-05-03T08:21:13.000Z (about 2 months ago)
- Last Synced: 2024-05-20T19:36:11.935Z (about 1 month ago)
- Language: JavaScript
- Homepage:
- Size: 16.6 MB
- Stars: 305
- Watchers: 16
- Forks: 35
- Open Issues: 57
-
Metadata Files:
- Readme: README.md
- Funding: .github/FUNDING.yml
Lists
- my-awesome-stars - ssborbis/ContextSearch-web-ext - Search engine manager for modern browsers (JavaScript)
- my-awesome-starred - ssborbis/ContextSearch-web-ext - Search engine manager for modern browsers (JavaScript)
- awesome-stars - ContextSearch-web-ext
README
[](media/promo.gif)
#  ContextSearch web-ext
Add any search engine to your [Web Extensions](https://developer.chrome.com/docs/extensions/reference/)-compatible browser and search using a variety of menus and shortcuts. Originally written as a replacement for Ben Basson's Context Search.
[Download @ Mozilla Add-ons](https://addons.mozilla.org/firefox/addon/contextsearch-web-ext/)
[Download @ Chrome Store](https://chrome.google.com/webstore/detail/contextsearch-web-ext/ddippghibegbgpjcaaijbacfhjjeafjh)
###### *AMO and Chromestore will not be as up-to-date as the git
#### Table of Contents
1. [Features](#features)
2. [Building From Source & Sideloading](#building)
3. Ways To Search
3.1 [Context Menu](#contextmenu)
3.2 [Quick Menu](#quickmenu)
3.3 [Toolbar Menu](#toolbarmenu)
3.4 [Sidebar Menu](#sidebarmenu)
3.5 [Page Tiles](#pagetiles)
3.6 [Omnibox](#omnibox)
3.7 [Hotkeys](#hotkeys)
4. [Adding Engines](#addingengines)
4.1 [Mycroft Project](#mycroftproject)
5. [Highlighting Results](#highlighting)
6. Editing Engines
6.1 [Search Engines Manager](#searchenginesmanager)
6.2 [Modifying Terms](#modifyingterms)
6.3 [Template Parameters](#templateparameters)
6.4 [Javascript and Form-Based Engines](#javascriptengines)
6.5 [Engines With Logins and Tokens](#loginsandtokens)
7. [User Scripts and Bookmarklets](#bookmarklets)
8. [Launching External Applications](#externalApplications)
9. [Styling](#styling)
10. [Advanced Options](#advanced)
11. [Security](#security)
12. [Libraries](#libraries)
___
## [1. Features](#toc)
* Works with any search engine.
* Context menu
* Popup menu with several opening methods
* Highlight search terms
* Custom Find bar with regex support
* Folders and subfolders for organizing search engines
* Bookmarklets support for user scripts
* Themes
* Custom user CSS for menus
* Site search support
* Reverse image search support
* International character coding for non-UTF-8 engines
* Built-in tools ( Copy, Open Image, Open Link, Downloads, Auto-copy, ... )
* Easily add new engines from website search forms
___
## [2. Building From Source / Sideloading](#toc)
The easiest way to build your own package is to install [web-ext](https://www.npmjs.com/package/web-ext)
Replace `manifest.json` with `chrome_manifest.json` or `firefox_manifest.json` depending on which browser you are using. Some browser forks may require modifications to the manifest to work. Waterfox Classic, for instance, requires the explicit `web_accessible_resources` section found in the generic manifest.json and `strict_min_version` to `"56.0"`
#### Mozilla
If you build your own package, it will not be "verified". Not all versions of Firefox will allow you to install an unverified addon. If your browser does allow it, you will likely need to set `xpinstall.signatures.required = false` in about:config.
You can install as a "temporary addon" from about:debugging -> This Firefox -> Load Temporary addon and browse to src/manifest.json in the unzipped source code. Temporary addons will be removed when you close Firefox, but good for testing. DO NOT use the `Remove` button or risk losing your ContextSearch config. Simply restart Firefox instead.
#### Chromium
Chrome variants allow you to install "unpacked" extensions from Menu -> More Tools -> Extensions -> Load Unpacked. Addons installed this way will persist after restarting the browser.
**Downgrading may result in loss of user preferences!**
Always backup your config before upgrading. The repo code is always being updated and not all changes to the default user preferences play nice with older versions. This is especially important if you're just installing temporarily for testing.
If something does go wrong, it's doubtful you've lost all the engines you've worked so hard to curate. Just post a new issue or contact me directly and we'll see about getting your engines back.
___
## [3.1 Context Menu](#toc)
Display search engines in the context (right-click) menu. The menu is a single entry that expands to all engines and folders not hidden in the [Search Engines Manager](#searchenginesmanager)
### Usage
* Select some text and right-click to bring up the context menu
* Expand the menu item  ` Search for ... `and click the desired search engine from the list that appears.
Enabling the advanced option `contextMenuUseContextualLayout` allows for displaying only specific engines in the menu, depending on the context in which the menu was opened. These "contexts" can be set in the Edit Engine modal from the Search Engines Manager.
For example, if you have a reverse-image search engine, you may only want to use it when right-clicking an image. If you enabled the contextual layout and checked the `image` context for that search engine, you would only be shown that engine ( and any others with the `image` context ) when right-clicking an image. This option is helpful for getting to the engine you want quickly, especially if you have lots of engines.
The search results can be displayed in a number of ways depending on the key held while clicking the menu.
Defaults
| | |
|-|-|
|`Click` | Open In New Tab|
|`Click + Shift` |Open In New Window|
|`Click + Ctrl` |Open In Background Tab|
These settings can be customized from `ContextSearch web-ext Options -> Context Menu -> Search Actions`
### Options
#### `Enable "Add Custom Search / Add to ContextSearch"`
An option to add new search engines will appear in the context menu when you right-click a text input element. If you're going to be adding engines, you want to keep this enabled.
#### ` Show an option to search the entire folder at the top of the menu`
Each folder will display `<>` as the first entry at the top of the folder contents. Click this will search all engines in the folder at once using the same search terms.
#### Recently Used
Display the most recently-used search engines at the top of the main folder. Optionally display them as a folder. Set the number / limit to display
#### Search Actions
Choose how different buttons / button + key combos will display the search results. Mozilla-based browsers recognize more buttons and actions when interacting with the context menu than chromium-based browsers
```
Current Tab
New Tab
Background Tab
New Window
New Incognito Window
Sidebar (Mozilla)
```
#### Access Key
Some OS's allow a key to be used to jump to a particular context menu entry. If you use a keyboard to quickly navigate the context menu, this may be useful to set.
___
## [3.2 Quick Menu](#toc)
The Quick Menu is a robust popup menu that can be used to perform search actions not available to the context menu. It opens with a user-defined number of columns and rows, and can be expanded to show hidden engines by clicking the `More` button.
### Usage
Select text and hold down the right mouse button until the menu appears.
Click the icon for the desired search engine
The search results can be displayed in a number of ways depending on the button used or key held while clicking the search engine.
Defaults:
|||
|-|-|
|`Left Click`|Open In New Tab|
|`Middle Click`|Open In Background Tab|
|`Right Click`|Open In Current Tab|
|`Click + Shift`|Open In New Window|
|`Click + Ctrl`|Open In Background Tab|
|`Click + Alt`|Keep Menu Open|
These settings can be customized from `ContextSearch web-ext Options -> Quick Menu -> Search Actions`
### Options
| General | |
|--- | --- |
| Enable on <textarea> and input elements | If you don't want the menu to open when you're working in a text field, uncheck this.
| Enable on links | Links can be treated as selected text and allow the menu to open. The search terms can be either the link URL or link text, depending on whether CTRL is held down. More options under the General tab.
|Enable on images | Images can be treated as selected text and allow the menu to open. The image URL will be used as the search terms. This can be useful for reverse-image searches.
___
| Layout | |
| --- | --- |
| Default View | Grid: Display search engines as small tiles in a grid layout with just icons
Text: Display search engines in a list with names shown
This setting can be changed with the menu open by using the Toggle Display tool or shortcut |
| Rows / Columns | Set the opening size of the menu. The initial size of grid and text modes can be set independently. |
___
| Size | |
| --- | --- |
| Menu Size | The menu scale can be adjusted for different resolutions. If you have a 4K monitor with no scaling, you may want to set this to a high value.
| Icon Size | A bit obsolete, but you can change the icon size in grid view to take up more of the tile. ( will probably be removed ) |
#### Opening
Pick what actions open the menu. You can use more than one
| | |
| --- | --- |
| `Hide the default context menu when opening the Quick Menu using right-click` | Somewhere between overkill and useless. Depending on the OS, you may be able to suppress the original context menu from opening if you're using the same mouse button to open the quick menu.|
| `Auto` | Menu opens immediately after selecting some text|
|`Keyboard`|Selecting text and pressing a key opens the menu|
|`Mouse`|Select text and click or hold a mouse button. Using the right-click / hold can get a bit weird and conflict with the default context menu on some browsers / OS's, mostly Linux-based. The timeout for opening on Hold can be set in Advanced|
|`Simple Click`|Forget selecting text and just click a word. Probably best to set a modifier key (Alt, Ctrl, Shift) with it to avoid opening the menu all the time. Clicking between words will get you both.
|`Drag`|Select text and drag to open the menu. The tiles respond to drag & drop ( Mozilla ) so you can drag to open, drop to search. |
| Icon | Display an icon adjacent to the current selection. Click to open the menu. |
#### Closing
Optionally close the menu after clicking a search tile or by scrolling the mouse wheel
#### Search Actions
Choose how different buttons / button + key combos will display the search results. You can set a different action for folders.
Note: If you open folders in a new window, only one new window will be created. The rest of the folder content results will be background tabs in that new window.
Folders also have the choice `Browse Folder`. Normally this would be left-click, but you can set it to anything you want.
If a button ( say middle-click ) is set to `Browse Folder` under the folder column and `No Action` under the search engines column, clicking that button ( middle-click ) anywhere in the menu will close the folder and go back to the original menu.
##### Additional Actions
Search actions can be bound to additional mouse keys, and to double-clicks. Click the + button to add a new entry and set the perferred mouse / action / modifier keys / ...
```
Current Tab
New Tab
Background Tab
New Window
New Incognito Window
Sidebar (Mozilla)
```
#### Position
The quick menu normally opens relative to the mouse cursor. Here you can adjust what side of the cursor it opens on and fine-tune the offset.
#### Tools
Along with your search engines, you can display some useful? tools for performing some common tasks.
##### `Display Tools In a Separate Toolbar`
If you don't want your tools mingling with your search engines, taking up space and whatnot, you can put them in their own toolbar. Scroll left / right using the mouse wheel or by clicking the buttons that appear to the left or right of the menu if you have more tools than can be displayed.
##### `Position`
Show tools on the top or bottom of the quick menu, or hide them altogether
| | |
| --- | --- |
|`Last Used`|Show the last-used search engine to easily repeat a search|
|`Copy`|Copy the current search terms to the clipboard|
|`Close`|Close the menu|
|`Disable Menu`|This closes the menu and prevents it from opening again on the current tab session. Useful if the menu opens unwanted on a particular page but you don't want to disable it everywhere.|
|`Lock`|Keep the menu open after performing a search and it stays in the same place. You can reposition it by dragging the menu bar.|
|`Open As Link`|If the selected text is thought to be an URL, this tool will become enabled. Click to navigate to the URL|
|`Find In Page`|Use the built-in Find bar to highlight words in the current page. See the [Highlighting](#highlighting) section for more info.|
|`Grid / List`|Toggle the menu display between a grid layout and a list with text labels
|`Options`|Open the options page
|`Next Theme`|Cycle through some build-in themes for the menus. Find something you like.
|`Layout Editor`|Put the menu into 'edit' mode to resize the layout or rearrange tiles. When editing, tiles can be dragged & dropped to re-order, and the lower-right corner of the menu can be dragged to resize and change the columns / rows count. The vertical order of elements like the search bar, title bar, menu bar, etc can be enable/disabled and rearranged while editing.
|`Toggle Hotkeys`|This one might get removed. Right now, it toggles whether search engine hotkeys can work when the quick menu does not have focus. Basically, turns on or off the ability to type a letter and perform a search. See [Hotkeys](#hotkeys) for more info.
|`Instant Search / Repeat Search`|Enabling this tool allows you to use whatever opening methods are enabled for the quick menu to perform a search using the last search engine used.
Confused?
Essentially, it can work like this. Say you're on a website and you're going look up many words / urls / images / whatever on the page using a particular search engine. Well, you could open the quick menu, lock it, perform a search using the engine you want, then turn on the Instant Search. Lets say you also enabled the quick menu opening method 'Simple Click'. Now you can just start clicking words in the webpage and get a bunch of search results in background tabs. If you do a LOT of searches on a particular page, this tool will save you time.|
| Add to Blocklist | Add the current page URL to a list of sites to not inject ContextSearch content scripts |
| Show / Hide | Toggle display of all engines marked as hidden in current menu |
#### Search Bar
You can optionally show a search bar in the quick menu. Search bars include a suggestions drop-down box that displays search history and Google suggestions ( optionally, see [General](#general) for more info)
#### `Set focus to search bar when the Quick Menu is opened`
Like to edit your search terms after opening the menu?
#### `Select all text in the search bar when it receives focus`
When used with 'Set focus...', the first thing you type replaces the search terms in the search bar. If you're using a shortcut to open the quick menu, not necessarily selecting text first, you may want to enable this to erase and replace the currently displayed search terms with a keystroke.
___
## [3.3 Toolbar Menu](#toc)
A version of the quick menu accessible from an icon on the browser's toolbar menu. The columns setting is independent of the quick menu columns and there is no row setting. Tools that only perform functions on the quick menu will be shown but disabled. Nearly all settings, search functions, etc will be the same as the quick menu.
Unlike the quick menu, the search bar is always at the top of the Toolbar menu.
Sometimes, a website just won't allow content scripts to be injected. This menu provides a way to access all ContextSearch web-ext engines whenever the browser is open, regardless of the website.
___
## [3.4 Sidebar Menu](#toc)
Yet another version of the quick menu. Think of this as a quick menu that always stays put.
Like the Toolbar menu, this gets its own column setting. Unlike the quick menu, it can be dragged around by the menu bar and docked to the left or right of the screen. Double-click the menu bar to dock, and you'll get a full viewheight menu the width of the undocked menu. Why? Why not.
### Options
#### `Overlay an icon for opening the sidebar`
You can also minimize this menu to a small-ish icon that can also be moved around, but if you want to see the opener icon when you visit a new page, enable this. The position is remembered next time you open the menu. In Firefox, this menu will open on drag events if you're the type to drag text / links / images to be searched. Once opened, you can drop onto a search engine tile.
#### `Open the sidebar automatically when the page loads`
Want the menu to show up whenever a new page is opened?
___
## [3.5 Page Tiles](#toc)
Drag text and get a full-page menu of search engine tiles ala Web Search Pro. Drop to search. Dropping on an empty tile closes the menu.
You can also close the menu by pressing ESC or shaking the mouse left and right a few times. Didn't want the menu opened this time but still want to complete your drag event? Shake it.
Like other menus, you can set columns and rows, but the search engine order is completely independent of the other menus. Under the Page Tiles tab in Optionss, using the folder view tree, drag and drop engines or folders where you want them to show up in the menu. Clicking a tile on the preview will clear the tile.
Search actions can be set just for this menu.
There's also a few palette options to give menu a bit of color.
___
## [3.6 Omnibox](#toc)
Modern browsers have a versatile URL bar that do more than point to a web page. Enter the [omnibox](http://www.chromium.org/user-experience/omnibox)
If you're into that sort of thing, you can access any ContextSearch engine, folder, bookmarklet you've set a hotkey or keyword to in the omnibox.
Format: `cs [keyword | hotkey(s)] searchterms`
Say I've set a hotkey for Google to `g` in the [Search Engines Manager](#searchenginesmanager) and want to search for the term "movies", I'd type this in the URL bar (just kidding, I use the other menus) `cs g movies` and press Enter. This will perform the search using whatever tab opening method I've chosen under Search Actions.
If you've set hotkeys, they can be chained like so.
|||
|-|-|
|Amazon| `a`|
|eBay| `e`|
|Google| `g`|
If I type `cs aeg socks` and press Enter, I'll get a new results tab for each engine.
Unlike hotkeys, keywords cannot be chained. You can set a hotkey and a keyword for each engine, but only one keyword will be recognized in the omnibox at a time.
___
## [3.7 Hotkeys](#toc)
The [Search Engines Manager](#searchenginesmanager) allows you to set a hotkey for each engine / folder / bookmarklet which can be used in either the omnibox or as a way to perform a quick search without opening one of the ContextSearch menus.
Select text and press the key corresponding to a search engine. Boom, done. A results tab will open according to the Search Actions setting under the Hotkeys tab.
___
## [4. Adding Search Engines](#toc)
Most websites that have an embedded search bar can be added to the list of search engines in ContextSearch web-ext using the Add Custom Search option from the context menu.
* Open the website you want to add a search engine for
* Right-click on the search bar in the page to open the context menu
* Select the menu item `Add to ContextSearch` to open the Add Custom Search dialog box
* Click Add
You can also rename the engine and choose what folder to add the new engine to.
Clicking `Advanced` will show more options.
* If the website provides an opensearch engine, you can choose to use the opensearch template instead of the template generated by ContextSearch.
* Link to MycroftProject to browse opensearch xml files for the current domain
* Open a Create Custom Engine form to customize and test the engine before installing. You can also change it after installing from the [Search Engines Manager](#searchenginesmanager)
## [4.1 MycroftProject](#toc)
Engines found at http://mycroftproject.com can be easily installed by clicking the  icon placed next to the OpenSearch link.
___
## [5. Highlighting Results](#toc)
After performing a search, search terms in the results page can be highlighted. The highlight styling and behavior can be found in CS Options -> Highlight
Highlighting can be removed from a page by pressing ESC
#### Highlight Options
Search results are marked with an alternating color scheme to distinguish between separate words ( if enabled ). Four sets of background and foreground colors can be chosen using color pickers.
Results can be marked as either foreground / background colors, or as underlines to be less obtrusive. The opacity of the background color can also be changed.
A separate color scheme for the currently active result is provided, and can be customized.
#### Search Results & Navigation
It's often useful to not only mark results on the initial search results page, but on subsequent pages in the same tab.
You can choose to highlight only on the current domain / website, or follow links offsite and continue marking.
* `Continue highlighting pages on the search results website`
* `Continue highlighting on external websites linked from the search results page`
You can also display the CS Find bar and / or a navigation bar ( page preview ) when highlighting.
#### Accuracy
Marking search words is done using the [mark.js](https://markjs.io/) library. Most relevant mark.js options can be set through CS options here. These values can also be changed on-the-fly in the Find bar.
#### Find Bar
A custom Find-In-Page style search bar for navigating through highlighted results. There is no cross-browser API available to interact with built-in page search functions, so for the sake of chromium users, this was developed instead.
Like the Sidebar, the Find bar is dockable. There is a small handle to move the menu around on the far-left side of the window. Double-click to dock. Keyboard shortcuts for Next Result / Previous Result can be set in the Hotkeys tab.
Thanks to the mark.js library, regex can be used for searching from the Find bar.
You can search for words in ALL TABS simultaneously by enabling the All Tabs option, or button
___
## [6.1 Search Engines Manager](#toc)
Under the `Search Engines` tab of CS Options is where you'll find the main menu for editing, moving, copying, deleting, hiding engines.
Each engine / folder / bookmarklet is displayed as a row in a table consisting of an icon, name, omnibox keyword, and hotkey.
A custom right-click menu provides several options.
You can edit your engines by double-clicking the row or Right-click menu -> Edit
When editing engines, folders and bookmarklets, you can change the name or icon using either the favicon finder or clicking the current icon and uploading an image from your computer. Search engine icons will be resized according to `cacheIconsMaxSize` under Advanced, and cached. The default size is 32x32, but if you are wanting higher-res images used with some custom user styles, raise this number.
Tools and separators can also be added from the custom context menu.
### Engine Types
* Search Engines
* Generally conforming to the [OpenSearch](https://developer.mozilla.org/en-US/docs/Web/OpenSearch) standard. These are your basic search engines. Each must have a unique name so as to not conflict with built-in browser search engines.
* Search Engine Shortcuts
* References to Search Engines that can be placed throughout separate folders in the Search Engines Manager. Useful if the same engine is used for different folder searches. Editing a shortcut will change the original engine, and all shortcuts referencing that engine will be updated.
* Multi-search Engines
* Search engines where the template is an array of either template URLs or engine IDs. Behaves like a folder search, but in a single search engine tile.
* One-Click Search Engines
* Engines from the built-in browser search bar, accessible through the [search API](https://developer.mozilla.org/en-US/docs/Mozilla/Add-ons/WebExtensions/API/search), currently only available on Firefox. These engines are added automatically to the Search Engines Manager. They cannot be deleted, but can be moved and/or hidden.
* Bookmarklets
* References to browser bookmarks where the URL begins with `javascript:`. Clicking a bookmarklet tile will execute the bookmarlet code in the currently active browser tab via [tabs.executeScript](https://developer.mozilla.org/en-US/docs/Mozilla/Add-ons/WebExtensions/API/tabs/executeScript)
* Folders
* Containers for groups of search engines. Every engine in the top tier of a folder can be searched at once. Engines in subfolders are ignored.
* App Launcher
* Uses the [Native Messaging API](https://developer.mozilla.org/en-US/docs/Mozilla/Add-ons/WebExtensions/Native_messaging) to send search terms to a native app.
* Separator
* a horizontal rule for visually separating groups of tiles
* Tool
* A built-in widget for performing common ContextSearch web-ext tasks
### Contextual Aware Layouts
Engines can be assigned one or more *contexts* so they only display in certain circumstances.
`"audio", "frame", "image", "link", "page", "selection", "video"`
You'll need to enable either `contextMenuUseContextualLayout` or `quickMenuUseContextualLayout` from `[ menu ] -> Advanced` to filter engines based on context.
### Additional Options for Firefox
Firefox comes with it's own searchbar, but those engines can be used by ContextSearch. These engines are added automatically to your search engine list, and are distinguishable by the orange (FF) tag. While they can be used by ContextSearch, they cannot be edited without first importing them. ( see below )
If you've curated a ton of OpenSearch engines and just want to access them in a more context-friendly way, you can `Sync With Firefox Search` and let Firefox manage your search engines. No folders or bookmarklets. Only engines in the Firefox search bar will show up in ContextSearch menus. Changing this will not lose your current search engine list.
If you want to not only use your Firefox search engines with ContextSearch, but also customize icons and templates, you'll need to `Import One-Click Search Engines`. Clicking this will prompt to browse to your Firefox profile and import your `search.json.mozlz4` file where Firefox stores its search engines. After importing, your Firefox engines should lose the (FF) tag indicating they are copied to ContextSearch and can be edited.
Under the Advanced menu, there is also an option to export ContextSearch engines to the Firefox searchbar. This is done by replacing your current `search.json.mozlz4` file with one generated by ContextSearch. You will also receive a renamed backup of your original `search.json.mozlz4` for safe-keeping, just in case.
___
## [6.2 Modifying Search Terms](#toc)
Each search engine's handling of the query string can be modified with the `Search Regex` field. The format should be a well-formed array in the following order:
`FIND_REGEX, REPLACE_REGEX [, REGEX_MODIFIERS]`
Some search engines require `+` instead of spaces. In this case, to change a query from `this is a search` to `this+is+a+search` the Search Regex would be `"\\s","+"`. Note the use of quotes and the need to escape the backslash. A literal backslash would require four backslashes `\\\\`
Regex can be chained using one regex replacement per line in the Search Regex field.
___
## [6.3 Template Parameters](#toc)
|||
|-|-|
|`{searchTerms}`|The current selection or link URL / image URL|
|`{domain}`|on `http://www.example.com/this/path`
replaced with
`example.com`|
|`{subdomain}`|on `http://www.example.com/this/path/`
replaced with
`www.example.com`|
|`{selectdomain}`|Engine becomes a folder with all subdomains and paths listed separately
on `http://www.example.com/this/path/`
replaced with
`example.com`
`www.example.com`
`www.example.com/this`
`www.example.com/this/path`|
|`["url1", "url2", ...]`|Array of templates can be used in place of a single template to search multiple sites at once
example: `["https://google.com/search?q={searchTerms}", "https://bing.com/search?q={searchTerms}"]`
Use a well-formed, JSON.stringify-able array
If search engines require a different encoding, add `{encoding=...}` to specify, i.e. `https://example.com/search?q={searchTerms}{encoding=gbk}` or `https://example.com/search?q={searchTerms}{encoding=shift_js}`|
|`["id1", "id2", ...]` | Array of ContextSearch node ids. Best achieved by selecting multiple engines using Shift or Ctrl + click, and choosing `Add Multi-Search` from the context menu. This will allow a single search engine to call multiple engines, similar to performing a folder search.
Use a well-formed, JSON.stringify-able array |
___
## [6.4 Javascript-Driven Search Engines](#toc)
Some websites use search bars that do not offer a GET or POST query, instead relying on web forms and javascript. For these engines, the template should exclude `{searchTerms}` and instead users can rely on the Search Code field. This field allows users to write javascript code to be executed after the GET or POST query is performed. For most javascript-driven engines, this means setting the search template to the URL of the website's search form and using DOM and CSS selectors to fill in the search form and simulate a submit.
For a simple example, if somewebsite.com used a javascript-driven search form, we could perform the search by using the Search Code field like this
* Name: Some Website Search Engine
* Template: https://somewebsite.com
* Method: **GET**
* POST params: *empty*
* Search Code:
```javascript
let input = document.querySelector('input');
input.value = searchTerms;
input.dispatchEvent(new KeyboardEvent('keydown', {key:"Enter", keyCode:13, bubbles:true}));
input.dispatchEvent(new KeyboardEvent('keyup', {key:"Enter", keyCode:13, bubbles:true}));
```
The search bar is assumed to be the first INPUT element which is filled in with the query string using the CS variable `searchTerms` and the Enter key is simulated.
Some sites will require more precise selectors and events ( click, change, etc ) in order to perform a search, but nearly all should be accessible with the search code field.
___
## [6.5 Search Engines Requiring Logins and Tokens](#toc)
The same approach as the Javascript-Driven Search Engines above may be used to bypass session-based tokens and logins, provided the user is logged in using cookies or otherwise authenticated.
___
## [7. User Scripts and Bookmarklets](#toc)
Javascript can be run in the active tab by adding a Script. The global variables `CS_searchTerms` and `searchTerms` are accessable from Scripts, and contain the current search terms as seen by ContextSearch.
A simple example:
```
alert(searchTerms);
```
Scripts can copy contents from local bookmarklets from a dropdown box in the Edit Script modal in CS options.
Most browsers can run custom javascript from bookmarks using [bookmarklets](https://en.wikipedia.org/wiki/Bookmarklet) formatting. You can add bookmarklets to CS menus through CS Options -> Search Engines -> right click menu -> Add Script -> Search Bookmarklets. This opens a list of all bookmarklets found in your Bookmarks. Simply click the name of the bookmarlet you want to add, and the contents will be copied to your Script.
Scripts have access to the [Content Script API](https://developer.mozilla.org/en-US/docs/Mozilla/Add-ons/WebExtensions/Content_scripts#WebExtension_APIs) (useful for messaging the background page and accessing CS functions)
You could, for instance, create a search engine tile that toggles the 'menuless search via hotkey' option using the following code:
```javascript
(async () => {
userOptions.allowHotkeysWithoutMenu = !userOptions.allowHotkeysWithoutMenu;
browser.runtime.sendMessage({action: "showNotification", msg: "hotkeys are " + (userOptions.allowHotkeysWithoutMenu ? "on" : "off")});
})();
```
The variable `userOptions.allowHotkeysWithoutMenu` is toggled for the current tab and a short notification is displayed by messaging the extension background page. Check out background.js -> notify() for available actions.
___
## [8. Launching External Applications](#toc)
External apps can be launched from ContextSearch web-ext.
You must install the [Native Messaging](https://developer.mozilla.org/en-US/docs/Mozilla/Add-ons/WebExtensions/Native_messaging) script found [here](https://github.com/ssborbis/ContextSearch-Native-App) to use.
Add a new launcher from the Search Engines manager and enter the full command line in the `Path` field. The string `{searchTerms}` will be replaced with the current active selection, or url.
Some examples:
Open image with GIMP
(linux)
```
gimp -n -a "{searchTerms}"
```
(windows)
```
"C:\\Program Files\\GIMP 2\\bin\\gimp-2.10.exe" -n -a "{searchTerms}"
```
Download mp3 from YouTube using yt-dlp
( linux )
```
/home/mclovin/bin/yt-dlp -P ~/Desktop -x --audio-format mp3 --no-playlist "{searchTerms}"
```
( linux show terminal )
```
gnome-terminal -- /home/mclovin/bin/yt-dlp -P ~/Desktop -x --audio-format mp3 --no-playlist "{searchTerms}"
```
( macOS )
```
osascript -e 'tell app "Terminal" to do script "/Users/mclovin/Downloads/yt-dlp -P $HOME/Desktop --no-playlist \"{searchTerms}\""'
```
Open link in Chromium
```
chromium "{searchTerms}"
```
Open link in Firefox
```
firefox "{searchTerms}"
```
You may need to use the full path of the executable. You may also need double-quotes around arguments with spaces.
Windows paths will require either double-backslash or single forward-slash.
Sometimes it is useful to see the terminal output while an application runs
```
gnome-terminal -- /home/mclovin/bin/yt-dlp -P ~/Desktop -x --audio-format mp3 --no-playlist "{searchTerms}"
```
replace `gnome-terminal --` with your terminal command
Modify the search terms before being passed to the command line via `{searchTerms}` using the `Search Regex` field.
App launchers will return the stdout of applications as the variable `result` to be used in Post-App Scripts.
A simple example ( Post-App Script )
Command: `ls ~`
Script:
```javascript
alert(result);
```
This would run the command `ls ~` and alert the stdout of the command
Sometimes it's useful to download a link target before launching an external app, because not all applications can handle URLs directly. In these cases, you can replace the parameter `{searchTerms}` with `{download_url}`. This will direct the python app to download the file located at the URL searched for within this addon, and place the file in the default TEMP folder for your particular OS, and finally replace `{download_url}` in the command line with the absolute path of the newly downloaded file. For example:
```sh
"C:/Windows/SysWOW64/mspaint.exe" "{download_url}"
```
This command would download the file at the URL searched for ( lets say, https://upload.wikimedia.org/wikipedia/en/a/a9/Example.jpg ) to the local file `C:\Users\AppData\Local\Temp\Example.jpg`, and finally run the command `"C:/Windows/SysWOW64/mspaint.exe" "C:\Users\AppData\Local\Temp\Example.jpg"`
___
## [9. Menu Styling](#toc)
Set the menu theme in CS Options > General. You can also use the `Next Theme` tool or the keyboard shortcut ( if enabled ).
In addition to themes, most CSS styling can be overridden in Options -> General -> User Styles.
Several important colors and values are given variable names under the :root style to make altering menu styles a bit easier, but some changes require more exact CSS selectors.
A few examples...
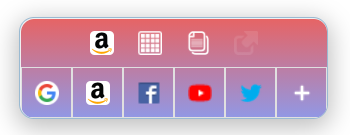
sunset gradient background and white tools ( newer code )
```css
:root {
--background: linear-gradient(#e66465, #9198e5);
--tools-color:white;
}
```
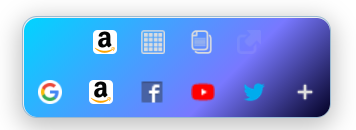
blue gradient background no tile borders and off-white tools for the quick menu only ( older code )
```css
[data-menu="quickmenu"] { background:linear-gradient(315deg, rgba(2,0,36,1) 0%, rgba(120,120,255,1) 35%, rgba(0,212,255,1) 100%); }
.tile { border-color:transparent;}
:root { --tools-color:#ddd; }
```
gradient background and white tools for all menus ( older code )
```css
[data-menu] { background:linear-gradient(#e66465, #9198e5);}
:root { --tools-color:white; }
```
---
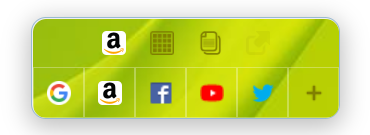
image background semi-transparent border white text and olive tools for all menus ( newer code )
```css
:root {
--background: url('https://www.ppt-backgrounds.net/thumbs/green-slide-download-downloads-backgrounds.jpg') repeat fixed right center;
--tools-color: olive;
--border:rgba(255,255,255,.3);
color:white;
}
```
image background with tile modifications borders tools and text
```css
:root {
--tools-color: #ddd;
--border:rgba(255,255,255,.2);
--background: url('https://img5.goodfon.com/wallpaper/nbig/f/b6/gradient-abstraktsiia-sinii-linii-background.jpg');
color:white;
}
.tile {
border-radius:10px;
margin:4px;
background-color:rgba(255,255,255,.3);
}
```
No quick menu resize handle:
```css
.CS_resizeWidget { display:none; }
```
Smaller tools bar
```css
#toolBar .tile { transform:scale(.60); }
```
Fat green qm border
```css
#CS_quickMenuIframe { border-width:6px; border-color: #6ec179; }
```
___
## [10. Advanced Options](#toc)
A number of settings that don't appear in the main options tabs can be set here. Some of them are really quite useful and probably belong with their respective settings menus, but for simplicity were moved here. This is also where a lot of fixes and user-requested changes show up. Take note, unlike most other settings, these do not always force the config to save when changed. There is a save button you can mash to make extra sure changes are written.
There is also a built-in manual JSON editor to adjust more obscure values.
___
## [11. Security](#toc)
This addon does not use any tracking or analytics. No information is collected, sold, etc. How you use it is your business. There are, however, a few things to note.
1. Most ContextSearch menus work by injecting [content scripts](https://developer.mozilla.org/docs/Mozilla/Add-ons/WebExtensions/Content_scripts) into the current website. For security, all content containing user preferences or any identifying or trackable data are placed in iframes, unreachable by potentially malicious websites through [same-origin policy](https://developer.mozilla.org/docs/Web/Security/Same-origin_policy). Like other addons, there is the possibility of some limited UUID tracking when using injected content. See more about [web accessible resources](https://developer.mozilla.org/docs/Mozilla/Add-ons/WebExtensions/manifest.json/web_accessible_resources)
2. Search suggestions are fetched from Google when typing in any ContextSearch searchbar unless disabled in CS Options -> General -> Suggestions.
___
## [12. Libraries](#toc)
[webextension-polyfill](https://github.com/mozilla/webextension-polyfill)
[text-encoding](https://github.com/inexorabletash/text-encoding)
[mark.js](https://markjs.io/)
___
Big thanks to [CanisLupus](https://github.com/CanisLupus) for his mozlz4 decompression script