https://github.com/0chain/rclone_zus
https://github.com/0chain/rclone_zus
Last synced: 5 months ago
JSON representation
- Host: GitHub
- URL: https://github.com/0chain/rclone_zus
- Owner: 0chain
- License: mit
- Created: 2025-05-08T16:23:18.000Z (about 1 year ago)
- Default Branch: main
- Last Pushed: 2025-09-18T06:09:02.000Z (9 months ago)
- Last Synced: 2025-09-18T08:22:49.421Z (9 months ago)
- Language: Go
- Size: 130 KB
- Stars: 2
- Watchers: 1
- Forks: 2
- Open Issues: 3
-
Metadata Files:
- Readme: README.md
- License: COPYING
Awesome Lists containing this project
README
[ ](https://rclone.org/#gh-light-mode-only)
[ ](https://rclone.org/#gh-dark-mode-only)
[rclone for Züs](#what-is-rclone_zus
) |
[Installation](#installation--setup) |
[Website](https://rclone.org) |
[Documentation](https://rclone.org/docs/) |
[Download](https://rclone.org/downloads/) |
[Contributing](CONTRIBUTING.md) |
[Changelog](https://rclone.org/changelog/) |
[Forum](https://forum.rclone.org/)
## Züs Overview
[Zus](https://zus.network/) is a blockchain-based, S3-compatible, breachproof, & privacy-first storage platform that’s fast, secure, and ACID-compliant operating on a zero-trust network.
Our goal is to deliver 10x value to customers through:
- 5x better performance due to parallel paths, limited only by the client bandwidth
- 2x lower costs, thanks to zero egress and API fees (for non-cloud deployments), and no additional security and compute costs.
- 2x lower carbon footprint, enabled by our erasure-coded architecture
- Breachproof security with split-key, zero-knowledge, and erasure coded data
- 100% dynamic availability, with ability to add or replace servers on the fly
- Vendor neutrality, with no lock-in or dependency on a single storage provider
- One of our customers benchmarked our platform against AWS on [s3compare.io](https://s3compare.io) showing our performance advantages.
### Core Features – Züs vs AWS S3 vs MinIO
| **Feature** | **AWS S3** | **MinIO** | **Züs** |
| ---------------------------------------- | --------------------------------------------------- | ---------------------------------------------- | ----------------------------------------------------------------------------------------- |
| **Managed Infrastructure** | Fully managed | Self-hosted; requires manual setup and scaling | Self-hosted or Fully managed |
| **Split-key Internal Breach Security** | Not available; single-party access control | Not available | Built-in split-key security prevents internal breaches with decentralized key control |
| **Zero Egress Fees** | Charges apply for all outbound data | No egress fees | No egress fees |
| **Zero API Fees** | Charges per API call | Free API requests | Free API requests |
| **Encrypted Data Sharing** | Requires external tools or complex configuration | Not supported natively | Native proxy re-encryption enables secure, private sharing of encrypted files & folders to anyone |
| **Zero Trust Network** | Not supported | Not supported | Zero-trust architecture ensures client with real identity on the blockchain sign for write or read operations |
| **ACID Compliant (Data Integrity)** | Not ACID compliant | Not ACID compliant | Fully ACID compliant for real time query and processing |
| **Add/Swap Servers/Providers (No Lock-in, achieve 100% Dynamic Availability)** | No real-time server switching | Tied to fixed infrastructure | Add, remove, or swap servers or storage providers dynamically with no lock-in to achieve 100% dynamic availability |
## What is rclone_zus?
**rclone_zus** is a custom backend for [rclone](https://rclone.org/) that connects directly to the Züs decentralized cloud. It lets you use familiar rclone commands—copy, sync, move, ls—to manage your files on Züs.
With rclone_zus, you can:
- Run efficient server-side operations (copy, move, delete)
- Automate uploads/downloads in scripts and CI/CD pipelines
- Use Züs as an S3-compatible remote without vendor lock-in
- Organize data across multiple allocations and Rooms via [Blimp UI](https://blimp.network)
- Share both public and encrypted files instantly

### Why use rclone_zus?
- Automation Ready – ideal for scripting and DevOps
- Privacy by Design – encrypted, zero-trust storage on Züs
- Fast & Efficient – batch sync avoids redundant uploads
- Scalable – manage multiple allocations through Blimp
## Configuration
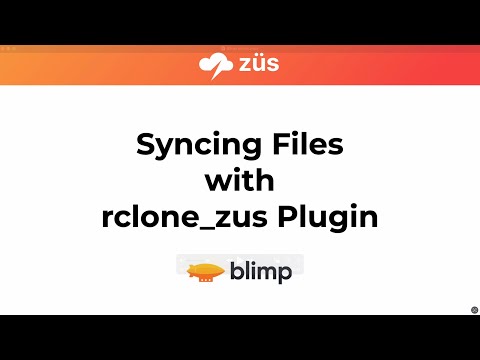
Click the image below to watch the step-by-step guide
### Prerequisites
Before using `rclone_zus`, you must have a wallet, allocation, and configuration files in place.
### 1. Download Wallet via Blimp (Recommended Method)
The standard way to configure your Züs wallet is by downloading it through the **Blimp** or **Vult** user interfaces. This requires no command-line setup and ensures all required files are prepared for you.
#### Downloading from Blimp
1. Visit [**Blimp**](https://blimp.zus.network)
2. Navigate to **Manage Allocation**
3. Select your allocation
4. Click the **ellipsis (⋯)** button
5. Choose **“Download Wallet”**
6. Enter your **mnemonic** or **wallet password**
7. You’ll receive a `.zip` file containing:
- `wallet.json` – Your Züs wallet credentials
- `allocation.txt` – The Allocation ID
- `config.yaml` – Züs network configuration (block worker, signature scheme, etc.)
> Make sure your wallet.json's "is_split" parameter is set to false
#### Move Files to Config Directory
Extract the ZIP and move **all three files** to your system’s default config folder:
- **Windows**:
`C:\Users\\.zcn`
- **Linux/macOS**:
`~/.zcn/`
> If the `.zcn` folder does not exist, create it manually.
#### Working with Multiple Allocations
If want to continue using .zcn as your config directory, ensure that:
- You replace `wallet.json` with the version linked to the correct wallet
- You replace `allocation.txt` with the matching allocation ID
- You can reuse `config.yaml` as long as it points to the same Züs network (e.g. mainnet)
> If do not want to overwrite your files, you could create a custom config directory.
> Then, use `rclone config` to point to this directory.
### Allocation Performance
**For reliable performance:**
- Use Züs blobbers usually provide better stability and performance
### 2. Alternate Setup (CLI Method)
Alternatively, you can create your wallet and allocation using the [Züs CLI tools](https://docs.zus.network/zus-docs/clis)
> ⚠Ensure the CLI-generated wallet matches the allocation you're trying to access.
> This method is more error-prone for beginners and should only be used if you're familiar with the Züs CLI ecosystem.
## Installation & Setup
There are two ways of installing the rclone_zus plugin: download a pre-built binary or build the binary.
### Download pre-built binary
1. Go to the [releases page](https://github.com/0chain/rclone_zus/releases/tag/v1.0.4) and download the pre-built binary for your OS.
2. Place `rclone.exe` in your desired directory
3. Run `./rclone`in that directory. If it shows the help description, you're ready to start using rclone with Züs storage
> This is the preferred method for Windows users
### Build the Binary
This section guides you through cloning, building, and configuring rclone_zus with the Züs backend. Ideal for Linux and MacOS.
#### 1. Clone the Repository
git clone https://github.com/0chain/rclone_zus.git
cd rclone_zus
#### 2. Build the rclone Binary
Use the provided Makefile to build the project:
make
This will compile the rclone binary into the project root (./rclone), including the Züs backend.
💡 Troubleshooting: If make fails (e.g., missing make command or incompatible system), you can build manually:
go build -o rclone ./rclone.go
Ensure you have Go ≥1.20 installed (suggested go 1.23.4)and your GOPATH properly configured.
This will build a local ./rclone binary with the Züs backend integrated.
Note: If you're modifying backend code (e.g. backend/zus/zus.go), you can recompile by running the go build command again.
#### 3. (Optional) Install as Global Command rclone_zus
To use your custom Rclone binary without the ./ prefix, install it globally by copying it to a directory in your system's $PATH, such as /usr/local/bin:
sudo cp ./rclone /usr/local/bin/rclone_zus
After this, you can run it from anywhere as a normal command:
rclone_zus move TestZus:/source TestZus:/dest
📌 Why rename it?
Renaming it to rclone_zus helps avoid conflicts with the system-installed rclone, if present.
**Remote Cofiguration**
Here is an example of how to make a `zus` remote called `myZus`.
First run
rclone config
This will guide you through an interactive setup process:
```
No remotes found, make a new one?
n) New remote
s) Set configuration password
q) Quit config
n/s/q> n
name> myZus
Type of storage to configure.
Enter a string value. Press Enter for the default ("").
Choose a number from below, or type in your own value
...
59 / Zus Decentralized Storage
\ "zus"
...
Storage> zus
Zus Allocation ID - allocation ID.
allocation_id>
Config Directory - directory to read config files (defaults to ~/.zcn; make sure to use the correct windows path for `C:\Users\Username\.zcn`).
config_dir>
Work Directory - directory to read/write files.
work_dir>
Encrypt - encrypt the data before uploading.
y) Yes
n) No (default)
y/n> n
Edit advanced config?
y) Yes
n) No (default)
y/n> n
Configuration complete.
Options:
- type: zus
- allocation_id: allocation_id
Keep this "myZus" remote?
y) Yes this is OK (default)
e) Edit this remote
d) Delete this remote
y/e/d> y
```
Make sure your **rclone.conf** file is created.
**Finding rclone.conf:**
- To locate your rclone configuration file (`rclone.conf`) via command line, use the command `rclone config file`
Example rclone.conf :
```ini
[myZus]
type = zus
allocation_id =
```
Once configured you can then use `rclone` like this,
See top level directories
rclone lsd :
Example to list all the files and directories inside the root directory of the remote "myZus"
rclone lsd myZus:/
Output example:
```
-1 2025-05-14 15:27:59 -1 Encrypted
-1 2025-07-12 17:25:15 -1 10MbFiles100
-1 2025-07-12 17:44:35 -1 10MbFiles100M
-1 2025-07-12 17:46:51 -1 project-zus
-1 2025-07-14 22:45:57 -1 10MbFiles50
```
**Make a new directory**
rclone mkdir myZus:/
Example: create new direcotry in the root (This example shows new directory name as "newDirectory")
rclone mkdir myZus:/newDirectory
**List** the contents of a directory
rclone ls myZus:/
**Copy** from source to destination `(Local to Remote, Remote to Remote, Remote to Local)`
`rclone copy : :`
- **Note**: Copy/move/sync commands only work within the same remote (same allocation). You cannot copy/move/sync across two different remotes (different allocations).
**Local to Züs Examples:**
```bash
# Windows example - copying from local Windows path to Züs remote
rclone copy "C:\Users\\OneDrive\Desktop\New folder" myZus:/testDirectory
# Linux/macOS example - copying from local Unix path to Züs remote
rclone copy /home/user/documents myZus:/backup
```
**Züs to Local Examples:**
```bash
# Copying from Züs remote to local directory
rclone copy myZus:/documents /home/user/downloads
```
**Cross-Cloud Backup Examples (Google Drive ↔ Züs):**
```bash
# Google Drive to Züs backup (source: gdrive, target: myZus)
rclone copy gdrive:important-files myZus:/backup
# Züs to Google Drive backup (source: myZus, target: gdrive)
rclone copy myZus:/documents gdrive:zus-backup
```
**Same Remote Operations (within same allocation):**
```bash
# Copying within the same Züs remote (source: myZus, target: myZus)
rclone copy myZus:/sourcefilesDir/ myZus:/destinationDir/
```
**Move** from source to destination `(Local to Remote, Remote to Remote, Remote to Local)`
`rclone move : :`
- **Cross-Remote Limitation**: Same limitation as copy - only works within the same remote/allocation
**Local to Züs Examples:**
```bash
# Windows example - moving from local Windows path to Züs remote
rclone move "C:\Users\\Desktop\New folder" myZus:/testDirectory
# Linux/macOS example - moving from local Unix path to Züs remote
rclone move /home/user/documents myZus:/backup
```
**Züs to Local Examples:**
```bash
# Moving from Züs remote to local directory
rclone move myZus:/documents /home/user/downloads
```
**Cross-Cloud Examples (Google Drive ↔ Züs):**
```bash
# Google Drive to Züs (source remote: gdrive, target remote: myZus)
rclone move gdrive:important-files myZus:/backup
# Züs to Google Drive (source remote: myZus, target remote: gdrive)
rclone move myZus:/documents gdrive:zus-backup
```
**Same Remote Operations (within same allocation):**
```bash
# Moving within the same Züs remote (source remote: myZus, target remote: myZus)
rclone move myZus:/sourcefilesDir/ myZus:/destinationDir/
```
Sync `/home/local/directory` to the remote path, deleting any
excess files in the path.
rclone sync --interactive /home/local/directory myZus:directory
You can also check your allocation in the Blimp and Vult UI. Files should be in a folder named "directory".
## Sync Mode Configuration
### Use sync mode in rclone_zus for bulk operations
use `--transfers=number of operations | --transfers=50` with the commands.
```
Edit advanced config?
y) Yes
n) No (default)
y/n> y
Option sdk_log_level.
Log level for the SDK
Enter a signed integer. Press Enter for the default (0).
sdk_log_level> leave empty
Option batch_mode.
Upload file batching sync|async|off.
This sets the batch mode used by rclone.
This has 3 possible values
- off - no batching
- sync - batch uploads and check completion (default)
- async - batch upload and don't check completion
Rclone will close any outstanding batches when it exits which may make
a delay on quit.
Enter a value of type string. Press Enter for the default (sync).
batch_mode> leave empty
Option batch_size.
Max number of files in upload batch.
This sets the batch size of files to upload. It has to be less than 50.
By default this is 0 which means rclone will calculate the batch size
depending on the setting of batch_mode.
- batch_mode: async - default batch_size is 100
- batch_mode: sync - default batch_size is the same as --transfers
- batch_mode: off - not in use
Rclone will close any outstanding batches when it exits which may make
a delay on quit.
Setting this is a great idea if you are uploading lots of small files
as it will make them a lot quicker. You can use --transfers 32 to
maximise throughput.
Enter a signed integer. Press Enter for the default (0).
batch_size> 50
Option batch_timeout.
Max time to allow an idle upload batch before uploading.
If an upload batch is idle for more than this long then it will be
uploaded.
The default for this is 0 which means rclone will choose a sensible
default based on the batch_mode in use.
- batch_mode: async - default batch_timeout is 5s
- batch_mode: sync - default batch_timeout is 500ms
- batch_mode: off - not in use
Enter a duration s,m,h,d,w,M,y. Press Enter for the default (0s).
batch_timeout> leave empty
Option batch_commit_timeout.
Max time to wait for a batch to finish committing
Enter a duration s,m,h,d,w,M,y. Press Enter for the default (10m0s).
batch_commit_timeout> leave empty
Option description.
Description of the remote.
Enter a value. Press Enter to leave empty.
description> leave empty
Edit advanced config?
y) Yes
n) No (default)
y/n> n
Configuration complete.
```
**Copy** from source to destination `(Local to Remote, Remote to Remote, Remote to Local)`
rclone copy : : --transfers=50
**Move** from source to destination `(Local to Remote, Remote to Remote, Remote to Local)`
rclone move : : --transfers=50