https://github.com/0x77dev/smart-mirror
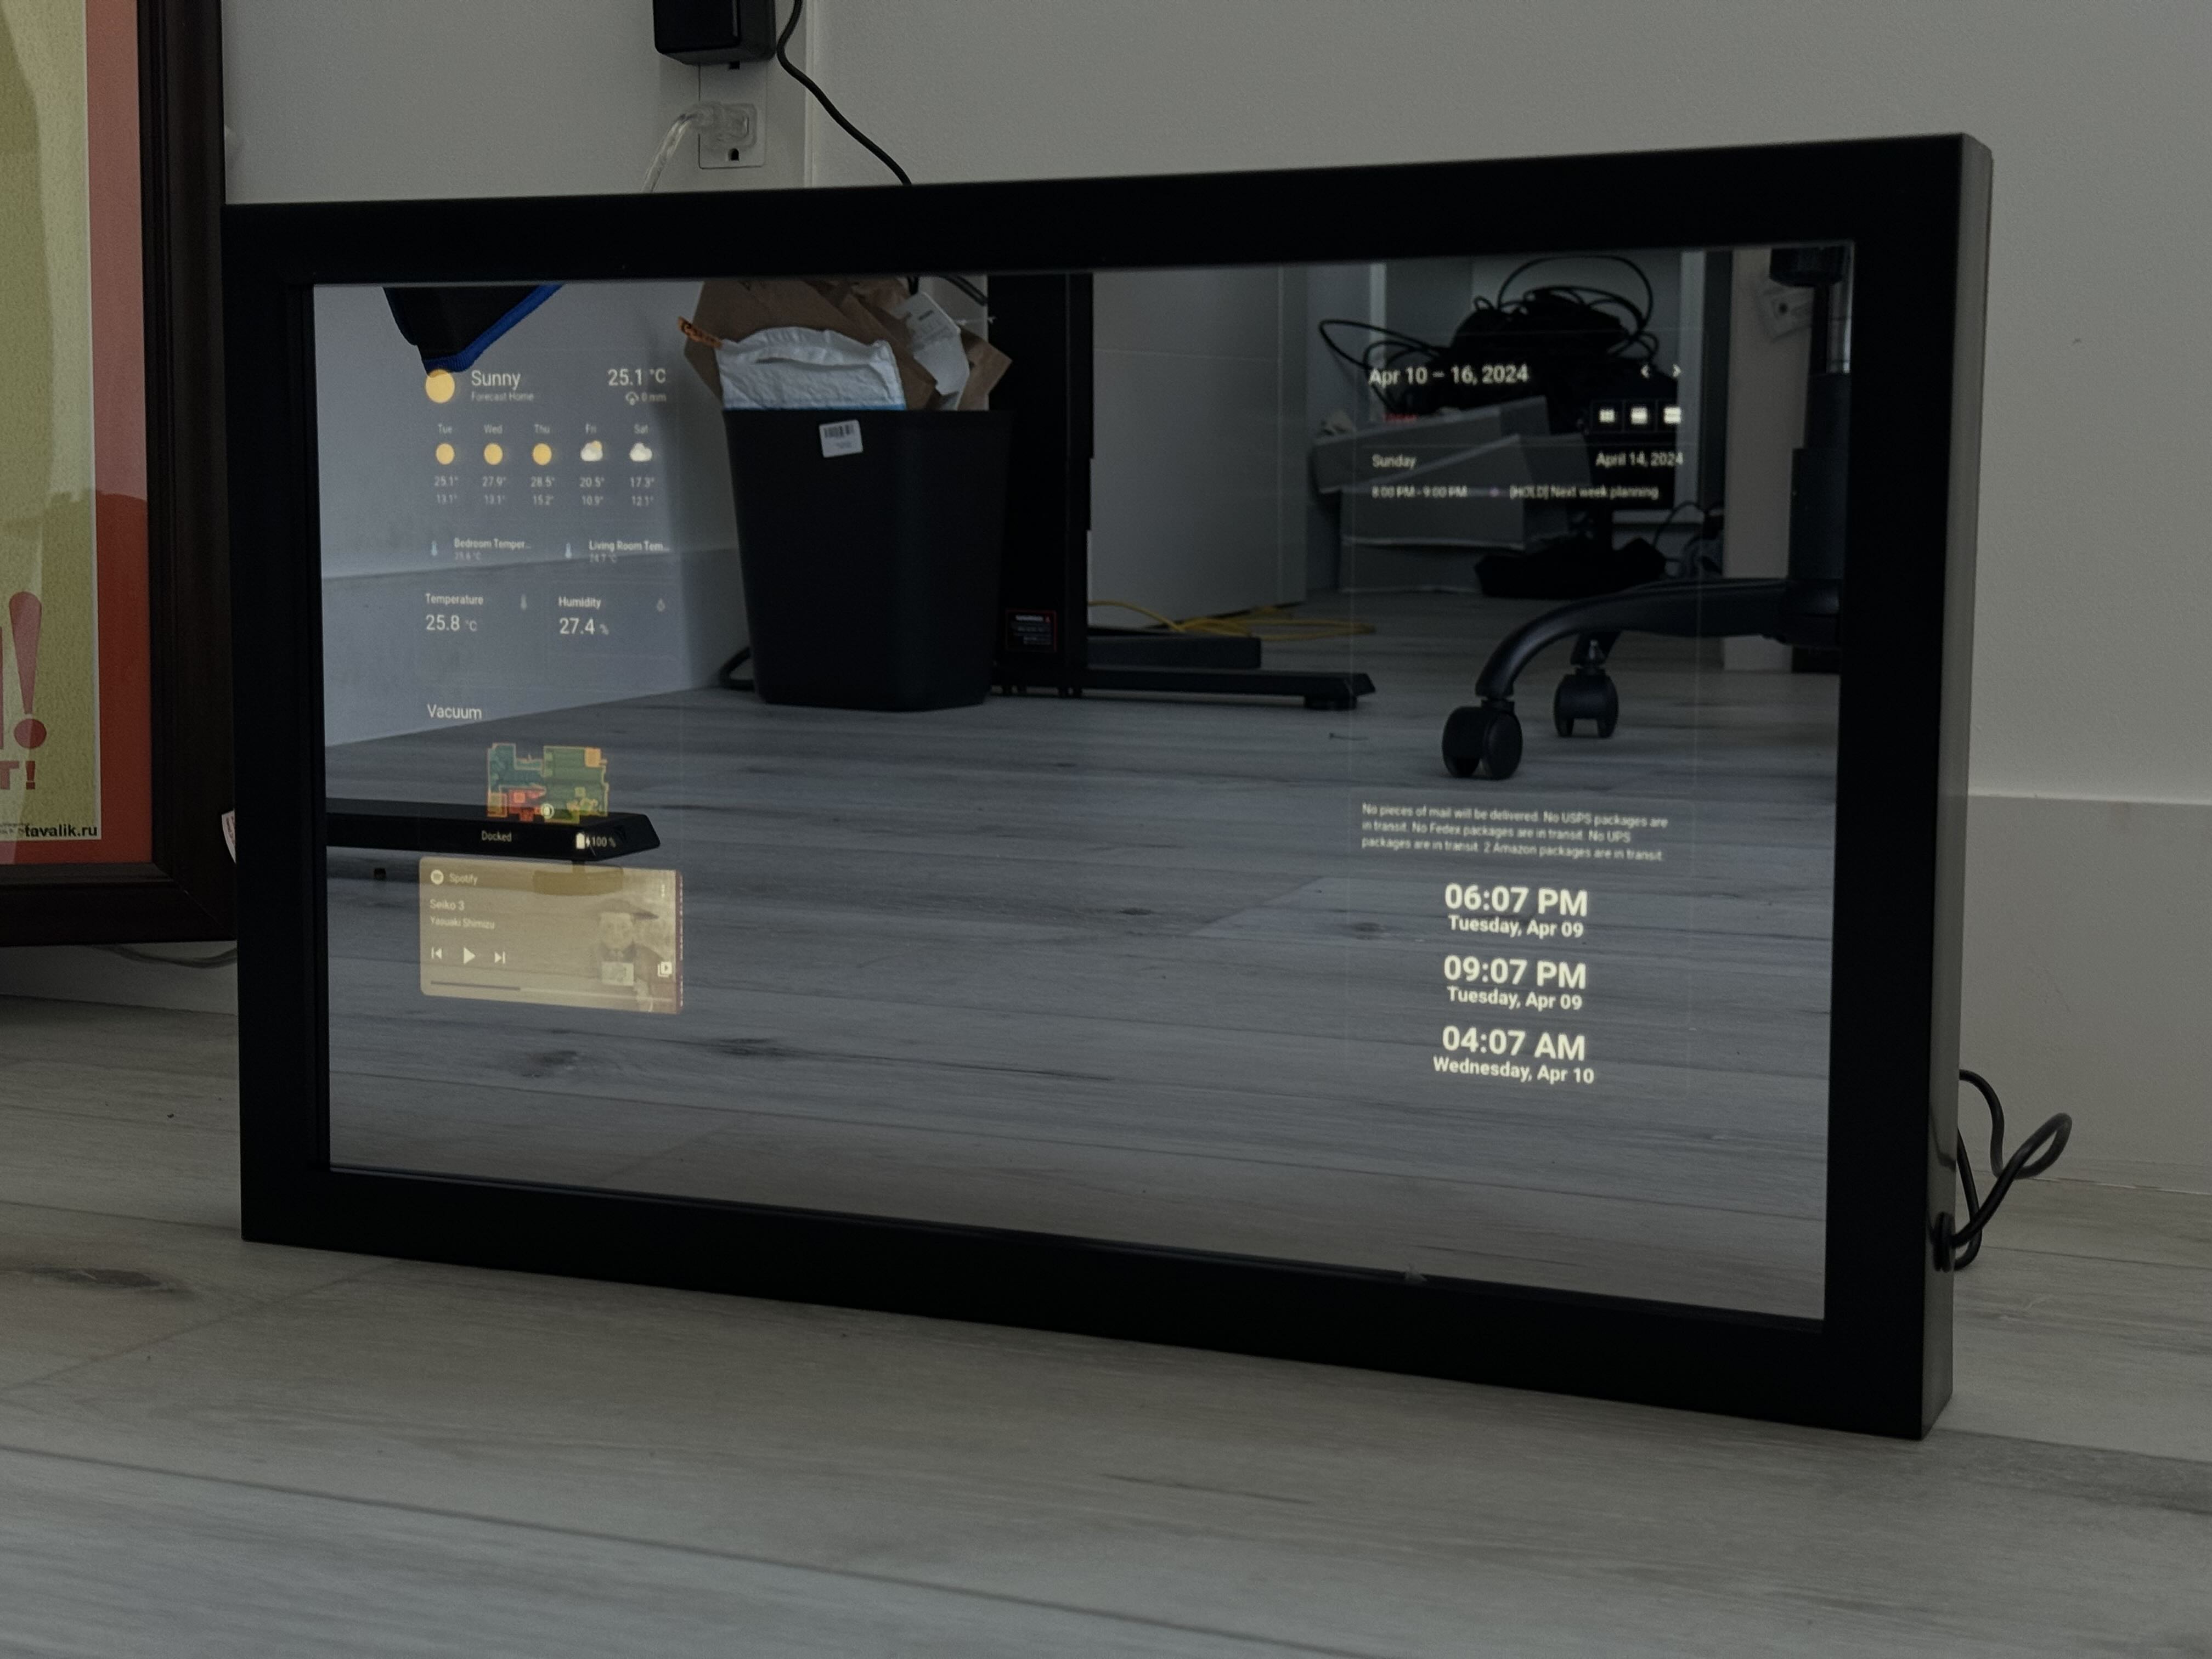
Simple smart mirror project using a Raspberry Pi 4 and BalenaCloud to display a Home Assistant dashboard.
https://github.com/0x77dev/smart-mirror
balena home-assistant magicmirror raspberry-pi smart-mirror
Last synced: about 1 year ago
JSON representation
Simple smart mirror project using a Raspberry Pi 4 and BalenaCloud to display a Home Assistant dashboard.
- Host: GitHub
- URL: https://github.com/0x77dev/smart-mirror
- Owner: 0x77dev
- License: mit
- Created: 2024-04-09T21:45:01.000Z (about 2 years ago)
- Default Branch: main
- Last Pushed: 2024-04-11T05:23:58.000Z (about 2 years ago)
- Last Synced: 2025-04-12T17:14:37.105Z (about 1 year ago)
- Topics: balena, home-assistant, magicmirror, raspberry-pi, smart-mirror
- Language: Makefile
- Homepage: https://community.home-assistant.io/t/smart-mirror-with-lovelace-dashboard/715299
- Size: 18.6 KB
- Stars: 5
- Watchers: 1
- Forks: 0
- Open Issues: 0
-
Metadata Files:
- Readme: README.md
- License: LICENSE
Awesome Lists containing this project
README
# HA Smart mirror
Simple smart mirror project using a Raspberry Pi 4 and BalenaCloud to display a Home Assistant dashboard.
[Home Assistant Community Topic](https://community.home-assistant.io/t/smart-mirror-with-lovelace-dashboard/715299)
## Hardware
- Raspberry Pi 4
- SD Card (4GB+)
- [I bought this pre-built smart mirror on Amazon](https://amzn.to/4cIKq5o), but you can build one or use any monitor.
## Easy way
1. [](https://dashboard.balena-cloud.com/deploy?repoUrl=https://github.com/0x77dev/smart-mirror)
2. Flash your RPI4 with the balenaOS image and boot it up.
3. Set static IP for your RPI4 in your router DHCP server settings.
4. Patch your home assistant configuration to bypass auth for the smart mirror
```yaml
homeassistant:
auth_providers:
# Important to keep this top on the list to bypass login page
- type: trusted_networks
trusted_networks:
- 192.168.0.0/24
trusted_users:
# Set your smart mirror ip address and kiosk user id
# Tip: to enhance security and avoid ip changes modify your router DHCP server to assign a static ip to your smart mirror
{{ smart mirror ip address }}: {{ user uuid }}
# Disable bypass for the rest of the network
192.168.0.0/24:
allow_bypass_login: true
- type: homeassistant
```
5. Optional: Install [Kiosk mode](https://github.com/NemesisRE/kiosk-mode), [Blackened Theme](https://github.com/home-assistant-community-themes/blackened), and [Browser mod](https://github.com/thomasloven/hass-browser_mod) for better automation and UI experience.
I use a separate dashboard for the smart mirror with a custom theme and kiosk mode to hide the header and sidebar.
Here is an example of the dashboard configuration:
```yaml
kiosk_mode:
kiosk: true
hide_refresh: true
block_overflow: true
views:
- type: sections
title: Home
icon: mdi:home
sections: []
cards: []
max_columns: 10
theme: blackened
```
And then to edit the dashboard use `/dashboard-mirror/?disable_km&edit=1` and see [Setting custom URL](#setting-custom-url) to set the custom URL (omit the query parameters) for your separate dashboard.
## Manual way
1. Clone this repo
```bash
git clone https://github.com/0x77dev/smart-mirror
```
2. [Install balena-cli](https://docs.balena.io/reference/balena-cli/)
3. Create a new application in BalenaCloud and push the code to your application
```bash
balena login
balena push
```
4. Flash your RPI4 with the balenaOS image and boot it up.
5. Set static IP for your RPI4 in your router DHCP server settings.
6. Patch your home assistant configuration to bypass auth for the smart mirror as mentioned in the [easy way](#easy-way).
## Setting custom URL
1. Open the balena dashboard and navigate to your device.
2. Open Device Variables
3. Add a new variable with the key `LAUNCH_URL` and value with your Home Assistant or any other URL.
## Additional docs
- [Browser/ REST API and Configuration variables](https://github.com/balena-io-experimental/browser?tab=readme-ov-file#api)
- [Home Assistant/ Auth providers](https://www.home-assistant.io/docs/authentication/providers)
- [Getting started with Balena](https://docs.balena.io/learn/getting-started/raspberrypi5/nodejs/)
## Useful commands
### Refresh the page
```bash
curl -X POST {{ SMART MIRROR IP ADDRESS }}:5011/refresh
```
### Screenshot
```url
{{ SMART MIRROR IP ADDRESS }}:5011/screenshot
```