https://github.com/3Qax/SwiftyOLED
A Swift library for OLED displays based on SSD1306 and SSD1305 drivers.
https://github.com/3Qax/SwiftyOLED
display iot oled-display-ssd1306 raspberry-pi swift
Last synced: about 1 year ago
JSON representation
A Swift library for OLED displays based on SSD1306 and SSD1305 drivers.
- Host: GitHub
- URL: https://github.com/3Qax/SwiftyOLED
- Owner: 3Qax
- License: mit
- Created: 2019-06-08T01:31:42.000Z (about 7 years ago)
- Default Branch: master
- Last Pushed: 2021-02-03T16:48:15.000Z (over 5 years ago)
- Last Synced: 2025-04-19T13:09:00.302Z (about 1 year ago)
- Topics: display, iot, oled-display-ssd1306, raspberry-pi, swift
- Language: Swift
- Homepage:
- Size: 1.98 MB
- Stars: 28
- Watchers: 2
- Forks: 9
- Open Issues: 2
-
Metadata Files:
- Readme: README.md
- License: LICENSE
Awesome Lists containing this project
- awesome-embedded-swift - SwiftyOLED - A Swift library for OLED displays based on SSD1306 and SSD1305 drivers. (Displays / Networking, IoT, Bus Protocols, …)
README
# SwiftyOLED
A Swift library for OLED displays based on SSD1306 and SSD1305 drivers.
It is just a set of functions for handling mentioned aboved drivers.
It is __not__ a graphics library. For that I would like to recommend a [SwiftyGFX](https://github.com/3Qax/SwiftyGFX), which I will be using here as an example. However you are free to use your own.
## Getting Started 💡
In this section you will create your first project
### Prerequisites
* Wire the display
* Make sure you know to which I2C interface you have wired the display
* Make sure you are aware of a I2C address of display module you have. For most cases it will be 0x3C or 0x3D. If you are unsure run `sudo apt-get install i2c-tools && sudo i2cdetect -y 1`. Confused? [take a look here](https://learn.adafruit.com/adafruits-raspberry-pi-lesson-4-gpio-setup/configuring-i2c#testing-i2c-5-14)
* Create new project with SwiftPM like `swift package init --type executable`
### Dependencies
In your __Package.swift__ file:
* Add the following packages as dependencies
```swift
.package(url: "https://github.com/3Qax/SwiftyOLED.git", from: "1.0.0"),
.package(url: "https://github.com/3Qax/SwiftyGFX.git", from: "1.0.0"),
.package(url: "https://github.com/uraimo/SwiftyGPIO.git", from: "1.0.0"),
```
* Show SwiftPM that your target will need those dependencies
```swift
.target(
name: "NameOfYourProject",
dependencies: ["SwiftyOLED", "SwiftyGFX", "SwiftyGPIO"]),
```
### Code
Paste the following code into your source file, which most likely will be in _Sources/NameOfYourProject/**main.swift**_. Change I2C Interface and I2C address if needed. Set width and height of your display according to specification of model you have bought.
```swift
import SwiftyOLED
import SwiftyGFX
import SwiftyGPIO
let i2cs = SwiftyGPIO.hardwareI2Cs(for: .RaspberryPiPlusZero)!
// Make sure you entered a correct parameters below
let myOLED = OLED(connectedTo: i2cs[1], at: 0x3C, width: 128, height: 32)
let myText = Text("Hello world!")
myOLED.draw(points: myText.generatePointsForDrawing())
myOLED.display()
```
### Run
Just do `swift build` and then `swift run`. You should see:
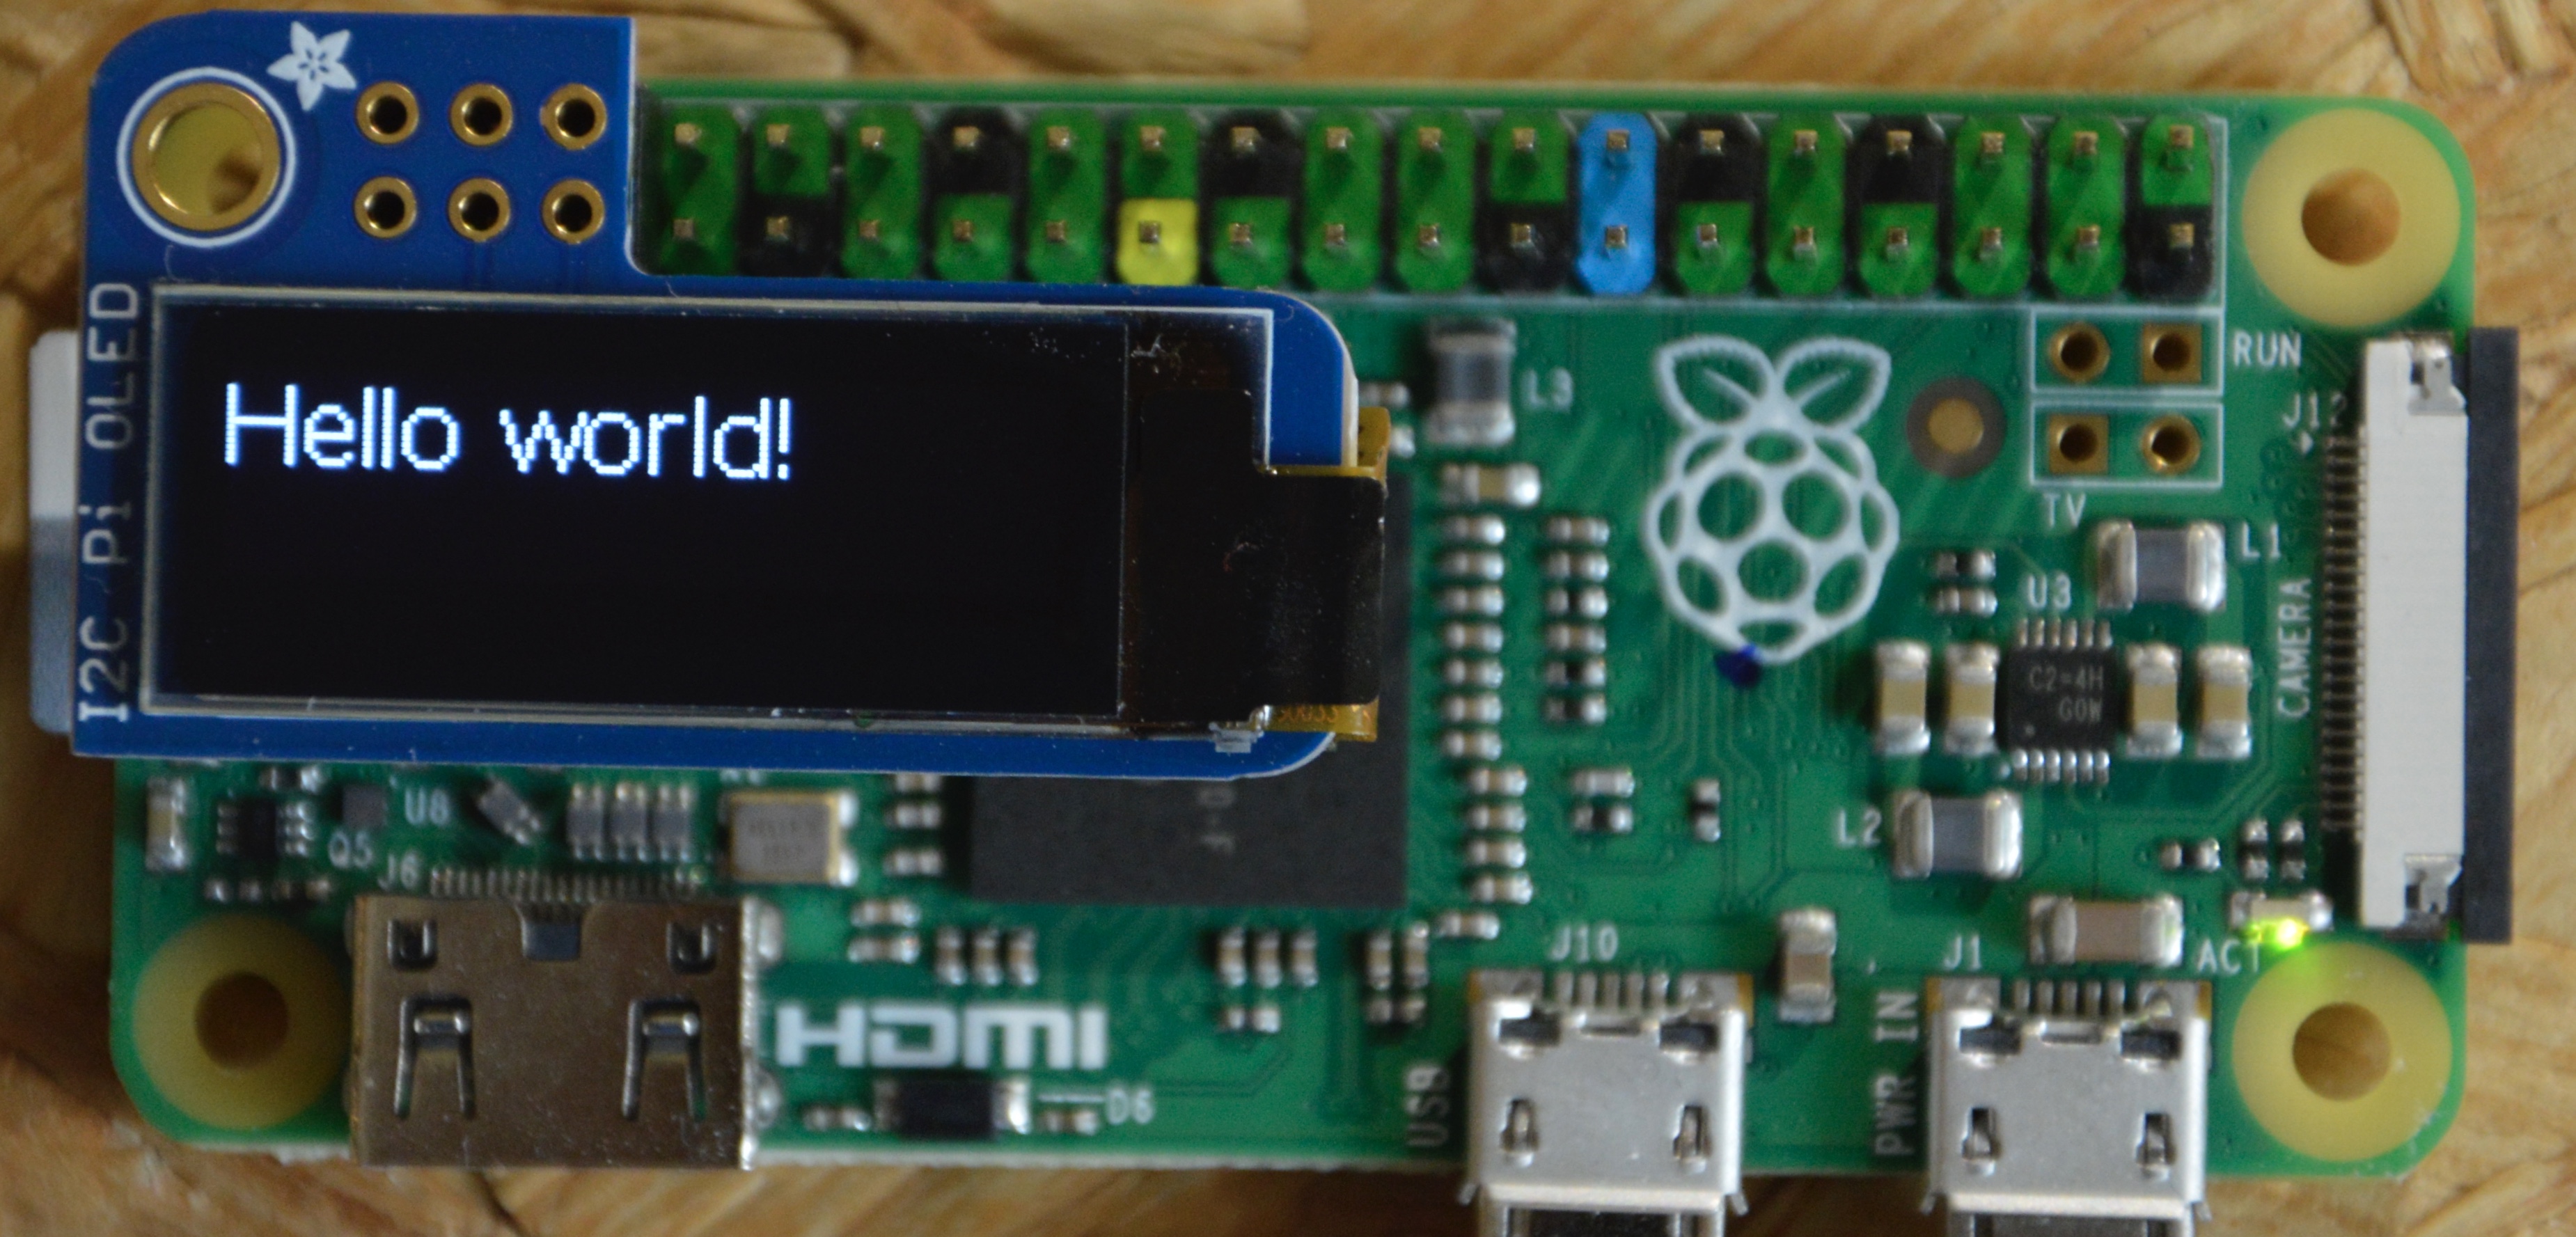
That's all. It's really that simple! Complete project can be found in _/Examples/hello world/_ folder.
## Usage 🛠
### Initialization
To create the instance of OLED use the follwoing initializer
```swift
public init(connectedTo interface: I2CInterface, at address: Int, width: Int, height: Int)
```
Pass the I2C interface that display is connected to and specify at which address device listens.
Enter the width and height (in px) based on the specification of display you have. Probably it will be 128x32 or 128x64.
Initialization will fail on runtime if display is unreachable or if given height or width doesn't make sense (exceed driver supported range).
### Drawing
If you don't feel like writing your graphics library today, take a look at my easy to use graphics library [SwiftyGFX](https://github.com/3Qax/SwiftyGFX). It provides a bunch of primitives like Circles and Rectangles, but is also capable of text rendering. See it's README.md for details.
Once you've got the reference to the display it's time to draw something!
This can be done by calling one of these methods
```swift
public func draw(point: (Int, Int))
public func draw(points: [(Int, Int)])
```
Doing so changes the color of point or points at given coordinates to white in __local buffer__. This means that __drawn points will be not visible until calling `display()`__.
The display works in iOS like coordinate system. So:
* (0, 0) is top left pixel
* X axis increases to the right
* Y axis increases downwards
Point consists of (respectively) x and y coordinates
If you would like to clean (make black) the __local buffer__ do it like
```swift
public func clear()
```
Or if you are on the light side of force this method might come in handy
```swift
public func fill()
```
### Inversion
In order to draw things in black on white display use above mentioned methods and set the display to interprete everything inversly. Logically, `clear()` will make whole local buffer white and drawing would make given points black. It is as simple as calling
```swift
public func set(inversion: Bool)
```
By default it off. You can check wether display is inverted by accessing _read only_ property called `isInverted`.
### Displaying drawn things
Once you have drawn everything you wanted and want to make it visible call
```swift
public func display()
```
This will make display reflect the actual state of local buffer. After that local buffer will be cleared. The API is designed is such a way, because transfering data over I2C is quite slow operation. Call this method only after you have drawn everything.
### Brightness
There is even an option to change the brightness by calling
```swift
public func set(brightness: Brightness)
```
There are two recomended setting: `.dimmed` or `.bright`, however if you wish so you can set custom level like `.custom(value: 0x8F)`
### Switching on and off
If your project requires low power consumption or showing data on display only from time to time take a look at
```swift
public func turn(_ state: State)
```
It allows you to either turn it `.on` or `.off`. Display is configured to display the latest data it have recived on resume (turn on after being turned off). The display after being initialized is automatically turned on. Display's state is stored in _read only_ property called `isOn`.
## Performance 💨
Performance was tested on geniune RaspberryPi ZERO v1.3 running Raspbian Stretch Lite using SwiftyGPIO 1.1.7.
| Display size (px) | Avarege time of `display()` |
|:-------------------:|:---------------------------------:|
| 96x16 | 7ms |
| 128x32 | 16ms |
| 128x64 | 32ms |
## Contributing 🤝
Any suggestions and contributions are welcome, as long as they are up to scratch.
## Acknowledgments 📣
* This library use, require and rely on [SwiftyGPIO](https://github.com/uraimo/SwiftyGPIO)
* Big inspiration and a lot of knowledge was taken from a [Adafruit CircuitPython library for SSD1306](https://github.com/adafruit/Adafruit_CircuitPython_SSD1306)
## Datasheets 📚
- [SSD1306 ](https://cdn-shop.adafruit.com/datasheets/SSD1306.pdf)
- [UG-2832HSWEG02](https://cdn-shop.adafruit.com/datasheets/UG-2832HSWEG02.pdf)