https://github.com/AFathi/NotchToolkit
Use the iPhone X notch in creative ways 👩🎨👨🎨.
https://github.com/AFathi/NotchToolkit
design draw iphone-x swift-4 swift-framework toolbar ui uiview
Last synced: 5 months ago
JSON representation
Use the iPhone X notch in creative ways 👩🎨👨🎨.
- Host: GitHub
- URL: https://github.com/AFathi/NotchToolkit
- Owner: AFathi
- License: mit
- Created: 2017-09-26T05:22:13.000Z (about 8 years ago)
- Default Branch: master
- Last Pushed: 2017-11-09T18:13:07.000Z (about 8 years ago)
- Last Synced: 2024-11-24T01:52:26.465Z (about 1 year ago)
- Topics: design, draw, iphone-x, swift-4, swift-framework, toolbar, ui, uiview
- Language: Swift
- Homepage:
- Size: 26.3 MB
- Stars: 57
- Watchers: 4
- Forks: 3
- Open Issues: 1
-
Metadata Files:
- Readme: README.md
- License: LICENSE
Awesome Lists containing this project
- awesome-ios - NotchToolkit - A framework for iOS that allow developers use the iPhone X notch in creative ways. (UI / Font)
- awesome-ios-star - NotchToolkit - A framework for iOS that allow developers use the iPhone X notch in creative ways. (UI / Font)
- fucking-awesome-ios - NotchToolkit - A framework for iOS that allow developers use the iPhone X notch in creative ways. (UI / Font)
README
# NotchToolkit
NotchToolkit is a framework for iOS that allow developers use the iPhone X notch space in creative ways.
Inspired by
I was working on this idea of blending app design with the #iPhoneX notch. 📲🤗 pic.twitter.com/lj2AhxWNeE
— Luboš Volkov⚡️ (@0therPlanet) September 18, 2017
| Table of Contents | Description |
| ------------------ |:------------------:|
| [Documentation](https://github.com/AFathi/NotchToolkit/wiki) | Describes the configuration options `NotchToolkit` offers |
| [Preview](#preview) | Displays preview images of `NotchToolkit` features |
| [Compatibility](#compatibility) | Describes the `NotchToolkit` device and iOS compatibality |
| [Example Project](#example-project) | Explains how to run the example project provided in this repository |
| [Installation](#installation) | Describes the [CocoaPods](#cocoapods), [Carthage](#carthage), and [Manual](#manual) options to install `NotchToolkit` |
| [Implementation](#implement-in-your-project) | Lists the steps needed to implement `NotchToolkit` into your project |
| [More Options](#more-options) | Describes an extra feature `NotchToolkit` supports |
| [License](#license) | Describes `NotchToolkit` license |
## Preview
[**NotchImageView**](https://github.com/AFathi/NotchToolkit/wiki/NotchImageView)

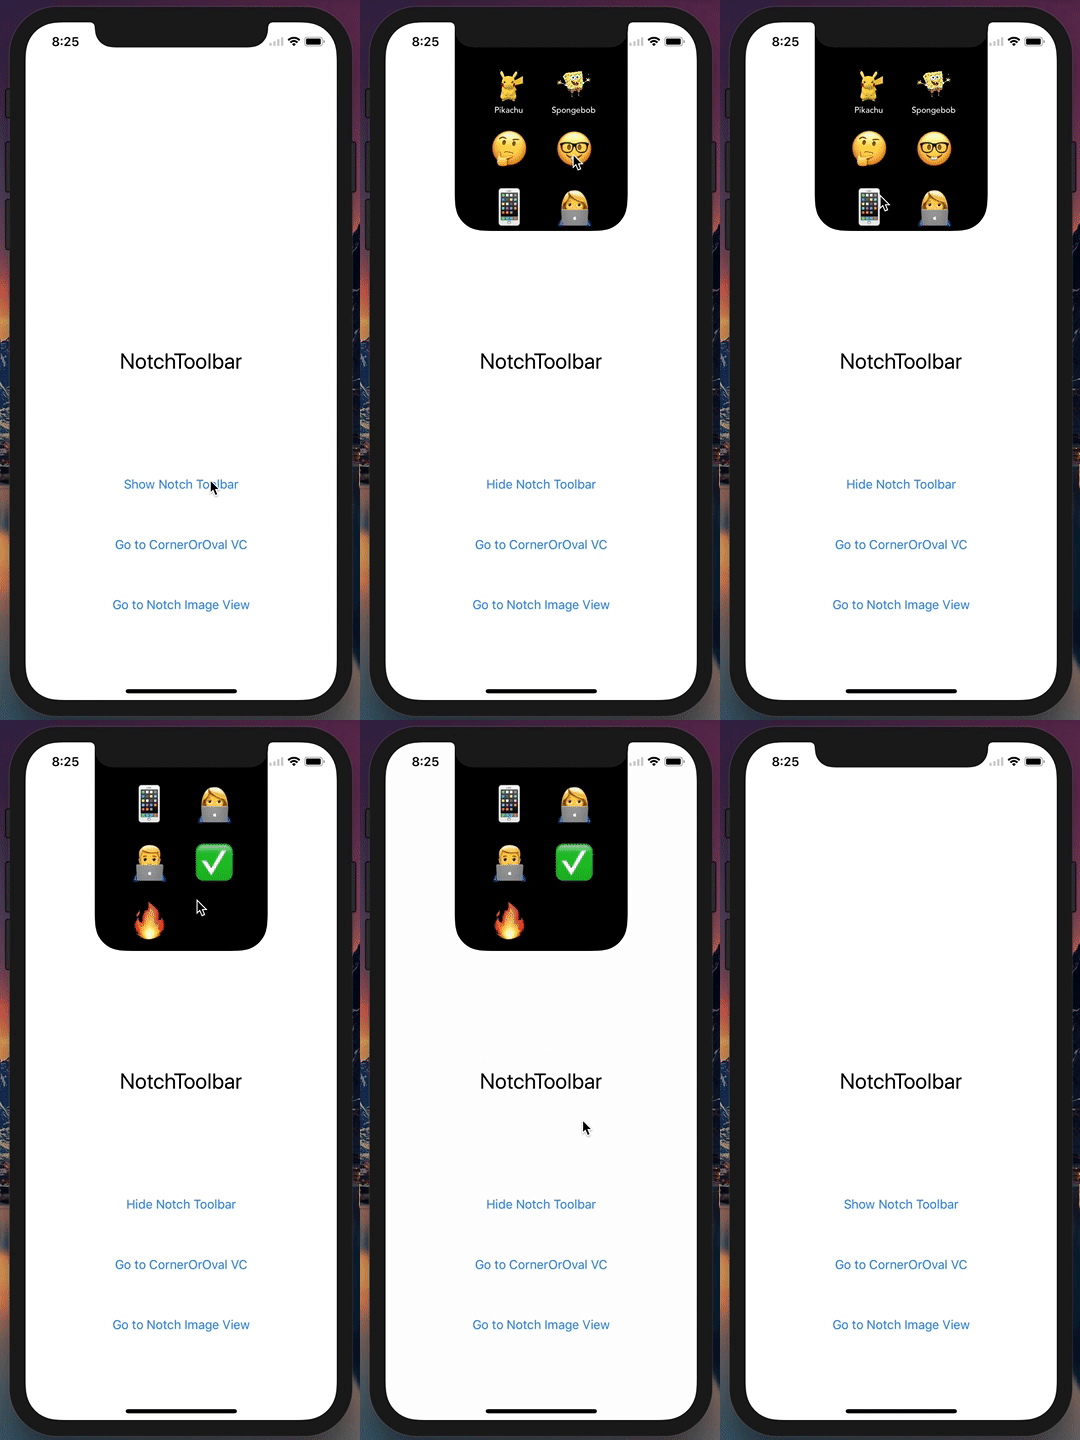
[**NotchToolbar**](https://github.com/AFathi/NotchToolkit/wiki/NotchToolbar)

[**Draw Notch**](#more-options)

## Compatibility
Although `NotchToolkit` is made for iPhone X, it can be implemented in older iPhone devices. This framework was tested on:
1. iPhone X
2. iPhone 8 plus, 7 plus, 6s plus and 6 plus
3. iPhone 8, 7, 6s and 6
4. iPhone SE and 5s
`NotchToolkit` requires
- iOS 11
- Swift 3.2 or higher
`NotchToolkit` has options to customize your Toolbar and UIView,
check [**Documentation**](https://github.com/AFathi/NotchToolkit/wiki) and [**More Options**](#more-options) for more details.
## Example Project
To try the example project, simply download this repo then open `NotchToolkit-Example.xcworkspace` project file, found in the `Example` folder.
## Installation
### CocoaPods
1. Download [CocoaPods](http://cocoapods.org) using this command in `Terminal`
```
$ sudo gem install cocoapods
```
2. Redirect to your project folder in `Terminal`
```
$ cd YOUR_PROJECT_FILE_PATH
```
3. Initialize a pod in `Terminal`
```
$ pod init
```
4. Open Podfile in a text editor and add this line
```
pod 'NotchToolkit'
```
5. Go back to `Terminal` and install the pod
```
$ pod install
```
### Carthage
1. Add this line to the `Cartfile` in your project directory
```
github "AFathi/NotchToolkit"
```
2. Update your Carthage directory
```
$ carthage update
```
### Manual
Drag the `NotchToolkit.xcodeproj` file into your project then add `NotchToolkit` as an embedded binary of your targets.
## Implement in your project
1. `import NotchToolkit` in a `UIViewController` class
2. Add [`NotchToolbarDelegate`](https://github.com/AFathi/NotchToolkit/wiki/NotchToolbarDelegate) in the delegate section
```
class ViewController: UIViewController, NotchToolbarDelegate
```
3. Add delegate methods
```
//A protocol method that's triggered when the device rotates.
func deviceDidRotate() {
}
//A protocol method that's triggered when an icon is selected.
func didTapToolIcon(_ tools: UICollectionView, toolIndex: IndexPath, section: Int, row: Int) {
}
```
4. Create a [`NotchToolbar`](https://github.com/AFathi/NotchToolkit/wiki/NotchToolbar) global variable
```
let toolbar = NotchToolbar()
```
5. Configure and initialize `toolbar` in `viewDidLoad`
```
toolbar.notch.isVisible = true
toolbar.notch.height = 250
toolbar.toolList = [
//[icon image, title]
[UIImage(named:"pikachusquare")!, "Pikachu"],
//only image icons
UIImage(named:"spongebob")!,
//only string icons (mainly for emojis 😉)
"🤔", "🤓",
"📱", "👩💻",
"👨💻", "✅", "🔥"]
toolbar.delegate = self
toolbar.initializeToolbar(self)
```
6. Call [`autoResize()`](https://github.com/AFathi/NotchToolkit/wiki/NotchToolbar#func-autoresize) method in the [`deviceDidRotate`](https://github.com/AFathi/NotchToolkit/wiki/NotchToolbarDelegate#func-devicedidrotate) delegate method
```
func deviceDidRotate() {
toolbar.autoResize()
}
```
**You're all set! 🤓**
## Show and Hide `toolbar`
### [showOrHide()](https://github.com/AFathi/NotchToolkit/wiki/NotchToolbar#func-showorhide)
This method allows you to show and hide the `NotchToolbar`. You can call this method in an `IBAction` that handles showing/hiding the toolbar.
```
@IBAction func buttonClicked(_ sender: UIButton) {
toolbar.showOrHide()
}
```
## Handle Icon Selection
1. Make sure you set the [`NotchToolbar`](https://github.com/AFathi/NotchToolkit/wiki/NotchToolbar) delegate to `self`.
2. Handle the icon selection in the [`didTapToolIcon`](https://github.com/AFathi/NotchToolkit/wiki/NotchToolbarDelegate#func-didtaptoolicon_-tools-uicollectionview-toolindexindexpath-section-int-row-int) delegate method:
```
func didTapToolIcon(_ tools: UICollectionView, toolIndex: IndexPath, section: Int, row: Int) {
if row == 0 {
print("first icon")
}else if row == 1 {
print("second icon")
}
}
```
## More Options
This framework include a `UIView` extension that allow you draw a notch bezier path to any `UIView` class or subclass.
### draw(_ notch:curveType, position:curvePosition, curve:CGFloat?, customBounds:CGRect? = nil)
This is a UIView extension that allows you add ovals and rounded corners to any UIView.
- For type `oval`, set `curve` scale from 1.0 - 10.0.
- For type `corner`, `curve` is the radius size.
- Check `curveType` & `curvePosition` for more info.
### Example
```
//horizontalSides draws an oval-based bezier path vertically on the right & left sides of a view.
myView.draw(.oval, position: .horizontalSides, curve: 1.5)
//diagonalAC draws rounded rectangle corners diagonally from topLeft to bottomRight of a view.
myView.draw(.corner, position: .diagonalAC, curve: 35)
```
### Preview

## LICENSE
`NotchToolkit` is under MIT license. Check the [LICENSE](LICENSE) file for more details.