https://github.com/FusedVR/VRStreaming
Unity Render Streaming SDK to stream VR from CloudXR to WebXR over WebRTC
https://github.com/FusedVR/VRStreaming
streaming-video unity vr webrtc webxr
Last synced: 5 months ago
JSON representation
Unity Render Streaming SDK to stream VR from CloudXR to WebXR over WebRTC
- Host: GitHub
- URL: https://github.com/FusedVR/VRStreaming
- Owner: FusedVR
- License: apache-2.0
- Created: 2021-07-01T14:15:02.000Z (over 4 years ago)
- Default Branch: master
- Last Pushed: 2022-03-04T04:22:17.000Z (over 3 years ago)
- Last Synced: 2025-04-06T21:13:31.733Z (6 months ago)
- Topics: streaming-video, unity, vr, webrtc, webxr
- Language: C#
- Homepage:
- Size: 51.9 MB
- Stars: 151
- Watchers: 15
- Forks: 24
- Open Issues: 20
-
Metadata Files:
- Readme: README.md
- Changelog: CHANGELOG.md
- License: LICENSE
Awesome Lists containing this project
README
# Unity VR Render Streaming SDK
[](https://github.com/FusedVR/VRStreaming/releases) [](https://discord.gg/rV8fEAmG5B) [](https://www.youtube.com/FusedVR?sub_confirmation=1)
This SDK package is built based on [Unity Render Streaming](https://docs.unity3d.com/Packages/com.unity.renderstreaming@2.0/manual/index.html) and [Unity WebRTC](https://docs.unity3d.com/Packages/com.unity.webrtc@2.4/manual/index.html). By using this package, you can stream any Unity scene from the the Unity Editor or a Standalone build to a WebXR client on the FusedVR Website : [https://fusedvr.com/rendering](https://fusedvr.com/rendering). To try this this package, it is as simple as dragging the included **Render Streaming Services** prefab into your Unity scene that you would like to stream and setting up the connect to the WebRTC server.
For an overview of this package, please refer to this video tutorial on the FusedVR Youtube Channel: [Streaming Your First WebXR Unity Game to Oculus Quest](https://www.youtube.com/watch?v=di18sWRlbFs&list=PLihwab7Zw-Ky7nE47-QZopD3TneZlsiP4&index=9)
# Setup
This project can either be imported via the Unity Package Manager using the Github Repo URL or alternatively via [NPM](https://www.npmjs.com/package/com.fusedvr.vrstreaming). If importing via NPM, you will need to include the following information to your Scoped Registries, located under Project Settings. The primary advantage of using NPM is that you will be notified of updates via the Unity Package Manager.
- name : **npmjs**
- url : **https://registry.npmjs.org**
- scopes : **com.fusedvr**
__________________
## Unity Setup
1. Import this Github Repo as a Unity Package via the Unity Package Manager **Add from Git URL** : https://github.com/FusedVR/VRStreaming.git
2. Drag the provided **Render Streaming Service** prefab into your Unity scene
3. Verify the WebRTC server address on the **Render Streaming Service** Gameobject and Component is : [wss://webrtc-pcehljv7ea-uw.a.run.app](https://webrtc-pcehljv7ea-uw.a.run.app)
4. Start the scene (click Play in Editor or create a standalone Build). **NOTE** : The Game View must be selected otherwise streaming will not work as documented in issue [#12](https://github.com/FusedVR/VRStreaming/issues/12)
5. Open https://fusedvr.com/rendering in a WebRTC compatible browser with a WebXR compatible VR Headset connected (most standard browsers support this).
a. Please verify that the URL is being served over an https connection!
b. This page will connect to the WebRTC server served at [webrtc-pcehljv7ea-uw.a.run.app](https://webrtc-pcehljv7ea-uw.a.run.app) using the Google STUN Server (stun:stun.l.google.com:19302)
5. On the Browser, click "**Connect to Cloud VR Streaming Server**"
6. Once you see the video feed, click "**Enter Virtual Reality**"
# Unity Versions
Tested & Verfied with Unity 2019.4 LTS. Limited testing has been done with Unity 2020.3 LTS and seems to be working as intended there as well.
Please also refer to [Unity Render Streaming](https://github.com/Unity-Technologies/UnityRenderStreaming) for their list of supported Unity versions.
# Configurations
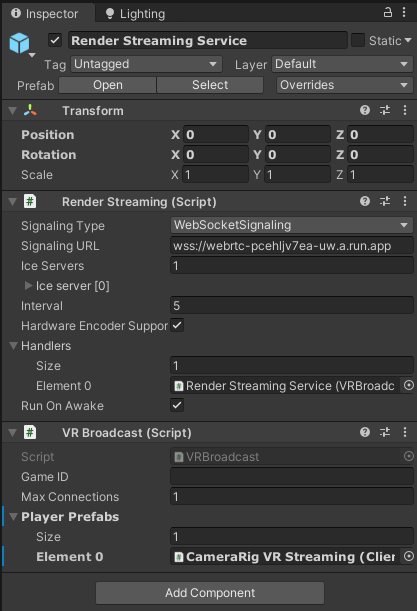
On the **Render Streaming Service** Game Object, there are a few configuration options to make it easier to customize your Render Streaming Game.
- **Game ID (optional)** : This field allows you to specify an ID that a user will be required to enter in order to connect with your game. If left blank, any user will be able to connect with the game.
- **Max Connections** : This field limits the number of clients that can connect to your game. Defaults to 1 and depending on the GPU you are using and what you are rendering, it is recommended to keep this to be no more than 5. As recommended by Unity in the [Render Streaming FAQ](https://docs.unity3d.com/Packages/com.unity.renderstreaming@2.0/manual/en/faq.html), if you are planning to allow more than 5 clients to connect, you may want to consider using an [SFU Rebroadcaster](https://webrtcglossary.com/sfu/). This can be very useful in cases where you would like to build an asymmetrical game or get data from another device (see blockchain support below).
- **Player Prefabs** : This field allows you to setup multiple prefabs that will be spawned once a player connects to the server. These prefabs must contain the [ClientStreams.cs])(https://github.com/FusedVR/VRStreaming/blob/master/Runtime/Scripts/ClientStreams.cs) component, which is responsible for defining the video streams that you would like to stream to the browser as well as the associated Data Channel.

VR Broadcast Component
# Samples
Provided with the package are several samples to help with quick testing the SDK : **HDRP**, **VRTK Integration** , **Asymmetrical Multiplayer** , **Blockchain Testing**. These samples can be imported via the Package Manager once you have imported the SDK into your Unity project.
## High Definition Render Pipeline
The first one uses the Unity HDRP Built In Template to show case streaming a scene with the [High Definition Render Pipeline](https://docs.unity3d.com/Packages/com.unity.render-pipelines.high-definition@11.0/manual/index.html) into WebXR. This is one of the very few ways to play a HDRP game / app within Oculus Quest / WebXR. In order to utilize this sample, import the High Definition RP package from the Unity registry.
#### Watch how to setup the project on [Youtube](https://youtu.be/yXta-2aHH18)
## VRTK Input Integration
The second provided sample shows integration with [VRTK](https://www.vrtk.io/) to showcase how to utilize the input that is streamed from the WebXR client into Unity. Using this input, we can build an Archery Sandbox. Simply pick up the bow and then grab arrows from behind your back to begin shooting. Please note that to you use this sample you will need to manually also import the following [VRTK Tilia Packages](https://www.vrtk.io/tilia.html):
- **io.extendreality.tilia.camerarigs.trackedalias.unity**
- **io.extendreality.tilia.interactions.interactables.unity**
- **io.extendreality.tilia.interactions.snapzone.unity**
#### Watch how to setup the project on [Youtube](https://youtu.be/Bc__t2MLarc)
## Asymmetrical Multiplayer
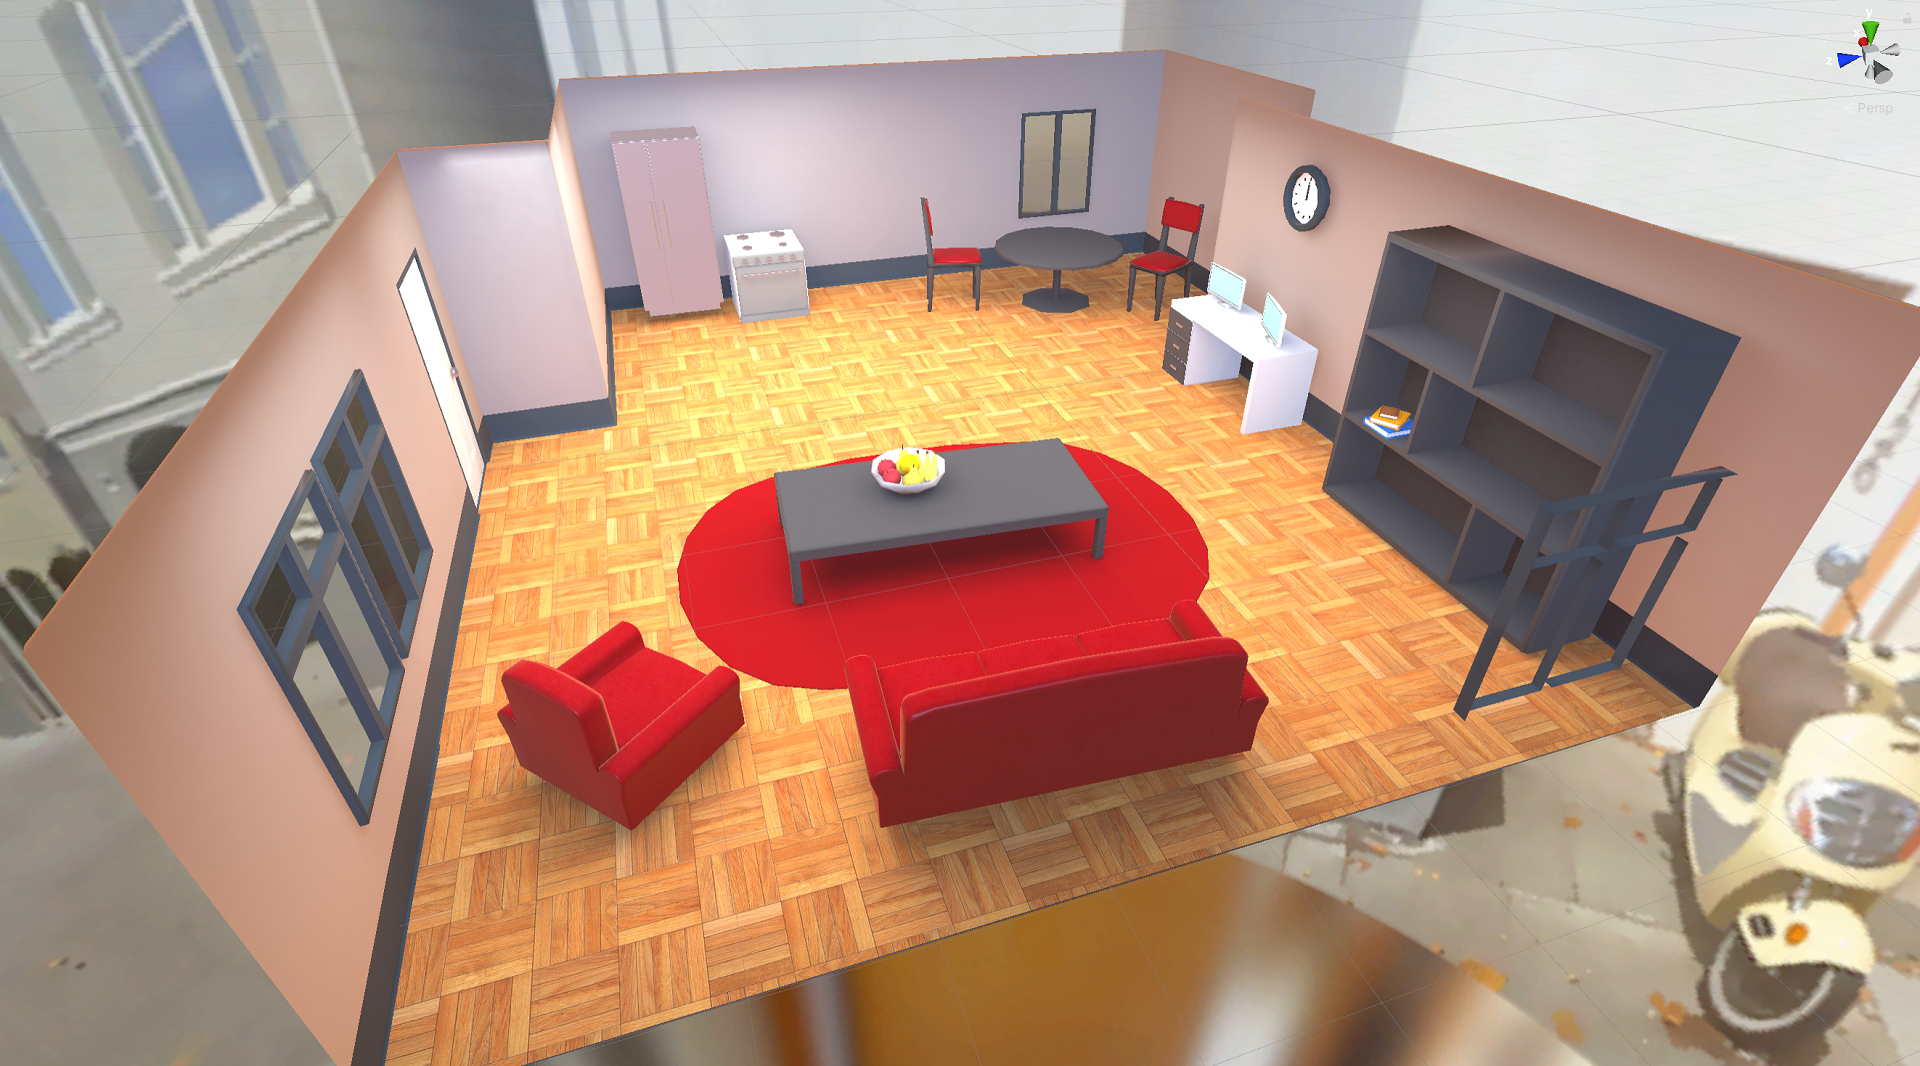
The third provided sample shows an example of creating a asymmetrical multiplayer experience, where up to 4 users can enter the application either in VR or in 2D as a laptop or mobile user to view an apartment. VR users will be able to teleport around using the enabled [VRTK](https://www.vrtk.io/) integration. Please note that to you use this sample you will need to manually also import the following [VRTK Tilia Packages](https://www.vrtk.io/tilia.html):
- **io.extendreality.tilia.camerarigs.trackedalias.unity**
- **io.extendreality.tilia.locomotors.teleporter.unity**
- **io.extendreality.tilia.indicators.objectpointers.unity**

## Blockchain Testing
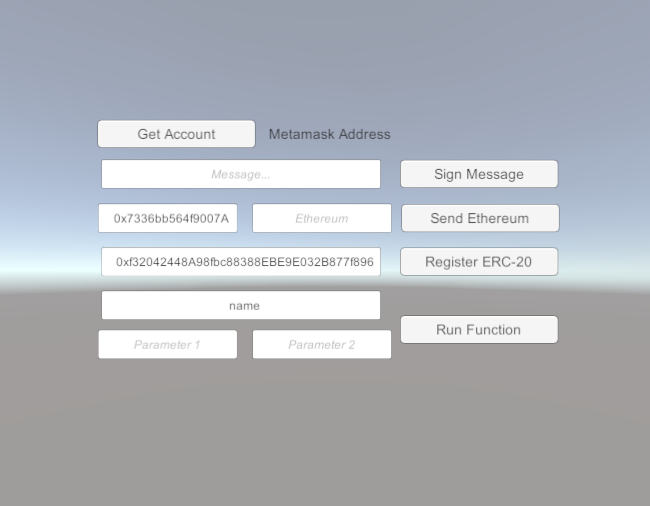
The forth sample shows an example of interacting with the Blockchain. This sample shows you how to use each feature of the Blockchain interaction highlighted above. Due to documented UI issues with Unity Render Streaming, this sample is a bit unstable to setup. If you are testing within Unity, please make sure the Game View is selected; otherwise input will fail to be recognized by the Editor Canvas. If you are running into trouble, please follow this [README](https://github.com/Unity-Technologies/UnityRenderStreaming/blob/develop/com.unity.renderstreaming/Documentation~/browser_input.md) guide from Render Streaming in order to setup browser input. There is also a work around script (RemoteInput.cs) that has been implemented to avoid the bug caused in this [issue](https://github.com/Unity-Technologies/UnityRenderStreaming/issues/542).
#### Some recommendations
- **In Project Setting->Player->Other Setting, check Allow 'unsafe' code**
- **For UnityEditor, Open Window->Analysis->Input Debugger and turn on Lock Input to Game View in Options**

### Authentication
Additionally, to help developers get started with building their own blockchain applications / NFTs, a new sample was recently added in the 0.6.1 update, which highlights how developers can authenticate a smart contract deployed on the Polygon network. More information will eventually be available on the [nft.games](https://github.com/FusedVR/nft.games) project, which will be used as a means for storing metadata and easily hosting your own NFT.
# Camera Eye Resolution
At this time, the WebXR Client sends the resolution required to render per eye based on the connected VR device to Unity in order to adapt the resolution that is sent. However, IPD data is not sent and is hard-coded to a standard default IPD of 64mm. If you would like to adjust the resolution yourself, you may change the [VRInputManager](https://github.com/FusedVR/VRStreaming/blob/master/Runtime/Scripts/VRInputManager.cs) and change the code related to the VRDataType.Display.
# Cloud Support
This project has been tested to work on AWS EC2 leveraging Nvidia's Gaming AMIs. See the following videos for documentation on how to setup your Unity VR Streaming project and get it deployed on the Cloud : [**Windows**](https://youtu.be/UFsbQ8YlboU) / [**Linux**](https://youtu.be/3p0tzqD-s-c)

Windows Server with Tesla T4 GPU Accelerated Graphics

Ubuntu 18.04 with Tesla T4 GPU Accelerated Graphics
# GPU Recommendations
It is strongly recommended to utlize a NVIDIA GPU as these GPUs support Hardware Accelerated Encoding, which is a requirement for lower latency VR Streaming. You can check the fully compatability matrix on the [Unity WebRTC documentation](https://docs.unity3d.com/Packages/com.unity.webrtc@2.4/manual/index.html). If you are using a GPU that does not support Hardware Acceleration, you will need to uncheck this option on the **Render Streaming Service** Game Object and Component
# WebXR Input
Controller Input is captured via the [A-Frame Tracked-Controls component](https://aframe.io/docs/1.2.0/components/tracked-controls.html) and then sent over the data channel to the Unity SDK. This data protocol is adapted from the Unity Broadcast system, which was also capable of sending Keyboard, Mouse, Touch, and Gamepad data back to Unity via the RemoteInput.cs script in Unity. As such, VR data is sent from the client to Unity as Data Array buffers, defined in bytes.
The first byte of the data Array Byffer refers to the input mode to determine how to parse the data as an id. The following IDs were reservered for Web Input by the Unity Render Streaming system and integrated with their Remote Input class.
- ID 0 = Keyboard
- ID 1 = Mouse
- ID 2 = MouseWheel
- ID 3 = Touch
- ID 4 = UI (legacy)
- ID 5 = Gamepad (currently not implemented)
ID 6 is used for all WebXR Input specific to VR. Within VR Input, we specify 3 different modes for sending data, which are:
- ID 0 = Positional and Rotational Data of the Headset and Hands
- ID 1 = Controller Button Data ( A , B , Trigger, Grip )
- ID 2 = Controller Axis Data (Joystick & Trackpad)
ID 7 is used for Blockchain Transaction Data (see next section).
The Raw Data from the Client is passed to VRInputManager, who is responsible for transmitting events based on the data mode recieved. Controller Input is then parsed by the ControllerInputManager, which has events that can be subscribed to for VR Input.
# Blockchain / Ethereum Web Wallet Integration
In order to support decentralized payments, the SDK now supports the ability to send and recieve information from any client with a web wallet that supports **window.ethereum** i.e. [Metamask](https://metamask.io/) or [Coinbase Wallet](https://wallet.coinbase.com/). The implementation for this is located with in the [BlockchainData.cs]((https://github.com/FusedVR/VRStreaming/blob/master/Runtime/Scripts/BlockchainData.cs)) script, which is a static class that allows you to call 3 key functions that will broadcast your message over the Data Channel to all connected clients :
- **GetAccount()** : returns the currently active Blockchain account
- **Signature(string message)** : returns the signed hash of the input message
- **SendTransaction(string to, string value)** : returns the transaction hash for the ethereum transaction that will send *value* ethereum to the *to* address from the active web wallet account
- **RegisterContract(string contractAddres , string abi)** : registers the smart contract address with an associated abi on the clients. This enables the client to make calls to the Smart Contract instead of the server bundling the request into the data field of the SendTransaction
- **RunTransaction(string contractAddress, string functionName, string[] args)** : runs the smart contract transaction on the client. If it is a read-only transaction, the client will return the value from the blockchain i.e. name / symbol. if the function requires writting to the blockchain, then the client will return a transaction hash.
Once any of these methods has been called, the data will be sent over each Client's Data Channel to be processed on the client. If the Client supports the Web Wallet, then the message will be processed and returned back to the server. From Unity, you can listen from the return values on the **BlockchainData.CryptoEvent** event handler, which will return the event name and the result depending on which method was called. Please refer to the Blockchain Testing sample above for instructions on how to use the functionality.
## How To Use Blockchain Support
The most common scenario where this can be integrated is when a VR device like Oculus Quest **NOT** support Blockchain integration and would like to have a secondary device (i.e. smart phone) to be paired with the headset in order to authorize payments. A user could simply connect both the VR headset and phone to the same server and the headset would be responsible for displaying VR, while the phone / computer would be responsible for authorizing any payments using Metamask.
To implement this, you will need to :
- Increase the number of clients that can connect to the server from 1 to 2.
- If desired, create a specific ClientStreamer prefab dedicated for Blockchain support and assign that prefab to the **VRBroadcast**. If unchanged, the video stream will be passed through, which may or may not be desired.
## More Blockchain Requests?
Please file [Github feature request issues](https://github.com/FusedVR/VRStreaming/issues) for additional methods and web wallet support that you would like to see implemented on clients.


