https://github.com/HotCakeX/Harden-Windows-Security
Harden Windows Safely, Securely using Official Supported Microsoft methods and proper explanation | Always up-to-date and works with the latest build of Windows | Provides tools and Guides for Personal, Enterprise, Government and Military security levels | Read The Rationale https://github.com/HotCakeX/Harden-Windows-Security/blob/main/Rationale.md
https://github.com/HotCakeX/Harden-Windows-Security
1st-party-security applicationcontrol bitlocker defender encryption enterprise-security firewall-configuration harden module operation-system-security powershell powershell-script proactive security security-hardening tpm2 wdac windows windows11 windowsdefender
Last synced: over 1 year ago
JSON representation
Harden Windows Safely, Securely using Official Supported Microsoft methods and proper explanation | Always up-to-date and works with the latest build of Windows | Provides tools and Guides for Personal, Enterprise, Government and Military security levels | Read The Rationale https://github.com/HotCakeX/Harden-Windows-Security/blob/main/Rationale.md
- Host: GitHub
- URL: https://github.com/HotCakeX/Harden-Windows-Security
- Owner: HotCakeX
- License: mit
- Created: 2022-11-22T11:26:53.000Z (over 3 years ago)
- Default Branch: main
- Last Pushed: 2024-11-19T14:35:27.000Z (over 1 year ago)
- Last Synced: 2024-11-19T17:12:14.989Z (over 1 year ago)
- Topics: 1st-party-security, applicationcontrol, bitlocker, defender, encryption, enterprise-security, firewall-configuration, harden, module, operation-system-security, powershell, powershell-script, proactive, security, security-hardening, tpm2, wdac, windows, windows11, windowsdefender
- Language: C#
- Homepage: https://hotcakex.github.io
- Size: 347 MB
- Stars: 1,826
- Watchers: 37
- Forks: 143
- Open Issues: 4
-
Metadata Files:
- Readme: README.md
- Contributing: .github/CONTRIBUTING.md
- License: LICENSE
- Citation: CITATION.cff
- Codeowners: .github/CODEOWNERS
Awesome Lists containing this project
- awesome-lists - Endpoint Security - Windows Hardening - Harden-Windows-Security
- awesome-starts - HotCakeX/Harden-Windows-Security - Harden Windows Safely, Securely using Official Supported Microsoft methods and proper explanation | Always up-to-date and works with the latest build of Windows | Provides tools and Guides for Persona (windows)
- awesome-starred - HotCakeX/Harden-Windows-Security - Harden Windows Safely, Securely using Official Supported Microsoft methods and proper explanation | Always up-to-date and works with the latest build of Windows | Provides tools and Guides for Persona (C# #)
README

# Harden Windows Security | A New Threat to Malware
## Harden Windows Safely, Securely, Only With Official Microsoft Methods
&label=Harden%20Windows%20Security%20Module&labelColor=rgb(233%2C255%2C125)&color=rgb(246%2C%2082%2C%20160))
&label=WDACConfig%20Module&labelColor=rgb(233%2C255%2C125)&color=rgb(246%2C%2082%2C%20160))

Hardening Categories 
How To Use
Features
Related
Trust
Support
Security Recommendations
Resources
License
Wiki
Basic FAQs Roadmap

> [!IMPORTANT]\
> Click/Tap on Each of the Items Below to Access Them on This GitHub Repository
>
> ###  Windows Defender Application Control Resources
>
> ###  The WDACConfig Module for Windows Defender Application Control
>
> ###  Read the Rationale Behind This GitHub Repository

> [!NOTE]\
> Windows by default is secure and safe, this repository does not imply nor claim otherwise. Just like anything, you have to use it wisely and don't compromise yourself with reckless behavior and bad user configuration; Nothing is foolproof. This repository only uses the tools and features that have already been implemented by Microsoft in Windows OS to fine-tune it towards the highest security and locked-down state, using well-documented, supported, recommended and official methods. Continue reading for comprehensive info.
## How To Use
###  Start The Harden Windows Security Using GUI [(Graphical User Interface)](https://youtu.be/a8YbihowTVg?si=hGUS2KAW_z80Hnx8)
```powershell
(irm 'https://raw.githubusercontent.com/HotCakeX/Harden-Windows-Security/main/Harden-Windows-Security.ps1')+'P'|iex
```
###  Install the Harden Windows Security Module from [PowerShell Gallery](https://www.powershellgallery.com/packages/Harden-Windows-Security-Module/)
[**Check the documentation and How to use**](https://github.com/HotCakeX/Harden-Windows-Security/wiki/Harden%E2%80%90Windows%E2%80%90Security%E2%80%90Module)
Click/Tap here for commands
```powershell
Install-Module -Name 'Harden-Windows-Security-Module' -Force
```
```powershell
Protect-WindowsSecurity
```
```powershell
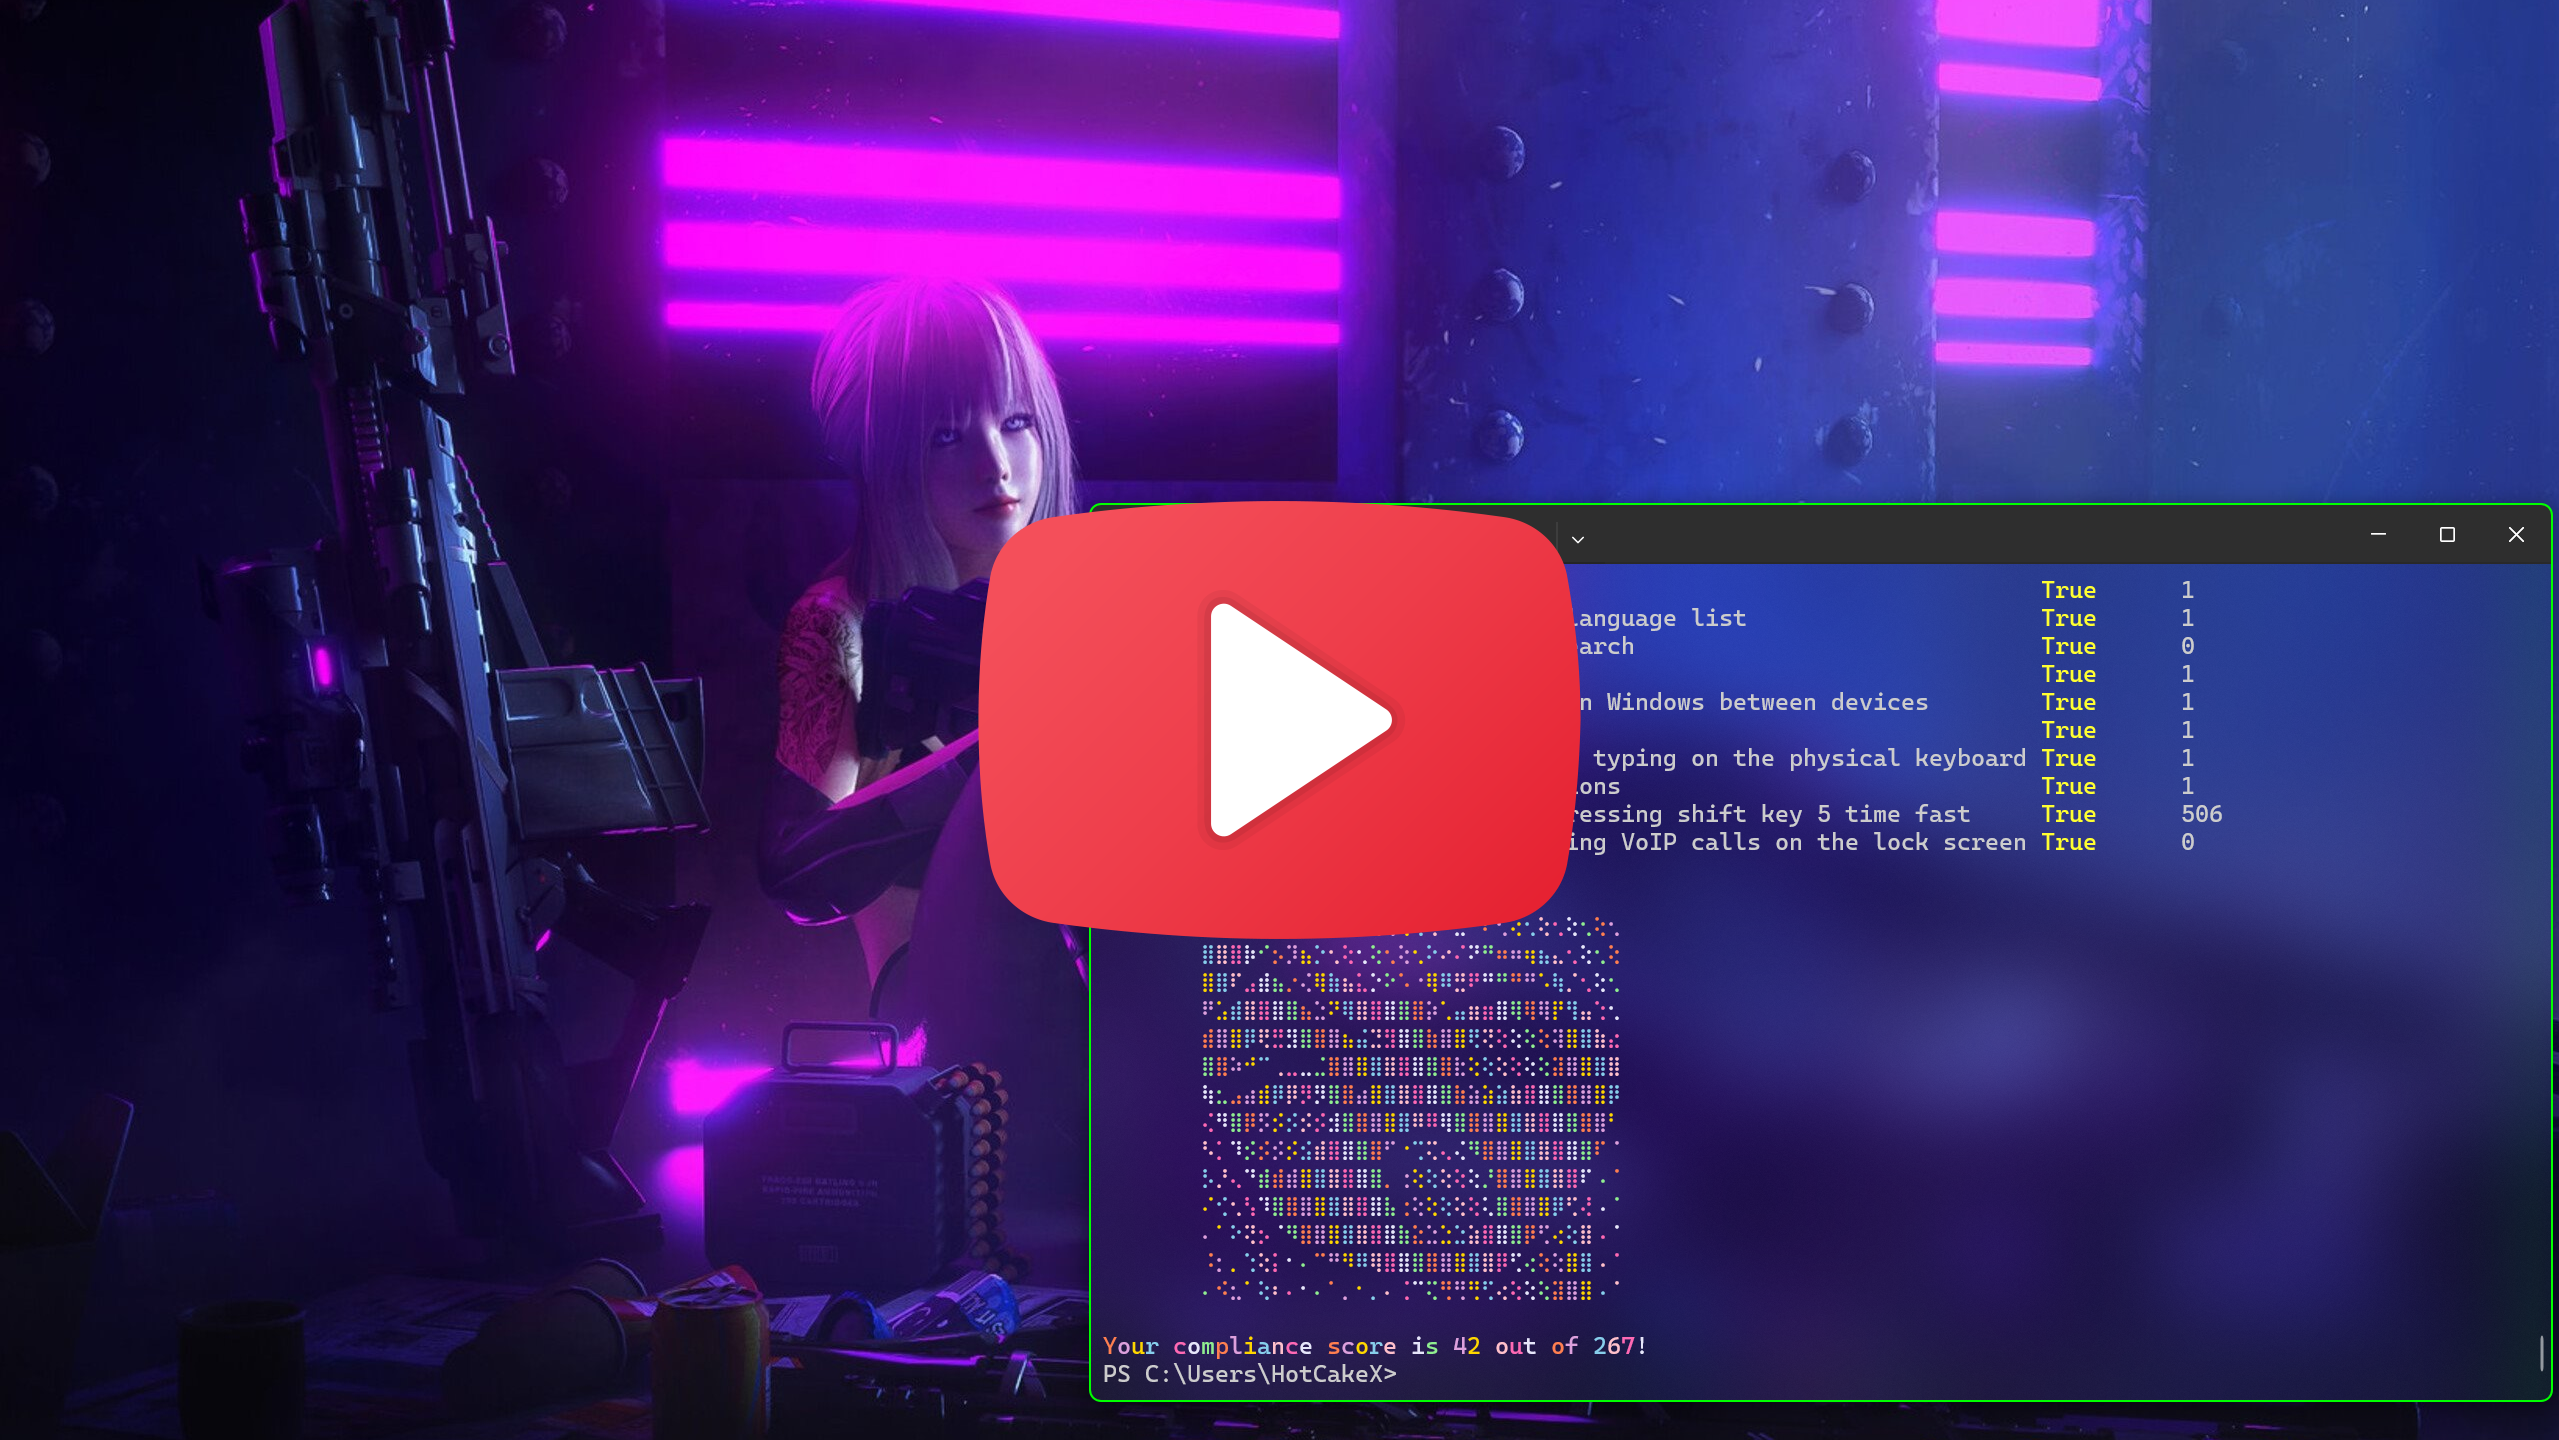
Confirm-SystemCompliance
```
```powershell
Unprotect-WindowsSecurity
```


## Requirements 
 PowerShell (latest version), Install it from [🛍️ Microsoft Store](https://apps.microsoft.com/store/detail/powershell/9MZ1SNWT0N5D) or using Winget: `Winget install Microsoft.PowerShell`
Any device that meets the [Windows 11 hardware](https://www.microsoft.com/en-in/windows/windows-11-specifications?r=1) and [Virtualization Based Security](https://learn.microsoft.com/en-us/windows-hardware/design/device-experiences/oem-vbs) requirements.
Virtualization technology and Secure Boot enabled in your UEFI settings. [Official guide](https://support.microsoft.com/en-us/windows/windows-11-and-secure-boot-a8ff1202-c0d9-42f5-940f-843abef64fad) - How to enable Secure Boot on: [HP](https://support.hp.com/document/ish_4300937-4295746-16?openCLC=true) - [Lenovo](https://support.lenovo.com/solutions/ht509044) - [Dell](https://www.dell.com/support/kbdoc/000190116/How-to-Enable-Secure-Boot-on-Your-Dell-Device).
No 3rd party AV installed.
[Latest available version](https://www.microsoft.com/en-us/software-download/windows11/) of Windows installed.
> [!TIP]\
> Restart your device after applying the hardening measures.
## Features 
 Everything always stays up-to-date with the newest proactive security measures that are industry standards and scalable.
Everything is in clear text, nothing hidden, no 3rd party executable or pre-compiled binary is involved.
No Windows functionality is removed/disabled against Microsoft's recommendations.
All of the links and sources are from official Microsoft websites, straight from the source. No bias, No FUD, No misinformation and definitely No old obsolete methods. That's why there are no links to 3rd party news websites, forums, made up blogs/articles, and such.
With the following exceptions
| Link Count| Link | Reason |
|:----:|:-----------------------------:|:----------------------------------------------------------:|
| 1 | Intel website | i7 13700k product page |
| 1 | state.gov | List of State Sponsors of Terrorism |
| 1 | orpa.princeton.edu | OFAC Sanctioned Countries |
| 2 | Wikipedia | TLS - providing additional information |
| 1 | UK Cyber Security Centre | TLS - providing additional information |
| 1 | Security.Stackexchange Q&A | TLS - providing additional information |
| 1 | browserleaks.com/tls | TLS - Browser test |
| 1 | clienttest.ssllabs.com | TLS - Browser test |
| 1 | scanigma.com/knowledge-base | TLS - providing additional information |
| 1 | cloudflare.com/ssl/reference/ | TLS - providing additional information |
| 1 | github.com/ssllabs/research/ | TLS - providing additional information |
| 1 | Wayback Machine | Providing additional information about Edge Browser |
The module primarily uses Group policies, **the Microsoft recommended way of configuring Windows**. It also uses PowerShell cmdlets where Group Policies aren't available, and finally uses [a few registry keys](https://github.com/HotCakeX/Harden-Windows-Security/blob/main/Harden-Windows-Security%20Module/Main%20files/Resources/Registry.csv) to configure security measures that can neither be configured using Group Policies nor PowerShell cmdlets. This is why the module doesn't break anything or cause unwanted behavior.
This Readme page lists **all** of the security measures applied by the module.
When a hardening measure is no longer necessary because it's applied by default by Microsoft on new builds of Windows, it will also be removed from the module in order to prevent any problems and because it won't be necessary anymore.
The module can be run infinite number of times, it's made in a way that it won't make any duplicate changes.
Applying these hardening measures makes your PC compliant with Microsoft Security Baselines and Secured-core PC specifications (provided that you use modern hardware that supports the latest Windows security features) - [See what makes a Secured-core PC](https://learn.microsoft.com/en-us/windows-hardware/design/device-experiences/oem-highly-secure-11#what-makes-a-secured-core-pc) - Check Device Guard article for more info
> [Secured-core](https://learn.microsoft.com/en-us/windows-hardware/design/device-experiences/oem-highly-secure-11) – recommended for the most sensitive systems and industries like financial, healthcare, and government agencies. Builds on the previous layers and leverages advanced processor capabilities to provide protection from firmware attacks.
Since I originally created this repository for myself and people I care about, I always maintain it to the highest possible standard.
If you have multiple accounts on your device, you only need to apply the hardening measures 1 time with Admin privileges, that will make system-wide changes. Then you can ***optionally*** run the module, without Admin privileges, for each standard user to apply the [Non-Admin category](https://github.com/HotCakeX/Harden-Windows-Security#non-admin-commands).
> [!WARNING]\
> For your own security, exercise caution when considering any other 3rd-party tools, programs, or scripts claiming to harden or modify Windows OS in any way. Verify their legitimacy thoroughly before use and after each release. Avoid blind trust in 3rd party Internet sources. Additionally, if they don't adhere to the rules mentioned above, they can cause system damage, unknown issues, and bugs.
>
> * Read the Trust section to see how you can 100% Trust this repository.
> * [How are Group Policies for this module created and maintained?](https://github.com/HotCakeX/Harden-Windows-Security/wiki/Group-Policy#how-are-group-policies-for-the-module-created-and-maintained)
## Hardening Categories
* Commands that require Administrator Privileges (click/tap on each of these to see in-depth info)
- Microsoft Security Baselines
- Microsoft 365 Apps Security Baselines
- Microsoft Defender
- Attack surface reduction rules
- Bitlocker Settings
- TLS Security
- Lock Screen
- UAC (User Account Control)
- Windows Firewall
- Optional Windows Features
- Windows Networking
- Miscellaneous Configurations
- Windows Update configurations
- Edge Browser configurations
- Certificate Checking Commands
- Country IP Blocking
- Downloads Defense Measures 
* Commands that don't require Administrator Privileges
- Non-Admin Commands
| Indicator| Description |
|:--------:|:-----------------------------:|
|  | Security measure is applied using PowerShell cmdlets or Registry |
|  | Security measure is applied using Group Policies |
|  | [CSP](https://learn.microsoft.com/en-us/windows/configuration/provisioning-packages/how-it-pros-can-use-configuration-service-providers) for the security measure |
|  | Sub-category - prompts for additional confirmation |
## Microsoft Security Baselines

A security baseline is a group of Microsoft-recommended configuration settings that explains their security implications. These settings are based on feedback from Microsoft security engineering teams, product groups, partners, and customers.
[Continue reading in the official documentation](https://learn.microsoft.com/en-us/windows/security/operating-system-security/device-management/windows-security-configuration-framework/windows-security-baselines#what-are-security-baselines)
[Optional Overrides for Microsoft Security Baselines](https://github.com/HotCakeX/Harden-Windows-Security/wiki/Overrides-for-Microsoft-Security-Baseline)
**Highly recommended** to apply these overrides, the module will ask you whether you want to apply them or not. Use Optional Overrides when applying the hardening measures on Azure VMs.
## Microsoft 365 Apps Security Baselines
The security baseline for Microsoft 365 Apps for enterprise is published twice a year, usually in June and December.
[More info in Microsoft Learn](https://learn.microsoft.com/en-us/deployoffice/security/security-baseline)
[Microsoft Security Baselines Version Matrix](https://learn.microsoft.com/en-us/windows/security/operating-system-security/device-management/windows-security-configuration-framework/get-support-for-security-baselines#version-matrix)
## Microsoft Defender

- Enables **additional** security features of Microsoft Defender, You can refer to [this official document](https://docs.microsoft.com/en-us/powershell/module/defender/set-mppreference?view=windowsserver2022-ps) for full details. [CSP](https://learn.microsoft.com/en-us/windows/client-management/mdm/policy-csp-defender)
- [Performance analyzer for Microsoft Defender Antivirus](https://learn.microsoft.com/en-us/microsoft-365/security/defender-endpoint/tune-performance-defender-antivirus)
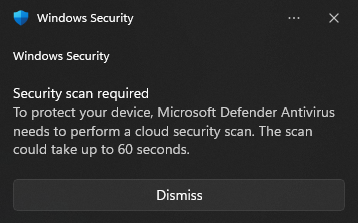
- The module makes sure [Cloud Security Scan](https://support.microsoft.com/en-us/topic/what-is-a-cloud-security-scan-75112696-7660-4450-9194-d717f72a8ad8) and [Block At First Sight](https://learn.microsoft.com/en-us/microsoft-365/security/defender-endpoint/configure-block-at-first-sight-microsoft-defender-antivirus?view=o365-worldwide#turn-on-block-at-first-sight-with-group-policy) are enabled to the highest possible security states available, **Zero Tolerance Cloud Block level**. You need to be aware that this means actions like downloading and opening an unknown file **will** make Microsoft Defender send samples of it to the Cloud for more advanced analysis and it can take a maximum of 60 seconds (this module sets it to max) from the time you try to open that unknown file to the time when it will be opened (if deemed safe), so you will have to wait. All of these security measures are in place by default in Windows to some extent and happen automatically, but this module **maxes them out and sets them to the highest possible levels**. [CSP](https://learn.microsoft.com/en-us/windows/client-management/mdm/policy-csp-defender#cloudblocklevel) [CSP](https://learn.microsoft.com/en-us/windows/client-management/mdm/policy-csp-defender#cloudextendedtimeout)
- Here is an example of the notification you will see in Windows 11 if that happens.
- Enables file hash computation; [designed](https://learn.microsoft.com/en-us/powershell/module/defender/set-mppreference?view=windowsserver2022-ps#-enablefilehashcomputation) to allow admins to force the anti-malware solution to "compute file hashes for every executable file that is scanned if it wasn't previously computed" to "improve blocking for custom indicators in Microsoft Defender Advanced Threat Protection (Microsoft Defender ATP). [CSP](https://learn.microsoft.com/en-us/windows/client-management/mdm/policy-csp-admx-microsoftdefenderantivirus#mpengine_enablefilehashcomputation)
- Clears Quarantined items after 1 day instead of the default behavior of keeping them indefinitely. [CSP](https://learn.microsoft.com/en-us/windows/client-management/mdm/policy-csp-admx-microsoftdefenderantivirus#quarantine_purgeitemsafterdelay)
- Allows Microsoft Defender to download security updates even on a metered connection. [CSP](https://learn.microsoft.com/en-us/windows/client-management/mdm/defender-csp?WT.mc_id=Portal-fx#configurationmeteredconnectionupdates)
- Enables [Microsoft Defender](https://learn.microsoft.com/en-us/microsoft-365/security/defender-endpoint/configure-advanced-scan-types-microsoft-defender-antivirus?view=o365-worldwide#settings-and-locations) to scan mapped network drives, network files, [reparse points](https://learn.microsoft.com/en-us/windows/win32/fileio/reparse-points), Emails and removable drives during a full scan. [CSP](https://learn.microsoft.com/en-us/windows/client-management/mdm/policy-csp-defender#allowemailscanning) [CSP](https://learn.microsoft.com/en-us/windows/client-management/mdm/policy-csp-defender#allowfullscanonmappednetworkdrives) [CSP](https://learn.microsoft.com/en-us/windows/client-management/mdm/policy-csp-defender#allowfullscanremovabledrivescanning) [CSP](https://learn.microsoft.com/en-us/windows/client-management/mdm/policy-csp-admx-microsoftdefenderantivirus#scan_disablereparsepointscanning) [CSP](https://learn.microsoft.com/en-us/windows/client-management/mdm/policy-csp-defender#allowscanningnetworkfiles)
- Sets the Signature Update Interval to every 3 hours instead of automatically. [CSP](https://learn.microsoft.com/en-us/windows/client-management/mdm/policy-csp-defender#signatureupdateinterval)
- [Change logs for security intelligence updates](https://www.microsoft.com/en-us/wdsi/definitions/antimalware-definition-release-notes)
- [Configure and validate Microsoft Defender Antivirus network connections](https://learn.microsoft.com/en-us/microsoft-365/security/defender-endpoint/configure-network-connections-microsoft-defender-antivirus?view=o365-worldwide)
- [Security intelligence updates for Microsoft Defender Antivirus and other Microsoft antimalware](https://www.microsoft.com/en-us/wdsi/defenderupdates)
- [Microsoft Safety Scanner](https://learn.microsoft.com/en-us/microsoft-365/security/intelligence/safety-scanner-download?view=o365-worldwide)
- Paste the following PowerShell code to retrieve the latest available online versions of the Platform, Signatures, and Engine for Microsoft Defender
-
```powershell
$X = irm "https://www.microsoft.com/security/encyclopedia/adlpackages.aspx?action=info"
@{Engine = $X.versions.engine; Signatures = $X.versions.signatures.'#text'; Platform = $X.versions.platform} | ft -AutoSize
```
- Forces Microsoft Defender to check for new virus and spyware definitions before it runs a scan. [CSP](https://learn.microsoft.com/en-us/windows/client-management/mdm/policy-csp-defender#checkforsignaturesbeforerunningscan)
- Makes Microsoft Defender run [catch-up scans](https://learn.microsoft.com/en-us/powershell/module/defender/set-mppreference?view=windowsserver2022-ps#-disablecatchupquickscan) for scheduled quick scans. A computer can miss a scheduled scan, usually because the computer is off at the scheduled time, but now after the computer misses two scheduled quick scans, Microsoft Defender runs a catch-up scan the next time someone logs onto the computer. [CSP](https://learn.microsoft.com/en-us/windows/client-management/mdm/policy-csp-defender#disablecatchupquickscan)
- Enables [Network Protection of Microsoft Defender](https://learn.microsoft.com/en-us/microsoft-365/security/defender-endpoint/network-protection?view=o365-worldwide) [CSP](https://learn.microsoft.com/en-us/windows/client-management/mdm/policy-csp-defender#enablenetworkprotection)
- Enables [scanning of restore points](https://learn.microsoft.com/en-us/powershell/module/defender/set-mppreference#-disablerestorepoint) [CSP](https://learn.microsoft.com/en-us/windows/client-management/mdm/policy-csp-admx-microsoftdefenderantivirus#scan_disablerestorepoint)
- Makes sure [Async Inspection for Network protection](https://learn.microsoft.com/en-us/microsoft-365/security/defender-endpoint/network-protection?view=o365-worldwide#optimizing-network-protection-performance) of Microsoft Defender is turned on - Network protection now has a performance optimization that allows Block mode to start asynchronously inspecting long connections after they're validated and allowed by SmartScreen, which might provide a potential reduction in the cost that inspection has on bandwidth and can also help with app compatibility problems. [CSP](https://learn.microsoft.com/en-us/windows/client-management/mdm/defender-csp?WT.mc_id=Portal-fx#configurationallowswitchtoasyncinspection)
- Enables [Smart App Control](https://support.microsoft.com/en-us/topic/what-is-smart-app-control-285ea03d-fa88-4d56-882e-6698afdb7003) (*if it's in Evaluation mode*): adds significant protection from new and emerging threats by blocking apps that are malicious or untrusted. Smart App Control also helps to block potentially unwanted apps, which are apps that may cause your device to run slowly, display unexpected ads, offer extra software you didn't want, or do other things you don't expect.
- Smart App Control is User-Mode (and enforces Kernel-Mode) [Windows Defender Application Control policy (WDAC)](https://learn.microsoft.com/en-us/windows/security/application-security/application-control/windows-defender-application-control/design/wdac-design-guide), **more info** [**in the Wiki**](https://github.com/HotCakeX/Harden-Windows-Security/wiki/Introduction). You can see its status in [System Information](https://support.microsoft.com/en-us/windows/view-your-system-info-a965a8f2-0773-1d65-472a-1e747c9ebe00) and enable it manually from Microsoft Defender app's GUI. It is very important for Windows and Windows Defender intelligence updates to be always up-to-date in order for Smart App Control to work properly as it relies on live intelligence and definition data from the cloud and other sources to make a Smart decision about programs and files it encounters.
- Smart App Control uses [ISG (Intelligent Security Graph)](https://learn.microsoft.com/en-us/windows/security/application-security/application-control/windows-defender-application-control/design/use-wdac-with-intelligent-security-graph#how-does-wdac-work-with-the-isg). The ISG isn't a "list" of apps. Rather, it uses the same vast security intelligence and machine learning analytics that power Microsoft Defender SmartScreen and Microsoft Defender Antivirus to help classify applications as having "known good", "known bad", or "unknown" reputation. This cloud-based AI is based on trillions of signals collected from Windows endpoints and other data sources and processed every 24 hours. As a result, the decision from the cloud can change.
- [Smart App Control](https://learn.microsoft.com/en-us/windows/security/application-security/application-control/windows-defender-application-control/wdac#wdac-and-smart-app-control) can block a program entirely from running or only [some parts of it](https://support.microsoft.com/en-us/topic/smart-app-control-has-blocked-part-of-this-app-0729fff1-48bf-4b25-aa97-632fe55ccca2) in which case your app or program will continue working just fine most of the time. It's improved a lot since it was introduced, and it continues doing so. Consider turning it on after clean installing a new OS and fully updating it.
- Smart App Control enforces the [Microsoft Recommended Driver Block rules](https://learn.microsoft.com/en-us/windows/security/application-security/application-control/windows-defender-application-control/design/microsoft-recommended-driver-block-rules) and the [Microsoft Recommended Block Rules](https://learn.microsoft.com/en-us/windows/security/application-security/application-control/windows-defender-application-control/design/applications-that-can-bypass-wdac)
- Once you turn Smart App Control off, it can't be turned on without resetting or reinstalling Windows.
- Enables ["Send optional diagnostic data"](https://learn.microsoft.com/en-us/windows/privacy/windows-diagnostic-data) because [it](https://learn.microsoft.com/en-us/windows/privacy/configure-windows-diagnostic-data-in-your-organization) is [required for Smart App Control](https://support.microsoft.com/en-us/topic/what-is-smart-app-control-285ea03d-fa88-4d56-882e-6698afdb7003) **to operate when it's in evaluation mode or turned on, and for communication with [Intelligent Security Graph (ISG)](https://learn.microsoft.com/en-us/windows/security/application-security/application-control/windows-defender-application-control/design/use-wdac-with-intelligent-security-graph).** You won't see this prompt if Smart App Control is already turned on (this setting will be applied), turned off (this setting will be skipped) or you choose to enable it in the previous step (this setting will be applied). [CSP](https://learn.microsoft.com/en-us/windows/client-management/mdm/policy-csp-system#allowtelemetry)
- Enables [Controlled Folder Access](https://learn.microsoft.com/en-us/microsoft-365/security/defender-endpoint/enable-controlled-folders). It [helps protect your valuable data](https://learn.microsoft.com/en-us/microsoft-365/security/defender-endpoint/controlled-folders) from malicious apps and threats, such as ransomware. Controlled folder access protects your data by checking apps against a list of known, trusted apps. Due to the recent wave of global ransomware attacks, it is important to use this feature to protect your valuables files, specially OneDrive folders. [CSP](https://learn.microsoft.com/en-us/windows/client-management/mdm/policy-csp-defender#enablecontrolledfolderaccess)
- If it blocks a program from accessing one of your folders it protects, and you absolutely trust that program, then you can add it to exclusion list using Microsoft Defender GUI or PowerShell. you can also query the list of allowed apps using PowerShell (commands below). with these commands, you can backup your personalized list of allowed apps, that are relevant to your system, and restore them in case you clean install your Windows.
- The module adds the root of the OneDrive folders of all user accounts present, to the protected folders list of Controlled Folder Access, to provide Ransomware protection for the entire OneDrive folder. [CSP](https://learn.microsoft.com/en-us/windows/client-management/mdm/policy-csp-defender#controlledfolderaccessprotectedfolders)
-
```powershell
# Add multiple programs to the exclusion list of Controlled Folder Access
Add-MpPreference -ControlledFolderAccessAllowedApplications 'C:\Program Files\App\app.exe','C:\Program Files\App2\app2.exe'
```
-
```powershell
# Get the list of all allowed apps
(Get-MpPreference).ControlledFolderAccessAllowedApplications
```
- Enables [Mandatory ASLR,](https://learn.microsoft.com/en-us/microsoft-365/security/defender-endpoint/enable-exploit-protection?view=o365-worldwide) *It might cause compatibility issues* only for some **poorly-made 3rd party programs**, specially portable ones. [CSP](https://learn.microsoft.com/en-us/windows/client-management/mdm/policy-csp-exploitguard)
- Automatically detects and excludes the Git executables of GitHub Desktop and Git (Standalone version) from mandatory ASLR if they are installed on the system. [More info here](https://github.com/HotCakeX/Harden-Windows-Security/wiki/Git-GitHub-Desktop-and-Mandatory-ASLR)
- You can add Mandatory ASLR override for a trusted program using the PowerShell command below or in the Program Settings section of Exploit Protection in Microsoft Defender app.
- `Set-ProcessMitigation -Name "C:\TrustedApp.exe" -Disable ForceRelocateImages`
- Applies [Exploit Protections/Process Mitigations](https://learn.microsoft.com/en-us/microsoft-365/security/defender-endpoint/enable-exploit-protection) from [**this list**](https://github.com/HotCakeX/Harden-Windows-Security/blob/main/Harden-Windows-Security%20Module/Main%20files/Resources/ProcessMitigations.csv) to the following programs: [CSP](https://learn.microsoft.com/en-us/windows/client-management/mdm/policy-csp-exploitguard)
- All channels of [Microsoft Edge](https://www.microsoft.com/en-us/edge) browser
- [Quick Assist](https://learn.microsoft.com/en-us/windows/client-management/client-tools/quick-assist) app
- Some System processes
- Microsoft 365 apps
- More apps and processes will be added to the list over time once they are properly validated to be fully compatible.
- Exploit Protection configurations are also accessible in XML format [within this repository](https://github.com/HotCakeX/Harden-Windows-Security/tree/main/Intune%20Files/Hardening%20Policies/Exploit%20Protections). When implementing exploit protections using an XML file, the existing exploit mitigations will seamlessly integrate rather than being overwritten. Should there be pre-existing exploit protections applied to an executable on the system, and the XML file specifies different mitigations for the same executable, these protections will be merged and applied collectively.
- [Turns on Data Execution Prevention](https://learn.microsoft.com/en-us/windows-hardware/drivers/devtest/bcdedit--set) (DEP) for all applications, including 32-bit programs. By default, the output of `BCDEdit /enum "{current}"` (in PowerShell) for the NX bit is `OptIn` but this module sets it to `AlwaysOn`
- Check for the latest virus and spyware security intelligence on startup. [CSP](https://learn.microsoft.com/en-us/windows/client-management/mdm/policy-csp-admx-microsoftdefenderantivirus#signatureupdate_updateonstartup)
- Specifies the maximum depth to scan archive files to the maximum possible value of `4,294,967,295` [CSP](https://learn.microsoft.com/en-us/windows/client-management/mdm/policy-csp-admx-microsoftdefenderantivirus#scan_archivemaxdepth)
- [Defines the maximum size of downloaded files and attachments to be scanned](https://learn.microsoft.com/en-us/microsoft-365/security/defender-endpoint/configure-advanced-scan-types-microsoft-defender-antivirus?view=o365-worldwide) and set it to the maximum possible value of `10,000,000 KB` or `10 GB`. [the default is](https://github.com/MicrosoftDocs/microsoft-365-docs/pull/5600) `20480 KB` or `~20MB` [CSP](https://learn.microsoft.com/en-us/windows/client-management/mdm/policy-csp-admx-microsoftdefenderantivirus#realtimeprotection_ioavmaxsize)
- Enables automatic data collection (formerly known as Capture Threat Window) of [Enhanced Phishing Protection](https://learn.microsoft.com/en-us/windows/security/operating-system-security/virus-and-threat-protection/microsoft-defender-smartscreen/enhanced-phishing-protection) in Microsoft Defender SmartScreen for security analysis from a suspicious website or app. [CSP](https://learn.microsoft.com/en-us/windows/client-management/mdm/policy-csp-webthreatdefense#automaticdatacollection)
- [Create scheduled task for fast weekly Microsoft recommended driver block list update.](https://github.com/HotCakeX/Harden-Windows-Security/wiki/Fast-and-Automatic-Microsoft-Recommended-Driver-Block-Rules-updates). You won't see this prompt if the task already exists and is enabled or running.
- Set Microsoft [Defender engine](https://learn.microsoft.com/en-us/powershell/module/defender/set-mppreference#-engineupdateschannel) and [platform update channel](https://learn.microsoft.com/en-us/powershell/module/defender/set-mppreference#-platformupdateschannel) to beta. [CSP](https://learn.microsoft.com/en-us/windows/client-management/mdm/defender-csp?WT.mc_id=Portal-fx#configurationengineupdateschannel) [CSP](https://learn.microsoft.com/en-us/windows/client-management/mdm/defender-csp?WT.mc_id=Portal-fx#configurationplatformupdateschannel)
- [Defines the number of days before spyware and virus security intelligence definitions](https://learn.microsoft.com/en-us/microsoft-365/security/defender-endpoint/manage-outdated-endpoints-microsoft-defender-antivirus?view=o365-worldwide#use-group-policy-to-specify-the-number-of-days-before-protection-is-considered-out-of-date) are considered out of date to 2 days, instead of the default 7 days. [CSP](https://learn.microsoft.com/en-us/windows/client-management/mdm/policy-csp-admx-microsoftdefenderantivirus#signatureupdate_assignaturedue)
- Sets the [default action](https://learn.microsoft.com/en-us/microsoft-365/security/defender-endpoint/configure-remediation-microsoft-defender-antivirus) for Severe and High threat levels to Remove, for Medium and Low threat levels to Quarantine. [CSP](https://learn.microsoft.com/en-us/windows/client-management/mdm/policy-csp-admx-microsoftdefenderantivirus#threats_threatiddefaultaction)
- Configures real-time protection and Security Intelligence Updates to be enabled during OOBE. [CSP](https://learn.microsoft.com/en-us/windows/client-management/mdm/defender-csp#configurationoobeenablertpandsigupdate)
- Enables the [Intel TDT](https://techcommunity.microsoft.com/t5/microsoft-defender-for-endpoint/defending-against-ransomware-with-microsoft-defender-for/ba-p/3243941) (Intel® Threat Detection Technology) integration with Microsoft Defender. [CSP](https://learn.microsoft.com/en-us/windows/client-management/mdm/defender-csp#configurationinteltdtenabled)
- Disables [Performance Mode](https://learn.microsoft.com/en-us/microsoft-365/security/defender-endpoint/microsoft-defender-endpoint-antivirus-performance-mode) - [Security risks in relation to Dev Drive](https://learn.microsoft.com/en-us/windows/dev-drive/#understanding-security-risks-and-trust-in-relation-to-dev-drive) [CSP](https://learn.microsoft.com/en-us/windows/client-management/mdm/defender-csp?WT.mc_id=Portal-fx#configurationperformancemodestatus)
- Enables a network protection setting that blocks malicious network traffic instead of displaying a warning. [CSP](https://learn.microsoft.com/en-us/windows/client-management/mdm/defender-csp#configurationenableconvertwarntoblock)
- Configures the Brute-Force Protection to use cloud aggregation to block IP addresses that are over 99% likely malicious [CSP](https://learn.microsoft.com/en-us/windows/client-management/mdm/defender-csp#configurationbehavioralnetworkblocksbruteforceprotectionbruteforceprotectionaggressiveness)
- Configures the Brute-Force Protection to detect and block attempts to forcibly sign in and initiate sessions [CSP](https://learn.microsoft.com/en-us/windows/client-management/mdm/defender-csp#configurationbehavioralnetworkblocksbruteforceprotectionbruteforceprotectionconfiguredstate)
- Sets the internal feature logic to determine blocking time for the Brute-Force Protections [CSP](https://learn.microsoft.com/en-us/windows/client-management/mdm/defender-csp#configurationbehavioralnetworkblocksbruteforceprotectionbruteforceprotectionmaxblocktime)
- Configures the Remote Encryption Protection to use cloud intel and context, and block when confidence level is above 90%. [CSP](https://learn.microsoft.com/en-us/windows/client-management/mdm/defender-csp#configurationbehavioralnetworkblocksremoteencryptionprotectionremoteencryptionprotectionaggressiveness)
- Configures the Remote Encryption Protection to detect and block attempts to replace local files with encrypted versions from another device [CSP](https://learn.microsoft.com/en-us/windows/client-management/mdm/defender-csp#configurationbehavioralnetworkblocksremoteencryptionprotectionremoteencryptionprotectionconfiguredstate)
- Sets the internal feature logic to determine blocking time for the Remote Encryption Protection [CSP](https://learn.microsoft.com/en-us/windows/client-management/mdm/defender-csp#configurationbehavioralnetworkblocksremoteencryptionprotectionremoteencryptionprotectionmaxblocktime)
## Attack surface reduction rules

[Reducing your attack surface](https://learn.microsoft.com/en-us/microsoft-365/security/defender-endpoint/attack-surface-reduction) means protecting your devices and network, which leaves attackers with fewer ways to perform attacks. Configuring attack surface reduction rules in Windows can help!
[Attack surface reduction rules](https://learn.microsoft.com/en-us/microsoft-365/security/defender-endpoint/attack-surface-reduction-rules-reference?view=o365-worldwide) target certain software behaviors, such as: [CSP](https://learn.microsoft.com/en-us/windows/client-management/mdm/policy-csp-defender#attacksurfacereductionrules)
* Launching executable files and scripts that attempt to download or run files
* Running obfuscated or otherwise suspicious scripts
* Performing behaviors that apps don't usually initiate during normal day-to-day work
Such software behaviors are sometimes seen in legitimate applications. However, these behaviors are often considered risky because they are commonly abused by attackers through malware. Attack surface reduction rules can constrain software-based risky behaviors and help keep your organization safe.
This module enables [all 19 available Attack Surface Reduction rules shown in the official chart](https://learn.microsoft.com/en-us/microsoft-365/security/defender-endpoint/attack-surface-reduction-rules-reference?view=o365-worldwide#asr-rule-to-guid-matrix).
## Bitlocker Settings

- The module sets up and configures Bitlocker [using official documentation](https://learn.microsoft.com/en-us/windows/security/information-protection/bitlocker/bitlocker-group-policy-settings), with the most secure configuration and military grade encryption algorithm, XTS-AES-256, to protect the confidentiality and integrity of all information at rest. [CSP](https://learn.microsoft.com/en-us/windows/client-management/mdm/bitlocker-csp#encryptionmethodbydrivetype) [CSP](https://learn.microsoft.com/en-us/windows/client-management/mdm/bitlocker-csp#systemdrivesrequirestartupauthentication)
- It offers 2 security levels for OS drive encryption: **Enhanced** and **Normal**.
- In **Normal** security level, the OS drive is encrypted with TPM and Startup PIN. This provides very high security for your data, specially with a PIN that's long, complicated (uppercase and lowercase letters, symbols, numbers, spaces) and isn't the same as your Windows Hello PIN.
- In **Enhanced** security level, the OS drive is encrypted with TPM and Startup PIN and Startup key. This provides the highest level of protection by offering Multifactor Authentication. You will need to enter your PIN and also plug in a flash drive, containing a special BitLocker key, into your device in order to unlock it. [Continue reading more about it here](https://learn.microsoft.com/en-us/windows/security/operating-system-security/data-protection/bitlocker/countermeasures#preboot-authentication).
- Once the OS drive is encrypted, for every other non-OS drive, there will be prompts for confirmation before encrypting it. The encryption will use the same algorithm as the OS drive and uses [Auto-unlock key protector](https://learn.microsoft.com/en-us/powershell/module/bitlocker/enable-bitlockerautounlock). Removable flash drives are skipped.
- The recovery information of all of the drives are saved in a single well-formatted text file in the root of the OS drive `C:\BitLocker-Recovery-Info-All-Drives.txt`. It's **very important to keep it in a safe and reachable place as soon as possible, e.g., in OneDrive's Personal Vault which requires additional authentication to access.** See [here](https://www.microsoft.com/en-us/microsoft-365/onedrive/personal-vault) and [here](https://support.microsoft.com/en-us/office/protect-your-onedrive-files-in-personal-vault-6540ef37-e9bf-4121-a773-56f98dce78c4) for more info. You can use it to unlock your drives if you ever forget your PIN, lose your Startup key (USB Flash Drive) or TPM no longer has the correct authorization (E.g., after a firmware change).
- TPM has [special anti-hammering logic](https://learn.microsoft.com/en-us/windows/security/information-protection/tpm/tpm-fundamentals) which prevents malicious user from guessing the authorization data indefinitely. [Microsoft defines that maximum number of failed attempts](https://learn.microsoft.com/en-us/archive/blogs/dubaisec/tpm-lockout) in Windows is 32 and every single failed attempt is forgotten after 2 hours. This means that every continuous two hours of powered on (and successfully booted) operation without an event which increases the counter will cause the counter to decrease by 1. You can view all the details using this [PowerShell command](https://learn.microsoft.com/en-us/powershell/module/trustedplatformmodule/get-tpm): `Get-TPM`.
- Check out Lock Screen category for more info about the recovery password and the 2nd anti-hammering mechanism.
- BitLocker will bring you a [real security](https://learn.microsoft.com/en-us/windows/security/operating-system-security/data-protection/bitlocker/countermeasures#attacker-with-skill-and-lengthy-physical-access) against the theft of your device if you strictly abide by the following basic rules:
- As soon as you have finished working, either Hibernate or shut Windows down and allow for every shadow of information to disappear from RAM within 2 minutes. **This practice is recommended in High-Risk Environments.**
- Do not mix 3rd party encryption software and tools with Bitlocker. Bitlocker creates a secure end-to-end encrypted ecosystem for your device and its peripherals, this secure ecosystem is backed by things such as software, Virtualization Technology, TPM 2.0 and UEFI firmware, Bitlocker protects your data and entire device against **real-life attacks and threats**. You can encrypt your external SSDs and flash drives with Bitlocker too.
> [!IMPORTANT]\
> [AMD Zen 2 and 3 CPUs have a vulnerability in them](https://github.com/HotCakeX/Harden-Windows-Security/issues/63), if you use one of them, make sure your Bitlocker Startup PIN is at least 16 characters long [*(max is 20)*](https://learn.microsoft.com/en-us/windows/security/operating-system-security/data-protection/bitlocker/bitlocker-group-policy-settings#configure-minimum-pin-length-for-startup).
- Enables or disables [DMA protection from Bitlocker Countermeasures](https://learn.microsoft.com/en-us/windows/security/information-protection/bitlocker/bitlocker-countermeasures#protecting-thunderbolt-and-other-dma-ports) based [on the status](https://github.com/MicrosoftDocs/windows-itpro-docs/issues/6878#issuecomment-742429128) of [Kernel DMA protection](https://learn.microsoft.com/en-us/windows/security/information-protection/kernel-dma-protection-for-thunderbolt). Kernel DMA Protection is [not compatible](https://learn.microsoft.com/en-us/windows/security/information-protection/kernel-dma-protection-for-thunderbolt#system-compatibility) with other BitLocker DMA attacks countermeasures. It is recommended to disable the BitLocker DMA attacks countermeasures if the system supports Kernel DMA Protection (this module does that exactly). Kernel DMA Protection provides higher security bar for the system over the BitLocker DMA attack countermeasures, while maintaining usability of external peripherals. you can check the status of Kernel DMA protection [using this official guide](https://learn.microsoft.com/en-us/windows/security/information-protection/kernel-dma-protection-for-thunderbolt#how-to-check-if-kernel-dma-protection-is-enabled). [CSP](https://learn.microsoft.com/en-us/windows/client-management/mdm/policy-csp-dataprotection#allowdirectmemoryaccess)
- [Kernel DMA Protection (Memory Access Protection) for OEMs](https://learn.microsoft.com/en-us/windows-hardware/design/device-experiences/oem-kernel-dma-protection) page shows the requirements for Kernel DMA Protection. for Intel CPUs, support for requirements such as VT-X and VT-D can be found in each CPU's respective product page. e.g. [Intel i7 13700K](https://ark.intel.com/content/www/us/en/ark/products/230500/intel-core-i713700k-processor-30m-cache-up-to-5-40-ghz.html)
- Disallows standard (non-Administrator) users from changing the Bitlocker Startup PIN or password [CSP](https://learn.microsoft.com/en-us/windows/client-management/mdm/bitlocker-csp#systemdrivesdisallowstandarduserscanchangepin)
- [Requires you to choose a PIN that contains at least 10 characters](https://learn.microsoft.com/en-us/windows/security/information-protection/bitlocker/bitlocker-group-policy-settings#configure-minimum-pin-length-for-startup) [CSP](https://learn.microsoft.com/en-us/windows/client-management/mdm/bitlocker-csp#systemdrivesminimumpinlength)
- (Only on Physical machines) Enables Hibernate and adds Hibernate to Start menu's power options. [CSP](https://learn.microsoft.com/en-us/windows/client-management/mdm/policy-csp-power#allowhibernate)
- Devices that support [Modern Standby](https://learn.microsoft.com/en-us/windows-hardware/design/device-experiences/modern-standby) have the most security because [(S1-S3) power states](https://learn.microsoft.com/en-us/windows-hardware/drivers/kernel/system-power-states) which belong to the [legacy sleep modes](https://learn.microsoft.com/en-us/windows-hardware/design/device-experiences/modern-standby-vs-s3) are not available. In Modern Standby, security components remain vigilant and the OS stays protected. Applying Microsoft Security Baselines also automatically disables the legacy (S1-S3) sleep states.
- [sets Hibernate to full](https://learn.microsoft.com/en-us/windows/win32/power/system-power-states#hibernation-file-types)
- Enables network connectivity in standby on modern standby-capable systems. This ensures security updates for Microsoft Defender and Windows will be installed automatically. [CSP](https://learn.microsoft.com/en-us/windows/client-management/mdm/policy-csp-admx-power#acconnectivityinstandby_2)
- [Disallows access to Bitlocker-protected removable data drives from earlier versions of Windows.](https://learn.microsoft.com/en-us/windows/security/information-protection/bitlocker/bitlocker-group-policy-settings#allow-access-to-bitlocker-protected-removable-data-drives-from-earlier-versions-of-windows)
Refer to this [official documentation about the countermeasures of Bitlocker](https://learn.microsoft.com/en-us/windows/security/information-protection/bitlocker/bitlocker-countermeasures)
## TLS Security

Changes made by this category only affect things that use [Schannel SSP](https://learn.microsoft.com/en-us/windows/win32/secauthn/protocols-in-tls-ssl--schannel-ssp-): that includes IIS web server, built-in inbox Windows apps and some other programs supplied by Microsoft, including Windows network communications, but not 3rd party software that use [portable stacks](https://en.wikipedia.org/wiki/Comparison_of_TLS_implementations#Portability_concerns) like Java, nodejs, python or php.
If you want to read more: [Demystifying Schannel](https://techcommunity.microsoft.com/t5/core-infrastructure-and-security/demystifying-schannel/ba-p/259233)
> [!NOTE]\
> The only [known](https://github.com/HotCakeX/Harden-Windows-Security/issues/38) program incompatible with this category is Battle.net game client.
- Disables TLS 1 and TLS 1.1 security protocols that only **exist for backward compatibility**. All modern software should and do use `TLS 1.2` and `TLS 1.3`. [CSP](https://learn.microsoft.com/en-us/windows/client-management/mdm/policy-csp-cryptography#overrideminimumenabledtlsversionclient) [CSP](https://learn.microsoft.com/en-us/windows/client-management/mdm/policy-csp-cryptography#overrideminimumenabledtlsversionserver)
- Disables [MD5 Hashing Algorithm](https://security.stackexchange.com/questions/52461/how-weak-is-md5-as-a-password-hashing-function) that is **only available for backward compatibility**
- Disables the following [weak ciphers](https://github.com/ssllabs/research/wiki/SSL-and-TLS-Deployment-Best-Practices) that are **only available for backward compatibility**: `"DES 56-bit"`,`"RC2 40-bit"`,`"RC2 56-bit"`,`"RC2 128-bit"`,`"RC4 40-bit"`,`"RC4 56-bit"`,`"RC4 64-bit"`,`"RC4 128-bit"`,`"3DES 168-bit (Triple DES 168)"`
- Configures the [TLS](https://www.ncsc.gov.uk/guidance/using-tls-to-protect-data) to only use the [following](https://developers.cloudflare.com/ssl/reference/cipher-suites/recommendations/) secure [cipher suites](https://learn.microsoft.com/en-us/windows/win32/secauthn/tls-cipher-suites-in-windows-11) and in this [exact](https://scanigma.com/knowledge-base) order: [CSP](https://learn.microsoft.com/en-us/windows/client-management/mdm/policy-csp-cryptography#tlsciphersuites)
```
TLS_CHACHA20_POLY1305_SHA256
TLS_AES_256_GCM_SHA384
TLS_AES_128_GCM_SHA256
TLS_ECDHE_ECDSA_WITH_AES_256_GCM_SHA384
TLS_ECDHE_ECDSA_WITH_AES_128_GCM_SHA256
TLS_ECDHE_RSA_WITH_AES_256_GCM_SHA384
TLS_ECDHE_RSA_WITH_AES_128_GCM_SHA256
TLS_DHE_RSA_WITH_AES_256_GCM_SHA384
TLS_DHE_RSA_WITH_AES_128_GCM_SHA256
```
- [Configures](https://learn.microsoft.com/en-us/windows-server/security/tls/manage-tls) TLS ECC Curves to [use the following](https://github.com/HotCakeX/Harden-Windows-Security/commit/5b5be1fcab8f7bf5d364f48459aecfc54c6eff9d#commitcomment-115982586) prioritized Curves order: [CSP](https://learn.microsoft.com/en-us/windows/client-management/mdm/policy-csp-cryptography#configureellipticcurvecryptography)
```
nistP521
curve25519
NistP384
NistP256
```
* By default, [in Windows](https://learn.microsoft.com/en-us/windows/win32/secauthn/tls-elliptic-curves-in-windows-10-1607-and-later), the order is this:
```
curve25519
NistP256
NistP384
```
*[Read more in this Wiki post](https://github.com/HotCakeX/Harden-Windows-Security/wiki/About-TLS,-DNS,-Encryption-and-OPSEC-concepts)*
## Lock Screen

- [Automatically locks device after X seconds of inactivity](https://learn.microsoft.com/en-us/windows/security/threat-protection/security-policy-settings/interactive-logon-machine-inactivity-limit) (just like mobile phones), which is set to 120 seconds (2 minutes) in this module, you can change that to any value you like. [CSP](https://learn.microsoft.com/en-us/windows/client-management/mdm/policy-csp-localpoliciessecurityoptions#interactivelogon_machineinactivitylimit)
- [Requires **CTRL+ALT+DEL** on the lock screen](https://learn.microsoft.com/en-us/windows/security/threat-protection/security-policy-settings/interactive-logon-do-not-require-ctrl-alt-del), kernel protected set of key strokes. The reason and logic behind it is: [CSP](https://learn.microsoft.com/en-us/windows/client-management/mdm/policy-csp-localpoliciessecurityoptions#interactivelogon_donotrequirectrlaltdel)
- A malicious user might install malware that looks like the standard sign-in dialog box for the Windows operating system and capture a user's password. The attacker can then sign into the compromised account with whatever level of user rights that user has.
- Enables [a security anti-hammering feature](https://learn.microsoft.com/en-us/windows/security/threat-protection/security-policy-settings/interactive-logon-machine-account-lockout-threshold) that sets a threshold of **5** for the number of failed sign-in attempts that causes the device to be locked by using BitLocker. Sign-in attempts include Windows password or Windows Hello authentication methods. This threshold means, if the specified maximum number of failed sign-in attempts is exceeded, the device will invalidate the Trusted Platform Module (TPM) protector and any other protector except the 48-digit recovery password, and then reboot. During Device Lockout mode, the computer or device only boots into the touch-enabled Windows Recovery Environment (WinRE) until an authorized user enters the recovery password to restore full access.
- This module (in the Bitlocker category) automatically saves the 48-digit recovery password of each drive in itself, the location of it will also be visible on the PowerShell console when you run it. It is **very important to keep it in a safe and reachable place, e.g. in OneDrive's Personal Vault which requires authentication to access. See [Here](https://www.microsoft.com/en-us/microsoft-365/onedrive/personal-vault) and [Here](https://support.microsoft.com/en-us/office/protect-your-onedrive-files-in-personal-vault-6540ef37-e9bf-4121-a773-56f98dce78c4) for more info about OneDrive's Personal Vault**
- Configures account lockout policy: [Account lockout threshold](https://learn.microsoft.com/en-us/windows/security/threat-protection/security-policy-settings/account-lockout-threshold), Sets the number of allowed failed sign-in attempts to **5**. In combination with other policies in this category, this means every 5 failed sign-in attempts will need a full day to pass before 5 more attempts can be made, otherwise Bitlocker will engage, system will be restarted and 48-digit Bitlocker code will be asked. **This policy greatly prevents brute force attempts.** [CSP](https://learn.microsoft.com/en-us/windows/client-management/mdm/policy-csp-devicelock#accountlockoutpolicy)
- Configures account lockout policy: Sets [Account lockout duration](https://learn.microsoft.com/en-us/windows/security/threat-protection/security-policy-settings/account-lockout-duration) to **1440 minutes or 1 day**. In combination with other policies in this category, this means every 5 failed sign-in attempts will need a full day to pass before 5 more attempts can be made, otherwise Bitlocker will engage, system will be restarted and 48-digit Bitlocker code will be asked. [CSP](https://learn.microsoft.com/en-us/windows/client-management/mdm/policy-csp-devicelock#accountlockoutpolicy)
- Configures account lockout policy: Sets [Reset account lockout counter](https://learn.microsoft.com/en-us/windows/security/threat-protection/security-policy-settings/reset-account-lockout-counter-after) to **1440 minutes or 1 day**. In combination with other policies in this category, this means every 5 failed sign-in attempts will need a full day to pass before 5 more attempts can be made, otherwise Bitlocker will engage, system will be restarted and 48-digit Bitlocker code will be asked. [CSP](https://learn.microsoft.com/en-us/windows/client-management/mdm/policy-csp-devicelock#accountlockoutpolicy)
- [Hides email address of the Microsoft account on lock screen](https://learn.microsoft.com/en-us/windows/security/threat-protection/security-policy-settings/interactive-logon-display-user-information-when-the-session-is-locked), if your device is in a trusted place like at home then this isn't necessary.
- [Don't display username at sign-in](https://learn.microsoft.com/en-us/windows/security/threat-protection/security-policy-settings/interactive-logon-dont-display-username-at-sign-in); If a user signs in as Other user, the full name of the user isn't displayed during sign-in. In the same context, if users type their email address and password at the sign-in screen and press Enter, the displayed text "Other user" remains unchanged, and is no longer replaced by the user's first and last name, as in previous versions of Windows 10. Additionally, if users enter their domain user name and password and click Submit, their full name isn't shown until the Start screen displays. [CSP](https://learn.microsoft.com/en-us/windows/client-management/mdm/policy-csp-localpoliciessecurityoptions#interactivelogon_donotdisplayusernameatsignin)
- [Useful](https://learn.microsoft.com/en-us/windows/security/threat-protection/security-policy-settings/interactive-logon-dont-display-username-at-sign-in#best-practices) If you have devices that store sensitive data, with monitors displayed in unsecured locations, or if you have devices with sensitive data that are remotely accessed, revealing logged on user's full names or domain account names
- [Don't display last signed-in](https://learn.microsoft.com/en-us/windows/security/threat-protection/security-policy-settings/interactive-logon-do-not-display-last-user-name); This security policy setting determines whether the name of the last user to sign in to the device is displayed on the Secure Desktop. If this policy is enabled, the full name of the last user to successfully sign in isn't displayed on the Secure Desktop, nor is the user's sign-in tile displayed. Additionally, if the Switch user feature is used, the full name and sign-in tile aren't displayed. The sign-in screen requests both Username + Windows Hello credentials. [CSP](https://learn.microsoft.com/en-us/windows/client-management/mdm/policy-csp-localpoliciessecurityoptions#interactivelogon_donotdisplaylastsignedin)
- This feature can be useful to enable if you live in *High-Risk Environments* and you don't want anyone to get any information about your accounts when you aren't logged-in.
- This policy will prevent you from using "Forgot my PIN" feature in lock screen or logon screen. If you forget your PIN, you won't be able to recover it.
- If you use Windows Hello Face or Fingerprint, you can easily login using those credential providers without the need to supply username first.
- [Don't Display Network Selection UI on Lock Screen](https://learn.microsoft.com/en-us/windows/client-management/mdm/policy-csp-windowslogon#dontdisplaynetworkselectionui) (like WIFI Icon); This setting allows you to control whether anyone can interact with available networks UI on the logon screen. Once enabled, the device's network connectivity state cannot be changed without signing into Windows. Suitable for *High-Risk Environments*. [CSP](https://learn.microsoft.com/en-us/windows/client-management/mdm/policy-csp-windowslogon#dontdisplaynetworkselectionui)
- Applies the following [PIN Complexity rules](https://learn.microsoft.com/en-us/windows/security/identity-protection/hello-for-business/hello-manage-in-organization#pin-complexity) to Windows Hello [CSP](https://learn.microsoft.com/en-us/windows/client-management/mdm/passportforwork-csp#devicetenantidpoliciespincomplexity)
- [Must include digits](https://learn.microsoft.com/en-us/windows/client-management/mdm/passportforwork-csp#usertenantidpoliciespincomplexitydigits) [CSP](https://learn.microsoft.com/en-us/windows/client-management/mdm/passportforwork-csp#devicetenantidpoliciespincomplexitydigits)
- [Expires](https://learn.microsoft.com/en-us/windows/client-management/mdm/passportforwork-csp#usertenantidpoliciespincomplexityexpiration) **every 180 days** (default behavior is to never expire) [CSP](https://learn.microsoft.com/en-us/windows/client-management/mdm/passportforwork-csp#devicetenantidpoliciespincomplexityexpiration)
- [History](https://learn.microsoft.com/en-us/windows/client-management/mdm/passportforwork-csp#usertenantidpoliciespincomplexityhistory) of the **3** most recent selected PINs is preserved to prevent the user from reusing them [CSP](https://learn.microsoft.com/en-us/windows/client-management/mdm/passportforwork-csp#devicetenantidpoliciespincomplexityhistory)
- [Must include lower-case letters](https://learn.microsoft.com/en-us/windows/client-management/mdm/passportforwork-csp#usertenantidpoliciespincomplexitylowercaseletters) [CSP](https://learn.microsoft.com/en-us/windows/client-management/mdm/passportforwork-csp#devicetenantidpoliciespincomplexitylowercaseletters)
## User Account Control

- [Prompt for elevation of privilege on secure desktop for all binaries](https://learn.microsoft.com/en-us/windows/security/identity-protection/user-account-control/user-account-control-group-policy-and-registry-key-settings#user-account-control-behavior-of-the-elevation-prompt-for-administrators-in-admin-approval-mode) in [Administrator accounts](https://learn.microsoft.com/en-us/openspecs/windows_protocols/ms-gpsb/341747f5-6b5d-4d30-85fc-fa1cc04038d4), which presents the sign-in UI and restricts functionality and access to the system until the sign-in requirements are satisfied. The [secure desktop's](https://learn.microsoft.com/en-us/windows/security/threat-protection/security-policy-settings/user-account-control-switch-to-the-secure-desktop-when-prompting-for-elevation#reference) primary difference from the user desktop is that only trusted processes running as SYSTEM are allowed to run here (that is, nothing is running at the user's privilege level). The path to get to the secure desktop from the user desktop must also be trusted through the entire chain. [CSP](https://learn.microsoft.com/en-us/windows/client-management/mdm/policy-csp-localpoliciessecurityoptions#useraccountcontrol_behavioroftheelevationpromptforadministrators)
- **This is the default behavior:** prompt the administrator in Admin Approval Mode to select either "Permit" or "Deny" for an operation that requires elevation of privilege for any non-Windows binaries. If the Consent Admin selects Permit, the operation will continue with the highest available privilege. This operation will happen on the secure desktop
- **This is the behavior that this module sets:** prompts the administrator in Admin Approval Mode to select either "Permit" or "Deny" an operation that requires elevation of privilege. If the Consent Admin selects Permit, the operation will continue with the highest available privilege. "Prompt for consent" removes the inconvenience of requiring that users enter their name and password to perform a privileged task. This operation occurs on the secure desktop.
- Only elevate executables that are signed and validated [by enforcing cryptographic signatures on any interactive application](https://learn.microsoft.com/en-us/windows/security/threat-protection/security-policy-settings/user-account-control-only-elevate-executables-that-are-signed-and-validated) that requests elevation of privilege. One of the [Potential impacts](https://learn.microsoft.com/en-us/windows/security/threat-protection/security-policy-settings/user-account-control-only-elevate-executables-that-are-signed-and-validated#potential-impact) of it is that it can prevent certain poorly designed programs from prompting for UAC. 