https://github.com/MhmRhm/SeeMake
A feature-packed, ready-to-use CMake template with testing, static and dynamic checks, coverage reports, and a tutorial.
https://github.com/MhmRhm/SeeMake
Last synced: 4 months ago
JSON representation
A feature-packed, ready-to-use CMake template with testing, static and dynamic checks, coverage reports, and a tutorial.
- Host: GitHub
- URL: https://github.com/MhmRhm/SeeMake
- Owner: MhmRhm
- License: mit
- Created: 2024-08-27T23:26:29.000Z (over 1 year ago)
- Default Branch: main
- Last Pushed: 2025-03-02T02:36:43.000Z (10 months ago)
- Last Synced: 2025-08-19T21:50:08.402Z (4 months ago)
- Language: CMake
- Homepage:
- Size: 54.7 KB
- Stars: 8
- Watchers: 2
- Forks: 0
- Open Issues: 0
-
Metadata Files:
- Readme: README.md
- License: LICENSE.txt
Awesome Lists containing this project
- trackawesomelist - SeeMake (⭐2) - A feature-packed, ready-to-use CMake template with testing, static and dynamic checks, coverage reports, and more. [`[MIT]`](https://opensource.org/licenses/MIT) (Recently Updated / [Aug 31, 2024](/content/2024/08/31/README.md))
- awesome-cmake - SeeMake - A feature-packed, ready-to-use CMake template with testing, static and dynamic checks, coverage reports, and more. [```[MIT]```][MIT] (Examples / Templates)
README
          # SeeMake

A feature-packed, ready-to-use, cross-platform CMake template with testing,

static and dynamic checks, coverage reports, and more.

This template comes with a [tutorial](https://mhmrhm.github.io/tutorials/posts/see-make/)

and a [working example](https://github.com/MhmRhm/FTowerX), so be sure to read on.

1. [Included Features](#included-eatures)

2. [Before You Begin](#before-you-begin)

3. [Using Dev Containers](#using-dev-containers)

4. [Setting Up Linux](#setting-up-linux)

5. [Setting Up Windows](#setting-up-windows)

6. [Setting Up Mac](#setting-up-mac)

7. [Final Step](#final-step)

8. [First Step](#first-step)

## Included Features:

- **Well-Structured and Easy to Extend**: The template is organized for easy

customization and expansion.

- **One-Command Workflow**: Configure, build, test, and package your project with

a single command.

- **Minimal Demo Code**: Includes examples to build an object library, one static

and one shared library, and an executable that links against them.

- **Out-of-the-Box Support**: Comes with GoogleTest, Google Benchmark, and

Boost.Test, with demo code for each.

- **Simple Dependency Management**: Most dependencies are fetched using CMake's

FetchContent, so there's no need to manually build and install Boost or Google

libraries.

- **Static and Dynamic Checks**: Uses Memcheck and Cppcheck to perform dynamic

and static checks.

- **Git Information**: Easily include Git details like commit hash and branch

name in your binary.

- **Automated Coverage Reports**: Generates test coverage reports automatically.

- **Automated Documentation**: Generates documentation with UML diagrams

automatically.

- **Code Formatting**: Automatically formats and styles your code before each

build.

- **Easy Installation**: Install targets with a single command, with well-defined

install targets and demo code.

- **Simple Packaging**: Create installers and packages for your libraries and

executables with one command.

- **CMake Config Files**: Generates CMake config files so others can easily link

against your project.

- **Cross-Platform Support**: All that on Windows, Linux and macOS!

(Dynamic checks for macOS is still a work in progress)

This work is based on material from

[Modern CMake for C++](https://github.com/PacktPublishing/Modern-CMake-for-Cpp)

by Rafał Świdziński, which is licensed under the MIT license. It is one of the

most useful books I have read.

For those using this template who want a deeper understanding, I’ve provided a

tutorial on this template at

[DotBashHistory](https://mhmrhm.github.io/tutorials/posts/see-make/).

I highly recommend that you review the tutorial or at least examine each file in

this template to understand them. You will likely need to modify these files at

some point.

I also have another project that implements the Model-View-Controller (MVC)

design pattern, using this template as a foundation. You can check it out in

action [here](https://github.com/MhmRhm/FTowerX).

## Before You Begin

I assume you will read this file in full before building the template. Below, I

will outline the necessary steps to prepare your system for the build.

Before continuing, note that this template uses CMake's FetchContent to include

most dependencies. For large repositories like Boost, this process can take some

time.

Modify the `test/CMakeLists.txt` to enable Boost:

```diff

--- a/test/CMakeLists.txt

+++ b/test/CMakeLists.txt

@@ -1,4 +1,4 @@

 include(Testing)


 add_subdirectory(libsee)

-# add_subdirectory(see)

+add_subdirectory(see)

```

If you clean the build directory by running for example:

```bash

cmake --build --preset linux-default-release --target clean

```

or by deleting the `CMakeCache.txt` file, the next build will not trigger

FetchContent. However, if you delete the entire build directory, the dependencies

will be downloaded again. For large libraries, you might consider building them

separately and then linking against them to avoid long download times. The latest

version of CMake provides improved output during the content fetching process.

I've noticed that sometimes tests aren't discovered automatically when running a

workflow for the first time using the VSCode CMake extension. If this happens,

try running the configuration and build steps separately.

```bash

cmake --list-presets

cmake --preset linux-default-release

cmake --build --list-presets

cmake --build --preset linux-default-release

```

Generating test coverage reports requires debug symbols, so coverage targets

won't build for Release configurations.

Keep in mind that on Windows, the file path length cannot exceed 260 characters.

To avoid issues, avoid using lengthy folder names.

One last thing, I've encountered a situation on Windows where having Strawberry

Perl installed can interfere with or disable Cppcheck. Just something to keep in

mind.

## Using Dev Containers

The easiest way to use this template is by installing the VSCode's Dev

Containers extension and opening the project directory in it.

Everything will work out of the box except for `cmake/BuildInfo.cmake`. Running

a `git status` command will indicate this issue. To fix it, simply run the

following command inside the container terminal:

```bash

git config --global --add safe.directory /workspaces/SeeMake

```

That's it! You can start developing.

## Setting Up Linux

To get started, you'll need to install Git and CMake. You can install CMake

either from the default repositories or by adding the Kitware repository, which

provides the latest CMake versions.

For the latest version of CMake, visit the

[Kitware APT Repository](https://apt.kitware.com).

To install CMake and Git from the repositories, run:

```bash

sudo apt-get install git cmake

```

Next, install the compiler and debugger by running:

```bash

sudo apt-get install build-essential gdb

```

This template includes a `CMakePresets.json` file with predefined workflows. To

start, run the following command and review the output. If any packages are

missing, you can install them, clean the build, and repeat the process:

```bash

cmake --workflow --list-presets

cmake --workflow --preset linux-default-release

cmake --build --preset linux-default-release --target clean

```

In CMake, a workflow combines configuration, building, testing, and packaging

steps. The command above executes all these steps in one go.

To install all necessary packages, use:

```bash

sudo apt-get install doxygen graphviz mscgen dia

sudo apt-get install clang-format

sudo apt-get install valgrind gawk

sudo apt-get install cppcheck

sudo apt-get install lcov

```

The following tools are used in this project:

- **Doxygen** and **Graphviz**: Generate project documentation with UML graphs.

- **Clang-Format**: Automatically applies standard formatting to the files.

- **Valgrind**: Checks for memory leaks during tests.

- **Cppcheck**: Performs static analysis to find potential bugs.

- **Lcov**: Generates coverage reports for tests in Debug.

Many of these reports are available in HTML format and can be easily served. To

serve a report, navigate to the corresponding directory and run:

```bash

python3 -m http.server

```

Then, open the provided address in your browser to view the report.

Examples:

1. **Documentation**:

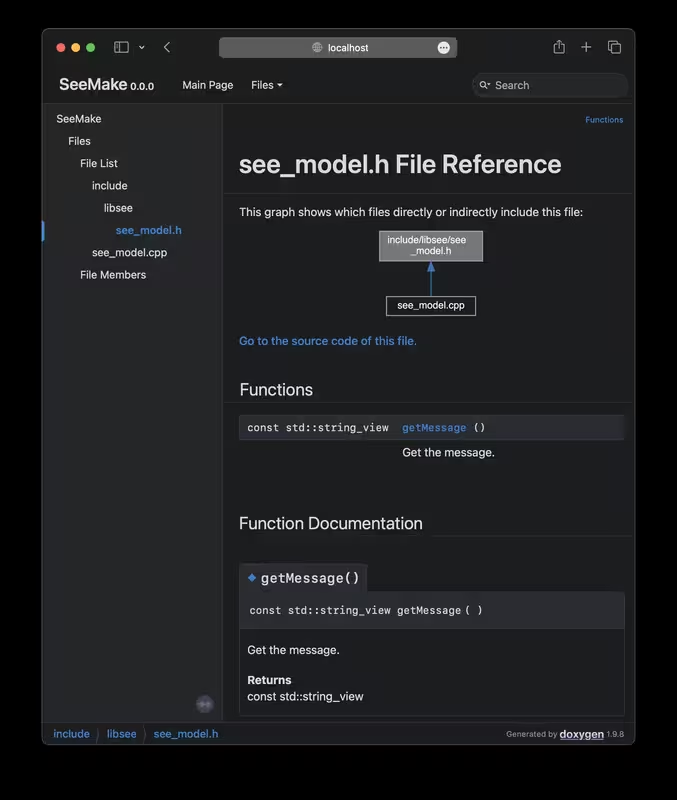
   ```bash

   cmake --build --preset linux-default-debug --target doxygen-libsee_static

   cd ../SeeMake-build-linux-default-debug/doxygen-libsee_static/

   python3 -m http.server 8172

   # Go to localhost:8172 in your browser to view the documentation

   ```


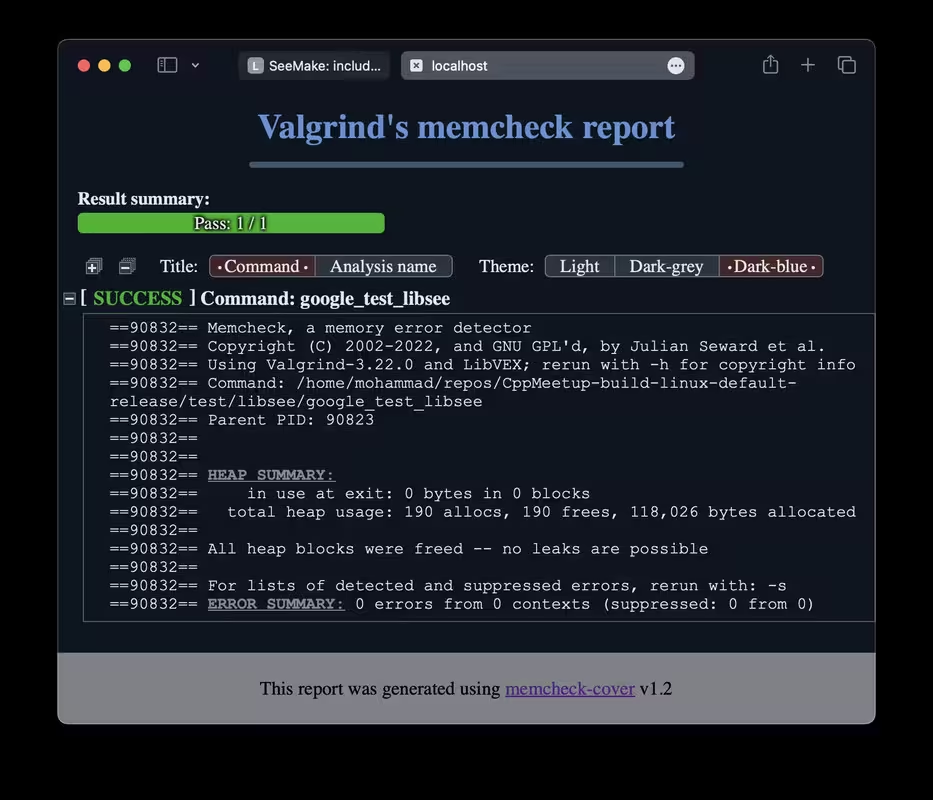
2. **Memory Check Report**:

   ```bash

   cmake --build --preset linux-default-debug --target memcheck-google_test_libsee

   cd ../SeeMake-build-linux-default-debug/valgrind-google_test_libsee/

   python3 -m http.server 8172

   # Go to localhost:8172 to view the test results

   ```


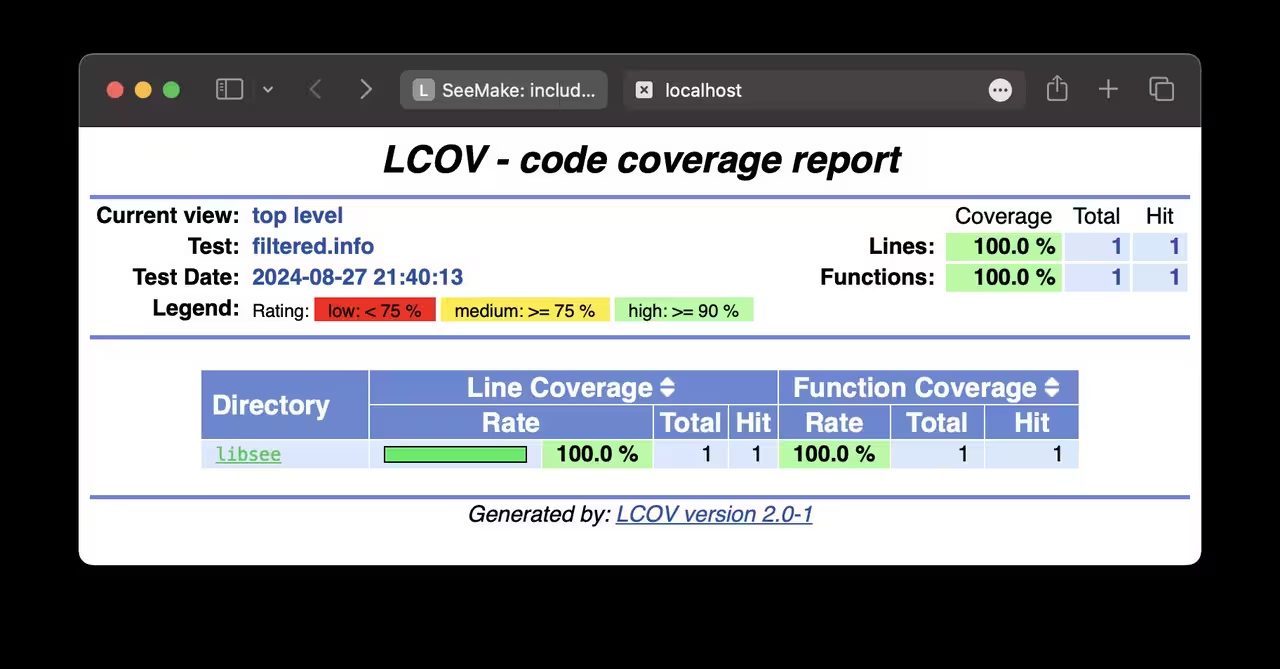
3. **Coverage Report**:

   ```bash

   cmake --build --preset linux-default-debug --target coverage-google_test_libsee

   cd ../SeeMake-build-linux-default-debug/coverage-google_test_libsee/

   python3 -m http.server 8172

   # Go to localhost:8172 to view the test coverage report

   ```


## Setting Up Windows

Setting up on Windows is quite different from Linux. On Windows, you’ll need to

manually find and install the required packages, making sure to add them to your

system's Path. Most software you install will have an option to add it to the

Path during installation, so no worries there. For any software that doesn't

offer that option, it's handled in the `CMakePresets.json` file.

The main task on Windows is to carefully download and install the required

software to set up this template. If you're developing on Windows on ARM, be sure

to download the correct binary from the software provider. Some offer custom

builds specifically for ARM architecture.

Here’s the list of software you need to download and install:

1. **[Git](https://git-scm.com/download/win)**: The default settings should be

fine. I usually change the default branch name to "main" and disable Git GUI.


2. **[CMake](https://cmake.org/download/)**: Ensure that the installer adds CMake

to the Path.

3. **[Visual Studio 2022](https://visualstudio.microsoft.com/downloads/#build-tools-for-visual-studio-2022)**:

Select the "Desktop development with C++" option.

This template includes a `CMakePresets.json` file with predefined workflows. To

start, run the following command and review the output. If any packages are

missing, you can install them, clean the build, and repeat the

process:

```bash

cmake --workflow --list-presets

cmake --workflow --preset windows-default-release

cmake --build --preset windows-default-release --target clean

```

4. **[Doxygen](https://www.doxygen.nl/download.html)**: Standard installation.

5. **[Graphviz](https://graphviz.org/download/)**: Make sure you choose the

option to add this to the Path.

6. **[LLVM](https://releases.llvm.org/download.html)**: There are many options.

For my Windows VM on Apple Silicon, I chose `LLVM-18.1.8-woa64.exe`. This package

installs `llvm-cov`, `clang-format` and Clang compilers. Make sure you select the

option to add it to the Path. On Windows coverage reports are available only with

`windows-clang-debug` preset.

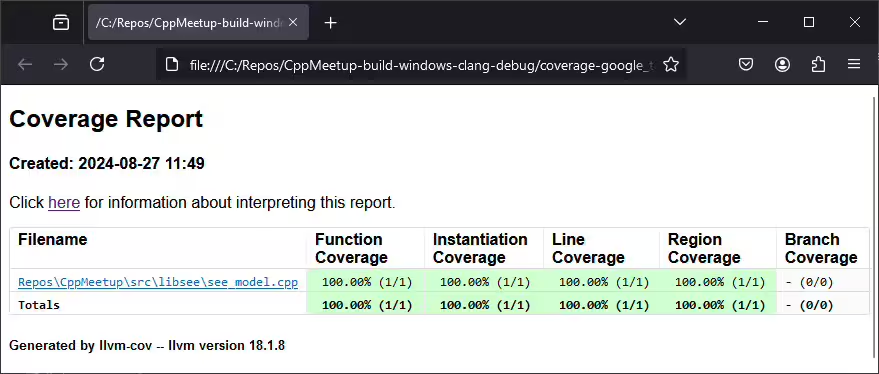
To generate coverage reports on Windows:

```bash

cmake --build --preset windows-clang-debug --target coverage-google_test_libsee

cd ../SeeMake-build-windows-clang-debug/coverage-google_test_libsee/

python3 -m http.server 8172

# Go to localhost:8172 to view the test coverage report

```


7. **[Cppcheck](https://cppcheck.sourceforge.io/)**: Standard installation.

8. **[NSIS](https://nsis.sourceforge.io/Download)**: Standard installation.

9. **[Ninja](https://ninja-build.org/)**: Copy the executable to

`C:/Program Files/ninja/`.

## Setting Up Mac

Mac support at the moment lacks dynamic checks. To set up Mac for this template,

follow these steps (replace the `` with correct value):

1. **Install Homebrew:**

   Run the following command to install Homebrew, the macOS package manager:

   ```zsh

   /bin/bash -c "$(curl -fsSL https://raw.githubusercontent.com/Homebrew/install/HEAD/install.sh)"

   (echo; echo 'eval "$(/opt/homebrew/bin/brew shellenv)"') >> /Users//.zprofile

   eval "$(/opt/homebrew/bin/brew shellenv)"

   ```

2. **Install required dependencies:**

   Use Homebrew to install the necessary tools:

   ```zsh

   brew install git cmake

   brew install cppcheck

   brew install clang-format

   brew install doxygen graphviz

   ```

3. **Set up LLVM for coverage reports:**

   Since coverage reports require LLVM tools, we need to add them to the system's

   PATH. You have two options:

   **Option 1: Use LLVM tools without changing the default Apple Clang compiler**

   Add LLVM tools (`llvm-cov` and `llvm-profdata`) to the end of your PATH to

   avoid overriding Apple's Clang compiler. Ensure that the LLVM version matches

   the default Apple Clang version to avoid compatibility issues:

   ```zsh

   clang --version

   brew install llvm@15

   echo 'export PATH="$PATH:/opt/homebrew/opt/llvm@15/bin"' >> ~/.zshrc

   ```

   **Option 2: Use LLVM entirely**

   If you'd prefer to use the latest LLVM as your default compiler, you can

   install it and add it to the front of your PATH:

   ```zsh

   brew install llvm

   echo 'export PATH="/opt/homebrew/opt/llvm/bin:$PATH"' >> ~/.zshrc

   ```

Make sure you restart the terminal for the changes in the PATH to take effect.

## Final Step

Use the following commands to see the available presets and build with the one

that matches your setup:

```bash

cmake --workflow --list-presets

cmake --workflow --preset linux-default-release

```

## First Step

One man's final step is another man's first step. After developing your

library using this template, your users will need to add it as an external

dependency. One easy way to do this is by using CMake's `FetchContent`. This

template has already set things up, so your users can add your library like

this:

```cmake

# CMakeLists.txt

cmake_minimum_required(VERSION 3.30.0)

project(Extension VERSION 0.0.0 LANGUAGES CXX)

include(FetchContent)

FetchContent_Declare(Libsee

    GIT_TAG main

    GIT_REPOSITORY https://github.com/MhmRhm/SeeMake.git

)

FetchContent_MakeAvailable(Libsee)

# or after installation:

# find_package(libsee)

add_executable(extension main.cpp)

target_link_libraries(extension PRIVATE see::libsee_shared see::precompiled)

```

In their `main.cpp`, they might write:

```cpp

// main.cpp

#include

#include

#include "libsee/see_model.h"

int main() {

  std::cout << getVersion() << std::endl;

}

```

Finally, they can compile the project easily using the `CMakePresets.json` file

or setup their own presets:

```bash

cmake --workflow --preset linux-default-release

```

This template works well with the recommended extensions for C++ development in

VSCode, so be sure to check them out.

This template is tested on both Linux and Windows. I hope you find this useful.

Please feel free to reach out if you have any improvements or suggestions.