https://github.com/Tencent/cos-mcp
基于 MCP 协议的腾讯云 COS MCP Server,无需编码即可让大模型快速接入腾讯云存储 (COS) 和数据万象 (CI) 能力。
https://github.com/Tencent/cos-mcp
Last synced: 8 months ago
JSON representation
基于 MCP 协议的腾讯云 COS MCP Server,无需编码即可让大模型快速接入腾讯云存储 (COS) 和数据万象 (CI) 能力。
- Host: GitHub
- URL: https://github.com/Tencent/cos-mcp
- Owner: Tencent
- License: other
- Created: 2025-04-21T06:25:18.000Z (8 months ago)
- Default Branch: master
- Last Pushed: 2025-04-21T09:36:50.000Z (8 months ago)
- Last Synced: 2025-04-21T10:34:40.519Z (8 months ago)
- Language: TypeScript
- Homepage:
- Size: 1.27 MB
- Stars: 5
- Watchers: 1
- Forks: 2
- Open Issues: 0
-
Metadata Files:
- Readme: README.en.md
- Changelog: CHANGELOG.md
- Contributing: Contributing Guidelines.md
- License: License.txt
- Code of conduct: code-of-conduct.md
Awesome Lists containing this project
- awesome-mcp-servers - **cos-mcp** - 基于 MCP 协议的腾讯云 COS MCP Server,无需编码即可让大模型快速接入腾讯云存储 (COS) 和数据万象 (CI) 能力。 `http` `ml` `git` `github` `typescript` `npm install Tencent/cos-mcp` (📦 Other)
- awesome-mcp-servers - Tencent Cloud COS MCP - Quickly integrate with Tencent Cloud Storage (COS) and Data Processing (CI) capabilities powered (Official Servers)
- metorial-index - Tencent Cloud COS Server - Integrate large language models with Tencent Cloud Object Storage (COS) and Data Insight (CI), enabling file management, automated cloud data handling, and various image and video processing tasks. Supports natural language-based metadata search and efficient backup workflows. (Image and Video Generation)
- awesome-mcp-servers - Tencent/cos-mcp
README
English | [中文](README.md)
# Tencent Cloud COS MCP Server 🚀🚀🚀

Tencent Cloud COS MCP Server based on the MCP protocol enables large models to quickly integrate with Tencent Cloud Storage (COS) and Data Processing (CI) capabilities without coding.
---
## ✨ Core Features
### Cloud Storage Capabilities
- ⬆️ Upload files to the cloud
- ⬇️ Download files from the cloud
- 📋 Retrieve cloud file list
### Cloud Processing Capabilities
- 🖼️ Retrieve image information
- 🔍 Image super-resolution
- ✂️ Image cropping
- 📲 QR code recognition
- 🏆 Image quality assessment
- 🅰️ Text watermarking
- 🎬 Metadata/Natural Language Search (MateInsight)
- 📄 Document to PDF conversion
- 🎥 Video thumbnail extraction
---
## 💡 Typical Use Cases
- Upload text/images/videos/audio data obtained from other MCP capabilities directly to COS cloud storage.
- Quickly transfer local data to COS cloud storage/backup via large models.
- Automate tasks with large models: batch transfer videos/images/audio/text data from web pages to COS cloud storage.
- Automate cloud processing of videos/images/audio/text data and transfer results to COS cloud storage.
---
## 🌟 Feature Examples
1. Upload files to COS
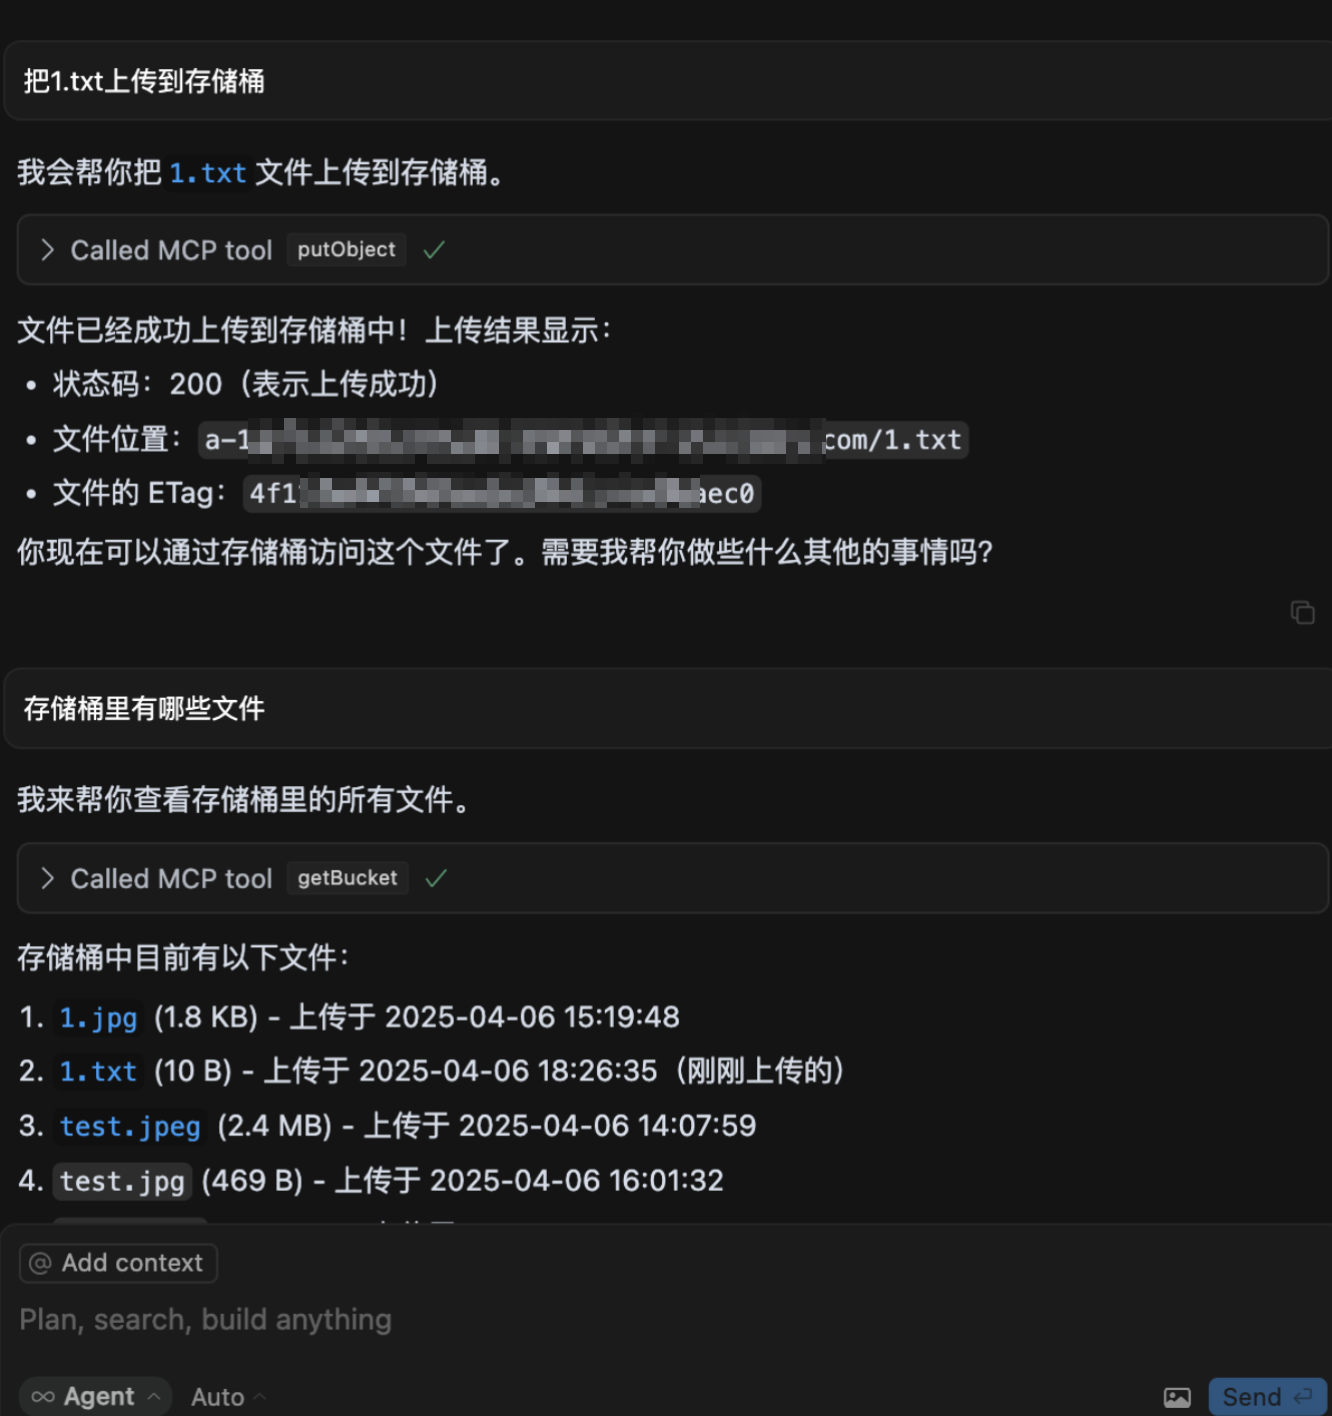
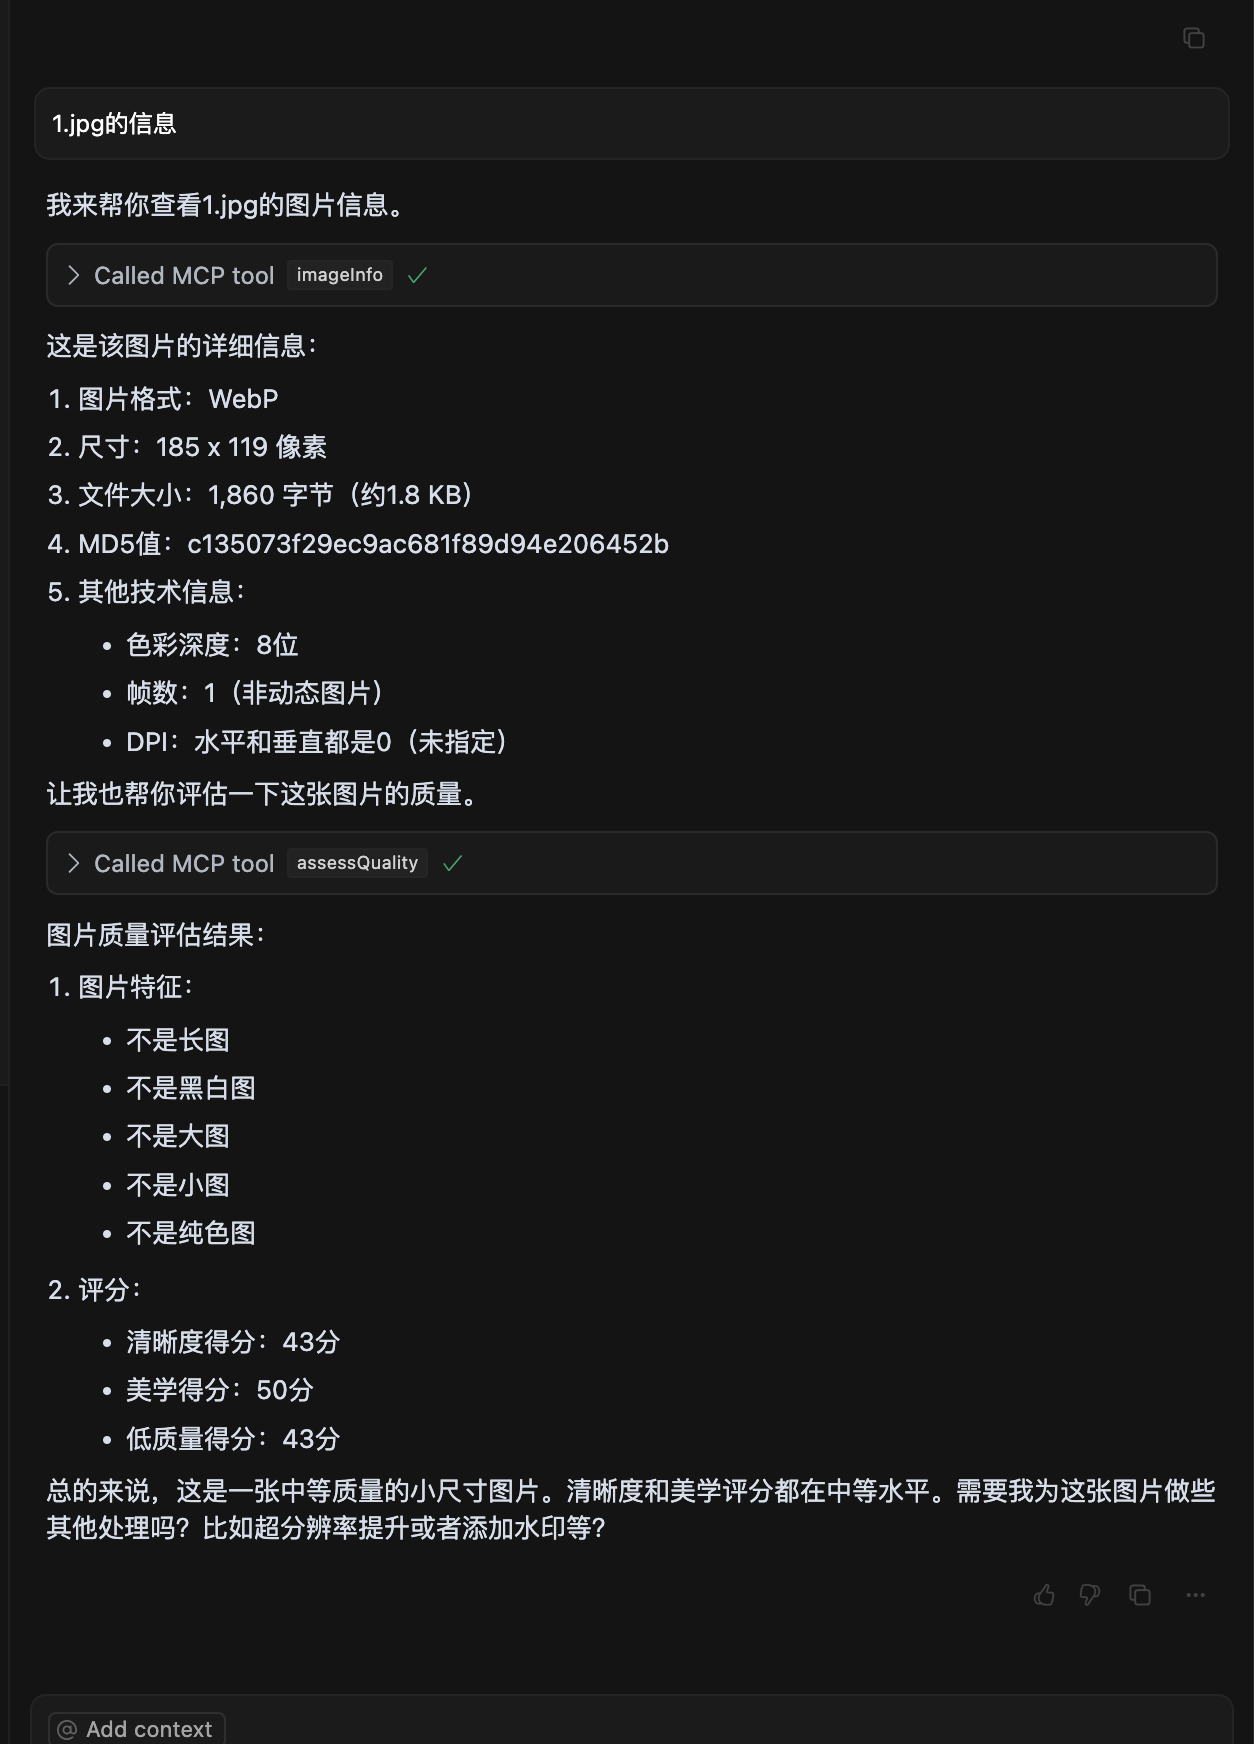
2. Image quality assessment
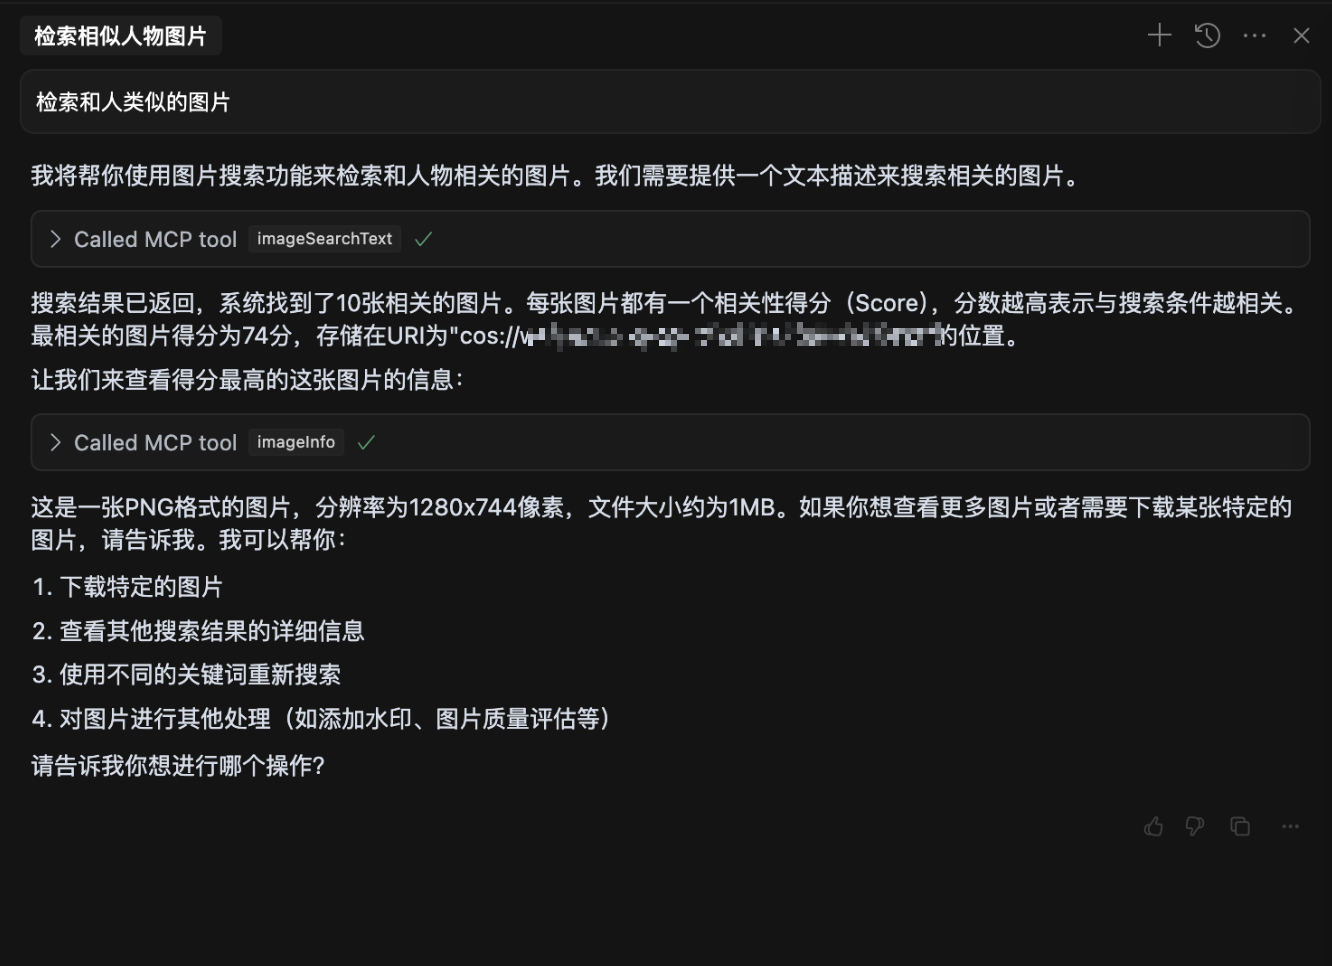
3. Natural language image search
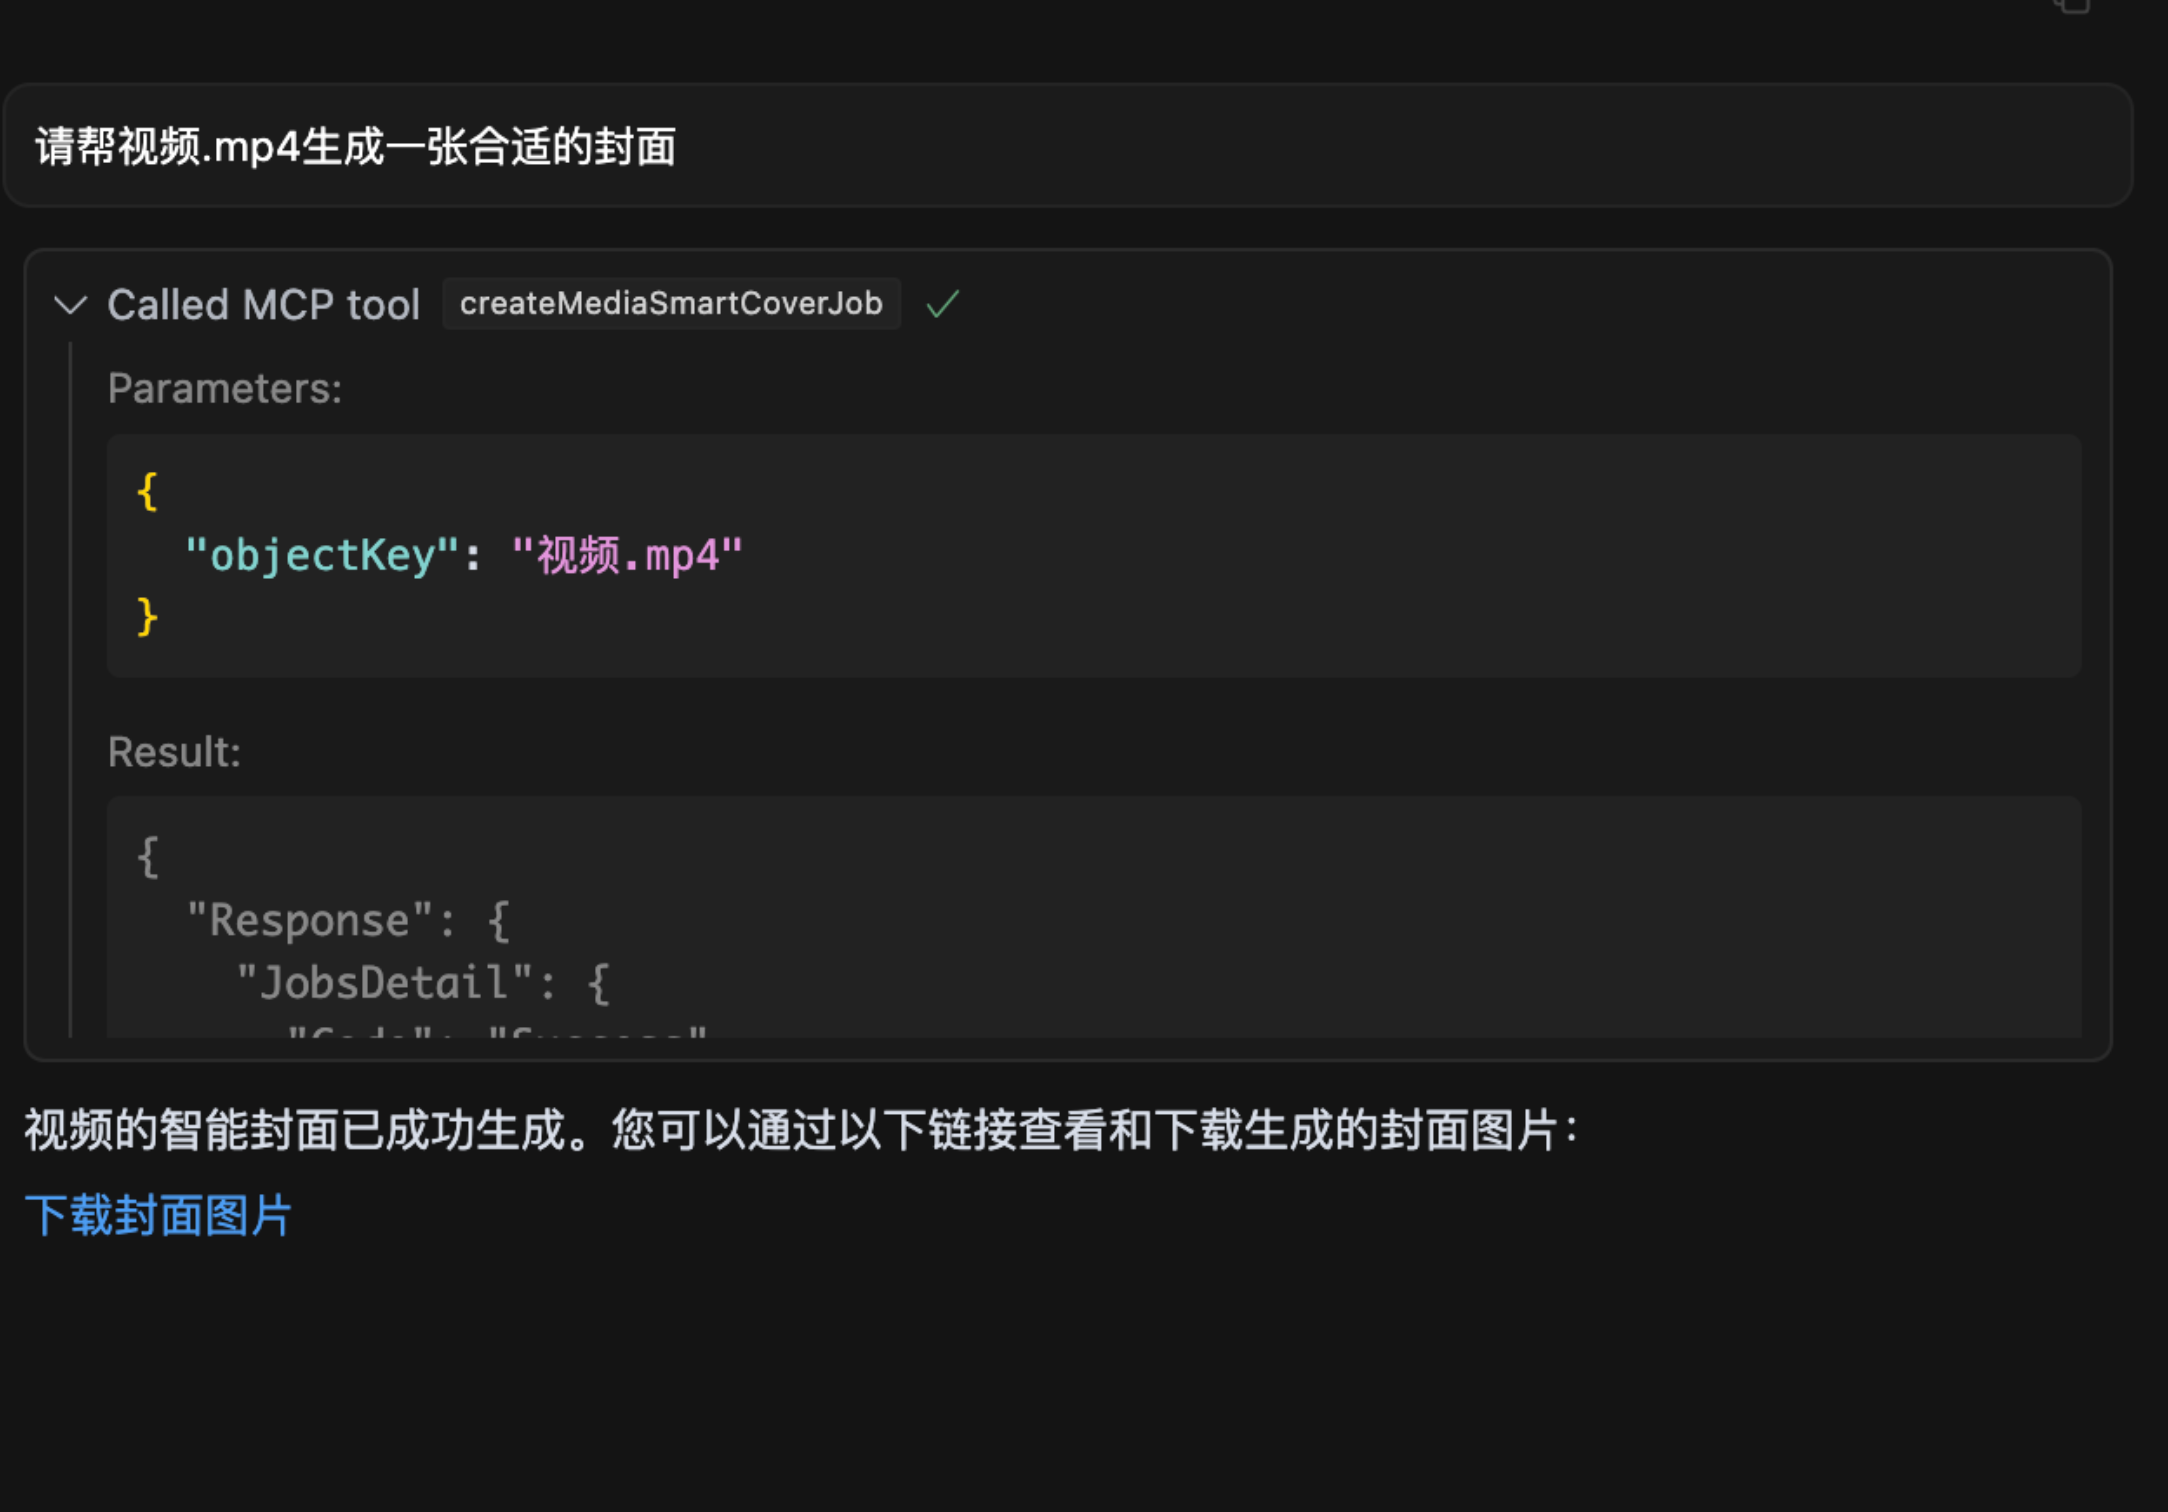
4. Video frame extraction
---
# 🔧 Installation and Usage
## Parameter Description
To protect your data privacy, prepare the following parameters:
### 1. **SecretId / SecretKey**
- **Description**: Tencent Cloud COS keys for authentication. Keep them secure and do not disclose.
- **How to Obtain**:
1. Visit [Tencent Cloud Key Management](https://console.cloud.tencent.com/cam/capi).
2. Create a new key and copy the generated **SecretId** and **SecretKey**.
### 2. **Bucket**
- **Example**: `mybucket-123456`
- **Description**: The bucket name for storing data, equivalent to your personal storage space.
- **How to Obtain**:
1. Visit [Bucket List](https://console.cloud.tencent.com/cos/bucket).
2. Copy the bucket name. If no bucket exists, click "Create Bucket" and use the default configuration for quick setup.
### 3. **Region**
- **Example**: `ap-beijing`
- **Description**: The region where the bucket is located.
- **How to Obtain**:
1. Find the bucket in the [Bucket List](https://console.cloud.tencent.com/cos/bucket).
2. Copy the region from the bucket's row, e.g., `ap-beijing`.
### 4. **DatasetName**
- **Description**: Optional parameter required for intelligent data retrieval operations.
- **How to Obtain**:
1. Visit [Dataset Management](https://console.cloud.tencent.com/cos/metaInsight/dataManage).
2. Create a dataset and wait for indexing to complete, then copy the dataset name.
### 5. **connectType**
- **Description**: Optional parameter to specify the connection type, either `stdio` (local) or `sse` (remote).
- **Default Value**: `stdio`
### 6. **port**
- **Description**: Optional parameter for setting the port when using `sse` connection type.
- **Default Value**: `3001`
---
## Start with npx
When used within a large model (e.g., cursor), configure `mcp.json` as follows:
```json
{
"mcpServers": {
"cos-mcp": {
"command": "npx",
"args": [
"cos-mcp",
"--Region=yourRegion",
"--Bucket=yourBucket",
"--SecretId=yourSecretId",
"--SecretKey=yourSecretKey",
"--DatasetName=yourDatasetname"
]
}
}
}
```
Alternatively, use JSON configuration:
```json
{
"mcpServers": {
"cos-mcp": {
"command": "npx",
"args": [
"cos-mcp",
"--cos-config='{\"Region\":\"yourRegion\",\"Bucket\":\"yourBucket\",\"SecretId\":\"yourSecretId\",\"SecretKey\":\"yourSecretKey\",\"DatasetName\":\"yourDatasetname\"}'"
]
}
}
}
```
---
## Install via npm
```bash
# Install
npm install -g cos-mcp@latest
# Run in SSE mode
cos-mcp --Region=yourRegion --Bucket=yourBucket --SecretId=yourSecretId --SecretKey=yourSecretKey --DatasetName=yourDatasetname --port=3001 --connectType=sse
# Or use JSON configuration
cos-mcp --cos-config='{"Region":"yourRegion","Bucket":"BucketName-APPID","SecretId":"yourSecretId","SecretKey":"yourSecretKey","DatasetName":"datasetName"}' --port=3001 --connectType=sse
```
When using SSE mode within a large model (e.g., cursor), configure `mcp.json` as follows:
```json
{
"mcpServers": {
"cos-mcp": {
"url": "http://localhost:3001/sse"
}
}
}
```
---
## Install from Source
### Step 1: Clone the Repository
```bash
git clone https://github.com/Tencent/cos-mcp.git
cd cos-mcp
```
### Step 2: Install Dependencies
```bash
npm install
```
### Step 3: Start the Service
#### 3.1 Configure Local Environment Variables
Create a `.env` file and configure the following variables:
```env
Region='yourRegion'
Bucket='yourBucket'
SecretId='yourSecretId'
SecretKey='yourSecretKey'
DatasetName="yourDatasetName"
```
#### 3.2 Start in Local SSE Mode (Option 1)
```bash
npm run start:sse
```
#### 3.3 Build and Use in STDIO Mode (Option 2)
```bash
npm run build
```
The build output is located at `dist/index.js`.
---
### Step 4: Use in a Large Model
#### SSE Mode Configuration
```json
{
"mcpServers": {
"cos-mcp": {
"url": "http://localhost:3001/sse"
}
}
}
```
#### STDIO Mode Configuration
```json
{
"mcpServers": {
"cos-mcp": {
"command": "node",
"args": [
"${your work space}/dist/index.js"
]
}
}
}
```
After completing the above steps, you can run COS MCP Server from the source code.
---
## ⚠️ Notes
1. If an older version of the package is installed, replace `cos-mcp` with `cos-mcp@latest` in the commands to install the latest version.
2. If the globally installed `cos-mcp` command does not work, it may be due to global variable issues. Use split variables or the `npx` method to start:
```bash
npm install -g cos-mcp@latest
cos-mcp --cos-config=xxx --port=3001 --connectType=sse
```
The above command is equivalent to:
```bash
npx cos-mcp@latest --cos-config=xxx --port=3001 --connectType=sse
```
3. If parsing issues occur, it may be due to terminal sensitivity to double quotes. Modify the configuration parameters as follows and try again:
```bash
--cos-config='{\"Region\":\"yourRegion\",\"Bucket\":\"BucketName-APPID\",\"SecretId\":\"yourSecretId\",\"SecretKey\":\"yourSecretKey\",\"DatasetName\":\"datasetName\"}' --port=3001 --connectType=sse
```
---
## 📄 License
[](License.txt)