https://github.com/Urtaq/URWeatherView
Show the weather effects onto view written in Swift4.2
https://github.com/Urtaq/URWeatherView
carthage cloud cocoapods dust glsl-shaders hot image-kernel lightning lottie rain snow swift wavewarp weather
Last synced: 10 months ago
JSON representation
Show the weather effects onto view written in Swift4.2
- Host: GitHub
- URL: https://github.com/Urtaq/URWeatherView
- Owner: Urtaq
- License: mit
- Created: 2017-04-21T09:28:48.000Z (about 9 years ago)
- Default Branch: master
- Last Pushed: 2019-01-07T11:50:57.000Z (over 7 years ago)
- Last Synced: 2024-05-29T04:51:02.886Z (about 2 years ago)
- Topics: carthage, cloud, cocoapods, dust, glsl-shaders, hot, image-kernel, lightning, lottie, rain, snow, swift, wavewarp, weather
- Language: Swift
- Homepage:
- Size: 116 MB
- Stars: 448
- Watchers: 11
- Forks: 35
- Open Issues: 1
-
Metadata Files:
- Readme: README.md
- License: LICENSE
Awesome Lists containing this project
- awesome-ios - URWeatherView - Show the weather effects onto view. (UI / Other Testing)
README
# URWeatherView
[](https://github.com/sindresorhus/awesome) [](https://swift.org) [](https://cocoapod-badges.herokuapp.com/p/URWeatherView/badge.png) [](https://cocoapods.org/pods/URWeatherView)   [](https://github.com/CocoaPods/CocoaPods) [](https://github.com/Carthage/Carthage) [](https://app.fossa.io/projects/git%2Bgithub.com%2Fjegumhon%2FURWeatherView?ref=badge_shield)
## What is this for?
Showing some kinds of the weather effect, written in **Swift4.2**.
This code style is the **`Protocol Oriented Programming`**.
To show the vector animation made by After Effect, [Lottie](http://airbnb.design/lottie/) can be used instead of UIImageView.
## Before using URWeatherView, Which resources do you need?
#### 1. main image or main lottie resource (Required)
- The weather effect's main target
- apply tone curve filter or gradient mask
#### 2. backgroundImage of main (Optional)
- The weather effect's background Image
#### 3. upperImage of main (Optional)
- The weather effect's upper Image
- If you want extra effect, you can use it.
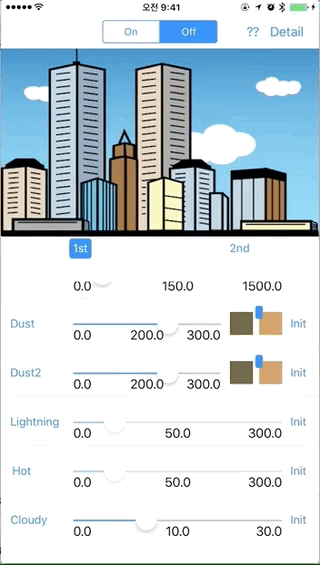
### Usable Weather Effects
#### 1. Snow

#### 2. Rain

#### 3. Dust
* #1

* #2

#### 4. Lightning
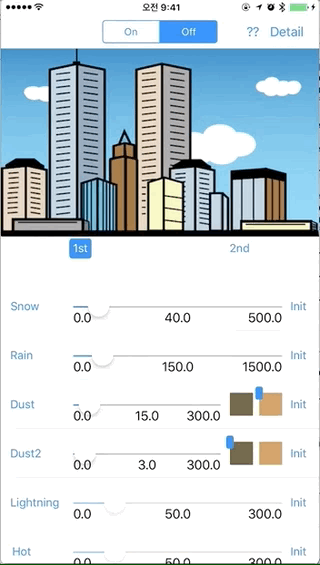
#### 5. Hot

#### 6. Cloudy
## Used library stack
#### [SpriteKit](https://developer.apple.com/spritekit/)
#### [CIFilter](https://github.com/airbnb/lottie-ios) & [CIKernel](https://developer.apple.com/documentation/coreimage/cikernel) & [Core Imager Kernel Language(like GLSL)](https://developer.apple.com/library/content/documentation/GraphicsImaging/Reference/CIKernelLangRef/ci_gslang_ext.html)
#### [Lottie](https://github.com/airbnb/lottie-ios)
* I needed to apply color filter for the weather effect.
So, I made custom Lottie library to get some properties from LOTAnimationView.
* It's [lottie-ios-extension](https://github.com/jegumhon/lottie-ios).
## Requirements
* iOS 10.0+
* Swift 4.2+ (Swift 3.x version is [v0.6.4](https://github.com/jegumhon/URWeatherView/tree/0.6.4))
## Installation
### Cocoapods
Add the following to your `Podfile`.
pod "URWeatherView"
#### Dependency
[lottie-ios-extension](https://github.com/jegumhon/lottie-ios)
(But, you don't need to care about this, when using URWeatherView. It's already included the dependency.)
### Carthage
Add the following to your `Cartfile`.
github "jegumhon/URWeatherView"
#### Dependency
[lottie-ios-extension](https://github.com/jegumhon/lottie-ios)
(But, you don't need to care about this, when using URWeatherView. It's already included the dependency.)
## Examples
See the `Example` folder.
Run `pod install` and open the .xcworkspace.
(The Example source is made for using Carthage.
So, you remove the linked frameworks in `General` of the project settings.
And then, you remove the run script of Carthage in `Build Phases` of the project settings.)
or
Run `carthage update` and open the .xcodeproj.
## Usage
```swift
import URWeatherView
```
#### 1. initialize the weather view
```swift
// for example...
// You can use the xib or storyboard to show the URWeatheView...
@IBOutlet var mainView: URWeatherView!
override func viewDidLoad() {
super.viewDidLoad()
// set the main Image to apply the weather effects...
// and set the backgroundImage, if you want to apply...
self.mainView.initView(mainWeatherImage: #imageLiteral(resourceName: "buildings"), backgroundImage: #imageLiteral(resourceName: "bluesky.en"))
// or, to use Lottie, do like below..
// self.mainView.initView(dataNameOfLottie: "data", backgroundImage: #imageLiteral(resourceName: "bluesky.en"))
}
```
##### 1.1. How to use Lottie
* You can find the detail Lottie usage guide at the [Lottie-iOS](https://github.com/airbnb/lottie-ios)
* add the lottie files in the project, and then just use the json file name to load the Lottie View
#### 2. show or remove the weather effects
```swift
func showWeather() {
let weather: URWeatherType = .cloudy
self.mainView.startWeatherSceneBulk(weather, debugOption: true, additionalTask: {
// task what you want to do after showing the weather effect...
})
}
func removeWeather() {
self.mainView.stop()
}
```
#### 3. 😀 Configurable parameters of URWeatherView 😀
Using or composing the functions in the URWeatherView, you can customize the weather effects.
The default configurable parameters are like below.
* **birthRate** : The particle's birth rate. This is used in the effects. e.g. Snow, Rain, Dust, Cloud.
* **upperImage** : The image onto the weather view. (optional)
* **duration** : The duration(in second). applied some effects among the URWeatherView's effects.
* **debugOption** : enable to show the debug option of SpriteKit's. Default is "false". This is for the SpriteKit frame checking.
* **cloud effect's option** : especially, you can customize the cloud effect with this structure. The sample codes is included in the example codes. Or you can see the codes below.
```swift
case .cloudy:
// self.mainView.startWeatherSceneBulk(cell.weather, duration: 33.0, debugOption: self.segment.selectedSegmentIndex == 0)
self.mainView.initWeather()
self.mainView.setUpperImageEffect(customImage: nil)
let option = UREffectCloudOption(CGRect(x: 0.0, y: 0.5, width: 1.0, height: 0.5), angleInDegree: 0.0, movingDuration: 33.0)
self.mainView.startWeatherScene(cell.weather, duration: 33.0, userInfo: [URWeatherKeyCloudOption: option])
```
## To-Do
- [ ] exchange the Core Image Kernel to [Metal](https://developer.apple.com/metal/).
## License
URWeatherView is available under the MIT license. See the [LICENSE](LICENSE) file for more info.
[](https://app.fossa.io/projects/git%2Bgithub.com%2Fjegumhon%2FURWeatherView?ref=badge_large)