https://github.com/Vulnogram/Vulnogram
Vulnogram is a tool for creating and editing CVE information in CVE JSON format
https://github.com/Vulnogram/Vulnogram
cve cve-json cvss cvssv3 cwe json nvd security security-automation security-tools security-vulnerability vulnerability
Last synced: about 1 year ago
JSON representation
Vulnogram is a tool for creating and editing CVE information in CVE JSON format
- Host: GitHub
- URL: https://github.com/Vulnogram/Vulnogram
- Owner: Vulnogram
- License: mit
- Created: 2017-10-24T19:04:39.000Z (over 8 years ago)
- Default Branch: master
- Last Pushed: 2024-10-31T04:27:53.000Z (over 1 year ago)
- Last Synced: 2024-10-31T05:20:08.322Z (over 1 year ago)
- Topics: cve, cve-json, cvss, cvssv3, cwe, json, nvd, security, security-automation, security-tools, security-vulnerability, vulnerability
- Language: JavaScript
- Homepage: https://vulnogram.github.io/
- Size: 1.56 MB
- Stars: 161
- Watchers: 8
- Forks: 45
- Open Issues: 35
-
Metadata Files:
- Readme: README.md
- License: LICENSE.txt
Awesome Lists containing this project
- awesome-hacking-lists - Vulnogram/Vulnogram - Vulnogram is a tool for creating and editing CVE information in CVE JSON format (JavaScript)
- awesome-starz - Vulnogram/Vulnogram - Vulnogram is the tool for reserving, managing, and publishing CVEs. Get started at vulnogram.org or deploy Docker edition for full enterprise features. (JavaScript)
README
# Vulnogram
_Making the world safer one CVE ID at a time, since 2017._
## Introduction
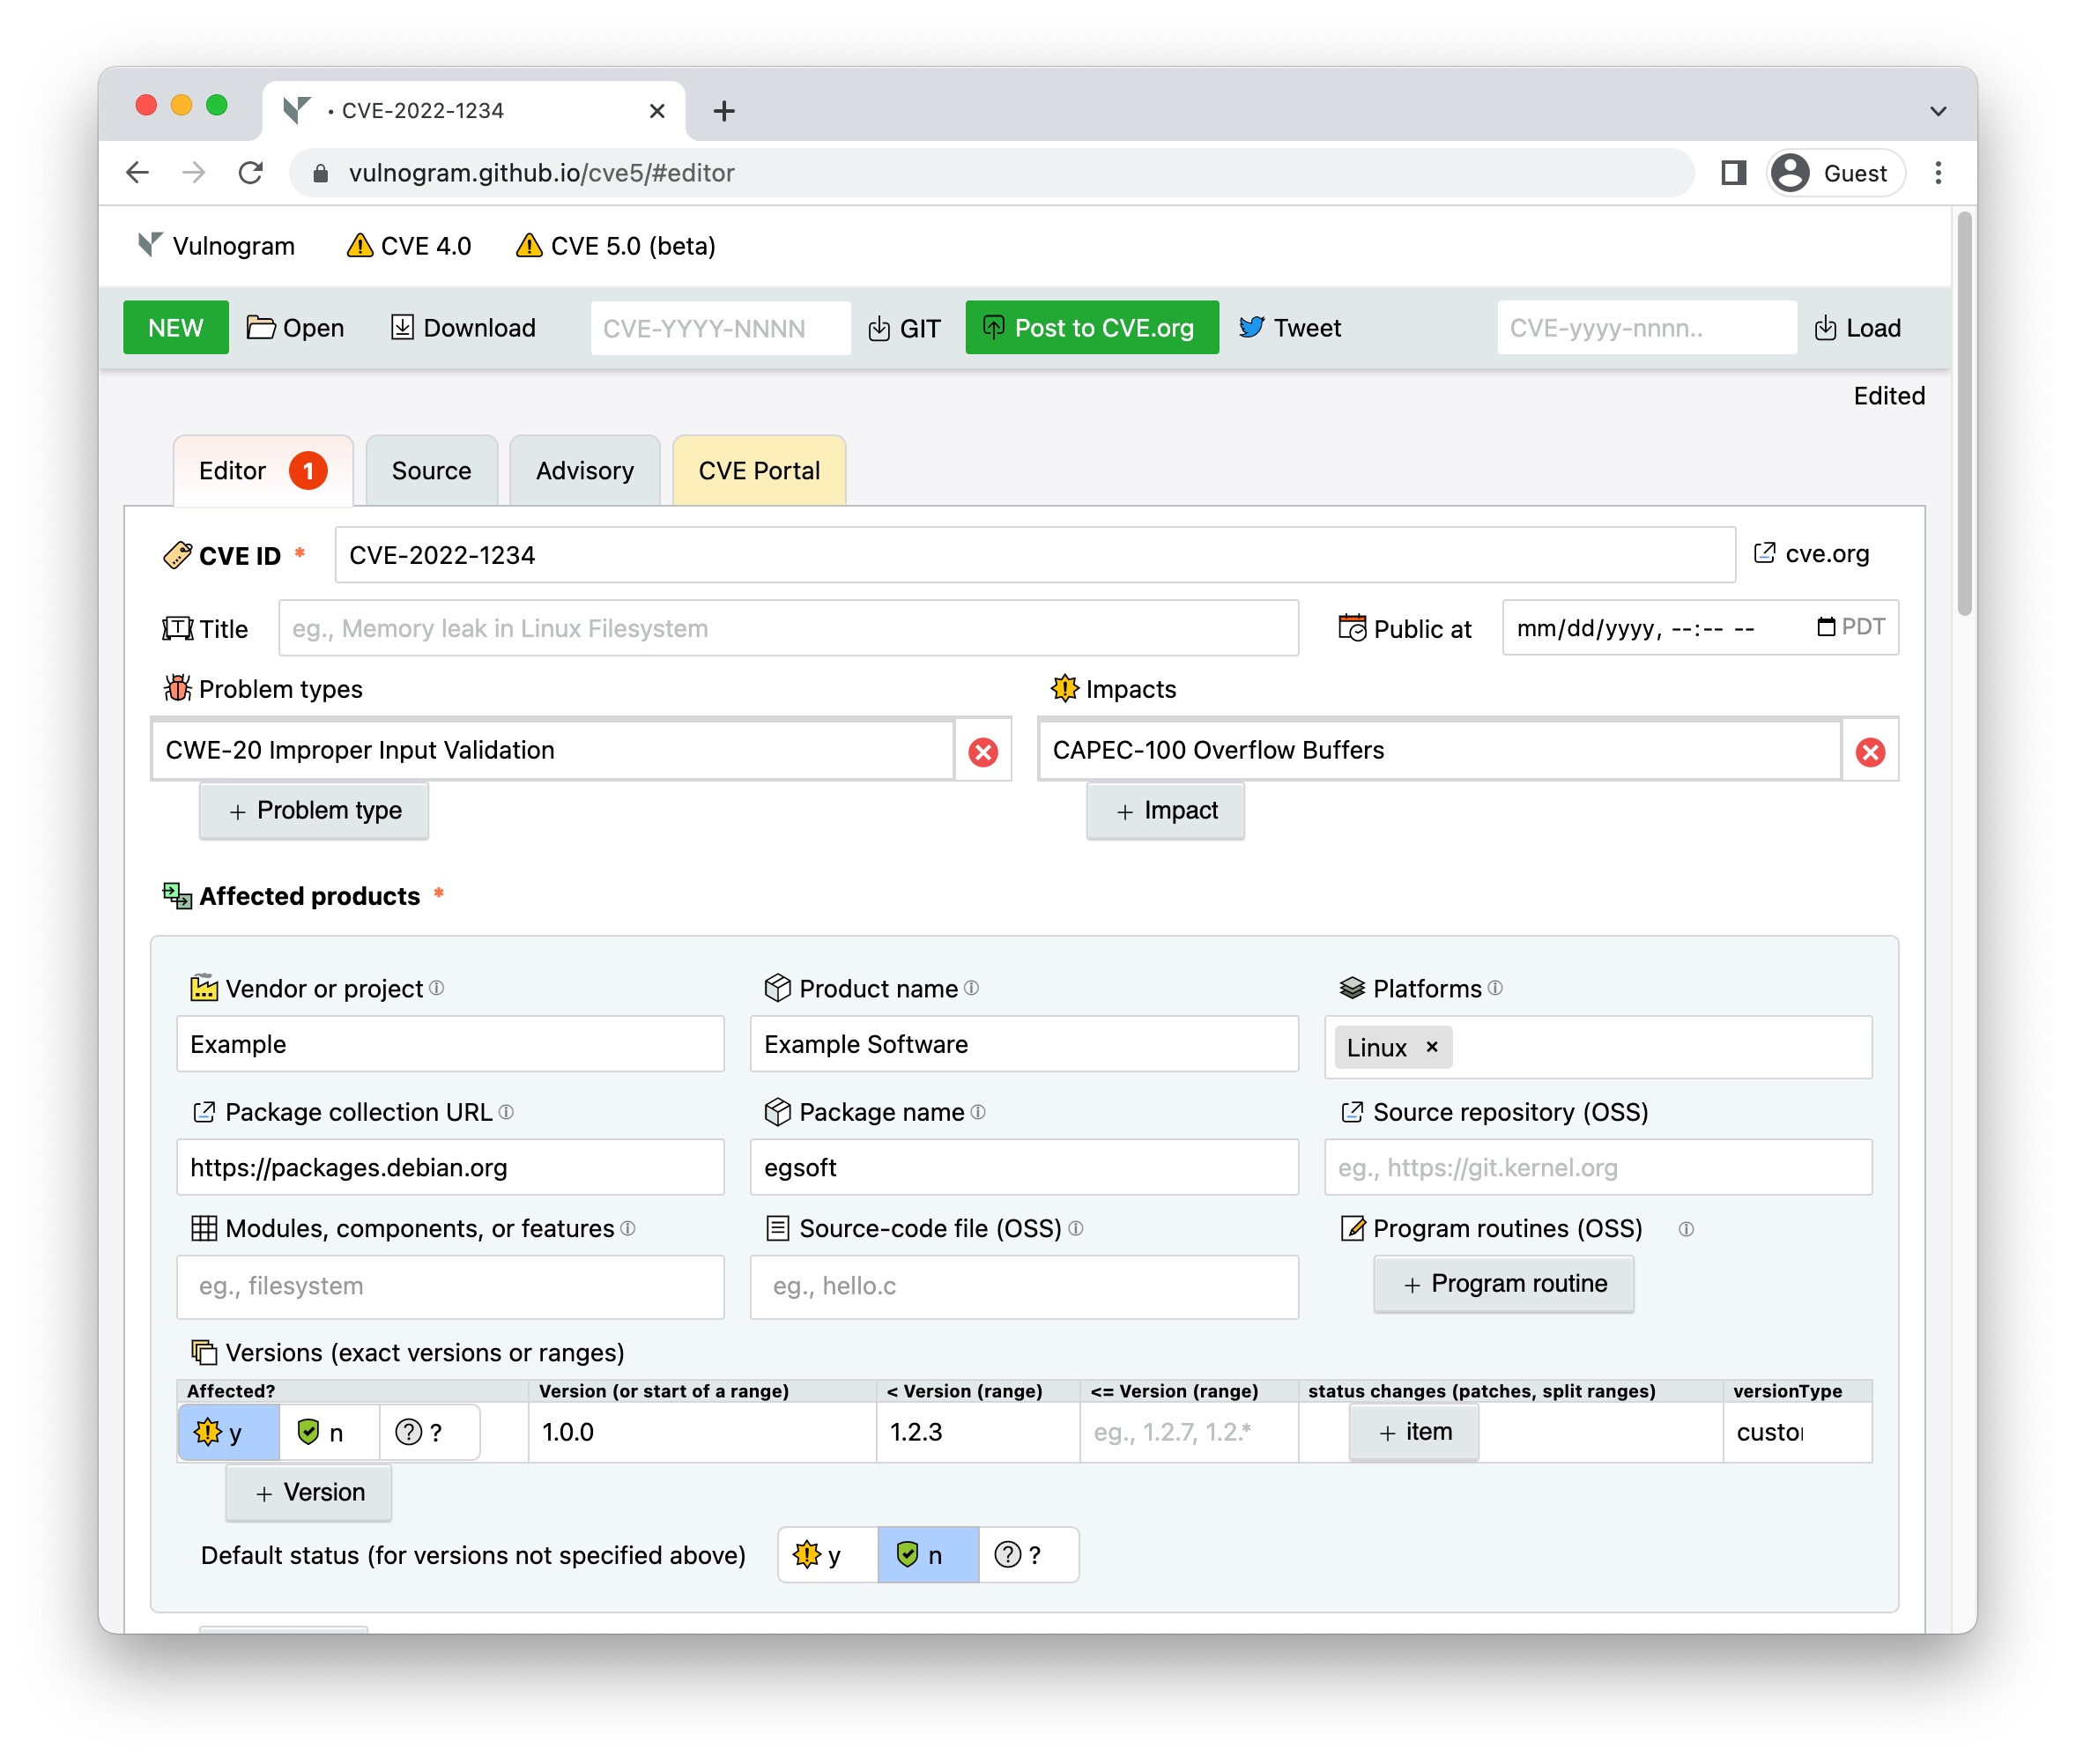
Vulnogram is a tool for creating and editing CVE information in CVE JSON format, and for generating advisories.
The name Vulnogram is inspired from Greek origin suffix '-gram' which is used for denoting something written or recorded especially in a certain way. Vulnerability related information when recorded in a standard format can help in aggregation, curation, dissemination, analysis and remediation. This enables automation and efficiency in response activities.
Vulnogram project aims to make it easier for vendors and security researchers to accurately record vulnerability information for inclusion in the CVE List.
## Getting started
Vulnogram can be deployed in two modes:
| Browser mode | Server mode |
|------------------------------|------------|
| Frontend web UI only, as seen on [vulnogram.github.io](https://vulnogram.github.io). | A NodeJS web application serves frontend web UI for a backend Mongodb. |
| It is a Javascript based tool to open, import, edit, preview and save JSON documents which conform to a given [JSON-Schema](https://json-schema.org). | It is a modern scalable issue tracker similar to JIRA or bugtrack but using [JSON-Schemas](https://json-schema.org) as data models and a NoSQL database as a backend. Along with customizable [plugins](https://github.com/Vulnogram/plugins) it can be used for tracking anything that can be expressed with a [JSON-Schema](https://json-schema.org). [plugins](https://github.com/Vulnogram/plugins) are available for tracking security incidents, tickets, contacts, NVD entries and CVE assignments. |
| Can't save CVE JSON drafts. | JSON documents are saved to a NoSQL (Mongodb) backend. |
| No login required. | Users are authenticated. |
| No workflow or tracking. | Allows tracking, querying, searching, version control, audit trail of changes, commenting and dashboard charts and graphs on collections of JSON documents. |
| Security considerations:
👍 Information entered in the tool is not transmitted anywhere out of the browser.
ℹ️ Download button saves the JSON document in the browser to a local file.
⚠️ Ensure local filesystem is secured.
⚠️ Avoid using the tool on a public computer (beware of browser autofill). | Security considerations:
ℹ️ Configure HTTPS in the config file.
⚠️ Ensure that MongoDB is secured and hardened. Mongodb backend is used for storing documents on the server.
⚠️ Keep configuration files secured.
⚠️ Only create accounts for trusted users. There is no RBAC or ACL feature (as of now)! |
## Server mode deployment
### Step 1. Install required Node.js modules
```console
$ cd vulnogram
$ npm install
... this should install required dependencies, (except process monitors) ...
```
### Step 2. Setup monogodb to be used for persistent storage of CVE JSON and users
See .
**Important**: Ensure mongodb authentication is enabled. It is recommended to run mongodb bound to loopback/localhost and not expose it to network.
### Step 3. Edit the config parameters in conf.js to suit your requirements
See config/conf-default.js comments for hints.
### Step 4 (Optional). Add custom templates, schemas, or routes
Copy the "default" directory as "custom" and modify relevant pug templates, schemas or routes. Files or fields from "custom" override "default".
### Step 5. Configure a user on the CLI for logging in
```console
$ node useradd.js tester tester@example.com Tester sirt@example.com 1
Enter Password: ********************************************
Enter Password again: ********************************************
Success New user is now registered and can log in: tester
```
### Step 6 (Optional). Configure the .env file
Copy the `example.env` file to `.env` and configure the environment variables to values you prefer. The values in `.env` will automatically be loaded as environment variables when Vulnogram starts. See [dotenv](https://github.com/motdotla/dotenv) for more details.
### Step 7. Start the node application
```plaintext
$ node app.js
```
(set `NODE_ENV=development` for local testing without HTTPS)
### Step 8. Run the application as a daemon server
Use a process monitor like [pm2](https://www.npmjs.com/package/pm2) (preferred) or [forever] to run vulnogram as a service:
#### 8.a Example using [pm2](https://www.npmjs.com/package/pm2)
First install pm2 using instruction [at pm2 documentation](https://www.npmjs.com/package/pm2)
```console
$ pm2 start app.js
[PM2] Spawning PM2 daemon with pm2_home=/home/vulnogram/.pm2
[PM2] PM2 Successfully daemonized
[PM2] Starting /home/vulnogram/app.js in fork_mode (1 instance)
[PM2] Done.
```
#### 8.b Example using [forever](https://www.npmjs.com/package/forever)
```console
$ forever start app.js
> Vulnogram@0.0.6 start /home/vulnogram/
> forever start --id 'vulnogram' --spinSleepTime 5000 --minUptime 2000 app.js
info: Forever processing file: app.js
info: Forever processes running
data: uid command script forever pid id logfile uptime
data: [0] v3wE /usr/bin/node app.js 11208 11210 vulnogram /home/vulnogram/.forever/v3wE.log 0:0:0:0.23
```
### Step 9. Finish
Web application should be now accessible at one of the following addresses, depending on configuration:
-
-
## Browser mode deployment
### Step 1. Install required NodeJS modules
Note: NodeJS 14.0.0 or later is required to generate files (NodeJS is not needed on a web server; it is only needed to execute the `node` command locally).
Install required NodeJS modules by following [step 1](https://github.com/Vulnogram/Vulnogram#step-1-install-required-nodejs-modules) above.
### Step 2 (Optional). Configure defaults
Edit the `config/conf-standalone.js` file to suit your requirements.
### Step 3 (Optional). Add custom functionality
See [step 4](https://github.com/Vulnogram/Vulnogram#step-4-optional-add-custom-templates-schemas-or-routes) above
### Step 4. Generate files needed for a front-end only static website (browser mode)
```plaintext
$ make min
```
This creates standalone /index.html with minimized JavaScript and stylesheets can be hosted independently on websites serving static files. This does not require the backend MongoDB server or the NodeJS server application to be running.
Note: Opening the index.html as a file URL may not work since some browsers (including Chrome) will not run async requests on file:// URLs. It is recommended to serve these files from a webserver. See for examples on how to run a simple testing webserver.
## Docker deployment
To run Vulnogram in a container alongside MongoDB, run the following command:
```plaintext
$ docker compose up
```
To modify the configuration options available, make a copy of the example.env file and make relevant modifications. Then launch Vulnogram by using the `ENV_VAR_PATH` environment variable. Replace `example.env` with the path to your file:
```plaintext
$ ENV_VAR_PATH=example.env docker compose up
```
To change the ports that Vulnogram or MongoDB are running on, use the `MONGO_PORT` and `VULNOGRAM_PORT` environment variables. When doing this, make sure to make the appropriate modifications within the environment variables file as well, so that the ports used inside the container match those being passed to docker compose:
```console
$ cat my-env-vars.env | grep PORT
MONGO_PORT=12345
VULNOGRAM_PORT=54321
$ MONGO_PORT=12345 VULNOGRAM_PORT=54321 ENV_VAR_PATH=my-env-vars.env docker compose up
```
## Dependencies
This project uses or depends on software from:
- NodeJS
- Express
- Mongodb
- Passportjs
- Pug
- ACE editor
- JSON Schema based editor
- tablesort v5.0.1
- cvssjs
- Ajv
- json-patch-extended
- querymen
- linkifyjs
- pptxGenJS
Copyright (c) 2017-2022 Chandan B N.
SPDX-License-Identifier: MIT