https://github.com/advanced-effects/muse-qml-app-template
A QML app template that looks and feels good, which integrates Muse's UI Components library.
https://github.com/advanced-effects/muse-qml-app-template
qml qt qt-gui qtquick qtquick2
Last synced: about 2 months ago
JSON representation
A QML app template that looks and feels good, which integrates Muse's UI Components library.
- Host: GitHub
- URL: https://github.com/advanced-effects/muse-qml-app-template
- Owner: Advanced-Effects
- Created: 2025-07-20T16:20:45.000Z (12 months ago)
- Default Branch: main
- Last Pushed: 2025-08-13T10:20:46.000Z (11 months ago)
- Last Synced: 2025-08-30T07:02:30.306Z (10 months ago)
- Topics: qml, qt, qt-gui, qtquick, qtquick2
- Language: C++
- Homepage:
- Size: 20.1 MB
- Stars: 2
- Watchers: 0
- Forks: 0
- Open Issues: 0
-
Metadata Files:
- Readme: README.md
Awesome Lists containing this project
README
# Muse App Template
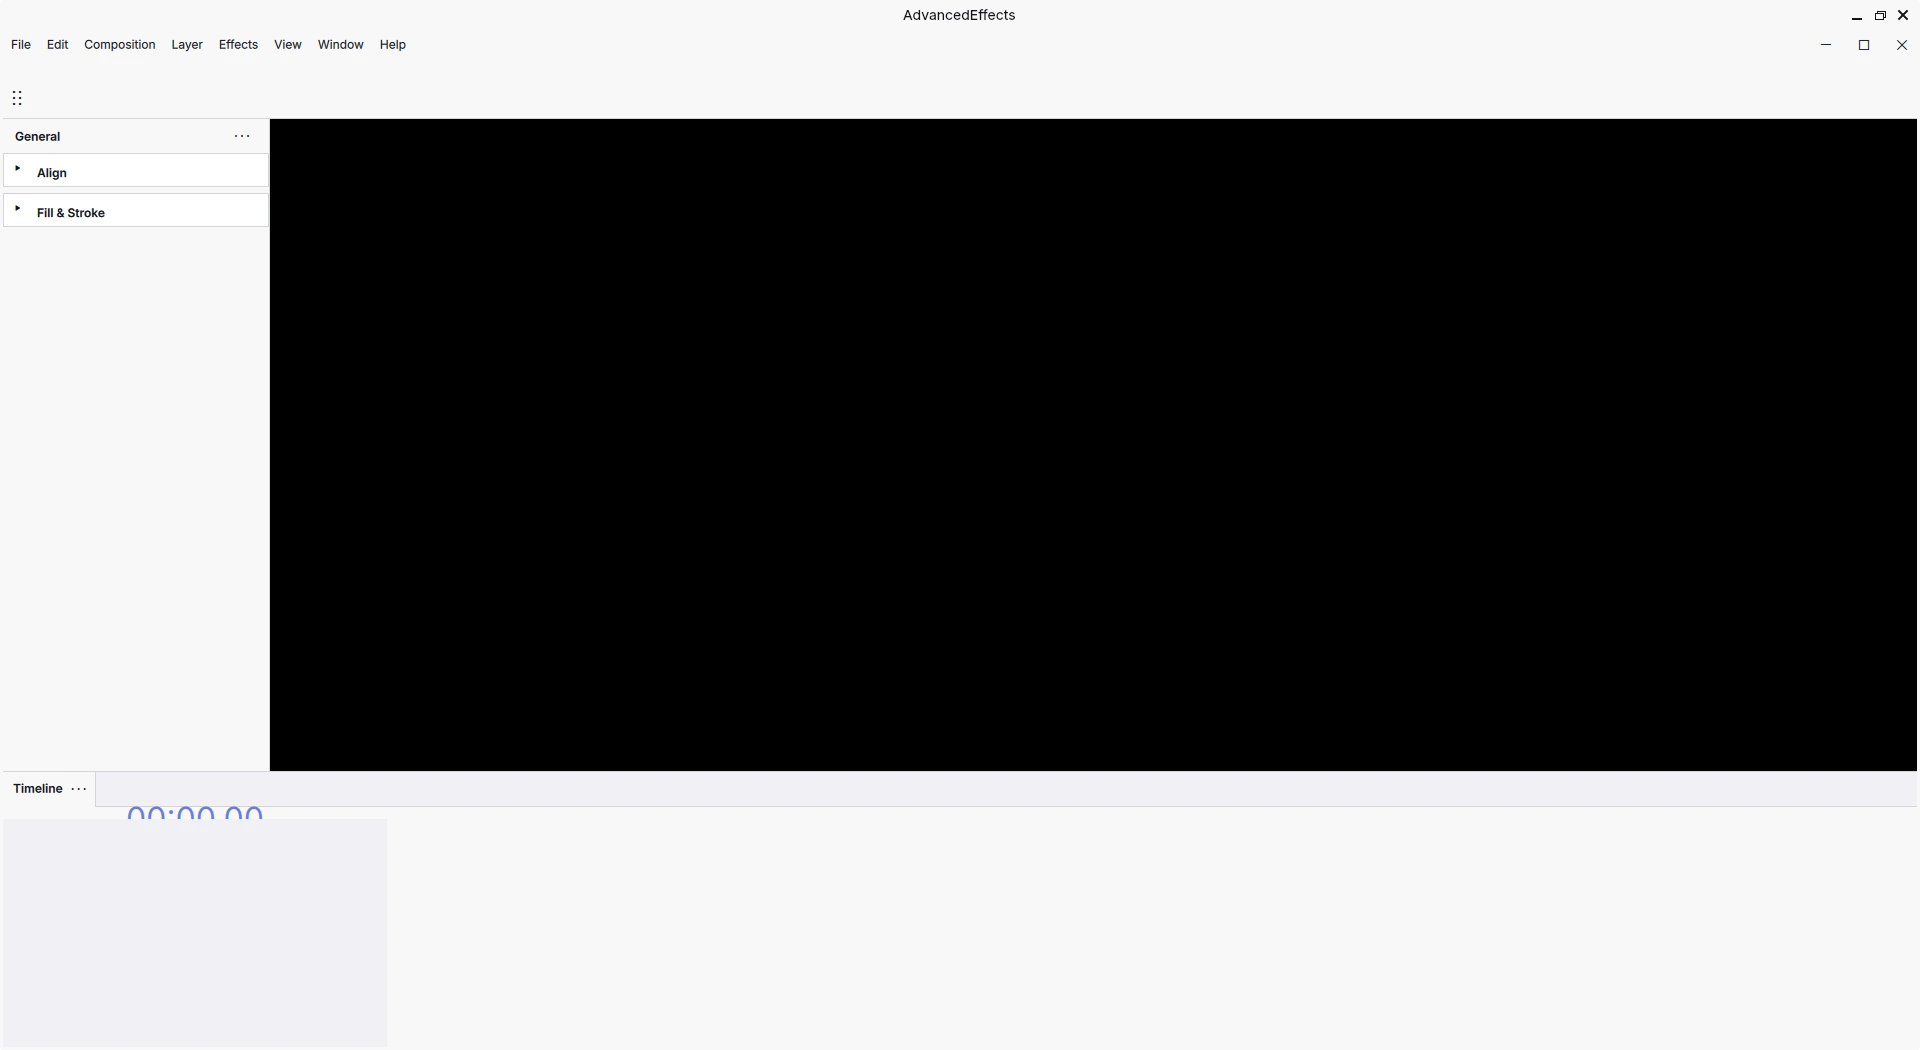
*A screenshot of Advanced Effects, my own application based on this template, with a Menu and a Canvas.*
When the MuseScore team decided to rewrite their entire UI to make it more modern, they rewritten it from Qt Widgets to a framework called QtQuick (or QML). This framework gives you more control over how the UI looks, with the contraposition that it's harder to make a UI that feels native to desktop.
So, since they planned on writing a desktop UI, they developed a set of components, UI components. These components are inside [MuseScore's framework]().
So, you want to write an application that feels modern? You don't need to write your own set of components, you can just use MuseScore's components!
## How we use MuseScore's framework
We do it the same way MuseScore or Audacity does. We download the [Muse framework](https://github.com/musescore/MuseScore/tree/master/src/framework) folder and add it to our application.
We then create a [usual Qt QML application](https://doc.qt.io/qt-6/qmlfirststeps.html), and load the framework's modules using the abstraction of `IModuleSetup` (more on that later).
Finally, in the UI code, we use MuseScore's widgets like `DockWindow`.
## Warning
If you want to **use Muse's components**, you **are required to make your app open source.**
> This application is licensed under GPL-3.0. That means you **can technically profit** from this app, but you **must redistribute your changes** to this app **publicly** under the **same license** (GPL3). This application was built thanks to dozens of people that prefered to keep the source open to everyone :) (MuseScore, Friction, Glaxnimate...)
## Project documentation
- A document explaining the MuseScore source code + general tips on how to understand other people's code: [Understand Source Code From Other People.](https://github.com/Advanced-Effects/Understand-Source-Code-From-Other-People)
- Understand the [app/](https://github.com/Advanced-Effects/Muse-Qml-App-Template/tree/main/src/app) folder.
- Understand the [appshell/](https://github.com/Advanced-Effects/Muse-Qml-App-Template/tree/main/src/appshell) folder
- Understand the [context/](https://github.com/Advanced-Effects/Muse-Qml-App-Template/tree/main/src/context) folder.
## Recommended lectures
We use a set of technologies. Understanding them will make working with this a lot, lot easier. It took me +3 months to finish this and make something compilable, but hopefully it's going to take you a lot less with the documentation I'm writing.
DO read-through these. Print if necessary. They will make development faster.
- [C++ W3Schools.](https://www.w3schools.com/cpp/default.asp)
- [Think in React.](https://react.dev/learn/thinking-in-react)
- CMake key concepts: https://cmake.org/cmake/help/book/mastering-cmake/chapter/Key%20Concepts.html
- QML positioning and layout: https://doc.qt.io/qt-6/qtquick-positioning-topic.html
- QML Module system: https://doc.qt.io/qt-6/qtqml-modules-topic.html
- QML State system: https://doc.qt.io/qt-6/qtquick-statesanimations-topic.html
## Dependencies & how to run
**1. Clone the repository:** `git clone https://github.com/Advanced-Effects/Muse-Qml-App-Template` or Download it as a zip from github's UI.
**2. Setup build environment:** You will need a C++17 compiler like `gcc`, `CMake`, `Ninja`, and `Qt6`.
**3. Get the dependencies:** Get the [Muse framework dependencies](https://github.com/musescore/MuseScore/wiki/Install-dependencies), OpenGL and `glfw3`.
**4. Build the project:**
- Open the terminal, go into the project's location using `cd /Your/Project/location`.
- Create a `build` directory using `mkdir build` and go into it `cd build`
- Setup CMake `cmake ..`
- Compile the project `cmake --build . -j`