https://github.com/akash-nath29/blogonit
This is an Blogging application, made using Django framework. This is still in under development.
https://github.com/akash-nath29/blogonit
Last synced: 4 months ago
JSON representation
This is an Blogging application, made using Django framework. This is still in under development.
- Host: GitHub
- URL: https://github.com/akash-nath29/blogonit
- Owner: Akash-nath29
- License: mit
- Created: 2023-07-28T03:36:55.000Z (almost 3 years ago)
- Default Branch: main
- Last Pushed: 2023-08-07T17:06:47.000Z (almost 3 years ago)
- Last Synced: 2025-10-08T03:32:33.907Z (8 months ago)
- Language: HTML
- Size: 4.18 MB
- Stars: 0
- Watchers: 2
- Forks: 0
- Open Issues: 0
-
Metadata Files:
- Readme: README.MD
- License: LICENSE
Awesome Lists containing this project
README
# BlogOnit - A Colorful Blogging Application with Django
[](https://github.com/Akash-nath29/BlogOnit/issues)
[](https://github.com/Akash-nath29/BlogOnit/network)
[](https://github.com/Akash-nath29/BlogOnit/stargazers)
[](https://github.com/Akash-nath29/BlogOnit/blob/main/LICENSE)
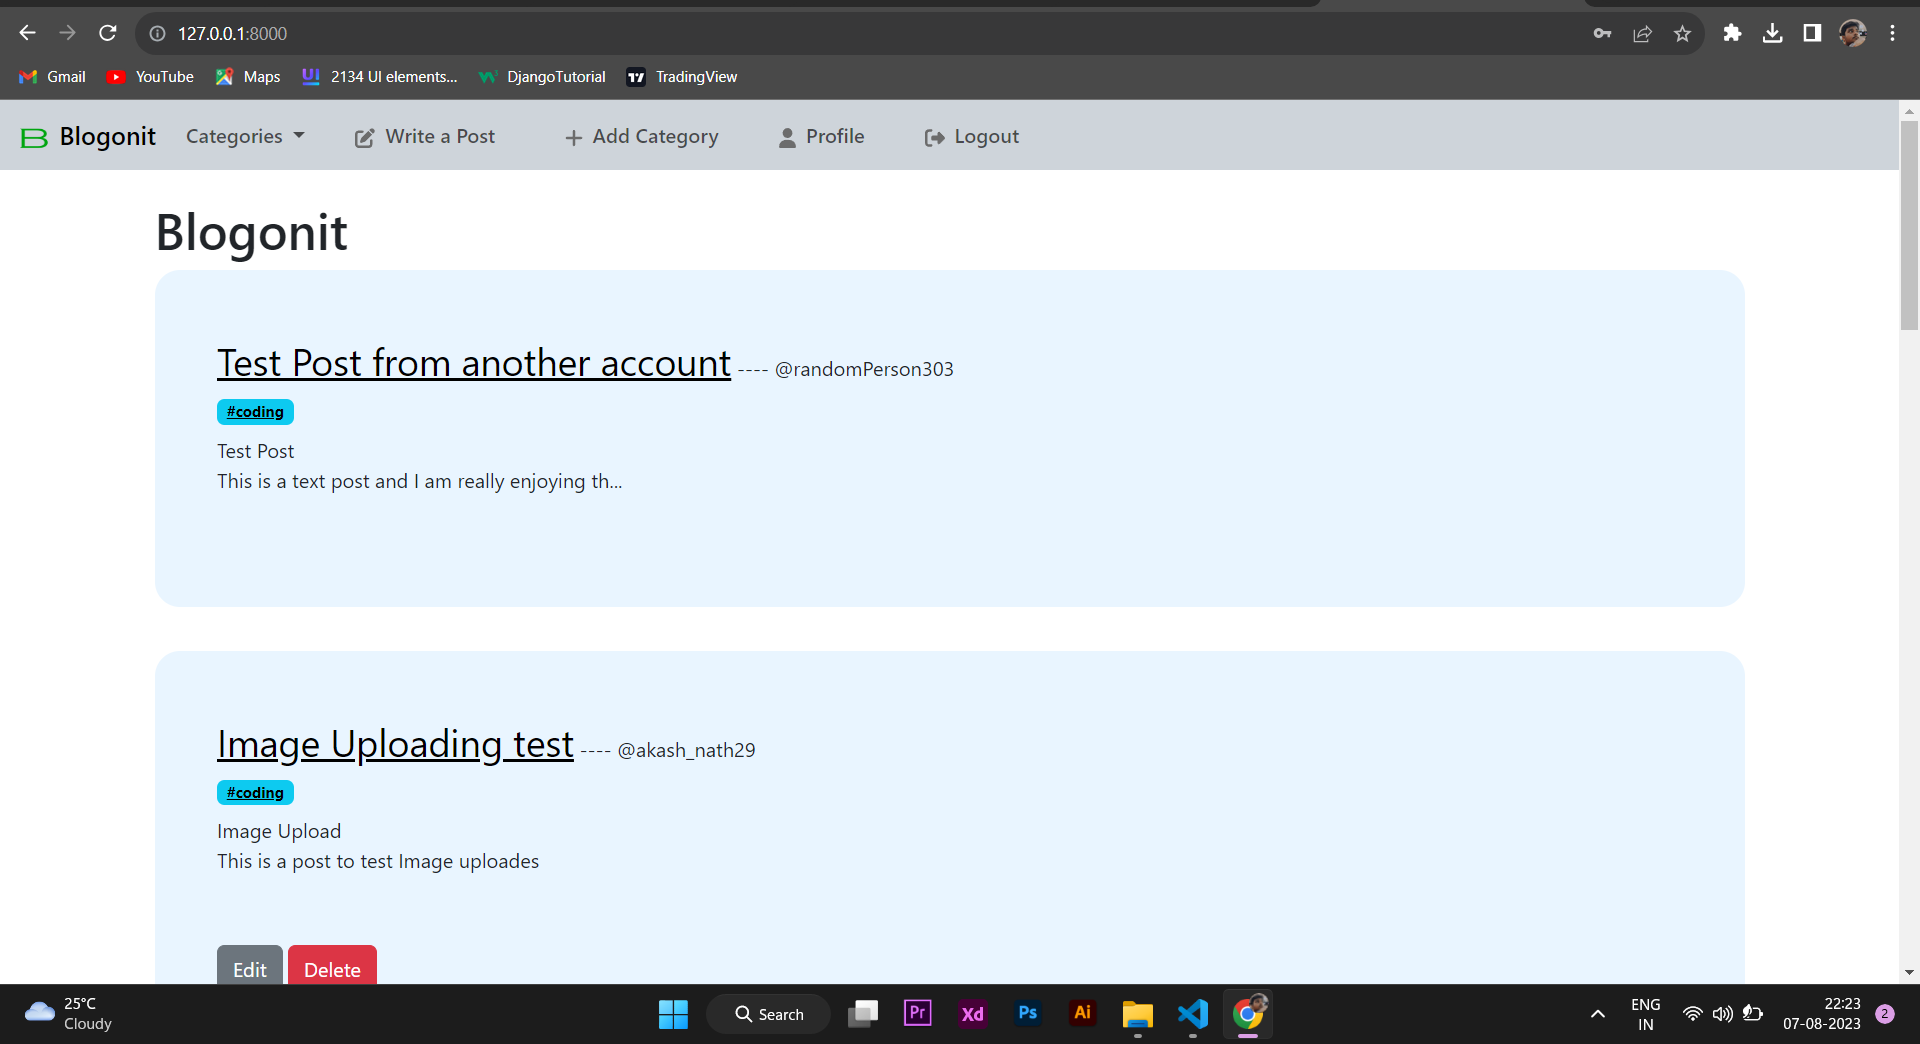
Welcome to **BlogOnit**, a feature-rich blogging application built with Django! This project aims to provide a dynamic platform for bloggers to share their thoughts, experiences, and ideas with the world. Whether you're a seasoned blogger or just starting your writing journey, BlogOnit offers an intuitive and user-friendly interface to manage and publish your blog posts with ease.
## ⚠️ Project Status
🚧 **Under Development** 🚧
Please note that BlogOnit is still a work in progress. We are actively developing and refining the application to offer a seamless experience to our users. As a result, you may encounter some bugs or incomplete features. However, we encourage you to **contribute** to the project by reporting issues, suggesting improvements, or even submitting pull requests. Let's make BlogOnit even better together!
## 🌟 Features
BlogOnit comes packed with a plethora of **exciting features** that make it a comprehensive blogging platform. Some of the key features include:
- **User Authentication**: Users can sign up, log in, and manage their accounts securely.
- **Create and Edit Posts**: Bloggers can easily create new posts and edit their existing ones.
- **Categories and Tags**: Organize posts by adding categories and tags for better navigation.
- **Rich Text Editor**: Compose your posts using a powerful and user-friendly rich text editor.

- **User Profiles**: Personalize your profile with a bio, avatar, and social media links.
- **Responsive Design**: Enjoy a seamless experience across various devices and screen sizes.
## 🚀 Installation
To set up BlogOnit on your local machine, follow these **simple steps**:
1. **Clone** the repository:
```
git clone https://github.com/Akash-nath29/BlogOnit.git
```
2. Navigate to the project directory:
```
cd BlogOnit
```
3. **Create a virtual environment** (optional but recommended):
```
# Using virtualenv
virtualenv venv
source venv/bin/activate
# Using venv (Python 3 standard library module)
python3 -m venv venv
venv\Scripts\activate
```
4. **Install the dependencies**:
```
pip install -r requirements.txt
```
5. **Run database migrations**:
```
python manage.py migrate
```
6. **Create a superuser** to access the Django admin panel:
```
python manage.py createsuperuser
```
7. **Start the development server**:
```
python manage.py runserver
```
8. **Access the application** at `http://127.0.0.1:8000/` in your web browser.
## 🎉 Usage
Once you have set up BlogOnit, you can start using it to create and manage your blog posts. Follow these **simple steps**:
1. **Open your web browser** and go to `http://127.0.0.1:8000/`.
2. **Register for a new account** or **log in** if you already have one.
3. After logging in, you will be redirected to the **Home Page**.
4. Click on the "**Write a Post**" button to create a new blog post.
5. Fill in the details, add content using the **rich text editor**, and choose categories and tags for your post.
6. Click on the "**Post**" button to make your post live.
7. Explore the **navigation menu** to edit your profile, published posts, and categories.
8. Engage with your readers through **Likes** on your posts.
9. Use the **Django admin panel** at `http://127.0.0.1:8000/admin/` to manage users, posts, comments, and other site content.
## 🙌 Contributing
We welcome contributions from the community to make BlogOnit even better! If you would like to contribute, here are some ways to get involved:
- **Report issues** or request new features.
- **Submit bug fixes** or improvements via **pull requests**.
- **Review and provide feedback** on open pull requests.
- Help in **improving documentation** and writing tests.
- Spread the word about BlogOnit and **encourage others** to use and contribute to it.
Before making a contribution, please ensure you read our [Contributing Guidelines](CONTRIBUTING.md).
## 📝 License
BlogOnit is open-source software released under the **MIT License**. You are free to use, modify, and distribute this software following the terms of the license.