https://github.com/alexatiks/keycloak-postman-pre-request
Postman pre-request script to fetch a token from Keycloak and set it to a collection variable to use in request headers.
https://github.com/alexatiks/keycloak-postman-pre-request
keycloak postman postman-collection postman-pre-request-script
Last synced: 3 months ago
JSON representation
Postman pre-request script to fetch a token from Keycloak and set it to a collection variable to use in request headers.
- Host: GitHub
- URL: https://github.com/alexatiks/keycloak-postman-pre-request
- Owner: alexatiks
- License: mit
- Created: 2018-03-30T14:11:21.000Z (over 7 years ago)
- Default Branch: master
- Last Pushed: 2024-02-16T13:07:31.000Z (over 1 year ago)
- Last Synced: 2025-03-23T21:22:02.386Z (4 months ago)
- Topics: keycloak, postman, postman-collection, postman-pre-request-script
- Language: JavaScript
- Homepage:
- Size: 759 KB
- Stars: 73
- Watchers: 3
- Forks: 24
- Open Issues: 2
-
Metadata Files:
- Readme: README.md
- License: LICENSE
Awesome Lists containing this project
README
# Postman pre-request script for authentication with Keycloak
This is a javascript-Script for use with [Postman](https://www.getpostman.com/)'s pre-request script feature.
It makes POST request to [Keycloak Token Endpoint](https://www.keycloak.org/docs/latest/authorization_services/#_service_overview) to
get a valid token and automatically set the token for all requests in Postman collection.
This will enable to make request as if a logged in user would make them to an API.
## Usage
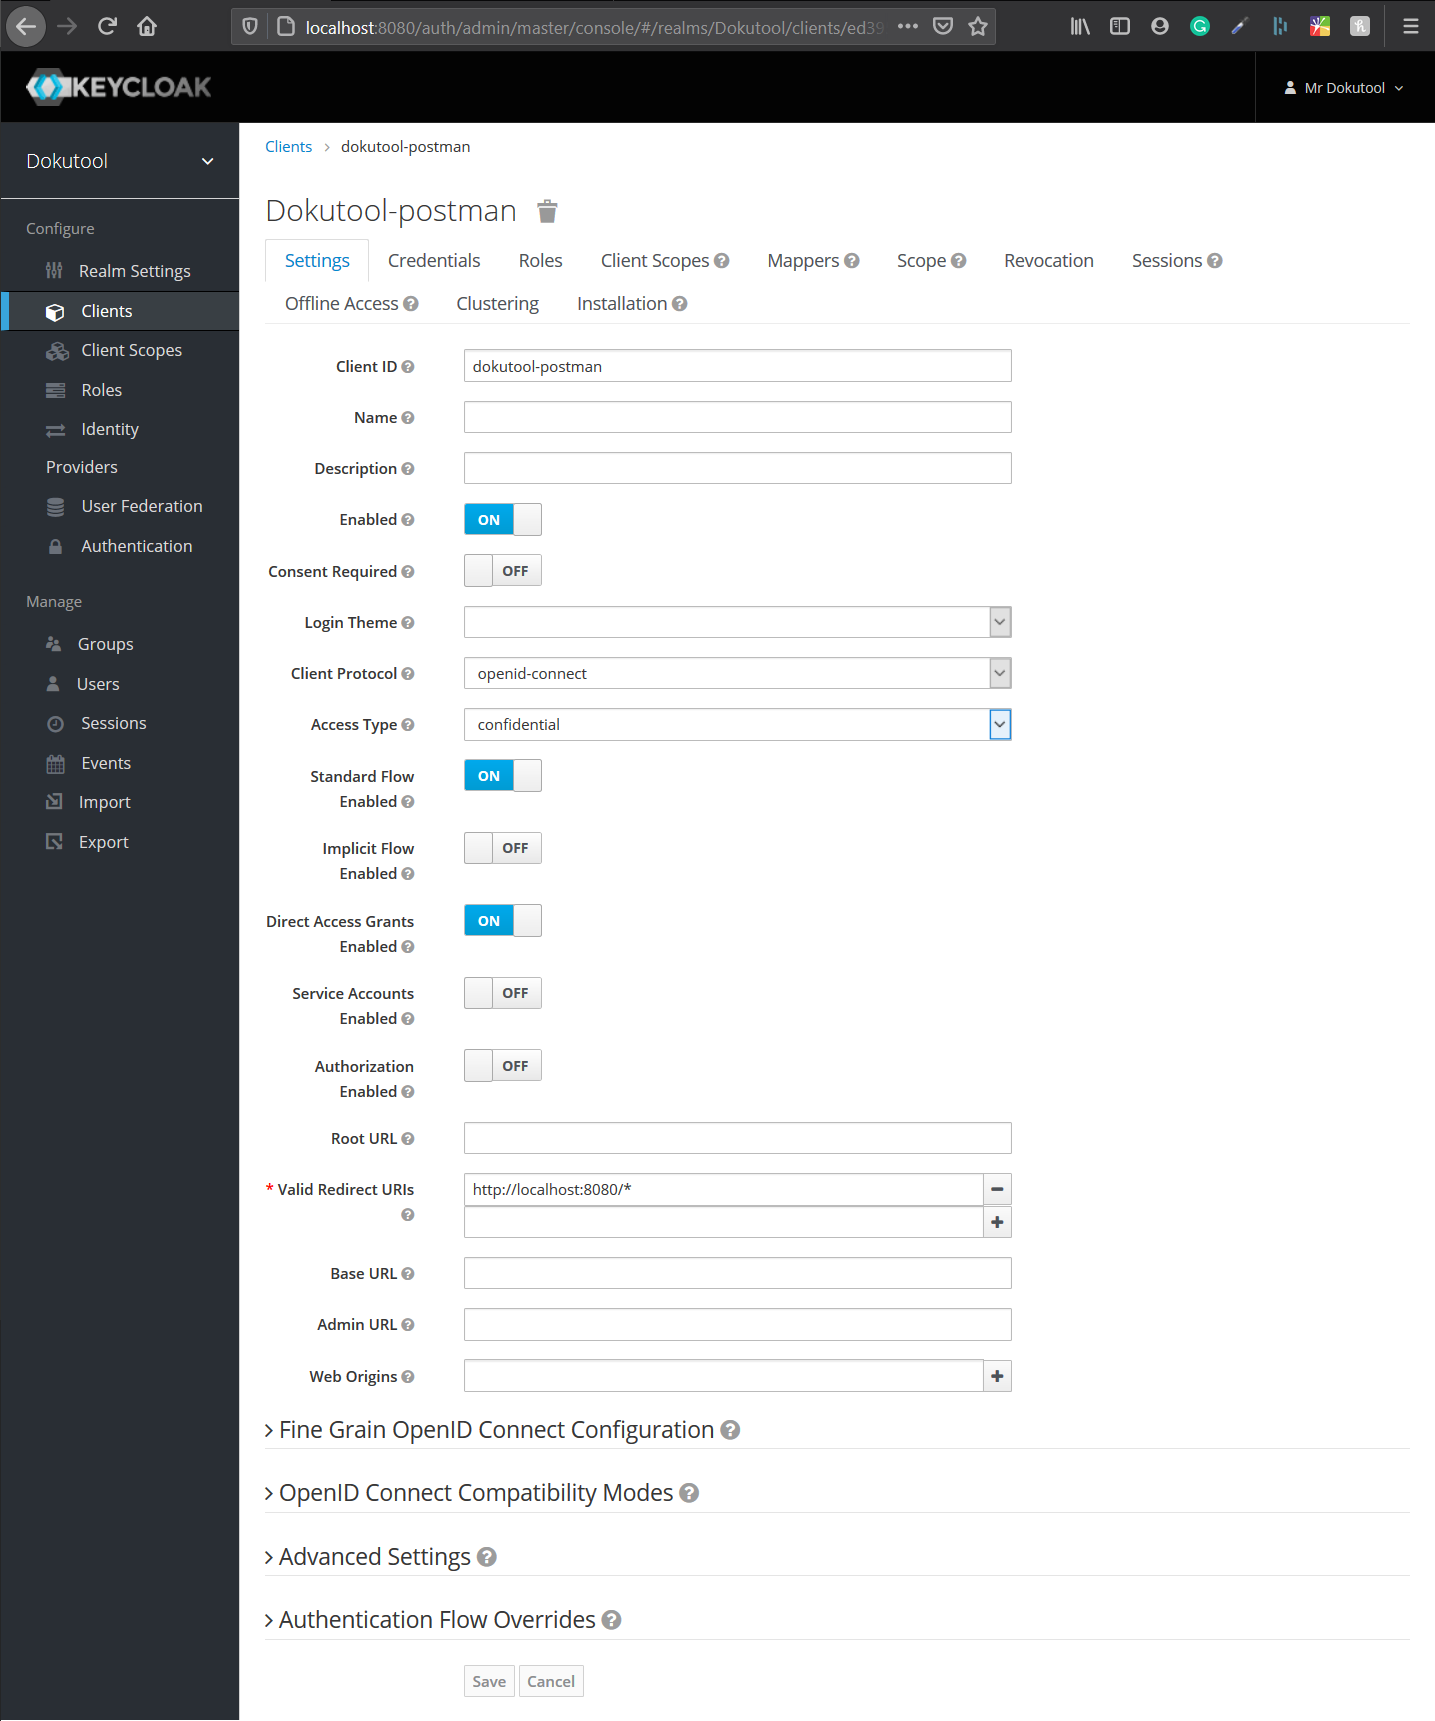
1. Create a new client in Keycloak. This client is mostly default. Important are just these few:
* Client ID: _Choose a name_
* Client Protocol: openid-connect
* Access Type: confidential
* Valid Redirect URIs: http://localhost:8080/*
This client will only be used for Postman then. Btw. don´t forget to hit "save".
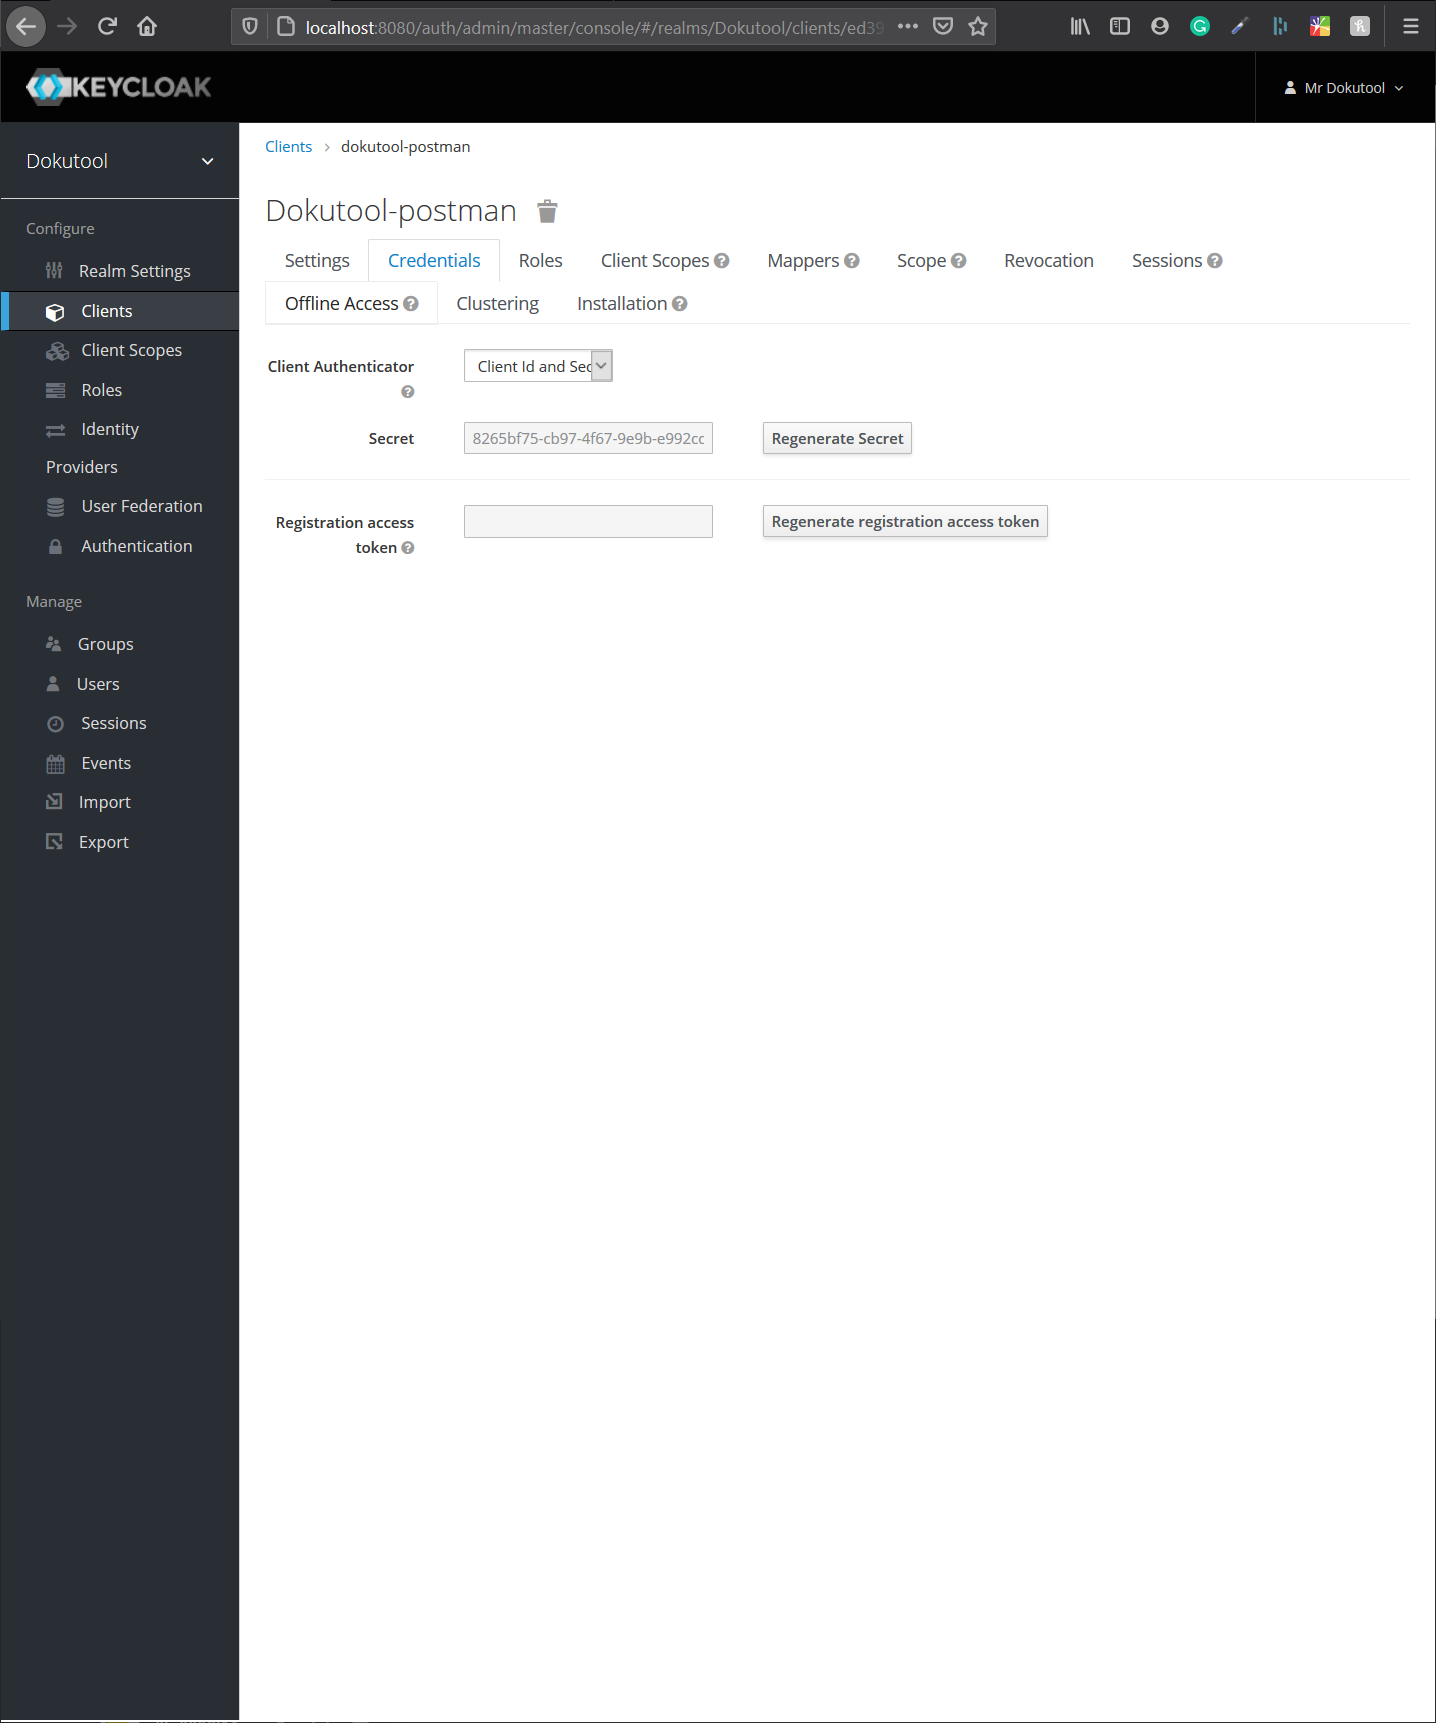
2. Go now into the second tab "Credentials" of your new created Client. Here you can find the Clientsecret in the field *Secret*. Copy that to you clipboard.
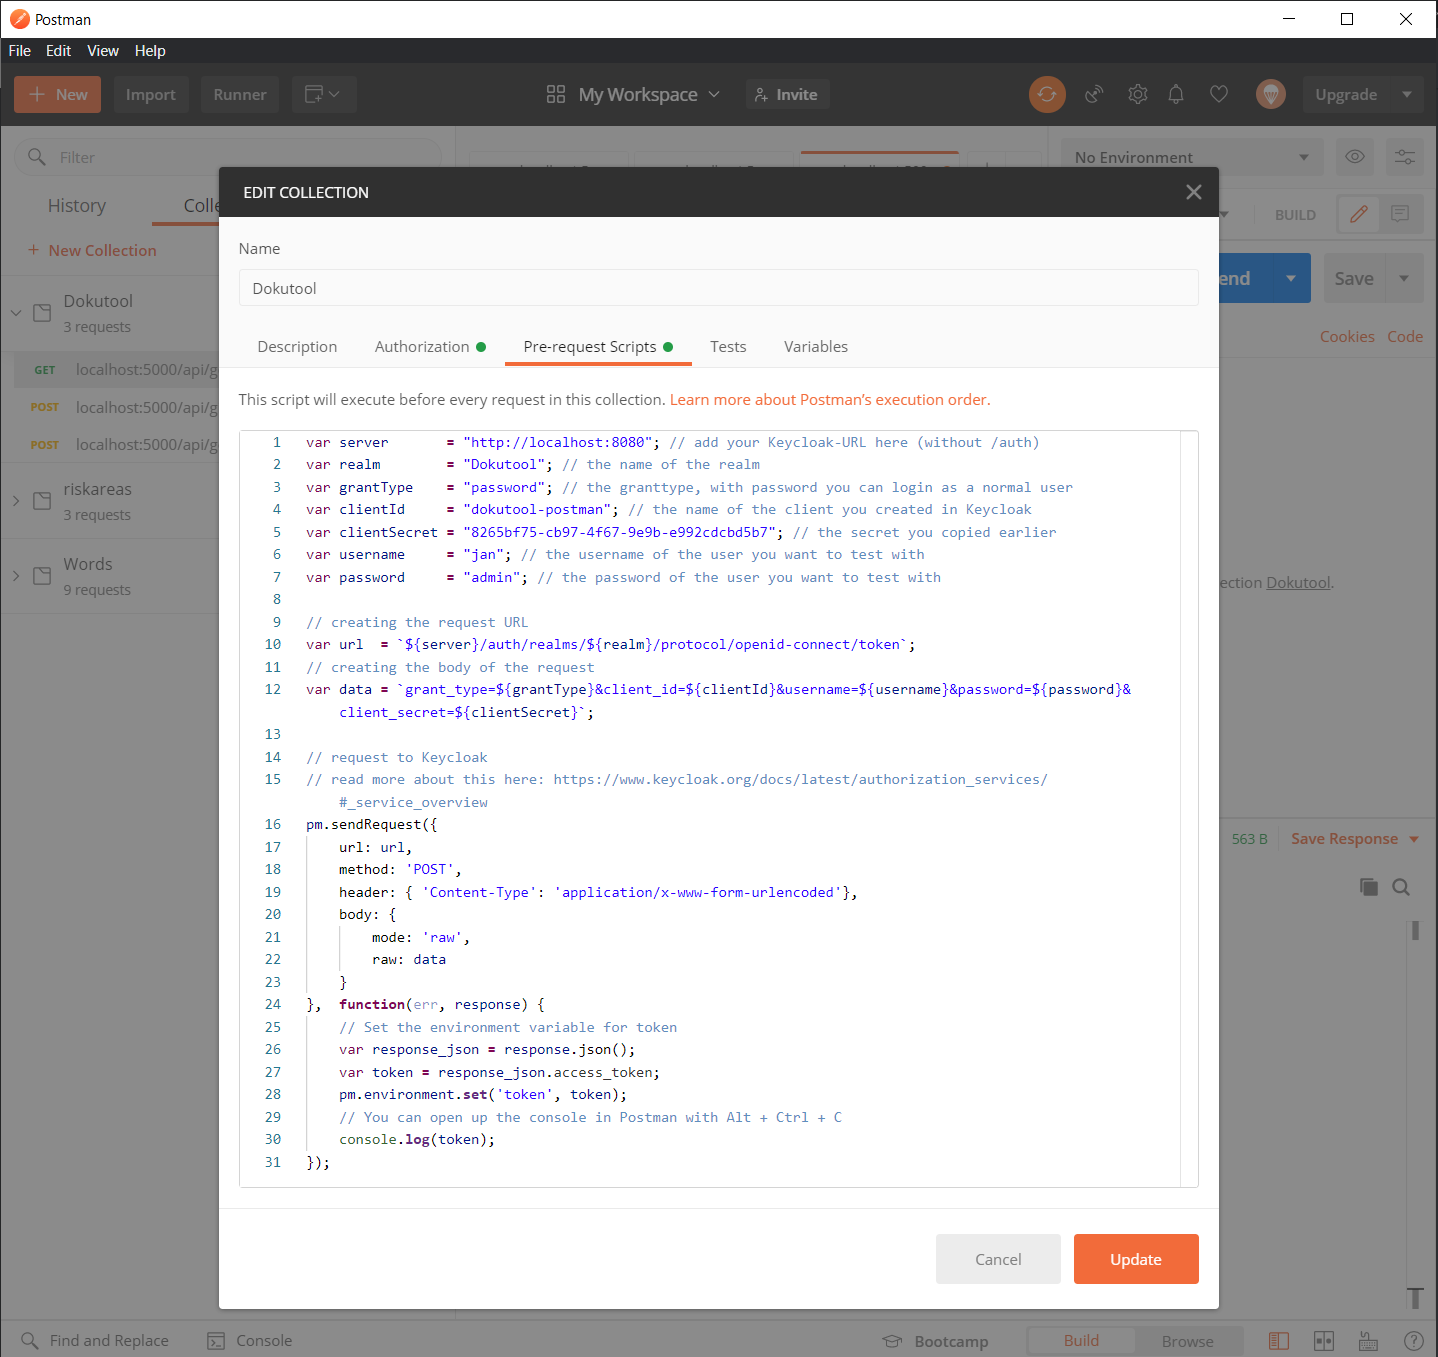
3. Now head on to Postman. Create a new collection. Every query you want to make to the API which is protected by Keycloak, has to be in this collection then. On a already existing collection click edit (behind the 3 vertical dots). In the new appearing window choose a name and copy the content of [keycloak-fetch-token-postman-pre-request.js](keycloak-fetch-token-postman-pre-request.js) into the "Pre-request Script" tab in Postman. No fill in all the variables in the beginning of the script. Remember you already copied the Clientsecret. If you dont know a variable, some of them can be found in Keycloak under the previously created Client and then in the tab *Installation*. In the screenshot below you can see an example. These are my development values. *Never post production clientsecrets or something!* With username and password you can choose a user. This is good for testing roles. Leave the rest as is.
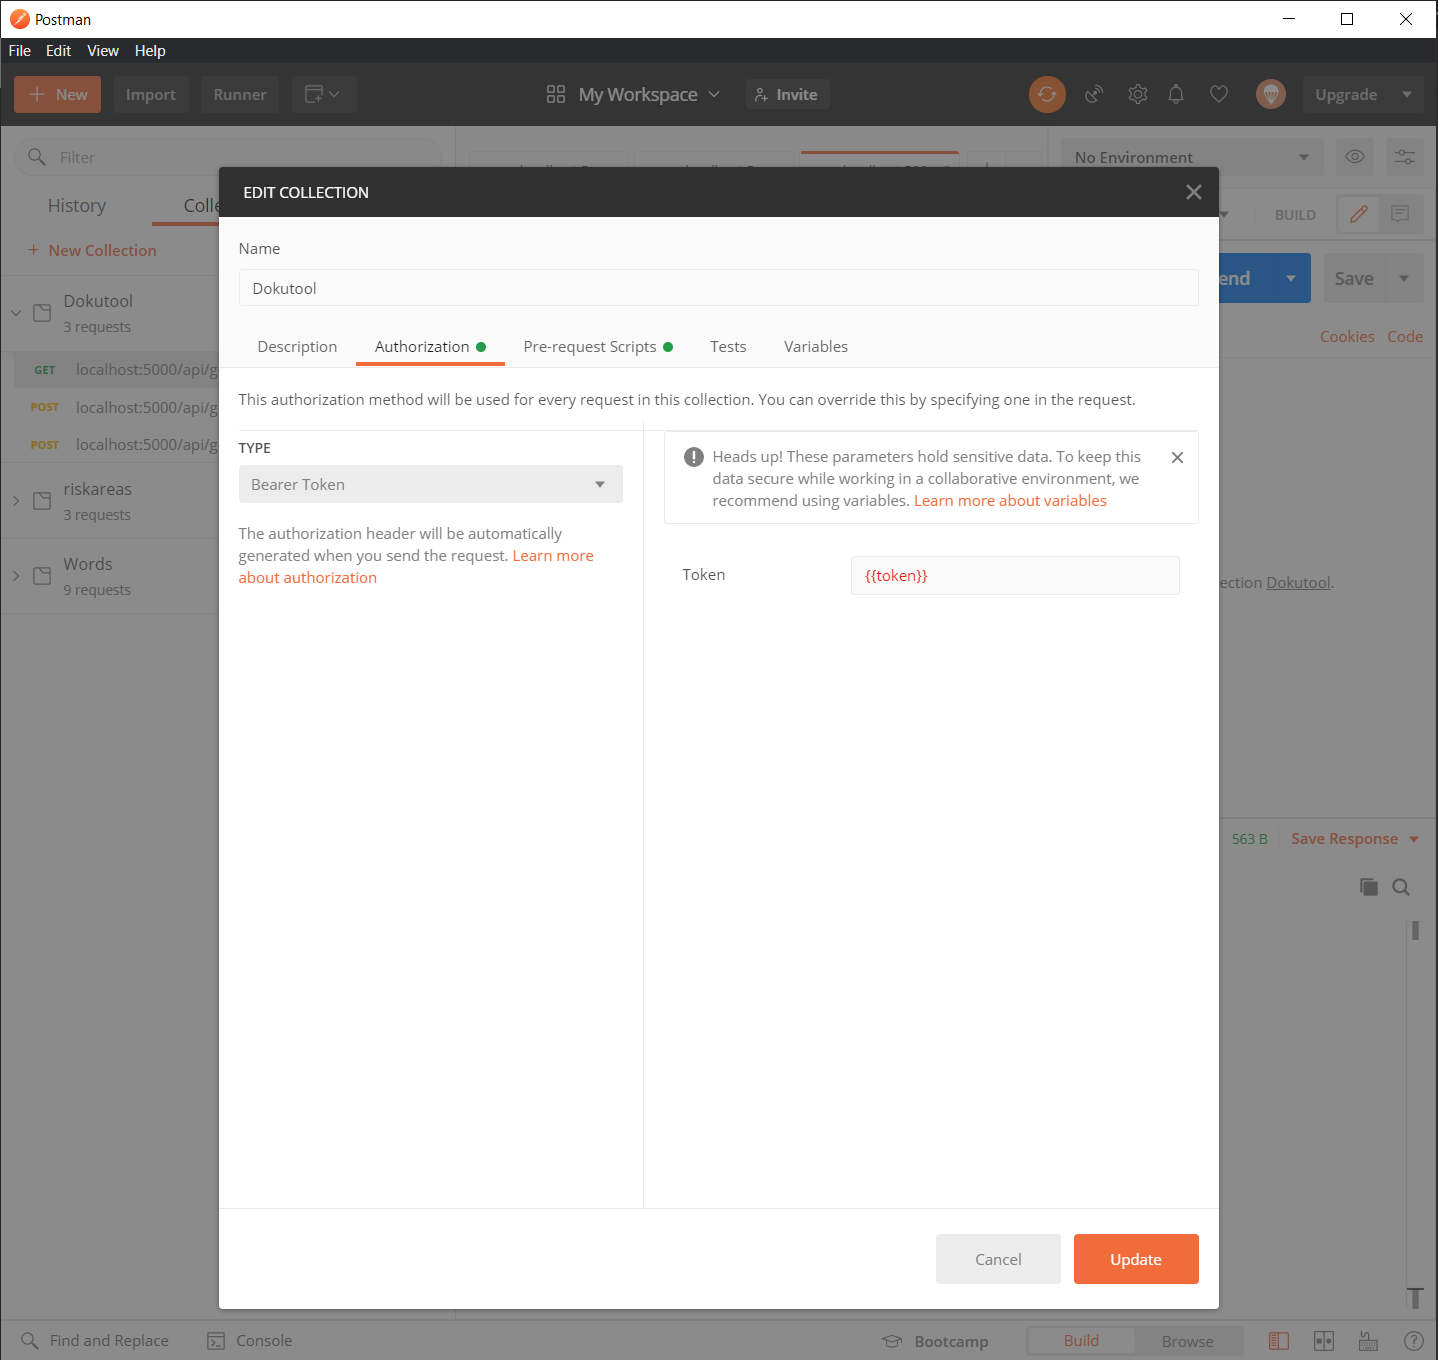
4. In the Authorization tab set the Type to Bearer Token and Token to *{{token}}*. This is the token that get send back from Keycloak via the pre-request script.
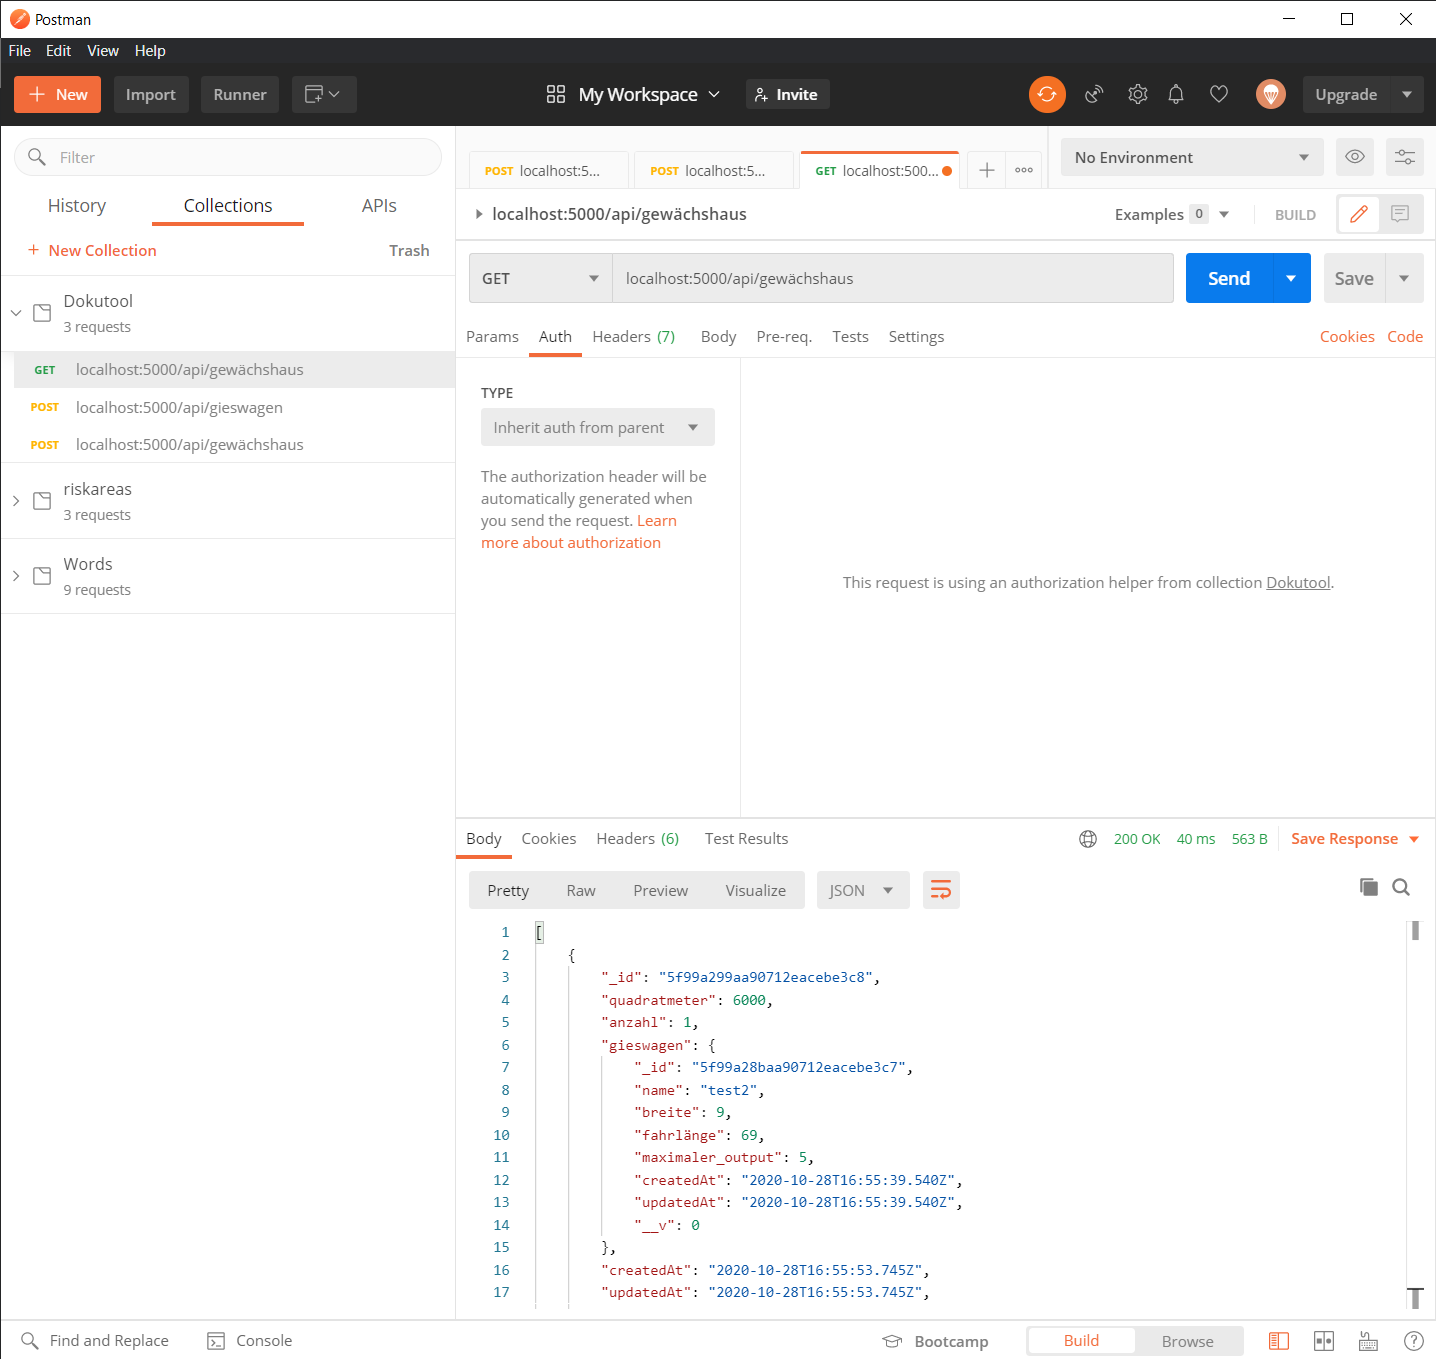
5. For all API requests: In the Authorization tab select Type - Inherit auth from parent. You can see an example below. Keep in mind that the queries you want to execute has to be saved into the configured collection
6. ENJOY