https://github.com/alimranahmed/liftpad
A UI to add domain/subdomain using cloudflared CLI of remote servers
https://github.com/alimranahmed/liftpad
cloudflare cloudflared dns domain server
Last synced: about 2 months ago
JSON representation
A UI to add domain/subdomain using cloudflared CLI of remote servers
- Host: GitHub
- URL: https://github.com/alimranahmed/liftpad
- Owner: alimranahmed
- License: mit
- Created: 2025-02-22T11:24:35.000Z (over 1 year ago)
- Default Branch: main
- Last Pushed: 2025-03-01T01:52:14.000Z (over 1 year ago)
- Last Synced: 2025-03-01T02:29:23.406Z (over 1 year ago)
- Topics: cloudflare, cloudflared, dns, domain, server
- Language: PHP
- Homepage:
- Size: 155 KB
- Stars: 0
- Watchers: 1
- Forks: 0
- Open Issues: 0
-
Metadata Files:
- Readme: README.md
- License: LICENSE
Awesome Lists containing this project
README
# Liftpad
A UI to add domain/subdomain using `cloudflared` CLI of remote servers.
If you have `cloudflared` cli installed in your server already and want to add domain/subdomain without running all the tunnel commands manually, this tool can help you.
This tool is built using [Laravel](https://laravel.com), it also uses [MySQL](https://www.mysql.com) database.
### Context
This tool basically handles the steps after 3rd step of "Using Cloudflare to Make Our Web App Public" mentioned in this article: [How I Turned an Old Laptop into a Web Hosting Server for My Laravel Application](https://medium.com/@al_imran_ahmed/how-i-turned-an-old-laptop-into-a-web-hosting-server-for-my-laravel-application-e9035692d56b)
### Requirements
1. Docker
2. [Cloudflared CLI](https://developers.cloudflare.com/cloudflare-one/connections/connect-networks/do-more-with-tunnels/local-management/create-local-tunnel/) in the server
3. Make sure you are logged in using `cloudflared tunnel login` command
### Installation
1. Clone this repository
2. Go to the project root `cd liftpad`
3. Run `docker compose up -d`
4. Run `docker exec -it liftpad-app composer install`
5. Run `docker exec -it liftpad-app php artisan migrate`
6. Visit `localhost:8081`, you should see the interface of this tool!
### How to stop it?
1. Go to the project root
2. Run `docker compose down` to stops all the application contains
3. Note: The docker images are still there, you have to remove them manually in case you don't need them.
### How to use?
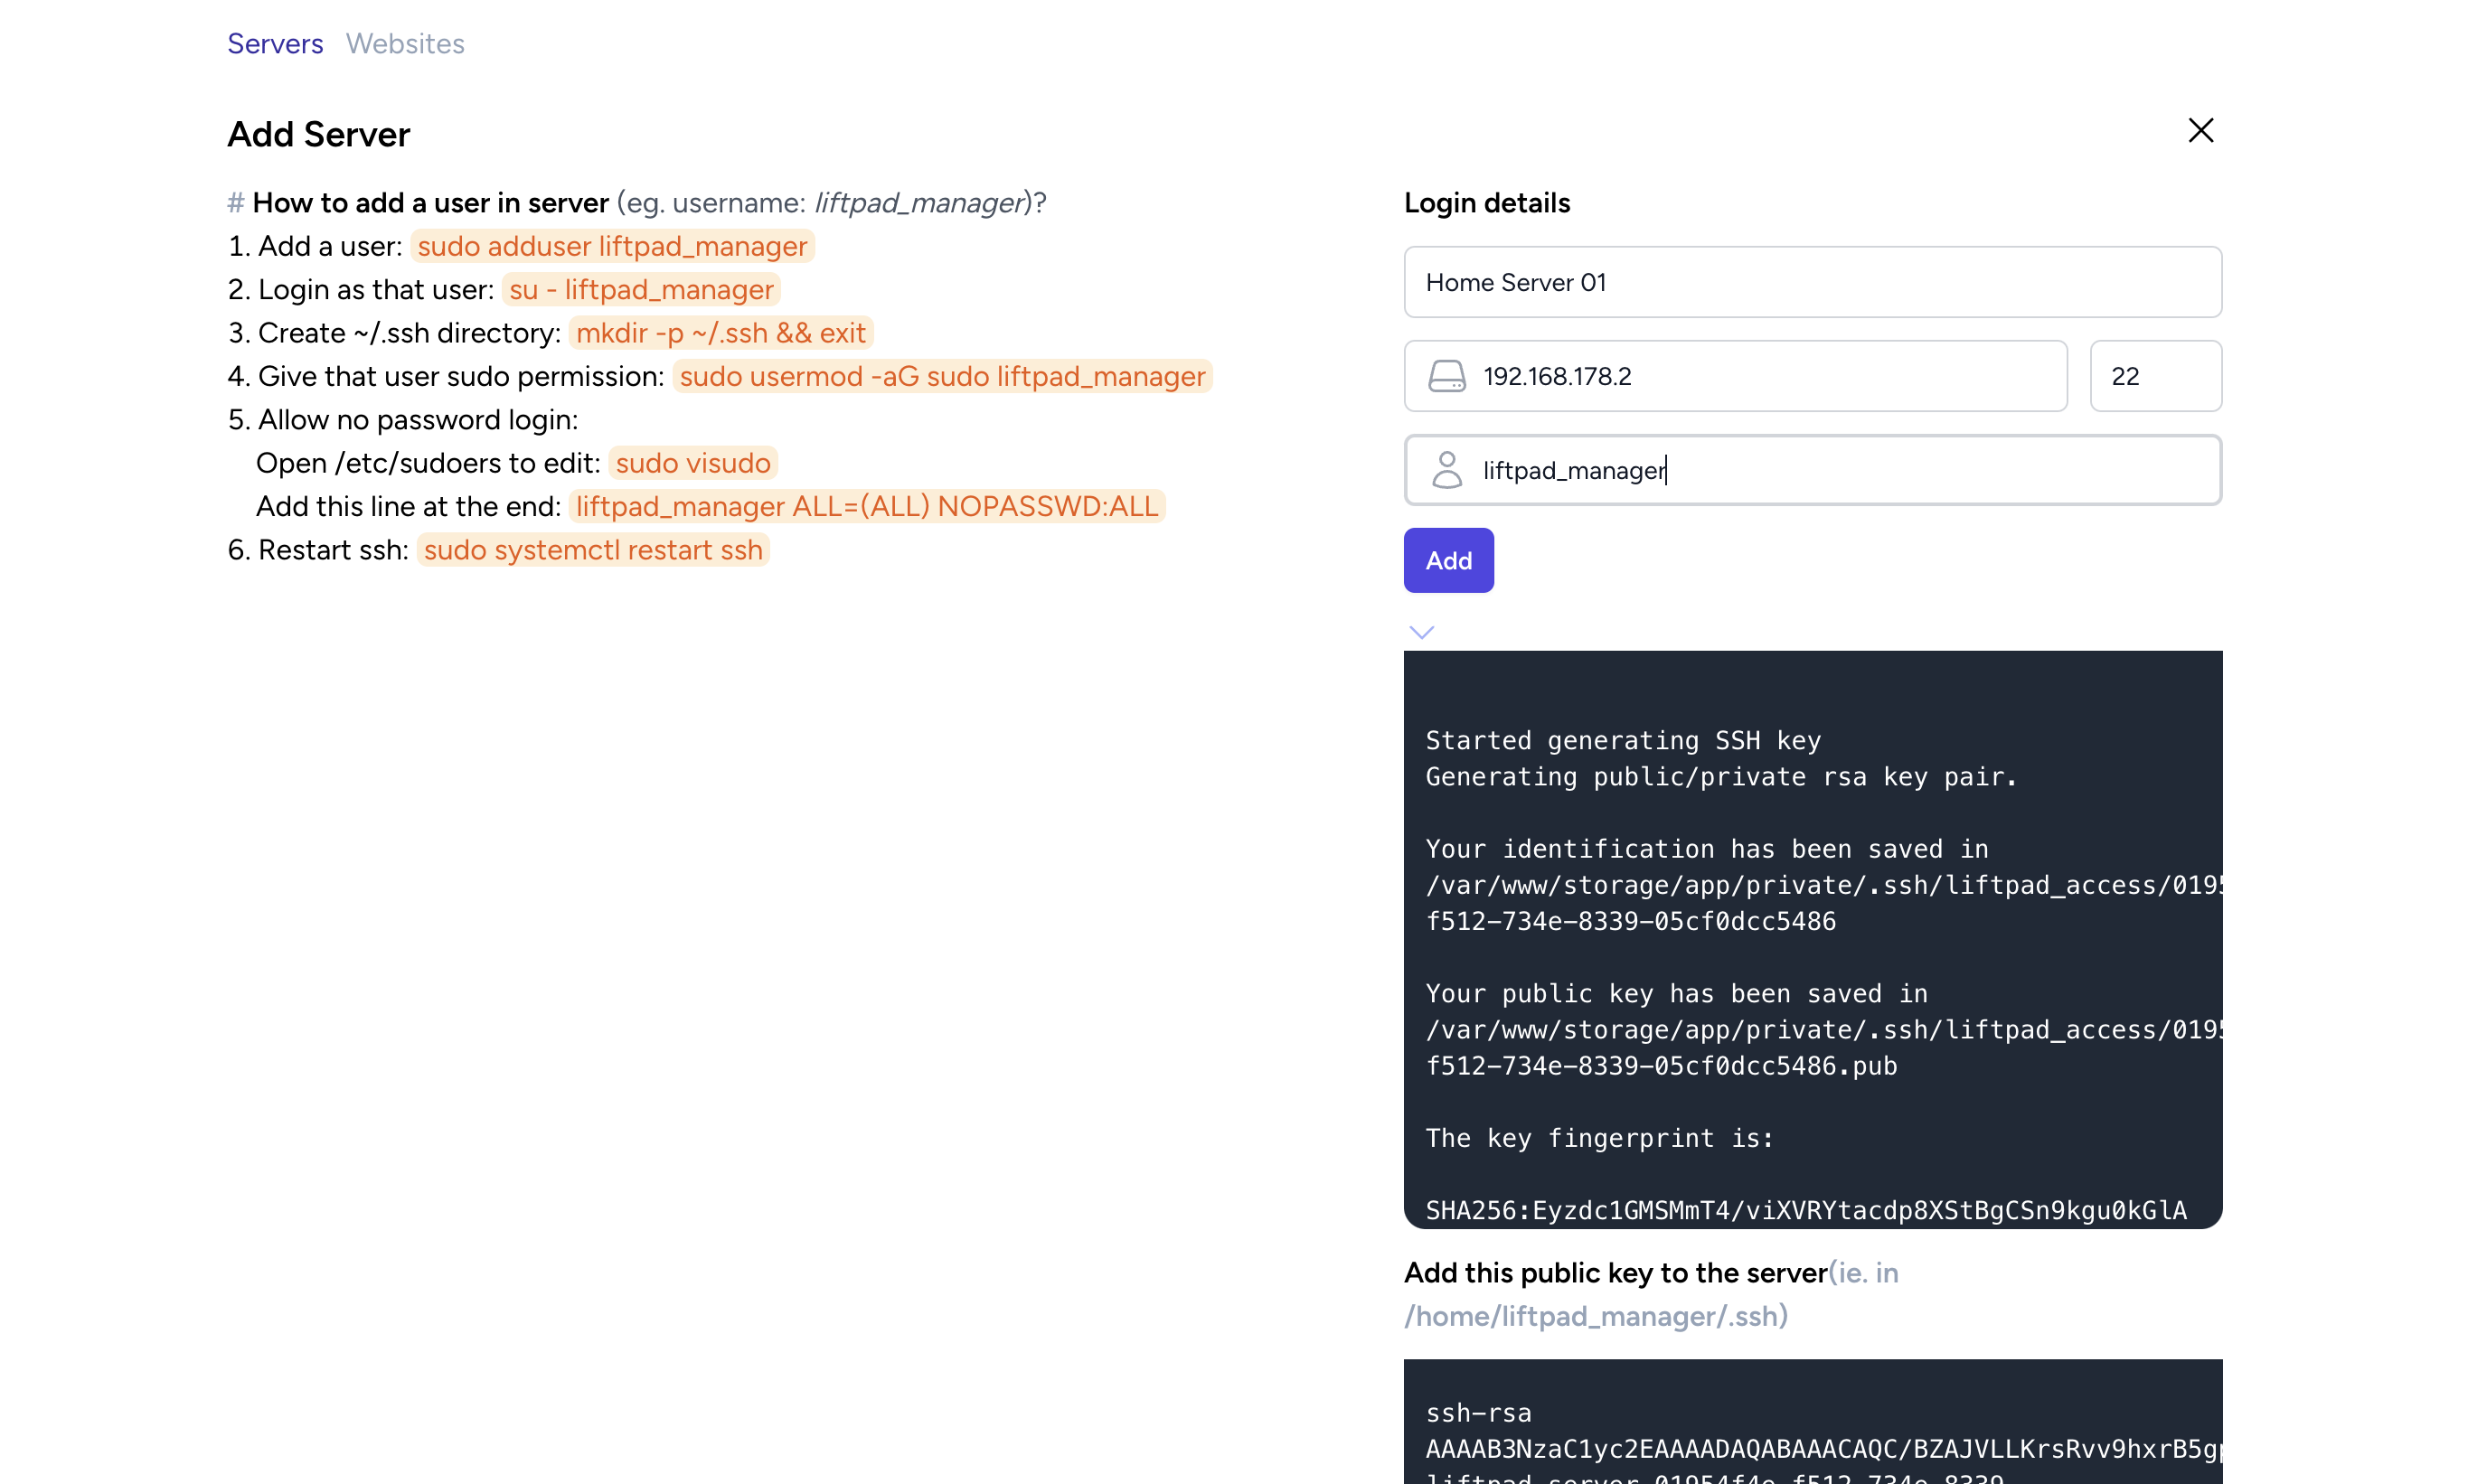
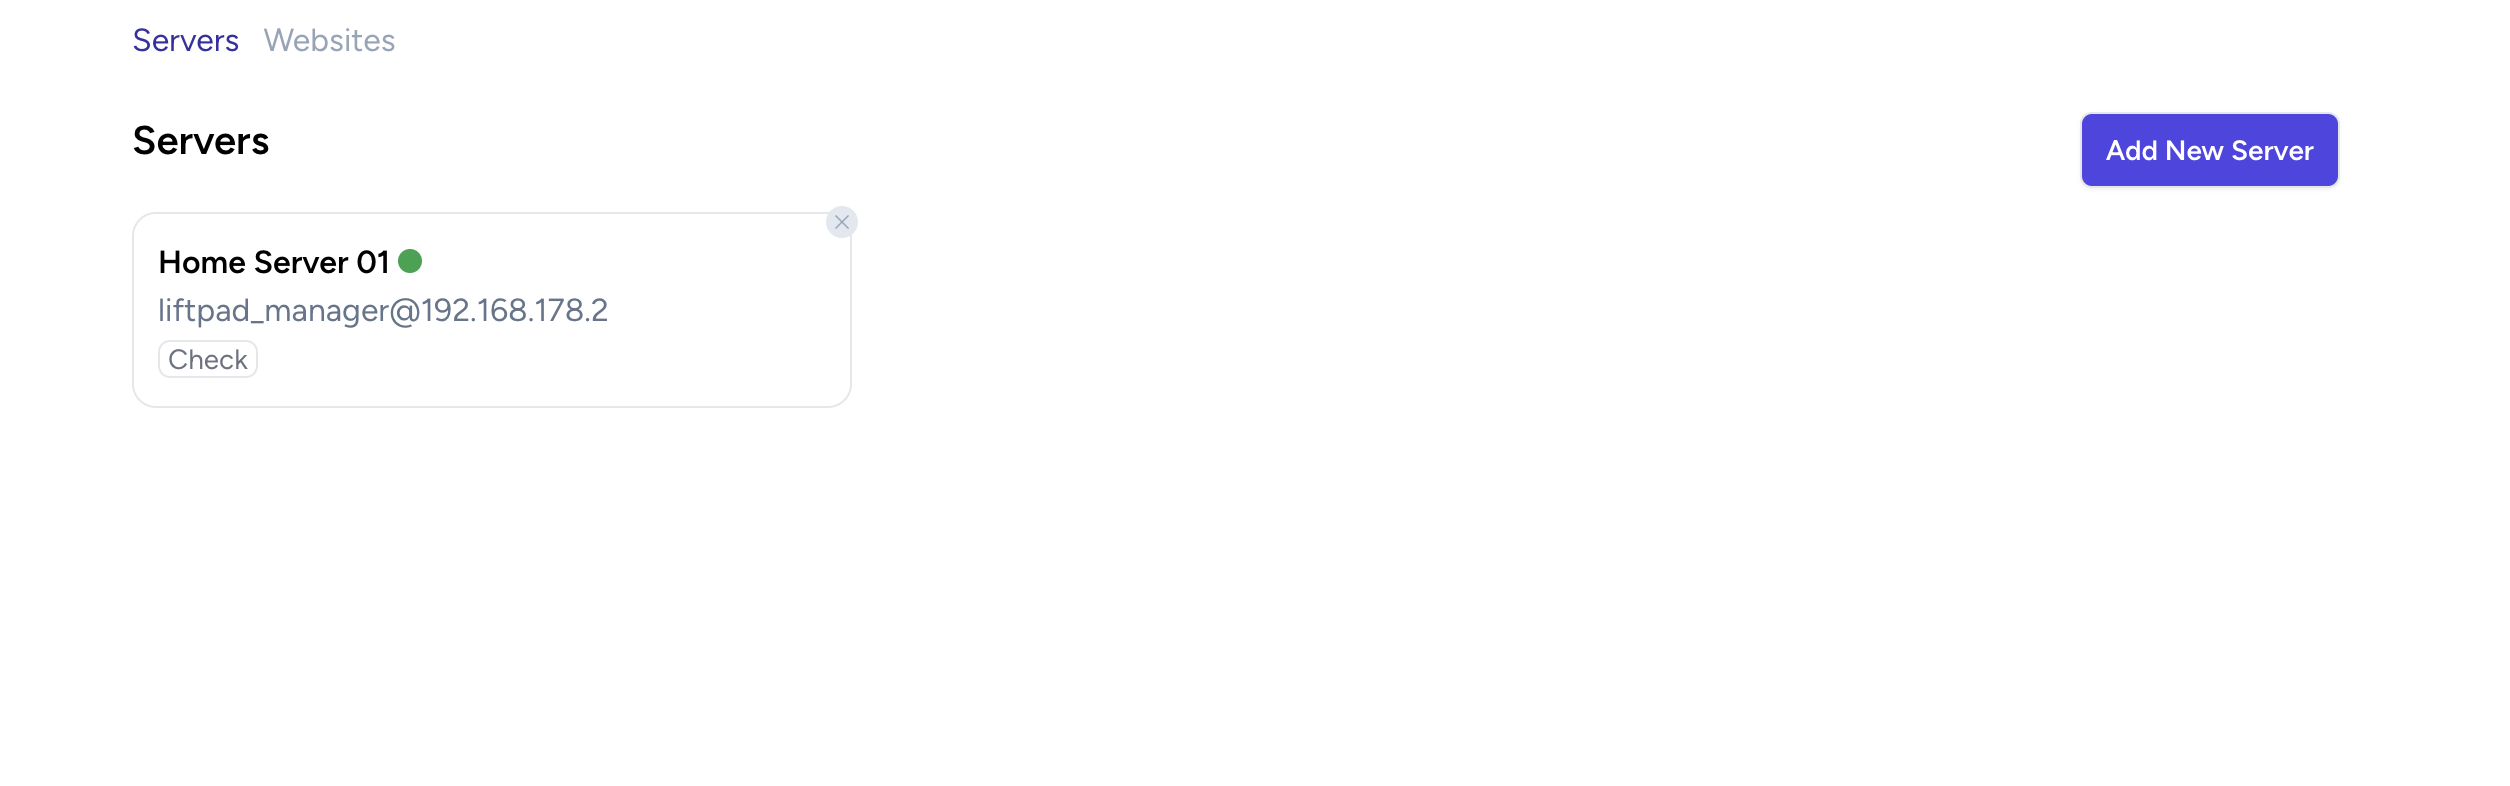
1. Go to servers menu and add the server details where your application is hosted
2. Once connection is successfully close the server form.
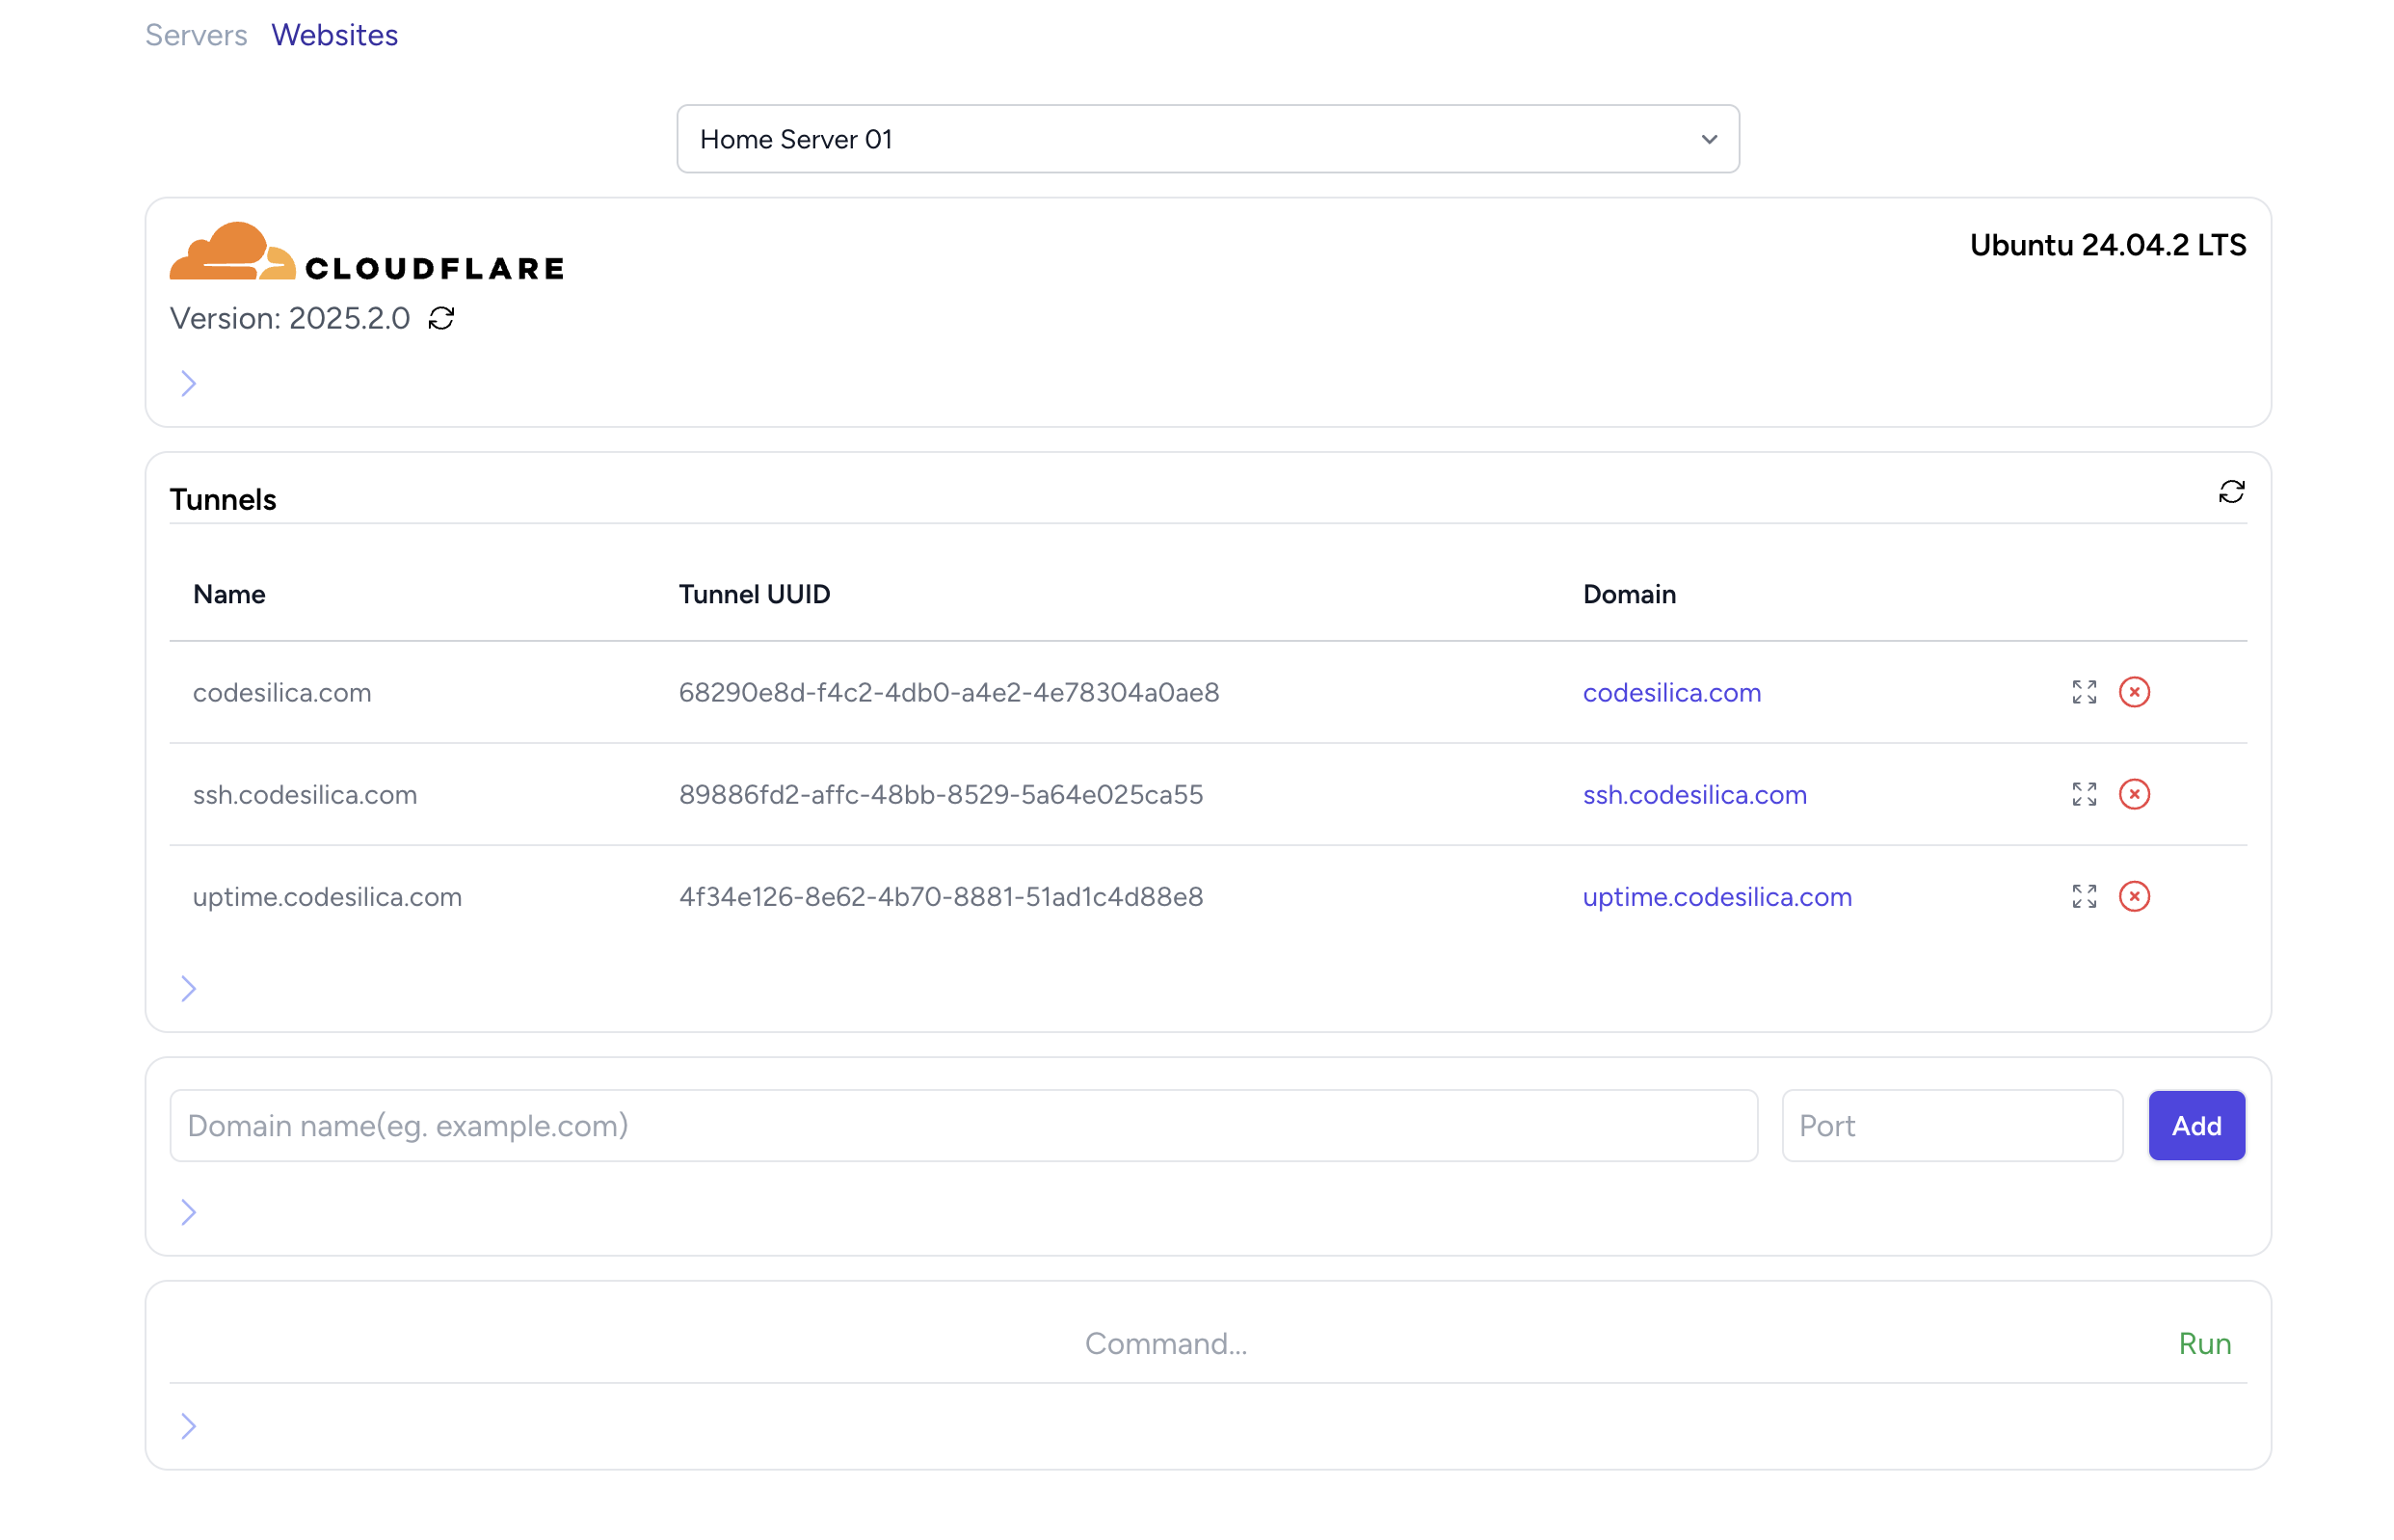
3. Go to websites menu and select the server
4. It should automatically load all your added tunnels and `cloudflared` version
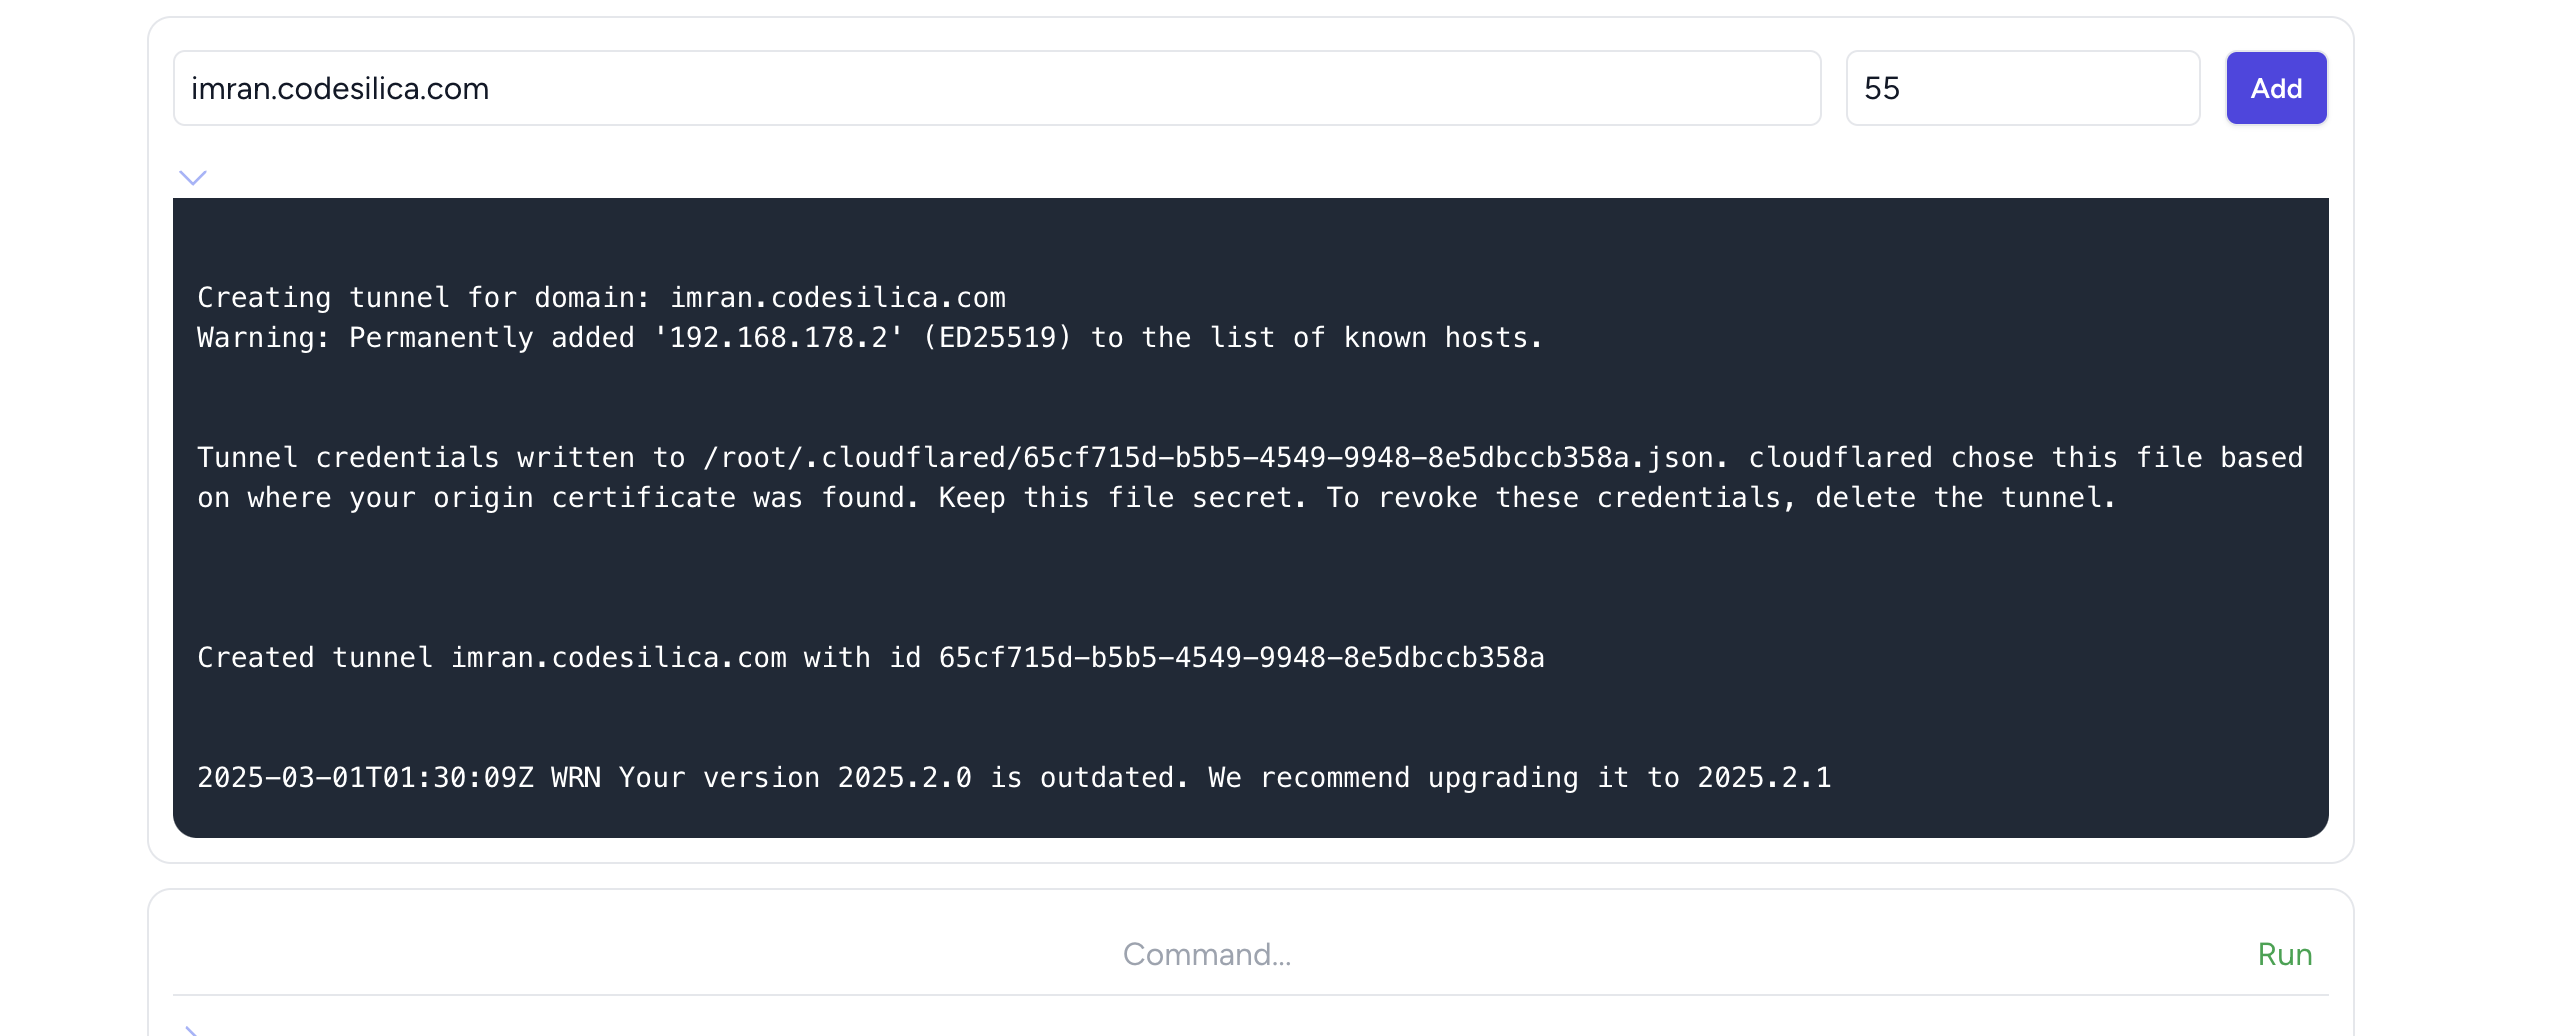
5. To add a new domain simply add the domain name and application port and click Add
Add Server
Server list
Add Domain
### How it works?
1. When you add a domain(e.g. example.com) and port(e.g. 8081) and click **Add** button
2. It **creates a tunnel** in the server using the server credentials you provided via `cloudflared` CLI.
3. Once the tunnel is created, it **creates a tunnel config file** for the domain and specified port
4. Then it **adds a DNS record** in Cloudflare using `cloudflared` CLI over your server
5. Once DNS record added, it **configures a service** to run the tunnel in the background
6. After creating the service config, it **starts the service**!
7. Then you can visit: `example.com`
### License
[MIT](https://github.com/alimranahmed/liftpad/blob/main/LICENSE)