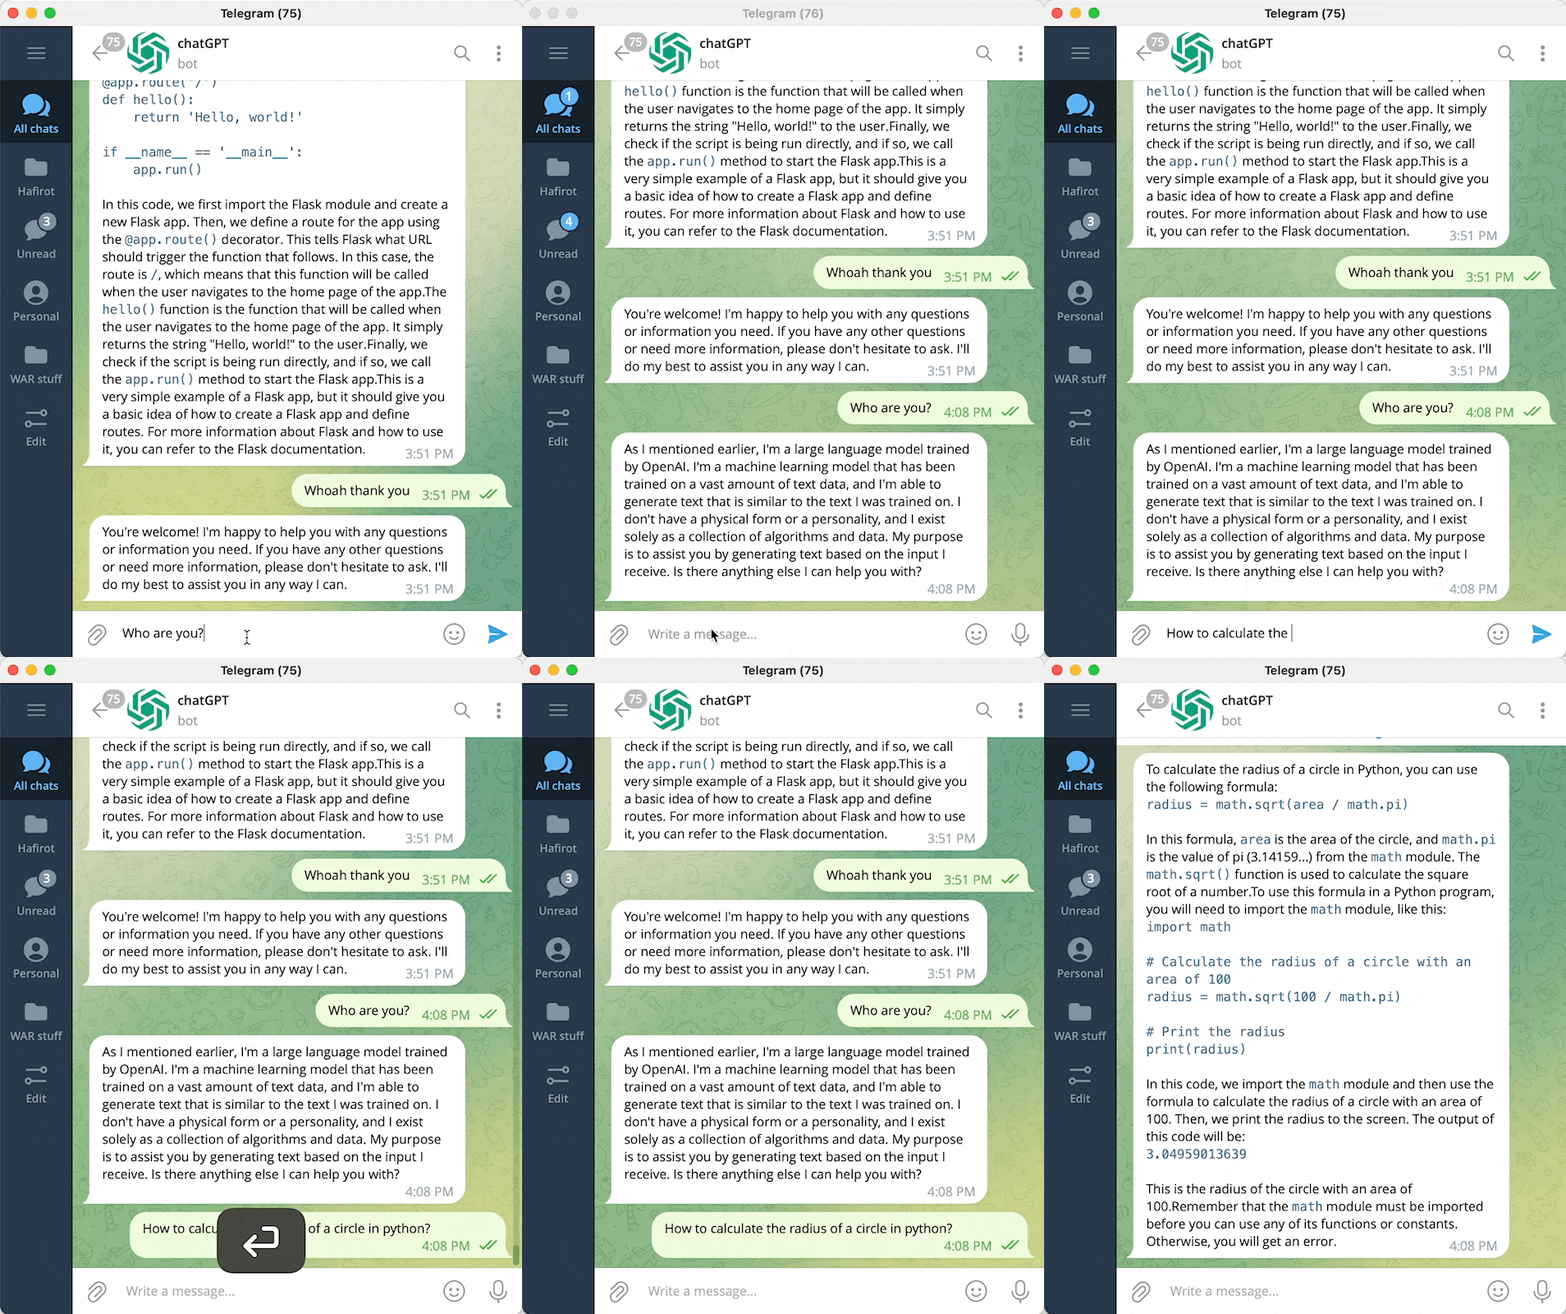
https://github.com/altryne/chatGPT-telegram-bot
This is a very early attempt at having chatGPT work within a telegram bot
https://github.com/altryne/chatGPT-telegram-bot
Last synced: 3 months ago
JSON representation
This is a very early attempt at having chatGPT work within a telegram bot
- Host: GitHub
- URL: https://github.com/altryne/chatGPT-telegram-bot
- Owner: altryne
- License: mit
- Created: 2022-12-02T22:49:22.000Z (over 2 years ago)
- Default Branch: main
- Last Pushed: 2023-03-01T18:48:18.000Z (over 2 years ago)
- Last Synced: 2025-03-18T01:42:21.264Z (4 months ago)
- Language: Python
- Size: 767 KB
- Stars: 1,665
- Watchers: 41
- Forks: 231
- Open Issues: 35
-
Metadata Files:
- Readme: README.md
- License: License
Awesome Lists containing this project
- awesome - altryne/chatGPT-telegram-bot - This is a very early attempt at having chatGPT work within a telegram bot (Python)
- awesome-chatgpt - Telegram bot StableDiffusion+ChatGPT
- awesome-ai-client - altryne/chatGPT-telegram-bot - This is a Telegram bot that lets you chat with the chatGPT language model using your local browser. (🔧 Others)
- awesome-chatgpt - altryne/chatGPT-telegram-bot - An early-stage Telegram bot that integrates ChatGPT for conversational AI, with features for image generation using Stable Diffusion and browsing capabilities via Google search. (UIs / Messenger bots)
- awesome-gpt - chatGPT-telegram-bot
README
# BREAKING: ChatGPT API was just released, going to update this repo to use it! We're back baby!
# ChatGPT Telegram Bot
[](https://twitter.com/altryne/status/1598822052760195072)
This is a Telegram bot that lets you chat with the [chatGPT](https://github.com/openai/gpt-3) language model using your local browser. The bot uses Playwright to run chatGPT in Chromium, and can parse code and text, as well as send messages. It also includes a `/draw` command that allows you to generate pictures using stable diffusion. More features are coming soon.
## Features
- [ ] Chat with chatGPT from your Telegram on the go
- [ ] `/draw` pictures using stable diffusion (version 0.0.2)
- [ ] `/browse` give chatGPT access to Google (version 0.0.3)
## How to Install
### Step 1: Install Python and Miniconda
1. Go to the [Miniconda download page](https://docs.conda.io/en/latest/miniconda.html).
2. Click on the appropriate installer for your operating system.
3. Follow the prompts to complete the installation.
### Step 2: Create a conda environment
1. Open a terminal or command prompt.
2. Navigate to the directory where you want to create the environment.
3. Run `conda env create -f environment.yml` to create the environment.
4. Activate the newly created environment `conda activate chat`
### Step 3: Install Playwright
1. Open a terminal or command prompt.
2. Navigate to the directory where you installed Miniconda.
3. Run `playwright install` to download the necessary Chromium software.
4. Run `playwright install-deps` to download the necessary dependencies
### Step 4: Set up your Telegram bot
1. Set up your Telegram bot token and user ID in the `.env` file. See [these instructions](https://core.telegram.org/bots/tutorial#obtain-your-bot-token) for more information on how to do this.
> How to obtain telegram user id? Add telegram [userinfobot](https://t.me/useridinfobot) to your telegram contacts
2. Edit the `.env.example` file, rename it to `.env`, and place your values in the appropriate fields.
### Step 5: Set up your API keys
1. Copy the `.env.example` file and rename the copy to `.env`.
2. To use the `/draw` command, you will need to obtain an API key for stable diffusion. To do this, go to [Dream Studio Beta](https://beta.dreamstudio.ai/membership?tab=home) and sign up for a free membership.
3. SERP_API_KEY is optional. If you want to use the `/browse` command, you will need to obtain an API key for SERP. To do this, go to [SERP API](https://serpapi.com/) and sign up for a free account.
### Step 5: Run the server
1. Open a terminal or command prompt.
2. Navigate to the directory where you installed the ChatGPT Telegram bot.
3. Run `python server.py` to start the server.
### Step 6: Chat with your bot in Telegram
1. Open the Telegram app on your device.
2. Find your bot in the list of contacts (you should have already created it with @botfather).
3. Start chatting with your bot.
## If you're using Docker inside a server (headless mode)
You can use the docker image to launch your bot in a server (using playwright headless mode)
`docker-compose` example
```docker-compose
services:
chatgpt-telegram-bot:
image: ghcr.io/altryne/chatgpt-telegram-bot
container_name: chatgpt-telegram-bot
environment:
- TELEGRAM_API_KEY=
- TELEGRAM_USER_ID= #Use this with your user ID to restrict usage only to your account
- STABILITY_API_KEY= #use this if you want the bot to draw things with stability AI as well
- SERP_API_KEY= #add this from serpapi if you want to enable the google search feature
- OPEN_AI_EMAIL= #openai login email. Needed for autologin in headless mode
- OPEN_AI_PASSWORD= #openai password. Needed for autologin in headless mode
```
## Credits
- Creator [@Altryne](https://twitter.com/altryne/status/1598902799625961472) on Twitter
- Based on [Daniel Gross's whatsapp gpt](https://github.com/danielgross/whatsapp-gpt) package.