https://github.com/anders94/raspberry-pi-home-automation
A node.js based home automation system based around the Raspberry Pi.
https://github.com/anders94/raspberry-pi-home-automation
Last synced: 10 months ago
JSON representation
A node.js based home automation system based around the Raspberry Pi.
- Host: GitHub
- URL: https://github.com/anders94/raspberry-pi-home-automation
- Owner: anders94
- Created: 2013-07-05T14:59:22.000Z (about 13 years ago)
- Default Branch: master
- Last Pushed: 2018-12-19T13:08:42.000Z (over 7 years ago)
- Last Synced: 2024-10-12T20:25:39.954Z (almost 2 years ago)
- Language: JavaScript
- Size: 6.84 KB
- Stars: 167
- Watchers: 36
- Forks: 51
- Open Issues: 0
-
Metadata Files:
- Readme: README.md
Awesome Lists containing this project
- awesome-raspberry-pi - Home Automation with NodeJS
README
raspberry-pi-home-automation
============================
A node.js based home automation system based around the Raspberry Pi. For background around this project:
[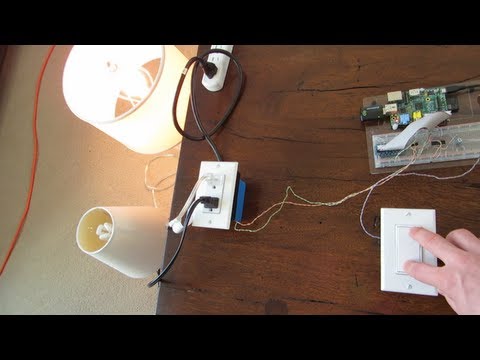](http://www.youtube.com/watch?v=SEAQVXHSwg4)
Installation
============
To get started, clone the repository and install the required dependencies.
git clone https://github.com/anders94/raspberry-pi-home-automation.git
cd raspberry-pi-home-automation
npm install
Hardware
========
The Raspberry Pi needs a little bit of circuitry to protect and amplify its GPIO
ports. Here's schematics of the circuits I created for this project.
Protected Pull-Up Switch
------------------------
If you want to read from the GPIO pins on the Raspberry Pi, you shouldn't just
switch the pin between 3.3v+ and nothing. Rather, you should either pull it up
to 3.3v+ through a small (1k) resistor or drain it down to ground through a
larger (10k + 1k = 11k) resistance.

Relay Driver
------------
The GPIO pins on the Raspberry Pi run at 3.3v which isn't really enough to
solidly throw relays. (in my case, I'm using a solid state relay but the
theory is the same) This circuit uses an NPN transistor to amplify the 3.3v
GPIO output to a 5v output which is enough to throw the relay.

Server
======
The server uses MQTT, a lightweight messaging channel over TCP, and presents a
pub-sub like interface to clients. Clients connect and can publish messages which
get copied to all other connected clients.
To start the server:
node server
It will connect and listen to 0.0.0.0:1883 by default.
Clients
=======
Clients read from and optionally write to the GPIO pins on the Raspberry Pi. Light
switches are directly attached to 3.3v GPIO pins pushing them either high or low.
Solid state relays to switch 120v AC loads are driven via 3.3v GPIO pins which are
up-converted to 5v with a transistor. (3.3v isn't quite enough to solidly switch the
Sharp S216S02 solid state relays I'm using) You may need to access GPIO pins as root
depending on how you have things set up.
watch.js
--------
Fires a callback when the GPIO pin state changes. Use this to test GPIO input
functionality.
blink.js
--------
Blinks GPIO pins on and off for 5 seconds so you can get your SSR setup working.
light-switch.js
---------------
Simple on or off lightswitch example, linking input and output. It does exactly
what you think it does.
multi-light-switch.js
---------------------
Connects to the server (IP is manually set in the source) via MQTT and
publishes light switch events. It works as a four position lightswitch
for two lights. See the video for a demonstration of this in action.
TODO
====
Publish the SPI code and circuit schematic for the 120vAC current sensing capability.