https://github.com/animator/blurhash-numba
Fastest BlurHash implementation for Python using Numba
https://github.com/animator/blurhash-numba
blurhash numba python
Last synced: about 1 year ago
JSON representation
Fastest BlurHash implementation for Python using Numba
- Host: GitHub
- URL: https://github.com/animator/blurhash-numba
- Owner: animator
- License: mit
- Created: 2020-09-24T00:59:22.000Z (over 5 years ago)
- Default Branch: master
- Last Pushed: 2022-03-03T05:18:19.000Z (over 4 years ago)
- Last Synced: 2025-04-05T06:45:51.511Z (about 1 year ago)
- Topics: blurhash, numba, python
- Language: Python
- Homepage:
- Size: 3.96 MB
- Stars: 8
- Watchers: 2
- Forks: 1
- Open Issues: 1
-
Metadata Files:
- Readme: README.md
- Changelog: CHANGELOG.md
- License: LICENSE
Awesome Lists containing this project
README
# blurhash-numba : The fastest Python 3 BlurHash implementation *powered by* numba
[](https://travis-ci.com/animator/blurhash-numba)
[](https://pypi.org/project/blurhash-numba)
[](https://pypi.org/project/blurhash-numba)
[](https://github.com/animator/blurhash-numba/blob/master/LICENSE)
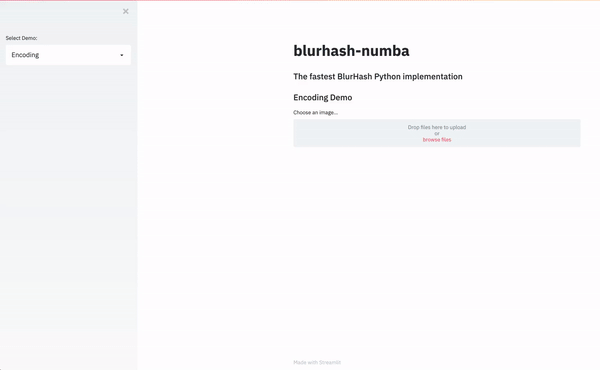
## Check out the Interactive Demo - [Link](https://share.streamlit.io/realworldpython/blurhash-numba-app/main/app.py)
## What is BlurHash?
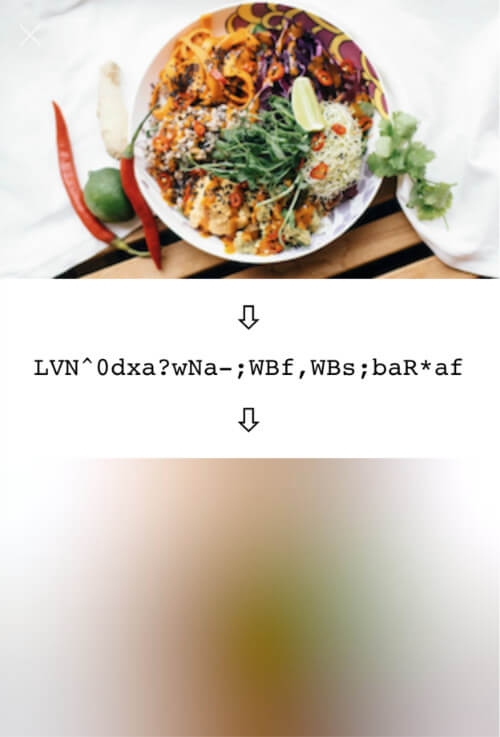
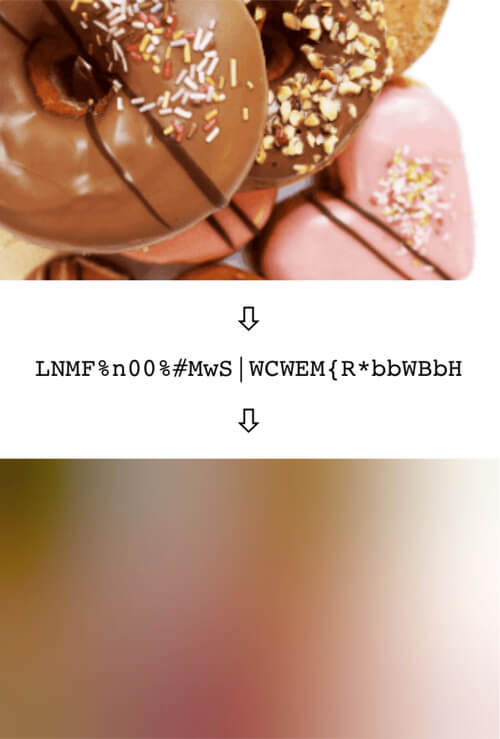
BlurHash is a compact representation of a placeholder for an image.

BlurHash encoder consumes an image, and provides a short string (only 20-30 characters!) that represents the placeholder for the image. You perform this on the backend of your service, and store the string along with the image. When you send data to any client, you send both the URL to the image, and the BlurHash string. Your client then takes the string, and decodes it into an image that it shows while the real image is loading over the network. The string is short enough that it comfortably fits into whatever data format you use. For instance, it can easily be added as a field in a JSON object.
In summary:
Read more about the algorithm [here](https://github.com/woltapp/blurhash/blob/master/Algorithm.md).
# Installation
You can install `blurhash-numba` using pip3
```
$ pip3 install blurhash-numba
```
You can also optionally install `Pillow` (PIL) along with `blurhash-numba` in case it is not already installed
```
$ pip3 install blurhash-numba[pillow]
```
# Usage
## Encoding
As `blurhash_numba.encode` accepts the image in the form of a `numpy` array. You can convert an image file using the `Pillow` python library.
```python
from blurhash_numba import encode
from PIL import Image
import numpy as np
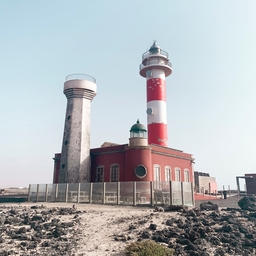
image = Image.open("256.jpg")
```
> `image`
> 
```python
image_array = np.array(image.convert("RGB"), dtype=np.float)
blurhash_code = encode(image_array, x_components = 4, y_components = 3)
```
> `blurhash_code`
> `'LtL#LZR*x]jG.TRkoeayIUofM{R*'`
`y_components` and `x_components` parameters adjust the amount of
vertical and horizontal AC components in hashed image. Both parameters must
be `>= 1` and `<= 9`.
## Decoding
```python
from blurhash_numba import decode
from PIL import Image
import numpy as np
blurhash_code = 'LtL#LZR*x]jG.TRkoeayIUofM{R*'
blur_img = Image.fromarray(np.array(decode(blurhash_code, 256, 256)).astype('uint8'))
```
> `blur_img`
> 
# Tests
Run test suite with `pytest` in virtual environment
```
$ pytest
```
# FAQs
## Why should I use blurhash-numba?
This is the fastest implementation of the BlurHash algorithm (both encoding & decoding) in Python currently as it uses `numba` to directly convert the Python+NumPy code into fast machine code. It is 30-70x faster than [halcy/blurhash-python](https://github.com/halcy/blurhash-python) and 2-4x faster than [woltapp/blurhash](https://github.com/woltapp/blurhash).
## How do I pick the number of X and Y components?
It depends a bit on taste. The more components you pick, the more information is retained in the placeholder, but the longer the BlurHash string will be. Also, it doesn't always look good with too many components. We usually go with 4 by 3, which seems to strike a nice balance.
However, you should adjust the number of components depending on the aspect ratio of your images. For instance, very wide images should have more X components and fewer Y components.
## What is the `punch` parameter in this implementations?
It is a parameter that adjusts the contrast on the decoded image. 1 means normal, smaller values will make the effect more subtle, and larger values will make it stronger. This is basically a design parameter, which lets you adjust the look.
Technically, what it does is scale the AC components up or down.
# Credits
This project is based on the pure python BlurHash implementation by [halcy/blurhash-python](https://github.com/halcy/blurhash-python).
Also credit goes to the original implementation by [woltapp/blurhash](https://github.com/woltapp/blurhash).