https://github.com/anthonygress/threejs-start
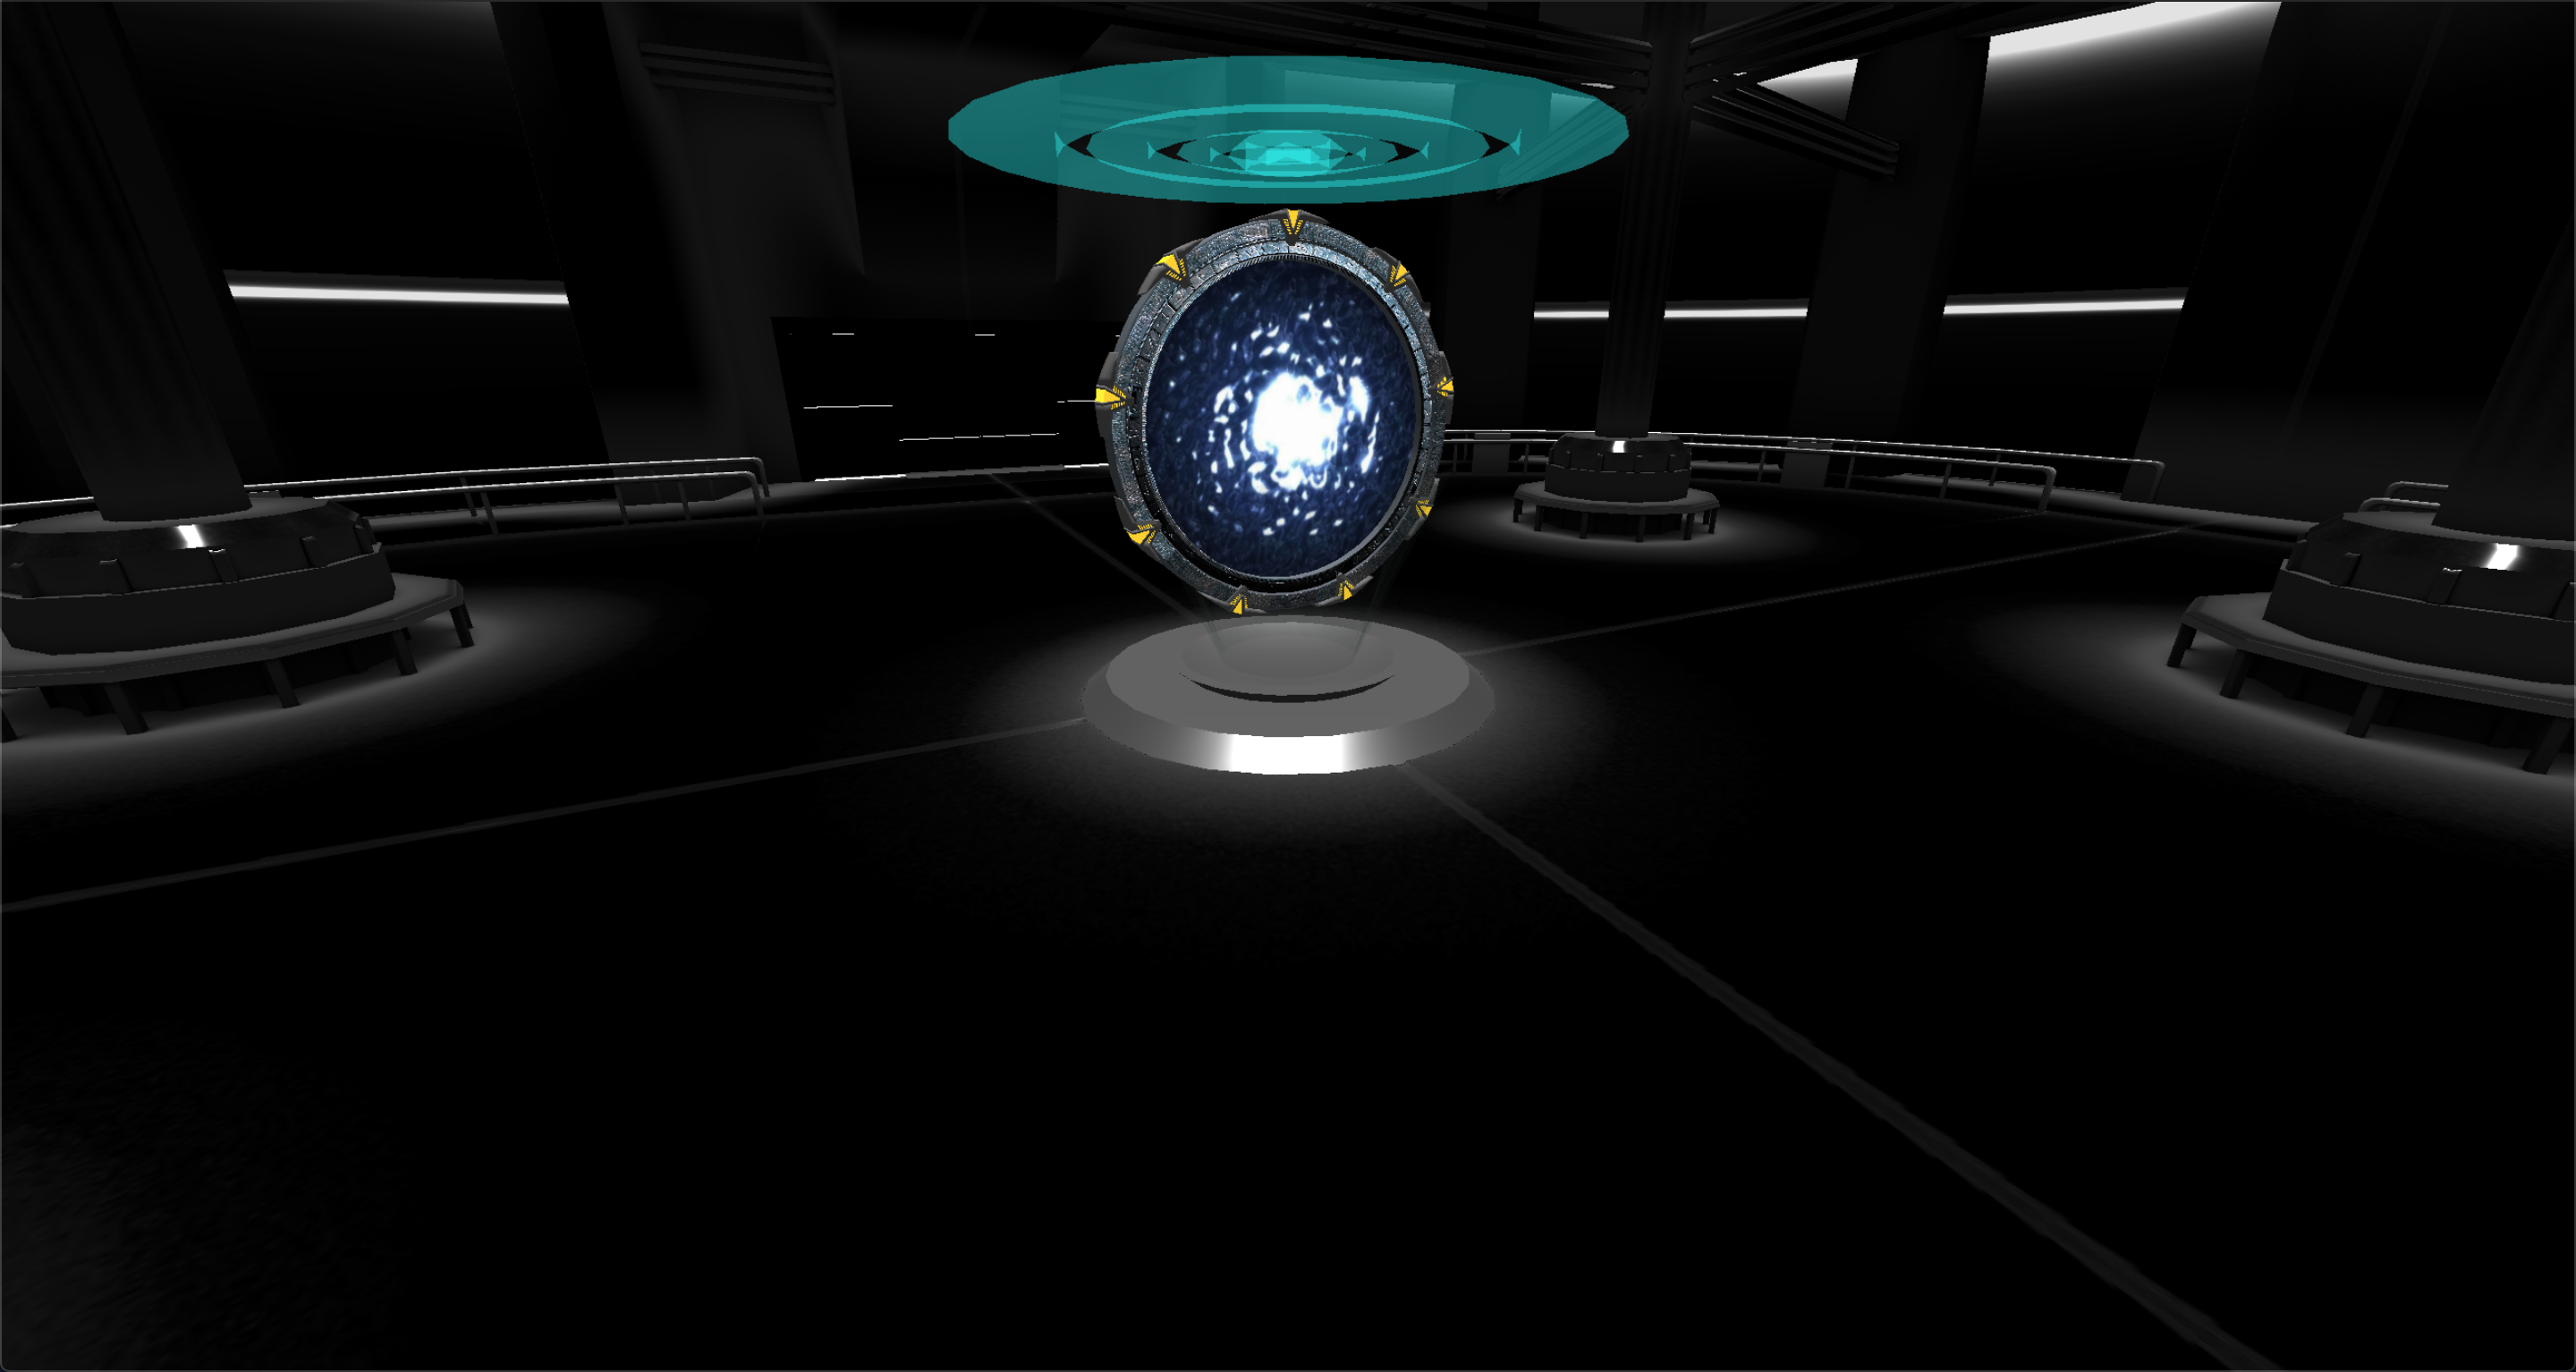
A boilerplate for three js projects, this one has a stargate model inside of a starship.
https://github.com/anthonygress/threejs-start
html javascript threejs webgl webpack
Last synced: 3 months ago
JSON representation
A boilerplate for three js projects, this one has a stargate model inside of a starship.
- Host: GitHub
- URL: https://github.com/anthonygress/threejs-start
- Owner: AnthonyGress
- License: mit
- Created: 2021-08-06T17:42:15.000Z (almost 5 years ago)
- Default Branch: main
- Last Pushed: 2021-08-10T22:10:53.000Z (almost 5 years ago)
- Last Synced: 2025-08-04T21:49:34.980Z (11 months ago)
- Topics: html, javascript, threejs, webgl, webpack
- Language: JavaScript
- Homepage:
- Size: 19.5 MB
- Stars: 3
- Watchers: 1
- Forks: 0
- Open Issues: 0
-
Metadata Files:
- Readme: README.md
- License: LICENSE
Awesome Lists containing this project
README
ThreeJS Starter
A three.js starter based on object-oriented programming.
## Table of Contents
- [Introduction](#introduction)
- [Getting Started](#getting-started)
- [Event Emitter](#event-emitter)
- [Mouse Control](#mouse-control)
- [Add Material](#add-material)
- [Create Mesh](#create-mesh)
- [Load Model](#load-model)
- [Customized Shader](#customized-shader)
- [GSAP Animation](#gsap-animation)
- [Debug Mode](#debug-mode)
- [Notes](#notes)
## Introduction
This is a three.js starter written in OOP based on [Bruno Simon's project](https://github.com/brunosimon/folio-2019) of this [cool website](https://bruno-simon.com/). I think this would really help for web developers, who are trying to use three.js library in a more modular and manageable way in their future projects. It's also a quick guide to understand some basic structure of Bruno Simon's project.
To use this starter, I would go through some main steps. However, you don't need to complete the entire document before getting started, instead, you can come back if needed while developing your own project.
Features: [Three.js](https://threejs.org/), [WebGL](https://github.com/KhronosGroup/WebGL), [GSAP](https://greensock.com/gsap/), [dat.gui](https://github.com/dataarts/dat.gui), [webpack](https://webpack.js.org/), [Babel](https://babeljs.io/), [ESLint](https://eslint.org/), OOP
## Getting Started
Type the following steps into the terminal.
```bash
git clone https://github.com/TomHsiao1260/three-starter.git
cd three-starter
npm install
```
Then start the dev server and navigate to http://localhost:8080
```bash
npm run dev
```
## Event Emitter
`Event Emitter` allows us to handle some custom events. For example, we can create an instance of `Time` class which is inherited from `Event Emitter`.
```javascript
// src/javascript/Application.js
this.time = new Time();
```
Let's put some callbacks via `Event Emitter` built-in `on` method.
```javascript
this.time.on('tick', myCallback);
```
Now, we can use `trigger` method to execute those callbacks. Note that it would only trigger events with the same name (`tick` in this example).
```javascript
this.time.trigger('tick');
```
You can also remove callbacks via `remove` method.
```javascript
const event = this.time.on('tick', myCallback);
this.time.remove(event);
```
In `src/javascript/Utils/Time.js`, the `trigger('tick')` would be executed for each frame, so callbacks such as `this.time.on('tick', ... )` would be automatically triggered once for each frame. In addition, the `Resources` class in this starter is also inherited from `Event Emitter` and callbacks such as `this.resources.on('ready', ... )` would be triggered after all resources are loaded.
You can also append multiple names to the callback, such as `.on('name1/name2/...', ... )`, so that both `.trigger('name1')` and `.trigger('name2')` will trigger the same callback. If you want to send parameters to the callback, you can use `.trigger('name', [para1, para2, ...])` which would send `para1` and `para2` as the first and second parameters to the callback, respectively.
## Mouse Control
The mouse controls are written in `src/javascript/World/Controls.js`. The instance of this class can be created as follows.
```javascript
// src/javascript/World/index.js
this.controls = new Controls({
time: this.time,
sizes: this.sizes,
});
```
You can put some callbacks after the mouse is pressed or released via the `Event Emitter`, or receive the current mouse position in Normalized Device Coordinate (NDC) as follows.
```javascript
// execute when pressing down the mouse button
this.time.on('mouseDown', myCallback);
// execute when releasing the mouse button
this.time.on('mouseUp', myCallback);
// current mouse x position: [-1, 1] from left to right
this.controls.mouse.x;
// current mouse y position: [-1, 1] from bottom to top
this.controls.mouse.y;
```
You can write your own custom events in `src/javascrpt/World/Controls.js` such as double click, keyboard controls, Raycaster, etc.
## Add Material
To create a material with external resources (ex: matcap), you can do the following steps. First, import the resources and put them into an array of objects.
```javascript
// src/javascript/Resources.js
import matcapGoldSource from '../models/matcaps/gold.png';
this.loader.load([
{ name: 'matcapGold', source: matcapGoldSource },
...
]);
```
Then create the material.
```javascript
// src/javascript/World/Materials.js
const { matcapGold } = this.resources.items;
this.items.matcap.gold = new THREE.MeshMatcapMaterial({ matcap: matcapGold });
```
Now, we can create the mesh using this material.
```javascript
// src/javascript/World/Torus.js
const material = this.material.items.matcap.gold;
const mesh = new THREE.Mesh(geometry, material);
```
## Create Mesh
Let's create a `THREE.Mesh` (ex: Torus) and add it to the scene. First, create a `Torus` class which can generate the `THREE.mesh`.
```javascript
// src/javascript/World/Torus.js
const geometry = new THREE.TorusGeometry(0.25, 0.08, 32, 100);
const material = this.material.items.matcap.gold;
const mesh = new THREE.Mesh(geometry, material);
this.container.add(mesh);
```
Then create an instance of this class. Note that the mesh would be added to the scene graph via the connection of `container` property, which is a `THREE.Object3D`.
```javascript
// src/javascript/World/index.js
import Torus from './Torus';
start() {
...
this.setTorus();
}
setTorus() {
this.torus = new Torus({
material: this.material,
});
this.container.add(this.torus.container);
}
```
## Load Model
The following steps can load some external models (ex: `.glb`, `.fbx`, etc.). First, we need to import our model file.
```javascript
// src/javascript/Resources.js
import foxSource from '../models/fox/glTF-Binary/Fox.glb';
this.loader.load([
{ name: 'fox', source: foxSource },
...
]);
```
Then create a class and add the loaded model to the `container` property.
```javascript
// src/javascript/World/Fox.js
const gltf = this.resources.items.fox;
this.container.add(gltf.scene);
```
Now we can create an instance of this class (just like [Create Mesh](#create-mesh)).
```javascript
// src/javascript/World/index.js
import Fox from './Fox';
start() {
...
this.setFox();
}
setFox() {
this.fox = new Fox({
resources: this.resources,
});
this.container.add(this.fox.container);
}
```
For simplicity, this starter only support `.glb`, `.gltf` and `.fbx` extensions. Draco compression would automatically support for models with `.glb` extension. If you want to load models with other extensions, you can check out `src/javascript/Utils/Loader.js` and write some custom model loaders.
## Customized Shader
You can create some customized shader materials as follows.
```javascript
// src/javascript/Materials/Plane.js
import vertexShader from '../../shaders/plane/vertex.glsl';
import fragmentShader from '../../shaders/plane/fragment.glsl';
export default function PlaneMaterial() {
const uniforms = {
uTime: { value: 0 },
};
const material = new THREE.ShaderMaterial({
vertexShader,
fragmentShader,
uniforms,
});
return material;
}
```
Then create an instance object of this material.
```javascript
// src/javascript/World/Materials.js
import PlaneMaterial from '../Materials/Plane';
...
this.items.shader.plane = new PlaneMaterial();
```
Now, we can use this shader material to create a plane mesh (just like [Create Mesh](#create-mesh)).
```javascript
// src/javascript/World/Plane.js
const geometry = new THREE.PlaneGeometry(1.2, 0.7, 50, 50);
const material = this.material.items.shader.plane;
const mesh = new THREE.Mesh(geometry, material);
```
## GSAP Animation
To handle animations in Three.js, one of the well-known options is [GSAP](https://greensock.com/gsap/) which is a blazing fast library for JavaScript animations. For convenience and predictable behavior, we use only single [GSAP Timeline](https://greensock.com/docs/v3/GSAP/Timeline) and apply [GSAP Labels](https://greensock.com/docs/v3/GSAP/Timeline/addLabel()) to handle all animations.
```javascript
// src/javascript/World/Transition.js
// all animations should be applied via this timeline
this.timeline = gsap.timeline();
...
const targetA = this.camera.instance.position;
const targetB = this.light.directionalLight;
const targetC = this.light.ambientLight;
this.timeline.to(targetA, { z: 1, duration: 2 }, 'firstTransition');
this.timeline.to(targetB, { intensity: 0.8, duration: 3 }, '<');
this.timeline.to(targetC, { intensity: 0.8, duration: 3 }, '<');
return this.timeline;
```
In `GSAP 3`, the `timeline` can be a promise which would be resolved when all animations are complete. As a result, we can return `this.timeline` at the end of the function, and then use `await` to manage the animation workflow as follows.
```javascript
// src/javscript/World/index.js
async start() {
...
await this.transition.firstTransition();
await this.transition.secondTransition();
...
}
```
This can ensure that `.secondTransition()` would not be executed until `.firstTransition()` is resolved. You can also add some procedures between each transition function if needed.
## Debug Mode
To enter the debug mode, you can append `#debug` at the end of the route http://localhost:8080/#debug. It would have [stats.js](https://github.com/mrdoob/stats.js/) performance monitor, and [dat.gui](https://github.com/dataarts/dat.gui) controller on the upper left and upper right, respectively.
In order to tune some parameters via `dat.gui` (ex: visibility of a Torus), you can do the following steps.
```javascript
// src/javascript/World/Torus.js
// create dat.gui folder
if (this.debug) {
this.debugFolder = this.debug.addFolder('torus');
this.debugFolder.open();
}
// add some tuning parameters to the 'torus' folder
if (this.debug) {
this.debugFolder.add(mesh, 'visible').name('visible');
...
}
```
Sometimes, printing out the whole scene graph is helpful. In this starter, the entire application has already been added to the global `window` object, so that you can easily print it out by typing `window.application` on your browser [console panel](https://developer.chrome.com/docs/devtools/console/).
```javascript
// src/index.js
window.application = new Application({
$canvas: document.querySelector('.js-canvas'),
});
```
Note that the current `dat.gui` library is installed locally instead of using `npm i dat.gui` in order to remove the ReDos [vulnerabilities warning](https://www.npmjs.com/advisories/1701) which is harmless when developing a frontend-only projects. Actually, this issue has already been [fixed and merged](https://github.com/dataarts/dat.gui/pull/279) recently and the warning will disappear after both `dat.gui` new version and `npm` security advisories have been updated. I will keep an eye on that and update this starter until `dat.gui` vulnerabilities warning disappears 🙂
## Notes
Would be really appreciated if you are willing to give me a star 🎉
If you have any questions or somewhere I can do better, welcome to send an issue or e-mail to me 🙏
e-mail: tomtogo1260@gmail.com
Forked from [TomHsiao1260](https://github.com/TomHsiao1260)