https://github.com/antoniotorres/homebridge-garage-door-gpio
A custom homebridge plugin to connect my old garage door remote with HomeKit
https://github.com/antoniotorres/homebridge-garage-door-gpio
home-automation homebridge homebridge-plugin homekit homekit-accessory homekit-accessory-protocol
Last synced: 4 months ago
JSON representation
A custom homebridge plugin to connect my old garage door remote with HomeKit
- Host: GitHub
- URL: https://github.com/antoniotorres/homebridge-garage-door-gpio
- Owner: antoniotorres
- License: apache-2.0
- Created: 2020-09-08T17:17:17.000Z (almost 5 years ago)
- Default Branch: master
- Last Pushed: 2020-09-08T18:43:08.000Z (almost 5 years ago)
- Last Synced: 2025-01-28T22:50:03.464Z (6 months ago)
- Topics: home-automation, homebridge, homebridge-plugin, homekit, homekit-accessory, homekit-accessory-protocol
- Language: TypeScript
- Homepage: https://www.npmjs.com/package/@toniotgz/homebridge-garage-door-gpio
- Size: 138 KB
- Stars: 2
- Watchers: 2
- Forks: 1
- Open Issues: 0
-
Metadata Files:
- Readme: README.md
- License: LICENSE
Awesome Lists containing this project
README

# Homebridge Garage Door Hack
```
NOTE: This package can only be used with a Raspberry Pi.
```
Homebridge plugin the supports opening and closing a garage door thought the GPIO pins of the Raspberry Pi.
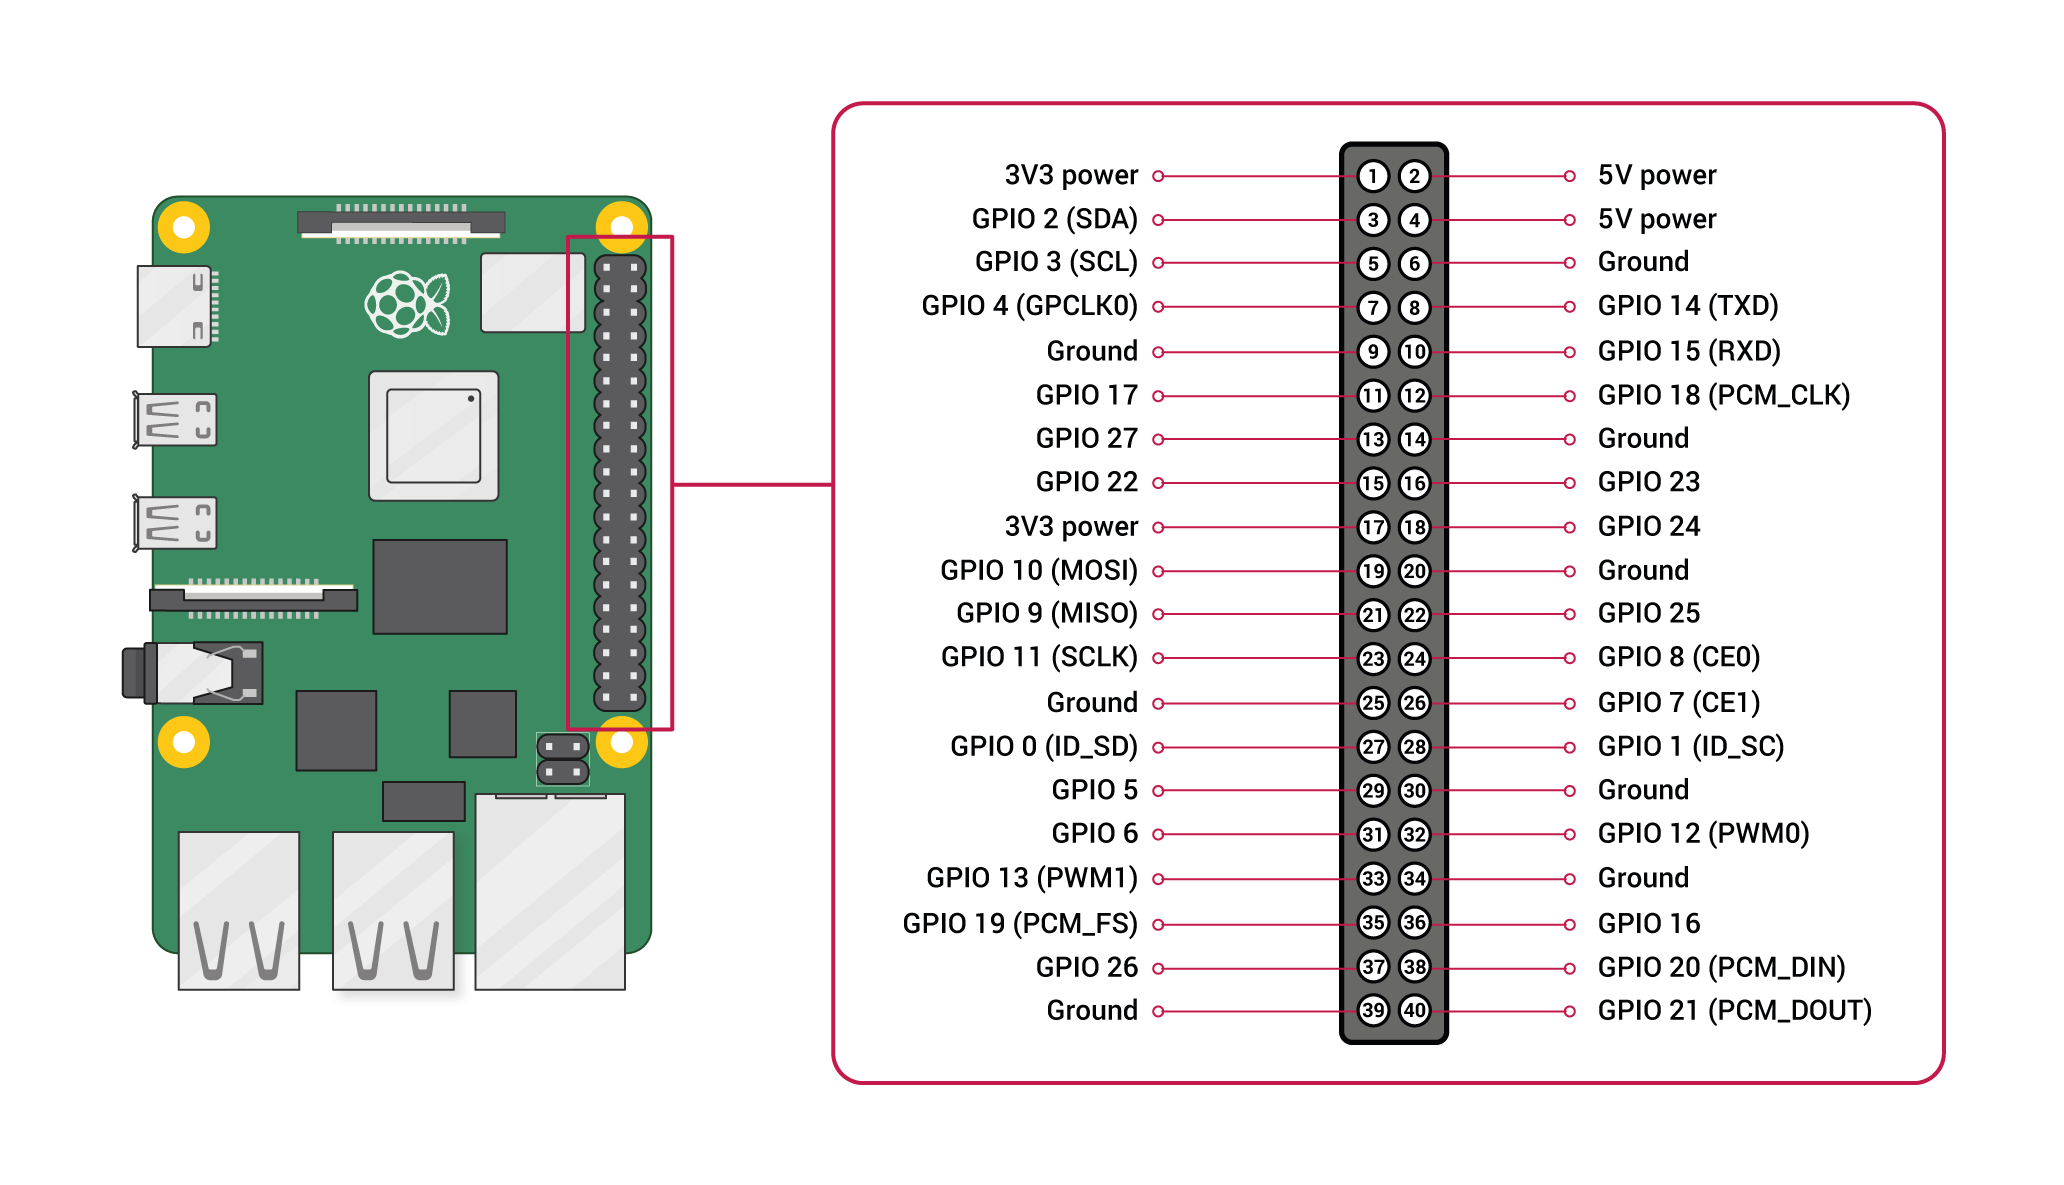
This package works by using pin 26 as a digital trigger. The image below shows the pin numbers of the Raspberry Pi.
## Installation
1. Install homebridge using: `npm install -g homebridge`
2. Install this plugin using: `npm install -g @toniotgz/homebridge-garage-door-gpio`
3. Update your configuration file. See the sample below.
## Configuration
### Configuration sample:
```json
"accessories": [
{
"accessory": "GarageDoorHack",
"name" : "Garage Door"
}
]
```
## Setup Development Environment
To develop Homebridge plugins you must have Node.js 12 or later installed, and a modern code editor such as [VS Code](https://code.visualstudio.com/). This plugin template uses [TypeScript](https://www.typescriptlang.org/) to make development easier and comes with pre-configured settings for [VS Code](https://code.visualstudio.com/) and ESLint. If you are using VS Code install these extensions:
- [ESLint](https://marketplace.visualstudio.com/items?itemName=dbaeumer.vscode-eslint)
## Install Development Dependencies
Using a terminal, navigate to the project folder and run this command to install the development dependencies:
```
npm install
```
## Build Plugin
TypeScript needs to be compiled into JavaScript before it can run. The following command will compile the contents of your [`src`](./src) directory and put the resulting code into the `dist` folder.
```
npm run build
```
## Link To Homebridge
Run this command so your global install of Homebridge can discover the plugin in your development environment:
```
npm link
```
You can now start Homebridge, use the `-D` flag so you can see debug log messages in your plugin:
```
homebridge -D
```
## Watch For Changes and Build Automatically
If you want to have your code compile automatically as you make changes, and restart Homebridge automatically between changes you can run:
```
npm run watch
```
This will launch an instance of Homebridge in debug mode which will restart every time you make a change to the source code. It will load the config stored in the default location under `~/.homebridge`. You may need to stop other running instances of Homebridge while using this command to prevent conflicts. You can adjust the Homebridge startup command in the [`nodemon.json`](./nodemon.json) file.