https://github.com/arbazkhan4712/smart-security-camera-pi3
IoT Raspberry Pi security camera running open-cv for object detection. The camera will send an email with an image of any objects it detects. It also runs a server that provides a live video stream over the internet.
https://github.com/arbazkhan4712/smart-security-camera-pi3
detection opencv python raspberry-pi-camera security-camera stream-video tutorial
Last synced: 9 months ago
JSON representation
IoT Raspberry Pi security camera running open-cv for object detection. The camera will send an email with an image of any objects it detects. It also runs a server that provides a live video stream over the internet.
- Host: GitHub
- URL: https://github.com/arbazkhan4712/smart-security-camera-pi3
- Owner: Arbazkhan4712
- License: mit
- Created: 2019-07-15T11:51:27.000Z (about 7 years ago)
- Default Branch: master
- Last Pushed: 2020-05-07T18:01:05.000Z (about 6 years ago)
- Last Synced: 2025-02-01T12:44:09.952Z (over 1 year ago)
- Topics: detection, opencv, python, raspberry-pi-camera, security-camera, stream-video, tutorial
- Language: Python
- Size: 351 KB
- Stars: 16
- Watchers: 3
- Forks: 11
- Open Issues: 0
-
Metadata Files:
- Readme: README.md
- License: License
Awesome Lists containing this project
README
# Smart-Security-Camera-Pi3
[](https://www.python.org/) [](https://www.python.org/downloads/release/python-360/) [](https://pypi.python.org/pypi/ansicolortags/)
[](https://GitHub.com/Naereen/StrapDown.js/network/) [](https://GitHub.com/Naereen/StrapDown.js/network/)
IoT Raspberry Pi security camera running open-cv for object detection. The camera will send an email with an image of any objects it detects. It also runs a server that provides a live video stream over the internet.
VIDEO:
[](https://www.youtube.com/watch?v=hN_ycikjrWg)
## Setup
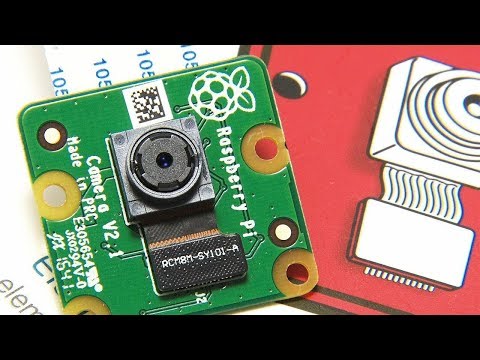
This project uses a Raspberry Pi Camera to stream video. Before running the code, make sure to configure the raspberry pi camera on your device.
Open the terminal and run
```
sudo raspi-config
```
Select `Interface Options`, then `Pi Camera` and toggle on. Press `Finish` and exit.
You can verify that the camera works by running
```
raspistill -o image.jpg
```
which will save a image from the camera in your current directory. You can open up the file inspector and view the image.
## Installing Dependencies
This project uses openCV to detect objects in the video feed. You can install openCV by using the following [tutorial](http://www.pyimagesearch.com/2016/04/18/install-guide-raspberry-pi-3-raspbian-jessie-opencv-3/). I used the Python 2.7 version of the tutorial.
The installation took almost 8 hours (!!) on my Raspberry Pi Zero, but it would be considerably faster on a more powerful board like the Raspberry Pi 3.
The tutorial will prompt you to create a virtual environment. Make sure you are using the virtual environment by typing the following commands.
```bash
source ~/.profile
workon cv
```
Next, navigate to the repository directory
```
cd Smart-Security-Camera
```
and install the dependencies for the project
```
pip install -r requirements.txt
```
*Note: If you're running python3, you'll have to change the import statements at the top of the mail.py file*
```
from email.mime.multipart import MIMEMultipart
from email.mime.text import MIMEText
from email.mime.image import MIMEImage
```
*and change your print statements from quotes to parenthesis*
```
print "" => print()
```
## Customization
To get emails when objects are detected, you'll need to make a couple modifications to the `mail.py` file.
Open `mail.py` with vim `vim mail.py`, then press `i` to edit. Scroll down to the following section
```
# Email you want to send the update from (only works with gmail)
fromEmail = 'myemail@gmail.com'
fromEmailPassword = 'password1234'
# Email you want to send the update to
toEmail = 'anotheremail@gmail.com'
```
and replace with your own email/credentials. The `mail.py` file logs into a gmail SMTP server and sends an email with an image of the object detected by the security camera.
Press `esc` then `ZZ` to save and exit.
You can also modify the `main.py` file to change some other properties.
```
email_update_interval = 600 # sends an email only once in this time interval
video_camera = VideoCamera(flip=True) # creates a camera object, flip vertically
object_classifier = cv2.CascadeClassifier("models/fullbody_recognition_model.xml") # an opencv classifier
```
Notably, you can use a different object detector by changing the path `"models/fullbody_recognition_model.xml"` in `object_classifier = cv2.CascadeClassifier("models/fullbody_recognition_model.xml")`.
to a new model in the models directory.
```
facial_recognition_model.xml
fullbody_recognition_model.xml
upperbody_recognition_model.xml
```
## Running the Program
Run the program
```
python main.py
```
You can view a live stream by visiting the ip address of your pi in a browser on the same network. You can find the ip address of your Raspberry Pi by typing `ifconfig` in the terminal and looking for the `inet` address.
Visit `:5000` in your browser to view the stream.
Note: To view the live stream on a different network than your Raspberry Pi, you can use [ngrok](https://ngrok.com/) to expose a local tunnel. Once downloaded, run ngrok with `./ngrok http 5000` and visit one of the generated links in your browser.
## License & Copyright
© [Arbaz Khan](https://arbazkhan4712.github.io/Contact.html)
Licensed under the [MIT License](License)