https://github.com/ashishpatel26/kubeflow-installation-on-windows-10
Kubeflow installation on windows 10/11
https://github.com/ashishpatel26/kubeflow-installation-on-windows-10
deep-learning docker docker-setup kubeflow kubernetes machine-learning minikube minikube-cluster minikube-setup mlflow mlops
Last synced: 5 months ago
JSON representation
Kubeflow installation on windows 10/11
- Host: GitHub
- URL: https://github.com/ashishpatel26/kubeflow-installation-on-windows-10
- Owner: ashishpatel26
- Created: 2022-01-19T10:05:27.000Z (over 3 years ago)
- Default Branch: main
- Last Pushed: 2022-12-26T13:33:41.000Z (almost 3 years ago)
- Last Synced: 2025-04-02T17:53:07.890Z (6 months ago)
- Topics: deep-learning, docker, docker-setup, kubeflow, kubernetes, machine-learning, minikube, minikube-cluster, minikube-setup, mlflow, mlops
- Homepage:
- Size: 1.57 MB
- Stars: 17
- Watchers: 4
- Forks: 8
- Open Issues: 0
-
Metadata Files:
- Readme: README.md
Awesome Lists containing this project
README
# Kubeflow-installation-on-windows-10/11
#  
> **Kubeflow installation on windows 10/11**
Official Kubeflow : https://github.com/kubeflow/kubeflow
## Section 0: **Docker Installation**
Install docker on windows11.
1. Install **wsl2** : [installation video](https://www.youtube.com/watch?v=n-J9438Mv-s&ab_channel=Pureinfotech) .
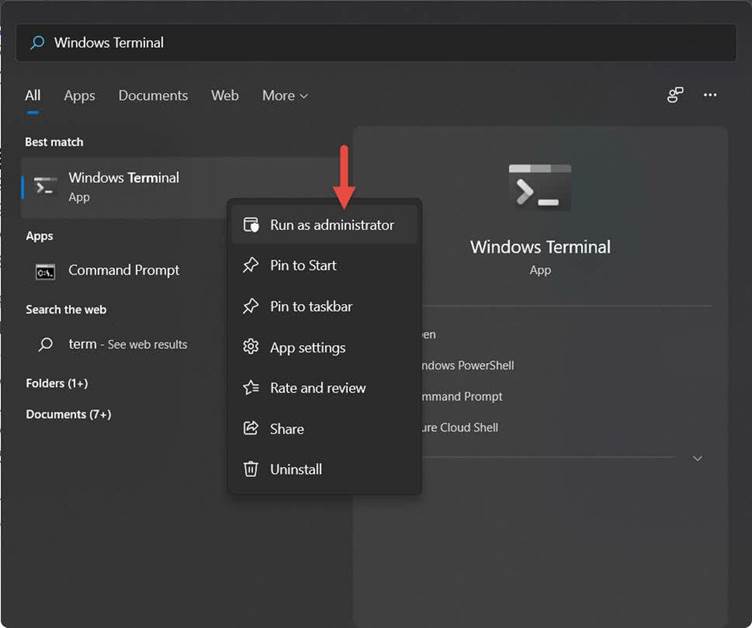
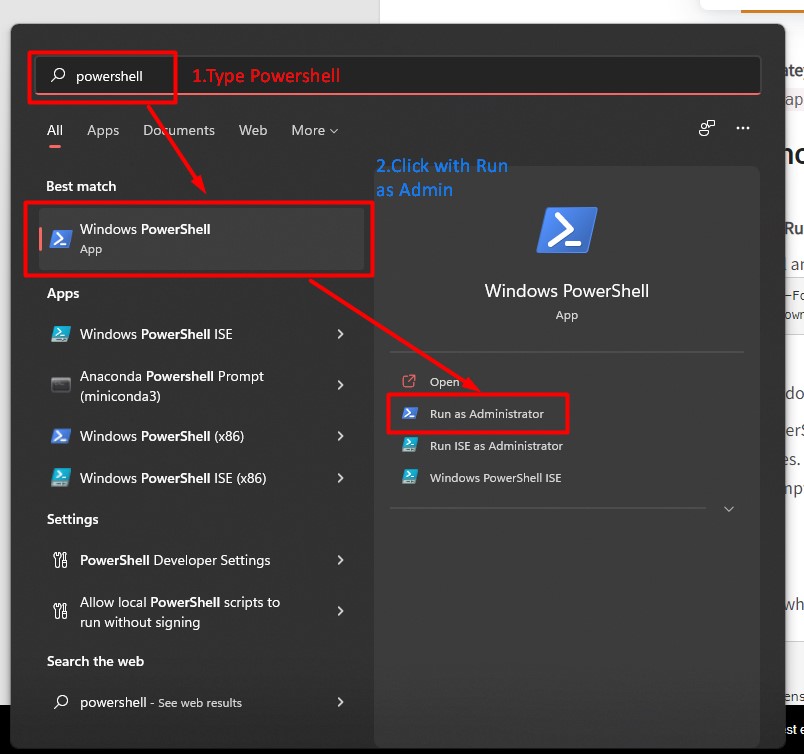
2. Open command prompt with “**Run as administrator**”.
3. Type command: wsl –install -d Ubuntu
**YouTube**: [https://www.youtube.com/watch?v=ysRfLJCBo_M&ab_channel=Sonoo%27sKB](https://www.youtube.com/watch?v=ysRfLJCBo_M&ab_channel=Sonoo'sKB)
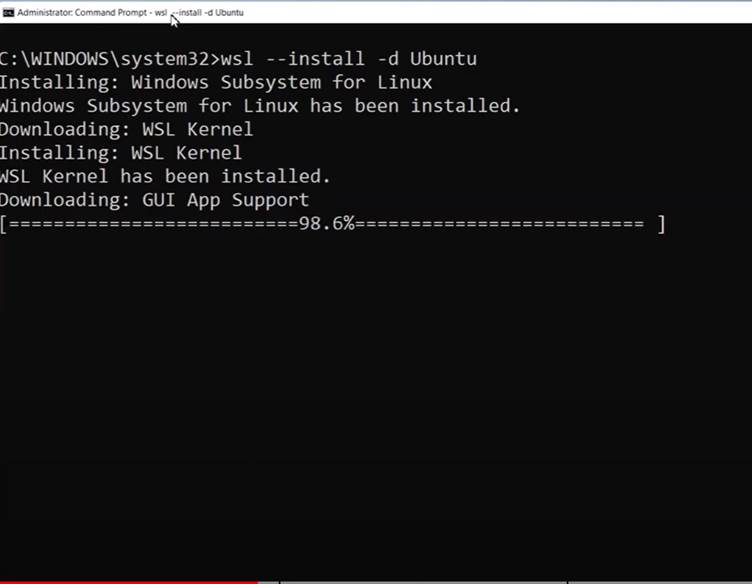
Then restart your PC.
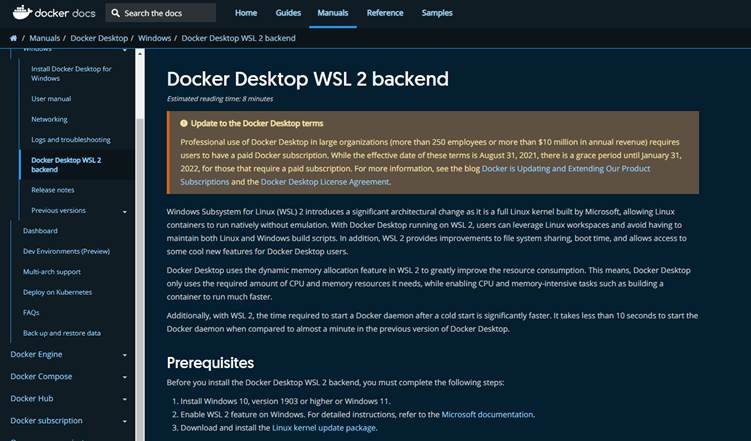
4. Download Docker from the below link.
https://docs.docker.com/desktop/windows/wsl/
5. Setup the docker step by step
YouTube: [https://www.youtube.com/watch?v=BMBwyadxokc&t=55s&ab_channel=Sonoo%27sKB](https://www.youtube.com/watch?v=BMBwyadxokc&t=55s&ab_channel=Sonoo'sKB)
#### **Docker file Run:**
---
1. **Run the Docker**
```powershell
Docker run -p 8000:8000 money_api_new:1.0
```
## Section 1 : Installation of Choco on Windows 10 or Windows 11
---
**Video References**
[](https://www.youtube.com/watch?v=-5WLKu_J_AE)
#### **Step 1: Installing the Chocolatey Package manager for Windows**
---
#### Step-2 Paste the following command into Powershell and press enter.
----
```powershell
Set-ExecutionPolicy Bypass -Scope Process -Force; `
iex ((New-Object System.Net.WebClient).DownloadString('https://chocolatey.org/install.ps1'))
```
> **OR**
```powershell
Set-ExecutionPolicy Bypass -Scope Process -Force; [System.Net.ServicePointManager]::SecurityProtocol = [System.Net.ServicePointManager]::SecurityProtocol -bor 3072; iex ((New-Object System.Net.WebClient).DownloadString('https://community.chocolatey.org/install.ps1'))
```
> **Answer Yes when prompted**

## Section 2: Hyper-V installation
---
**Video:**
[](https://www.youtube.com/watch?v=sFr4izuGuPA)
#### Minimum Requirement to install hyper-V
----
- Windows 10 Enterprise, Pro, or Education
- 64-bit Processor with Second Level Address Translation (SLAT).
- CPU support for VM Monitor Mode Extension (VT-c on Intel CPUs).
- Minimum of 4 GB memory.
**Trick setup :**
```bash
pushd "%~dp0"
dir /b %SystemRoot%\servicing\Packages\*Hyper-V*.mum >hv.txt
for /f %%i in ('findstr /i . hv.txt 2^>nul') do dism /online /norestart /add-package:"%SystemRoot%\servicing\Packages\%%i"
del hv.txt
Dism /online /enable-feature /featurename:Microsoft-Hyper-V -All /LimitAccess /ALL
pause
```
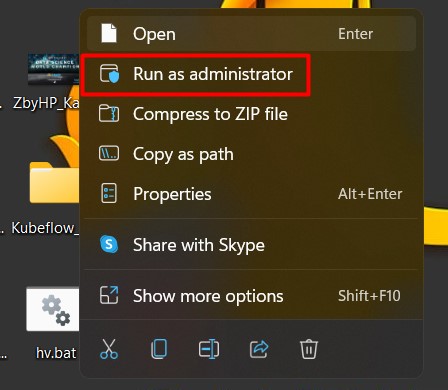
Save above code save as with name `hv.bat`.
and click on Run as Administrator
## Enable Hyper-V using PowerShell
1. Open a PowerShell console as Administrator.
2. Run the following command:
```powershell
Enable-WindowsOptionalFeature -Online -FeatureName Microsoft-Hyper-V -All
```
> If the command couldn't be found, make sure you're running PowerShell as Administrator.
>
> **When the installation has completed, reboot.**
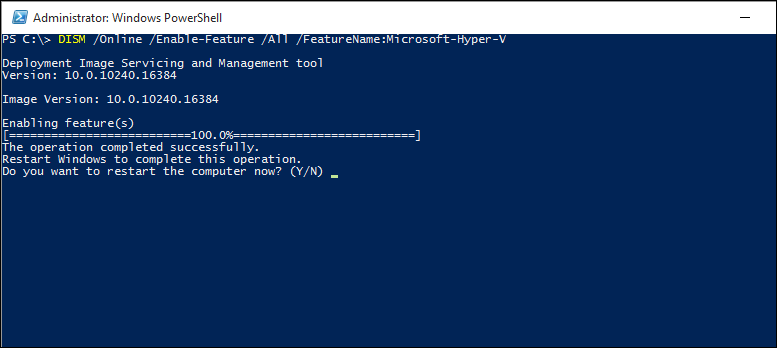
## Enable Hyper-V with CMD and DISM
The Deployment Image Servicing and Management tool (DISM) helps configure Windows and Windows images. Among its many applications, DISM can enable Windows features while the operating system is running.
To enable the Hyper-V role using DISM:
1. Open up a PowerShell or CMD session as Administrator.
2. Type the following command:
```powershell
DISM /Online /Enable-Feature /All /FeatureName:Microsoft-Hyper-V
```
## Enable the Hyper-V role through Settings
1. Right click on the Windows button and select ‘Apps and Features’.
2. Select **Programs and Features** on the right under related settings.
3. Select **Turn Windows Features on or off**.
4. Select **Hyper-V** and click **OK**.
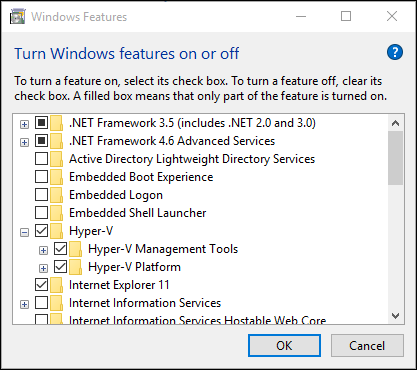
***Note : When the installation has completed you are prompted to restart your computer.***
---
### Note : Section-1 and Section-2 are prerequisite
---
## Section-3 : Installation of MiniKube and Kubectl
---
**Video :**
[](https://www.youtube.com/watch?v=B9hyHW2HK9M)
#### **Step : 1**: Type `Choco install minikube` on powershell with run as administrator mode
---
```powershell
choco install minikube
choco install kubectl
```

#### **Step : 2**: Type `Choco install kubectl` on powershell with run as administrator mode
---

## Section-4 : Change setting in Hyper-V
---
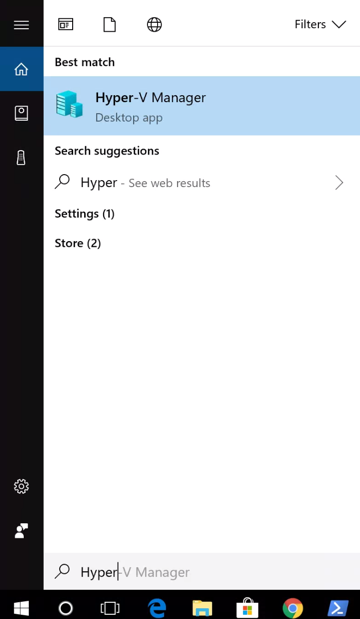
**Step 1: Open the Hyper-V Manager.**
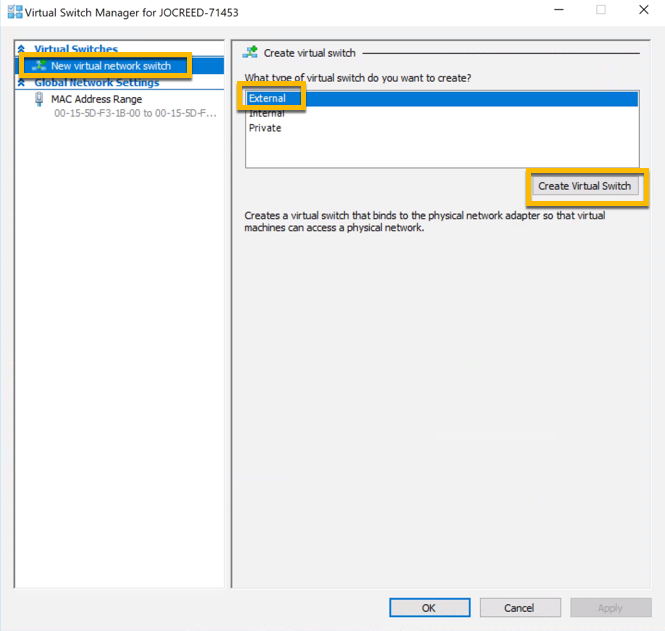
**Step 2: Once in the Hyper-V Manager, on the right panel, select the Virtual Switch Manager.**

**Step 3: Next we will create a virtual switch for minikube. Select `New virtual network switch` on the right hand side, select `External` for the network type, and then press the `Create Virtual Switch button.`**
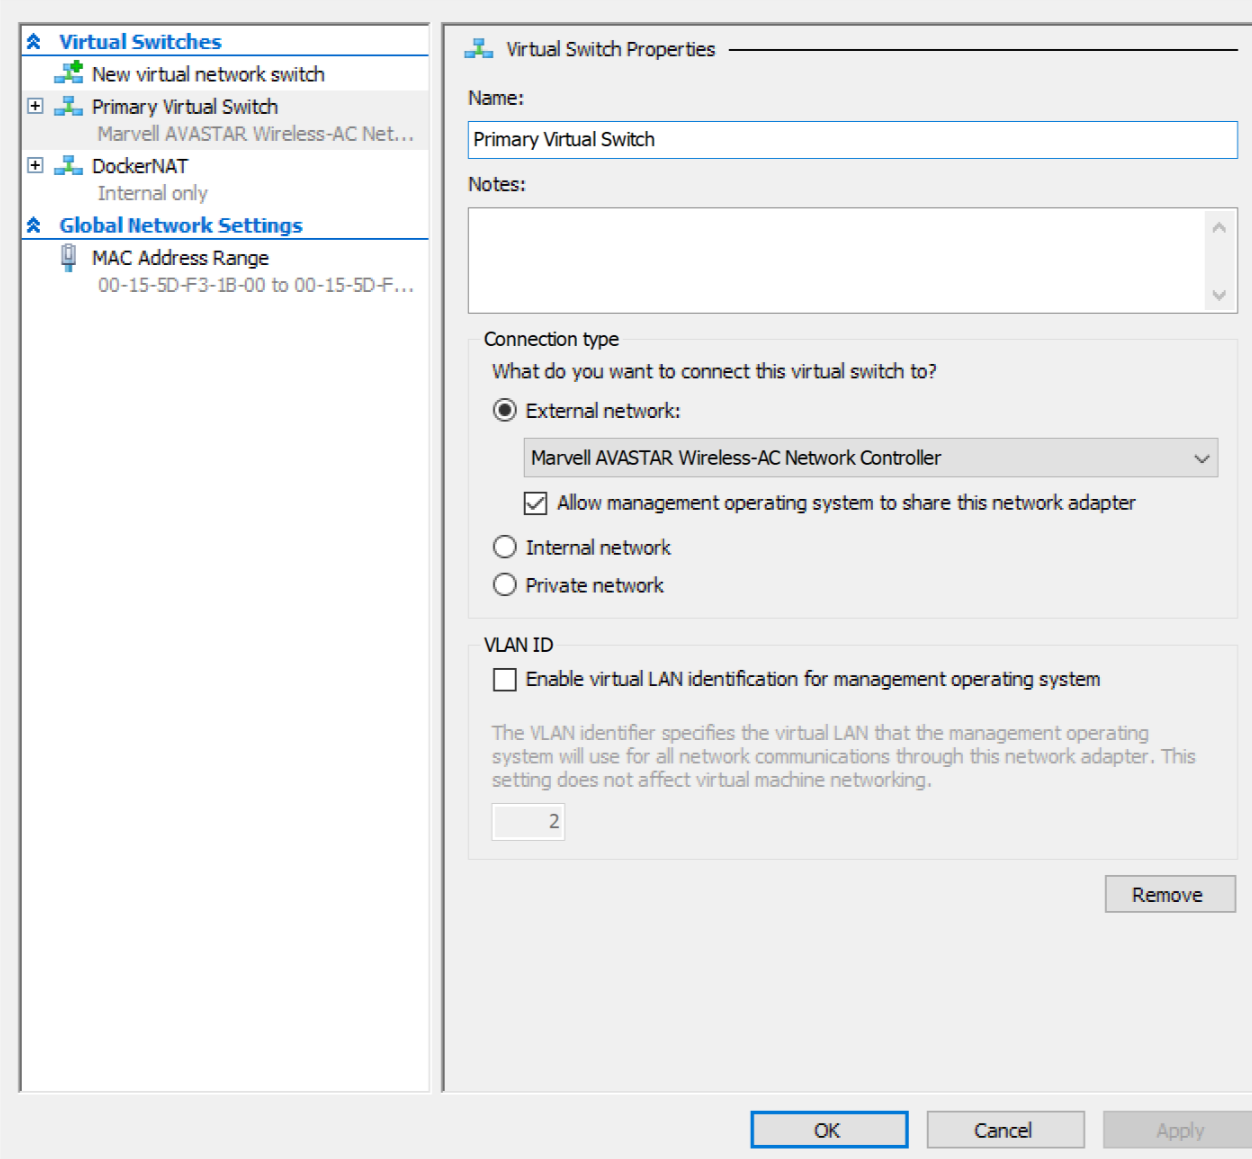
**Step 4: Name the switch `Primary Virtual Switch` and click the apply button.**
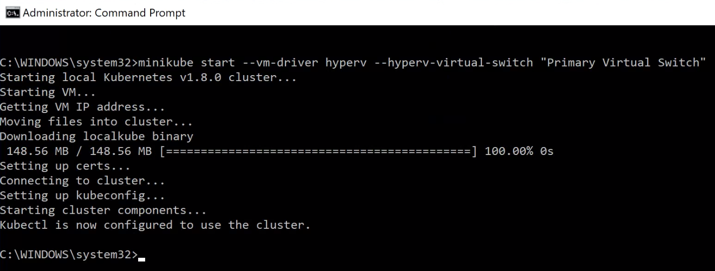
**Step 5 : Once you have the switch created we are now ready to start minikube. Run the following command to start the minikube VM with our applied changes.**
```powershell
minikube start --vm-driver hyperv --hyperv-virtual-switch "Primary Virtual Switch"
```
In your administrator command line window stop the minikube VM with the following command.
```powershell
minikube stop
```
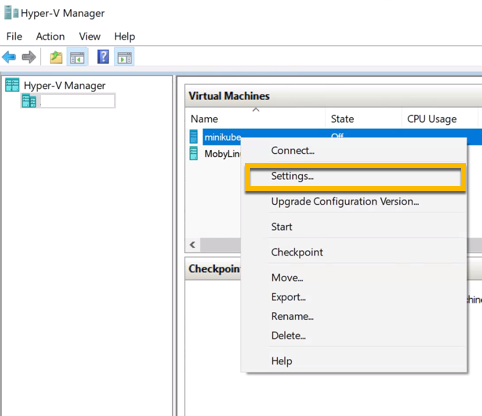
**Step 6 : Once minikube has stopped, open the Hyper-V Manager again and right click on the minikube VM and select settings.**
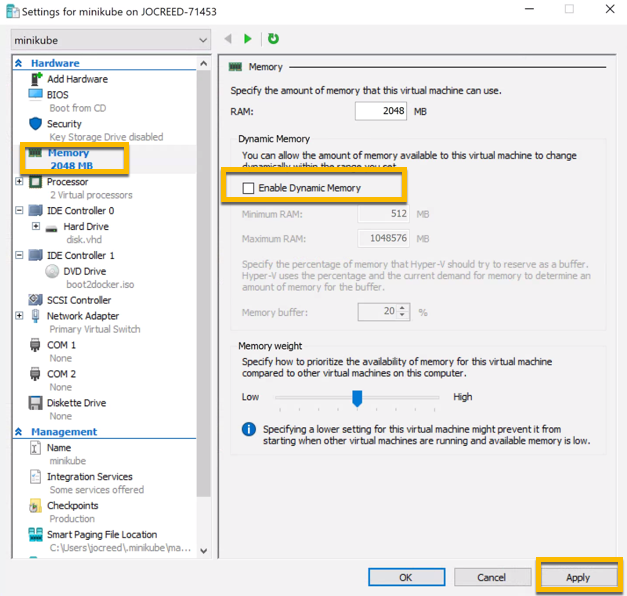
**Step 7: Select the `Memory` option on the left panel, then de-select `Enable Dynamic Memory`, and then click `Apply` button.**
**Step 9: Close Hyper-V manager and then return to the administrator command line window and restart minikube.**
```powershell
minikube start
```
Once minikube is restarted you should be ready to go. We will confirm the installation is ready by checking a couple of things.
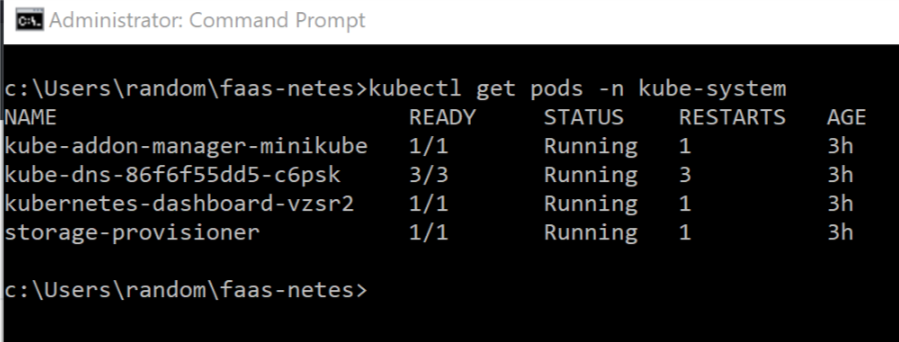
**Step 10: Check kubectl**
```powershell
kubectl get pods -n kube-system
```
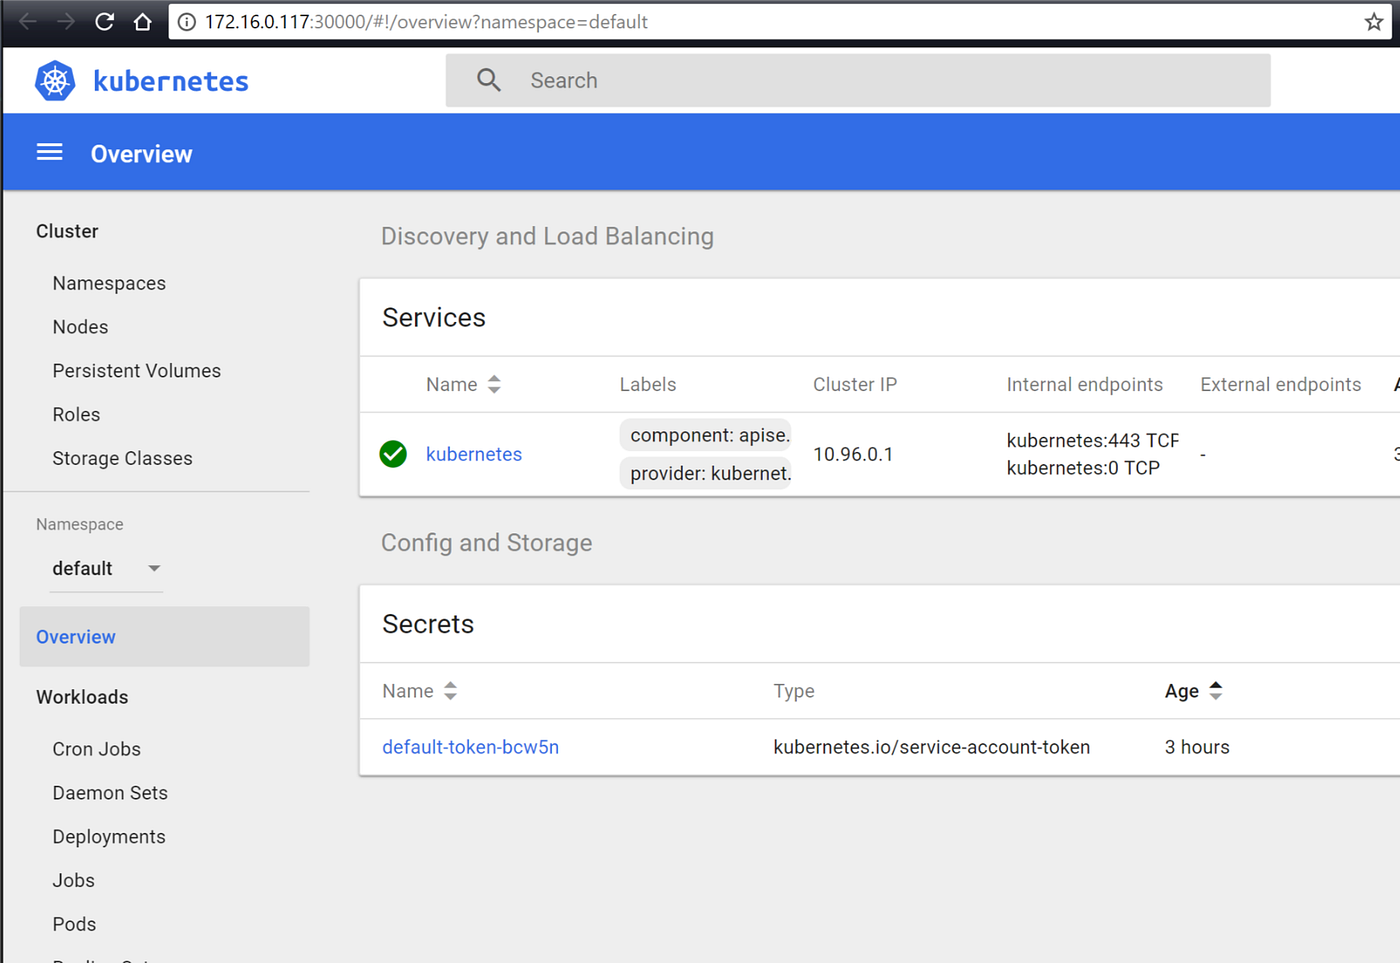
If you are a little more visual and want to see the kubernetes dashboard, you can open that up by typing in the following command in the command line window.
**Step 11: Open Kubernets Cluster in Chrome Browser type below command.**
```powershell
minikube dashboard
```
Now you are ready to explore and start your journey to learning Kubernetes.
---
**Note :** **This Repo is for education purpose only.**