https://github.com/auth0/ad-ldap-connector
Auth0 AD and LDAP connector
https://github.com/auth0/ad-ldap-connector
Last synced: about 1 year ago
JSON representation
Auth0 AD and LDAP connector
- Host: GitHub
- URL: https://github.com/auth0/ad-ldap-connector
- Owner: auth0
- License: mit
- Created: 2013-04-05T13:44:53.000Z (about 13 years ago)
- Default Branch: master
- Last Pushed: 2025-03-23T22:50:49.000Z (over 1 year ago)
- Last Synced: 2025-03-28T16:08:56.495Z (about 1 year ago)
- Language: JavaScript
- Size: 15.7 MB
- Stars: 73
- Watchers: 51
- Forks: 77
- Open Issues: 105
-
Metadata Files:
- Readme: README.md
- Changelog: CHANGELOG.md
- Contributing: CONTRIBUTING.md
- License: LICENSE.rtf
- Codeowners: CODEOWNERS
Awesome Lists containing this project
README
# Auth0 AD/LDAP Connector
The __AD/LDAP Connector (1)__, is a bridge between your __Active Directory (2)__ and the __Auth0 Service (3)__. It runs on Windows, Mac and Linux. This bridge is necessary because AD is typically locked down to your internal network, and Auth0 is as cloud service running on a completely different context.
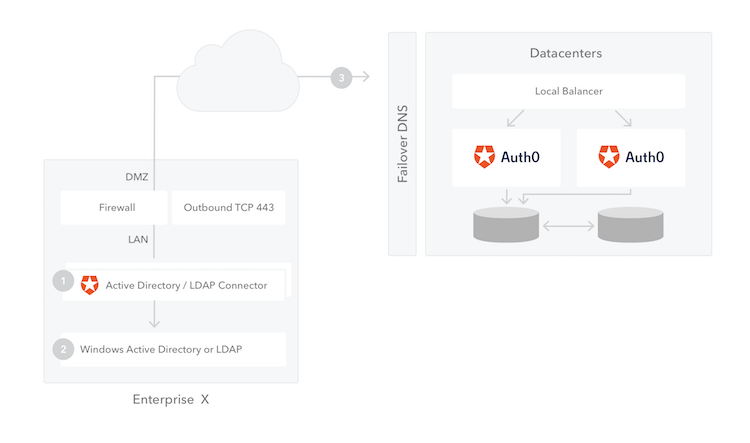
You can install multiple instances of the connector for high availability and load balancing. Also, all connections are out-bound: from the connector to the Auth0 Server, so in general no changes to the firewall need to be applied.
Configuring an AD/LDAP connection in Auth0 requires two simple steps:
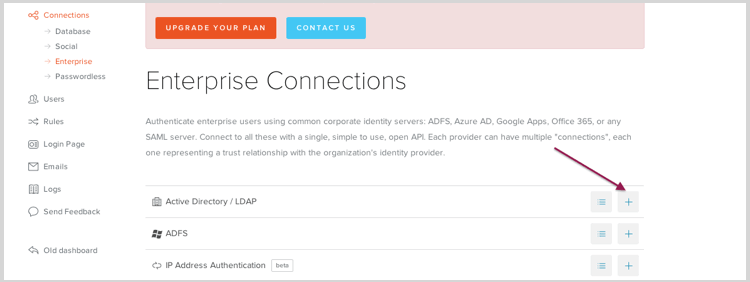
### 1. Creating an AD/LDAP Connection in Auth0
The first step is creating a new Connection on the dashboard:
__Connections > Enterprise > AD/LDAP__
Name the connection and check whether you want `Kerberos` enabled for this connection. If you enable this, you need to enter the range of IP addresses from where `Kerberos` authentication will be enabled. These would typically be the intranet where `Kerberos` would work.
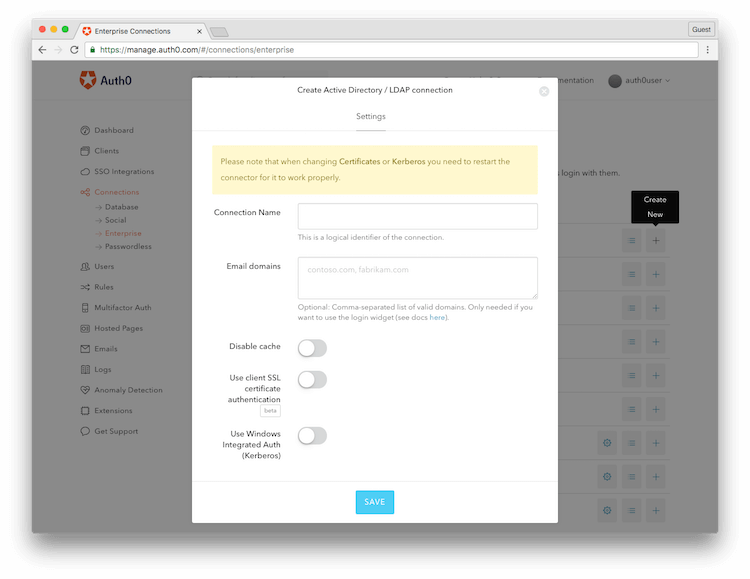
__Save__ the configuration. You are done on the Auth0 side! You will then be prompted to download the __AD/LDAP Connector__ on your machine.
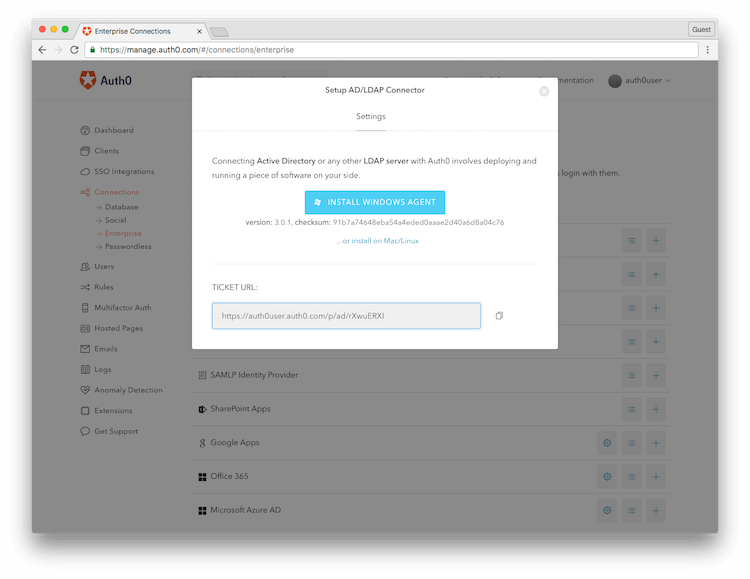
> We ship different versions of the Connector to install it on multiple platforms: Windows, Linux and OS X
Keep the __TICKET URL__ at hand as you will need it later.
### 2. Installing the AD/LDAP Connector
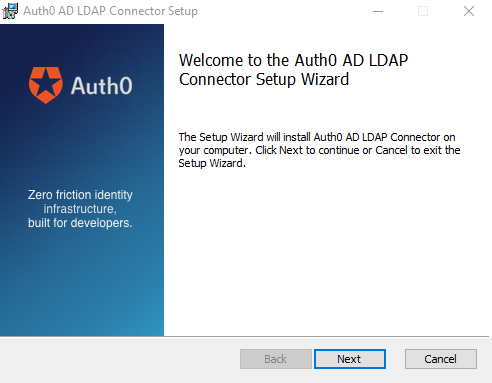
#### Auth0 AD LDAP Connector Setup (Windows Agent)
On Windows, the Connector is packaged as a standard installer file (__MSI__). Run it on the machine you want to install it and follow the installation wizard:
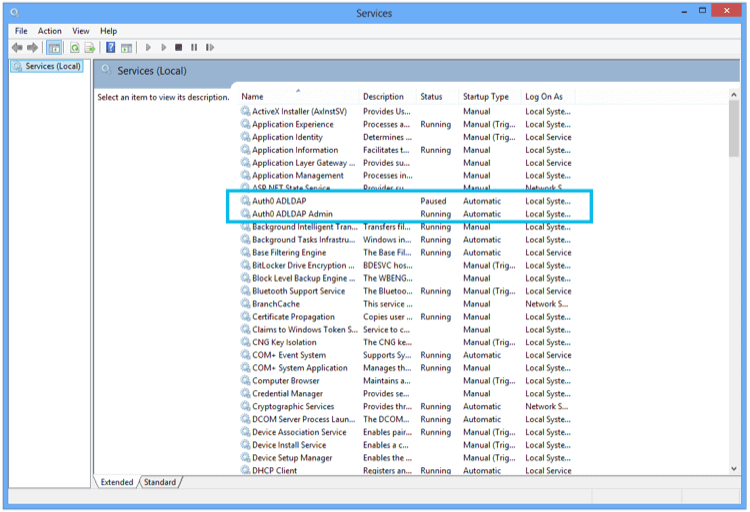
> The __AD/LDAP Connector__ in Windows is installed as a Service:
Once the installation is complete, you will see the following screen on a browser (notice that the browser is opening a page on the local machine).
Enter the __TICKET URL__ that was generated in __Step 1__.
The __Ticket URL__ uniquely identifies this connector in Auth0. Don't share it with anyone. The Connector will use this to communicate with Auth0 Server and automatically complete the configuration.
![]()
If successful, the next screen will allow you to enter your __Active Directory__ connection parameters. Namely:
* The __LDAP Connection String__ (this is the network location of the server)
* The __Base DN__
* A __Username__ and a __Password__
These are credentials used by the __AD/LDAP Connector__ to authenticate itself with AD.

### 3. Testing your new Active Directory/LDAP connection
Go back to your Auth0 Dashboard and you should see a green dot next to your Connection definition:

This signals that the __AD/LDAP Connector__ is online and working. Click in __Try__ to test the entire flow. If you configured `Kerberos` and testing this inside your network, your login will happen automatically.
If you didn't configure `Kerberos` or you are outside your intranet you will be prompted for credentials. After successful authentication you should see the test screen showing the user profile:

> Notice the __User profile__ includes the __Groups__ a user belongs to in AD. This will include any nested groups (flattened list).
### 4. High availability
High availability is achieved through multiple instances of the connector running simultaneously.
1. Install the connector on the first machine and follow all the steps. Once you have the connection running with only one agent move to the next step.
2. In the AD LDAP configuratino page click on __Import / Export__ and then click __Export__. Keep a copy of the zip file.
3. Install the connector on the second machine, when the browser opens and requests entering the __Ticket URL__, click on __Import / Export__.
4. In the __Import__ section select the file you downloaded from the first machine and click __Upload__.
5. Repeat from step 3 to 4 for every node you want to configure.
## Running behind a proxy
We discourage running the connector behind an http proxy.
If you still want to try it out behind a proxy you need an environment variable `http_proxy` or `HTTP_PROXY` set to `http://my-proxy:8080`.
## Troubleshooting
If you always get invalid username or password, try to search a profile by password with the following command:
```
node -e "require('./lib/initConf'); var Users = require('./lib/users'); var users = new Users(); users._queue.push(function(){users.getByUserName('the-username-you-are-trying', function (err, user) { console.log(user); } ); });"
```
By default the connector search using this query LDAP `(sAMAccountName={0})`, you can override this in the config.json file:
```
"LDAP_USER_BY_NAME": "(cn={0})",
```
If you get "Invalid Ticket" when configuring the connector for the first time, the most likely cause is a network issue (e.g. connector behind a proxy). Try connecting to `https://{your tenant}.auth0.com/testall` with a browser other than IE.
## Issue Reporting
If you have found a bug or if you have a feature request, please report them
by [Opening an issue] (https://auth0.com/docs/troubleshoot/customer-support/open-and-manage-support-tickets).
Please do not report security vulnerabilities on the public GitHub issue tracker. The [Responsible Disclosure Program](https://auth0.com/whitehat) details the procedure for disclosing security issues.
## Author
[Auth0](auth0.com)
## License
This project is licensed under the MIT license. See the [LICENSE](LICENSE) file for more info.