https://github.com/ballerina-platform/module-ballerinax-hubspot.crm.lists
This Ballerina connector provides capabilities to integrate with HubSpot CRM Lists API.
https://github.com/ballerina-platform/module-ballerinax-hubspot.crm.lists
ballerina connectors crm hubspot integration library
Last synced: 3 months ago
JSON representation
This Ballerina connector provides capabilities to integrate with HubSpot CRM Lists API.
- Host: GitHub
- URL: https://github.com/ballerina-platform/module-ballerinax-hubspot.crm.lists
- Owner: ballerina-platform
- License: apache-2.0
- Created: 2024-12-16T04:45:14.000Z (10 months ago)
- Default Branch: main
- Last Pushed: 2025-05-19T05:25:43.000Z (5 months ago)
- Last Synced: 2025-06-19T05:15:13.119Z (4 months ago)
- Topics: ballerina, connectors, crm, hubspot, integration, library
- Language: Ballerina
- Size: 2.42 MB
- Stars: 0
- Watchers: 47
- Forks: 1
- Open Issues: 0
-
Metadata Files:
- Readme: README.md
- License: LICENSE
- Codeowners: .github/CODEOWNERS
Awesome Lists containing this project
README
# Ballerina HubSpot CRM Lists connector
[](https://github.com/ballerina-platform/module-ballerinax-hubspot.crm.lists/actions/workflows/ci.yml)
[](https://github.com/ballerina-platform/module-ballerinax-hubspot.crm.lists/commits/master)
[](https://github.com/ballerina-platform/ballerina-library/labels/module%hubspot.crm.lists)
## Overview
[HubSpot](https://www.hubspot.com/) is an AI-powered customer relationship management (CRM) platform.
The `ballerinax/hubspot.crm.lists` offers APIs to connect and interact with the [HubSpot CRM Lists API](https://developers.hubspot.com/docs/reference/api/crm/lists) endpoints, specifically based on the [HubSpot REST API](https://developers.hubspot.com/docs/reference/api/overview)
## Setup guide
To use the HubSpot CRM Lists connector, you must have access to the HubSpot API through a HubSpot developer account and a HubSpot App under it. Therefore you need to register for a developer account at HubSpot if you don't have one already.
### Step 1: Create/Login to a HubSpot Developer Account
If you have an account already, go to the [HubSpot developer portal](https://app.hubspot.com/)
If you don't have a HubSpot Developer Account you can sign up for a free account [here](https://developers.hubspot.com/get-started)
### Step 2 (Optional): Create a Developer Test Account
Within app developer accounts, you can create a [developer test account](https://developers.hubspot.com/beta-docs/getting-started/account-types#developer-test-accounts) under your account to test apps and integrations without affecting any real HubSpot data.
> **Note:** These accounts are only for development and testing purposes. In production, you should not use Developer Test Accounts.
1. Go to the Test Account section from the left sidebar.
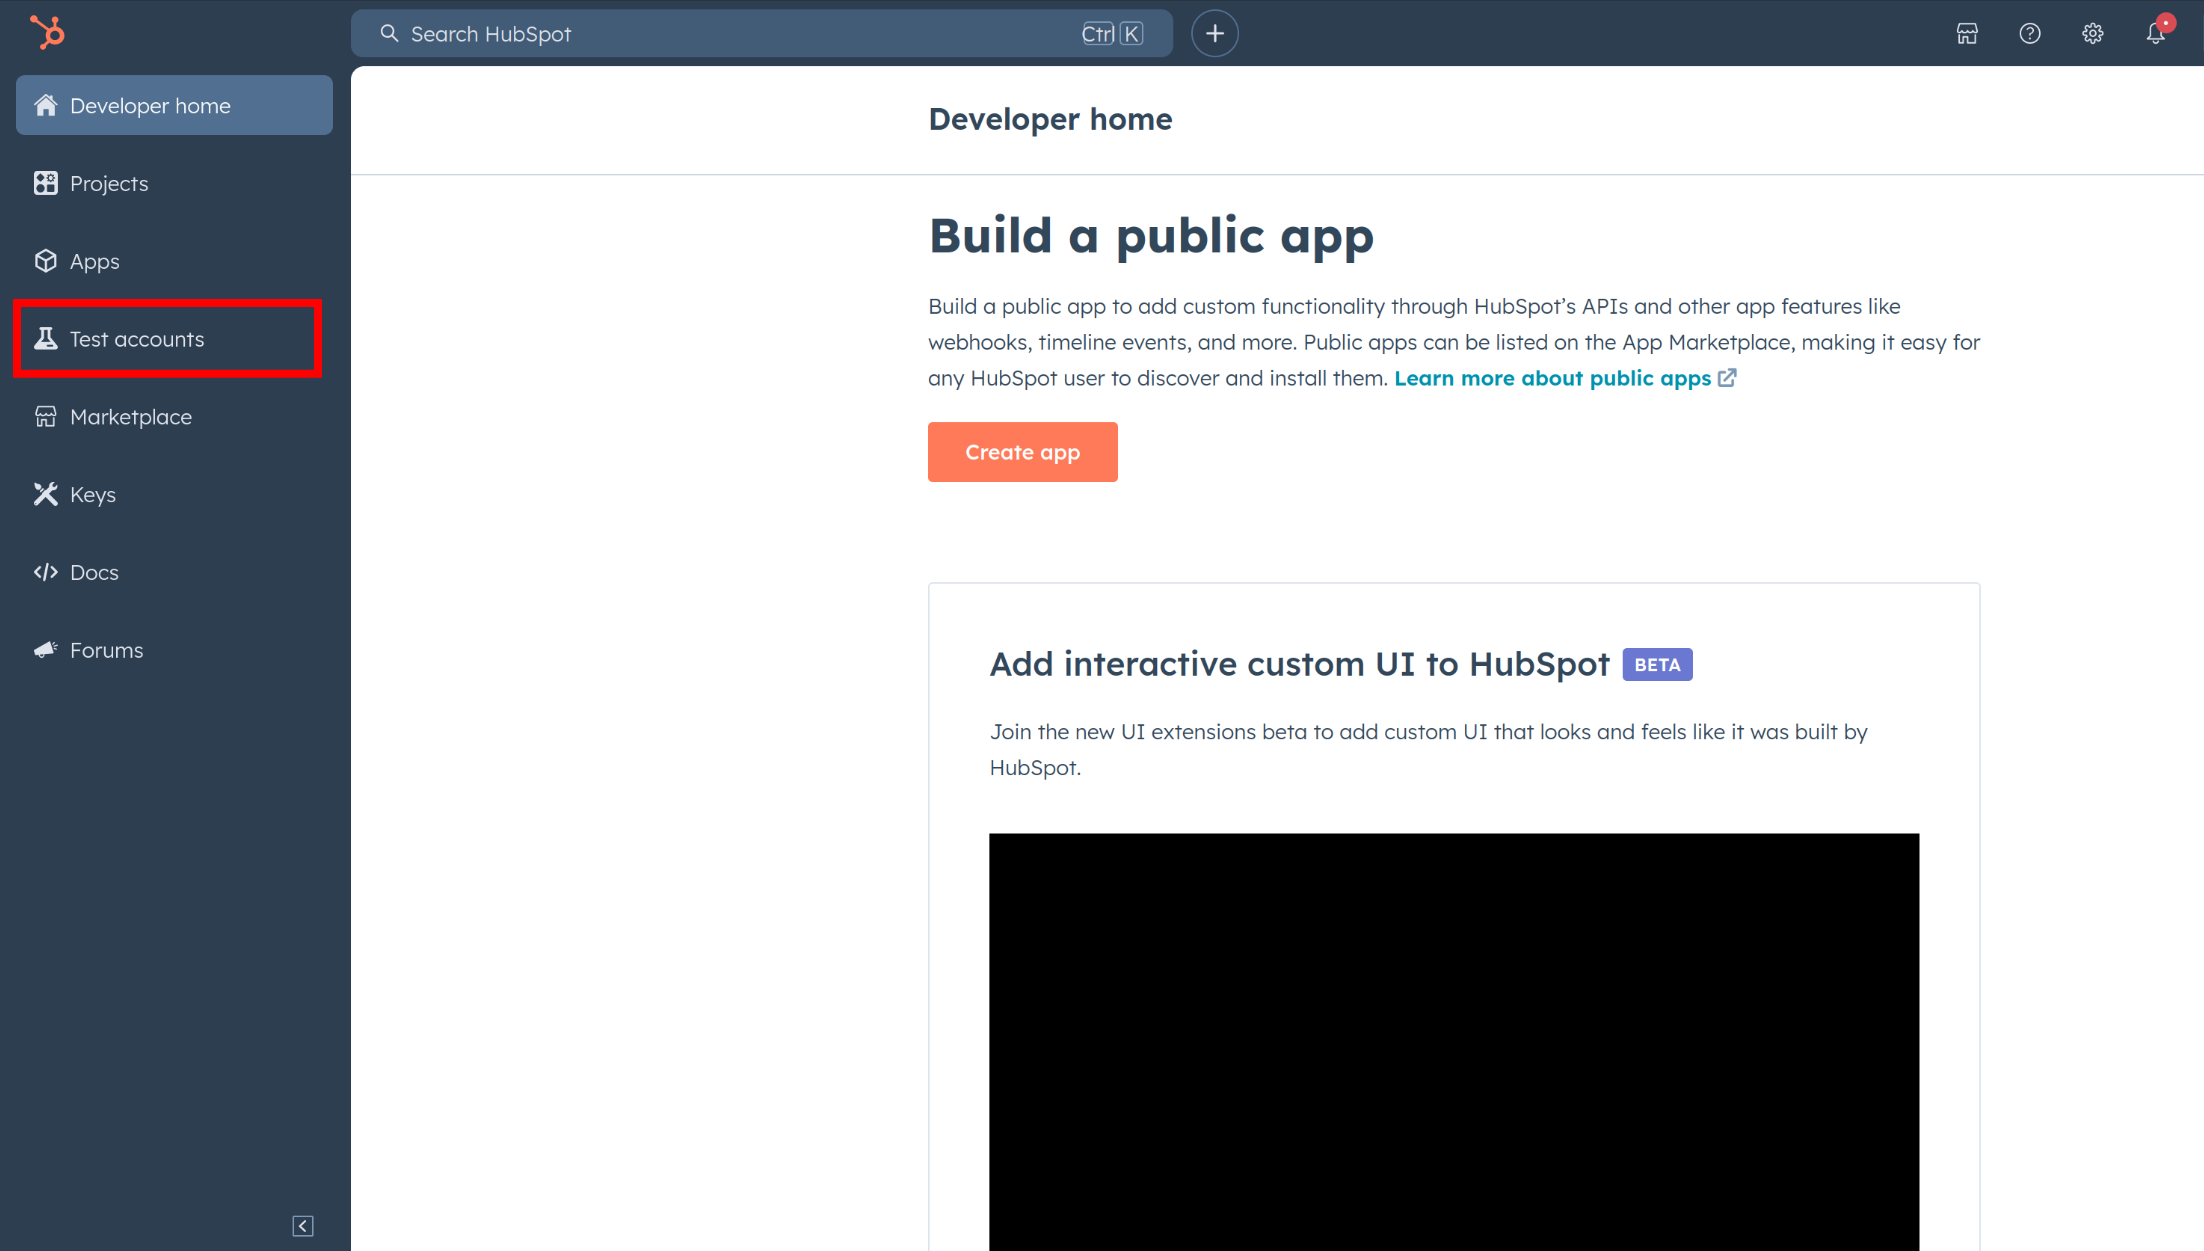
2. Click Create developer test account.
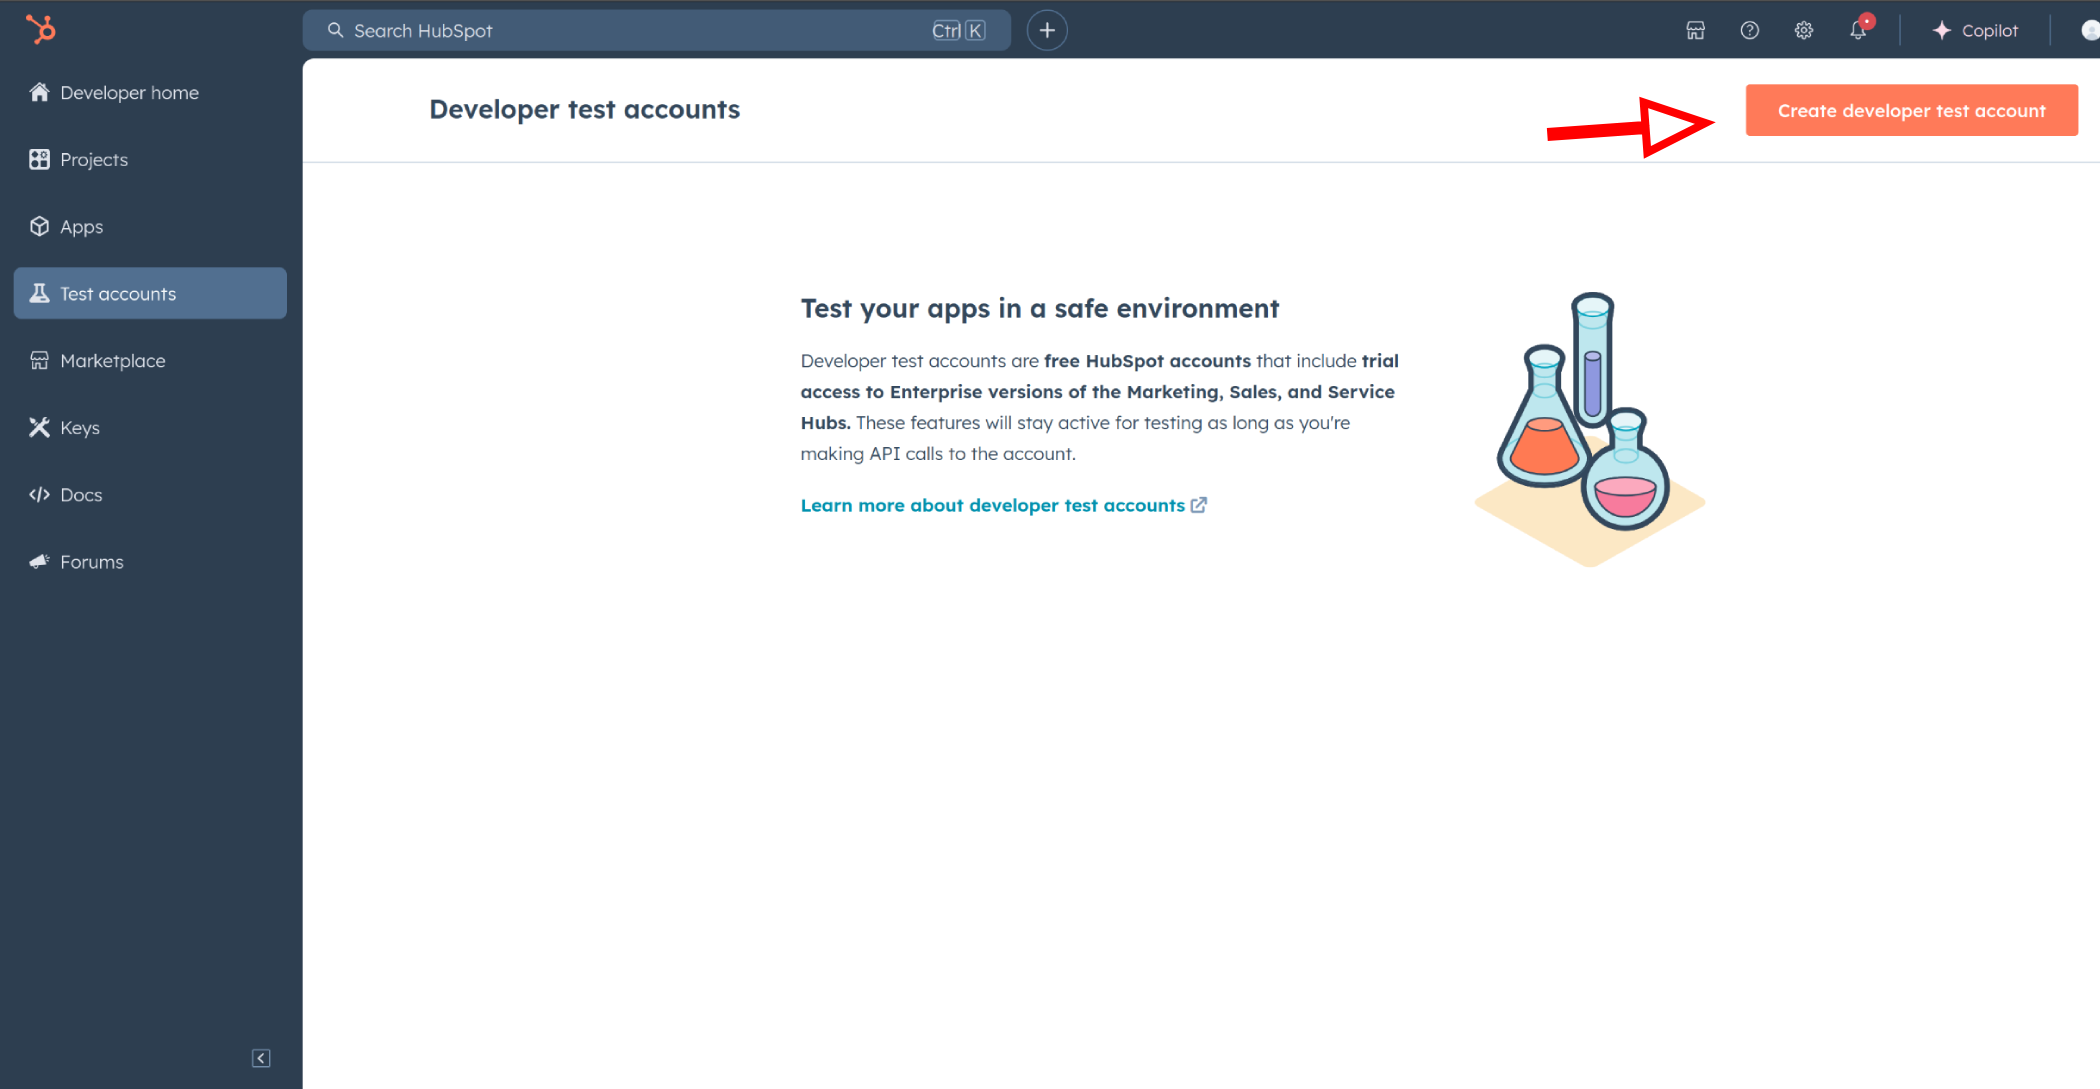
3. In the dialogue box, give a name to your test account and click "Create".

### Step 3: Create a HubSpot App under your account
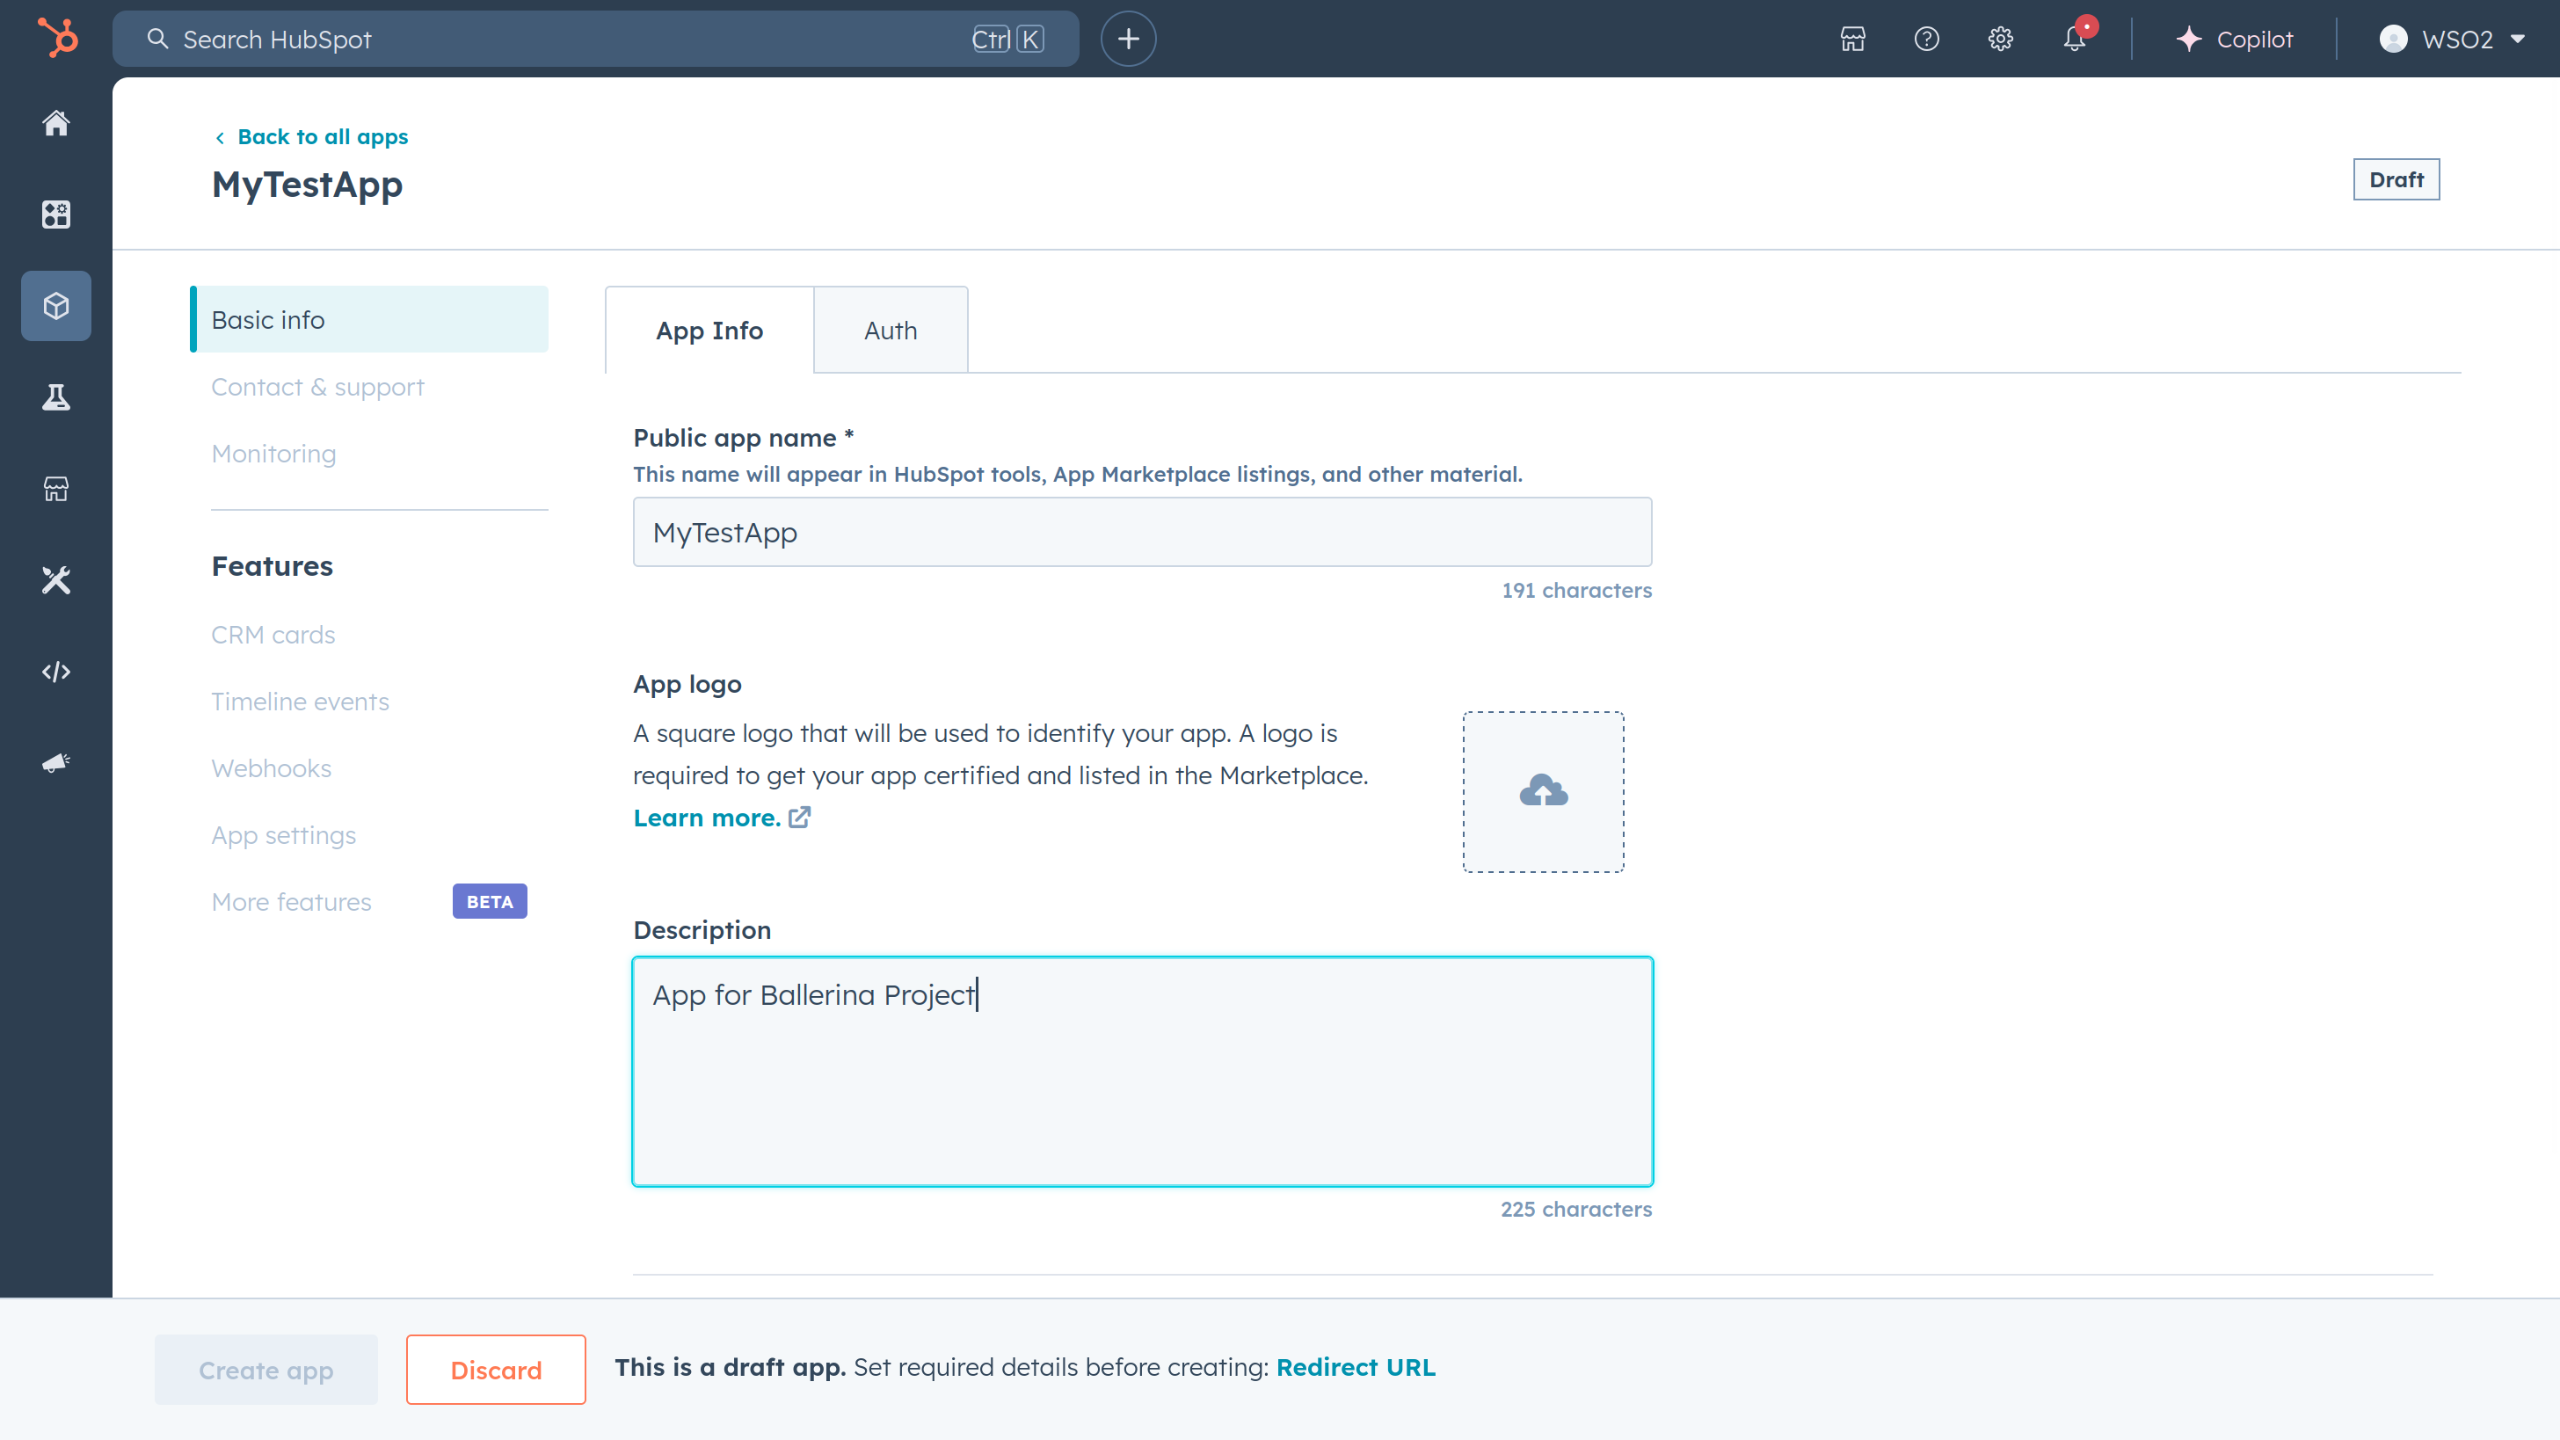
1. In your developer account, navigate to the "Apps" section. Click on "Create App"
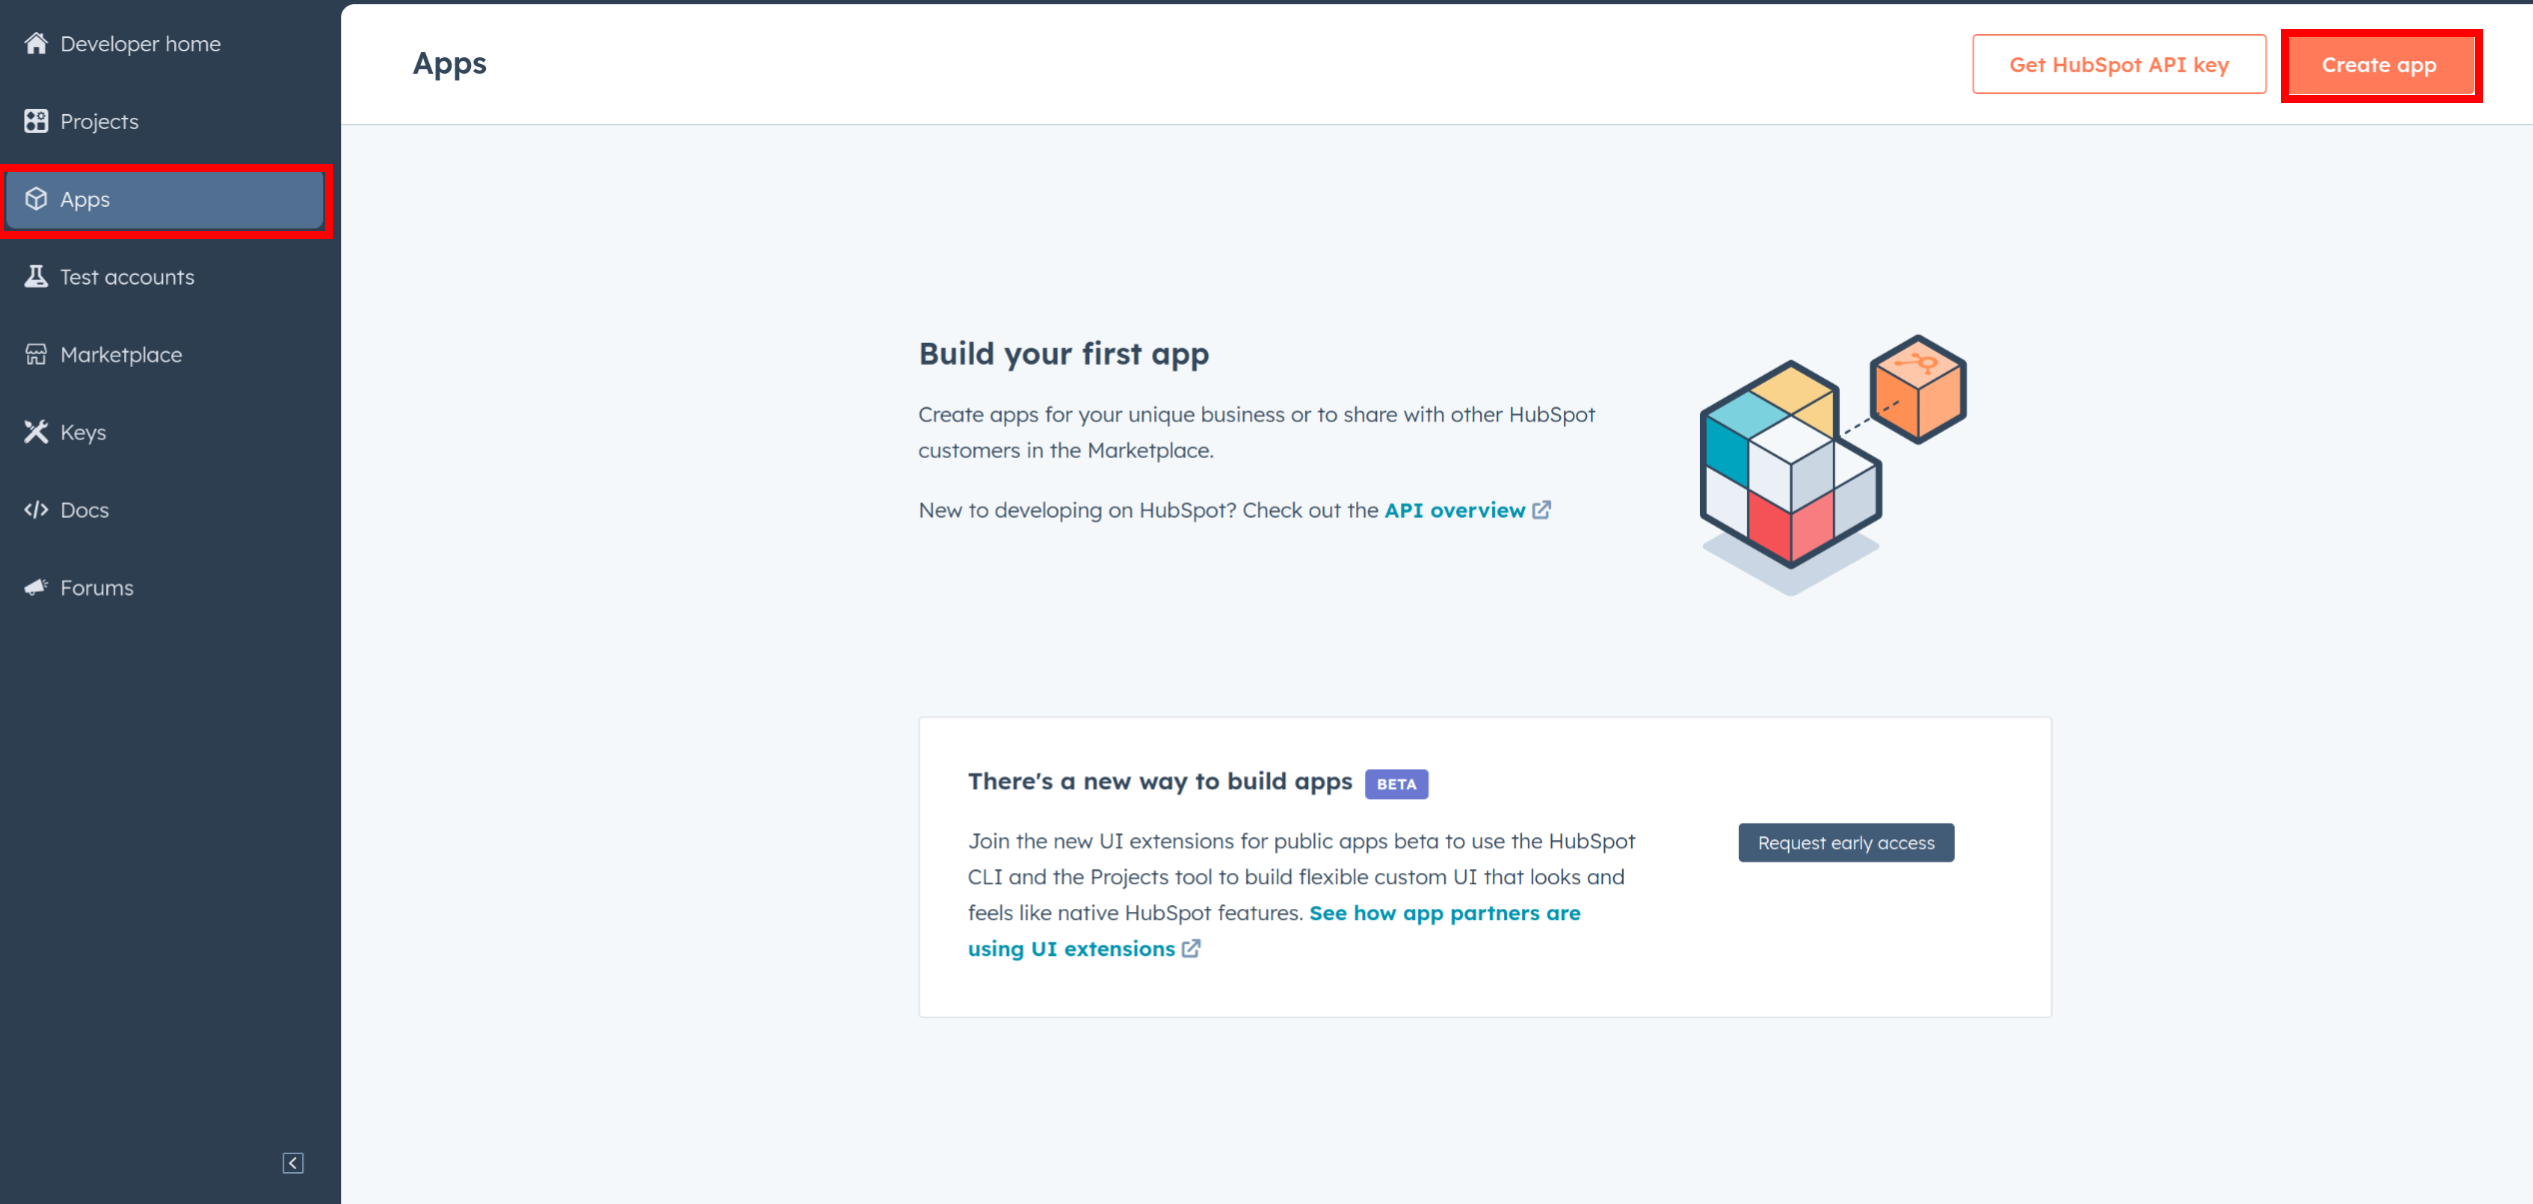
2. Provide the necessary details, including the app name and description.
### Step 4: Configure the Authentication Flow
1. Move to the Auth Tab.
2. In the Scopes section, add the following scopes for your app using the "Add new scope" button.
* `crm.lists.read`
* `crm.lists.write`
* `cms.membership.access_groups.write`
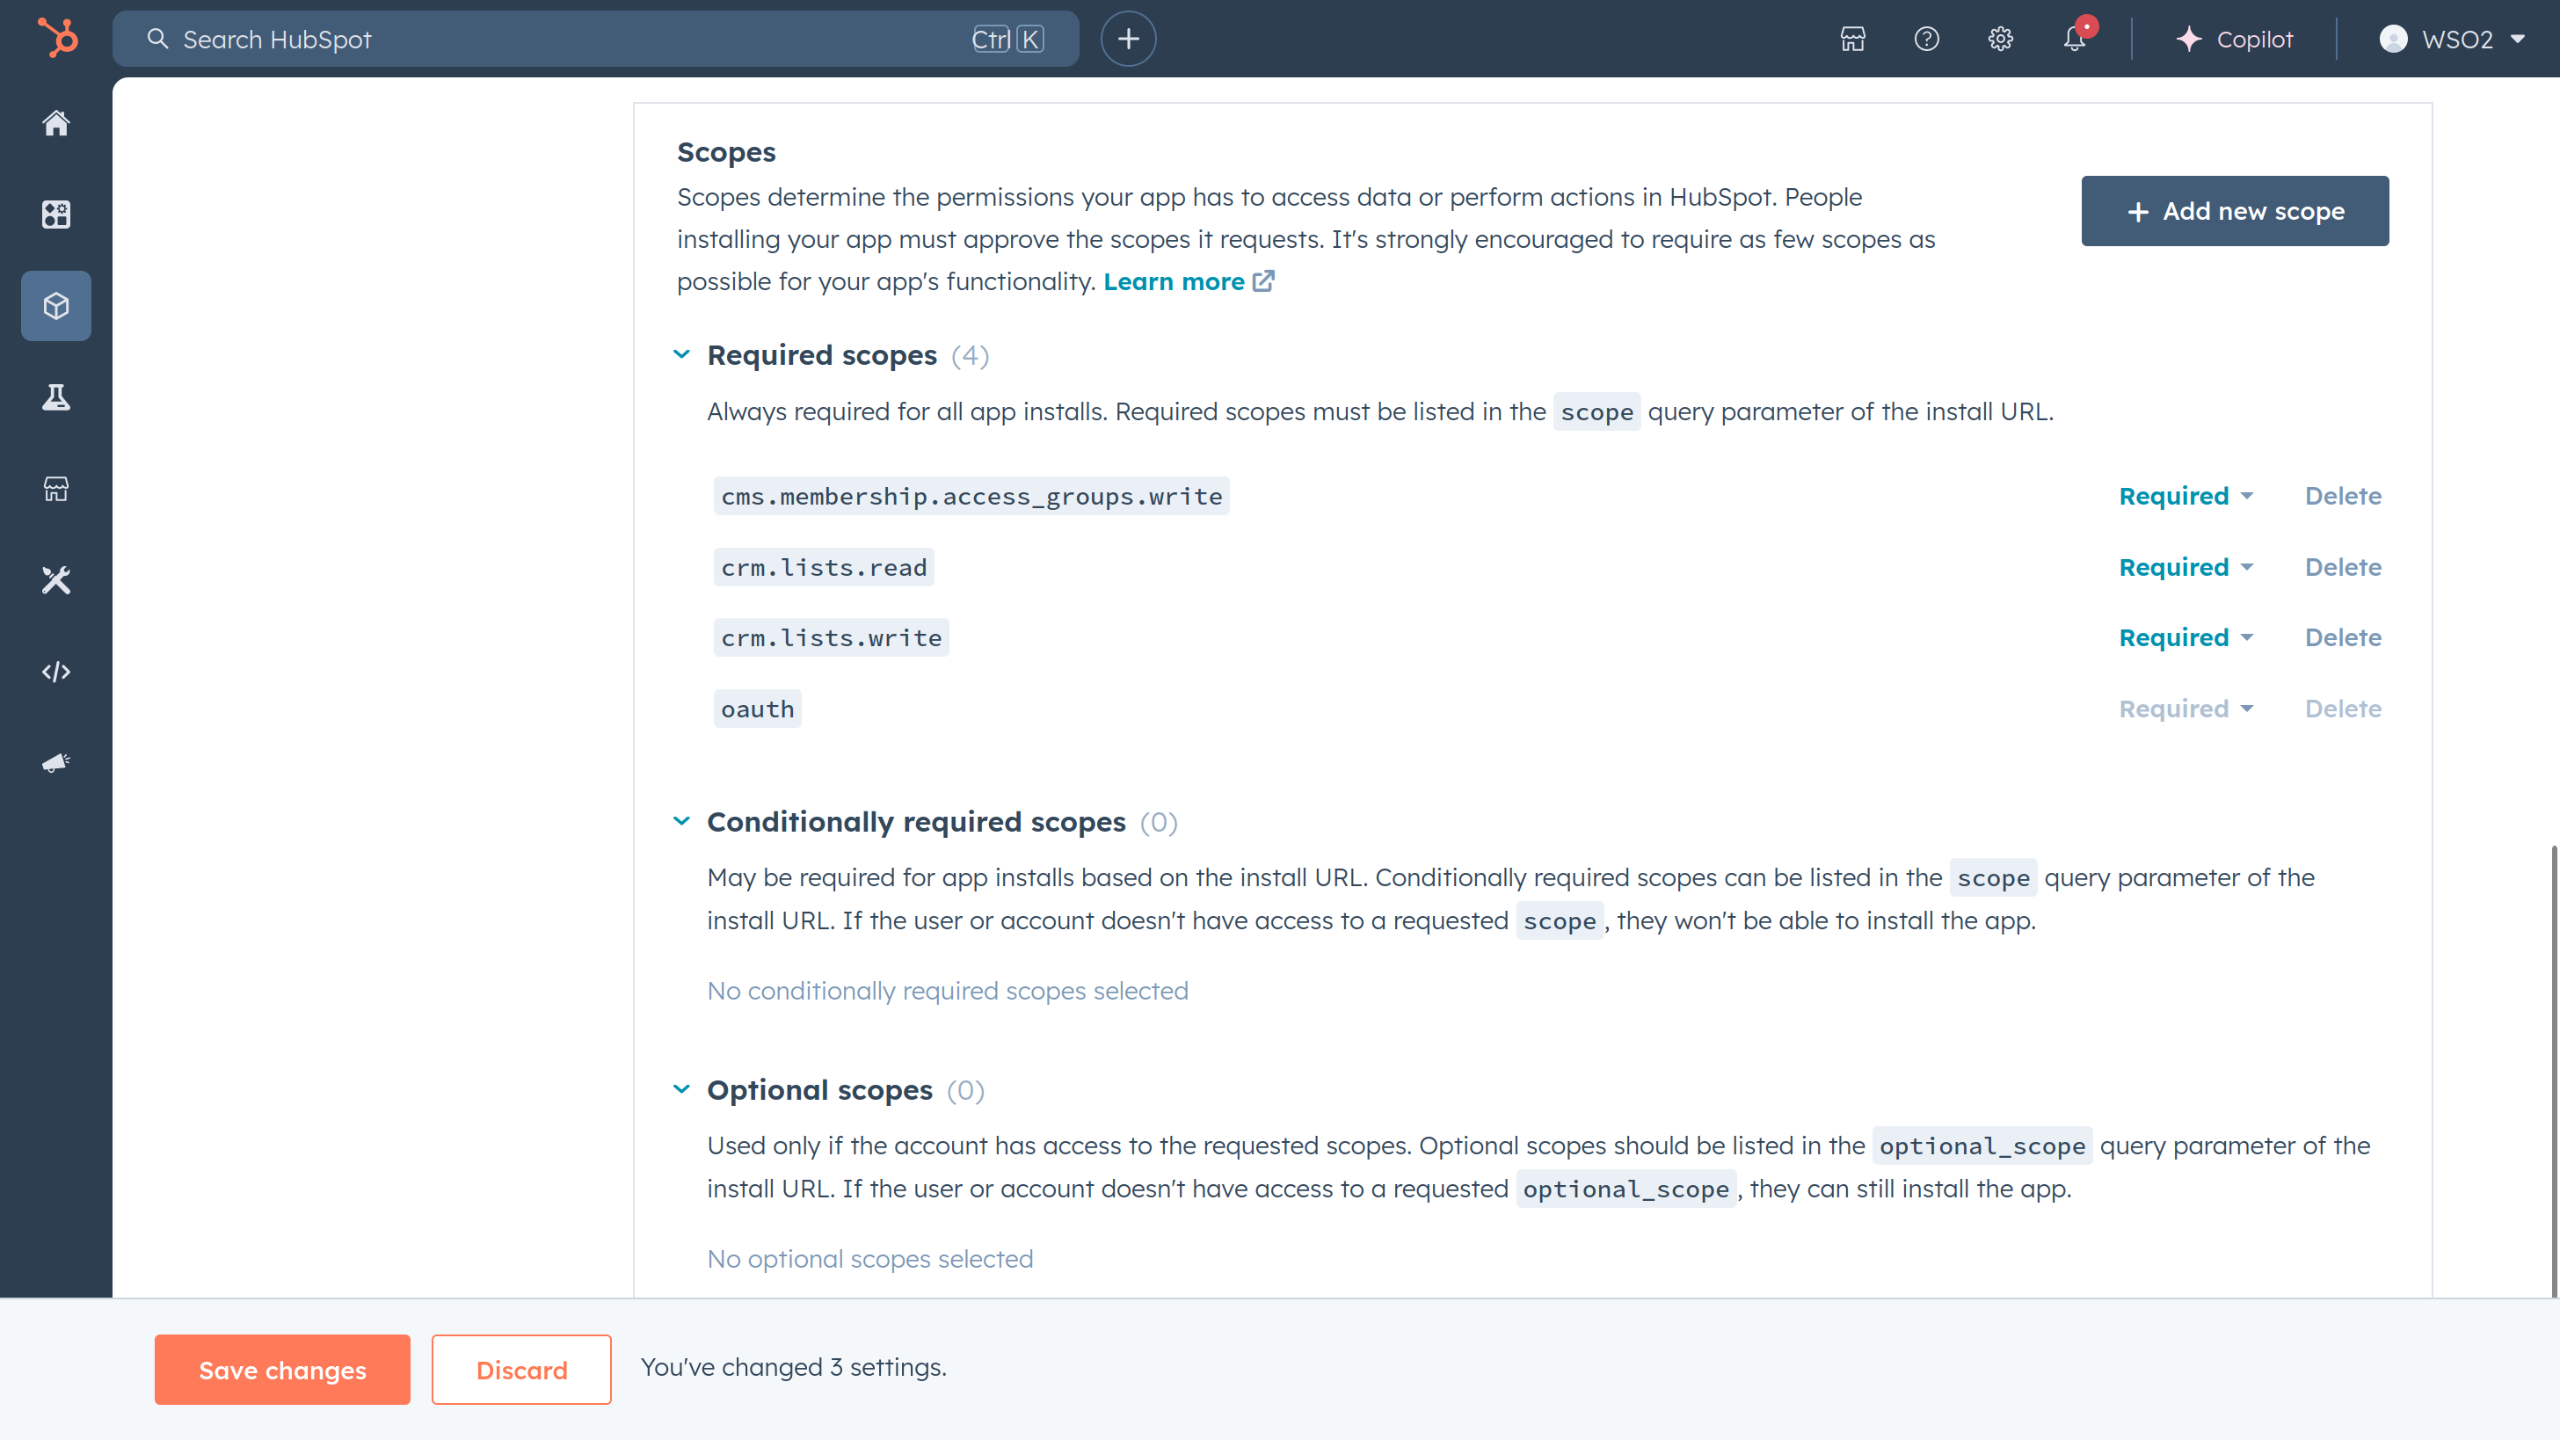
The scopes listed above are the mandatory scopes needed to use the HubSpot CRM Lists API. However, you may need to add additional scopes based on your use case. For example, if you are working with contacts, you may need to add `crm.objects.contacts.read` and `crm.objects.contacts.write` scopes as well.
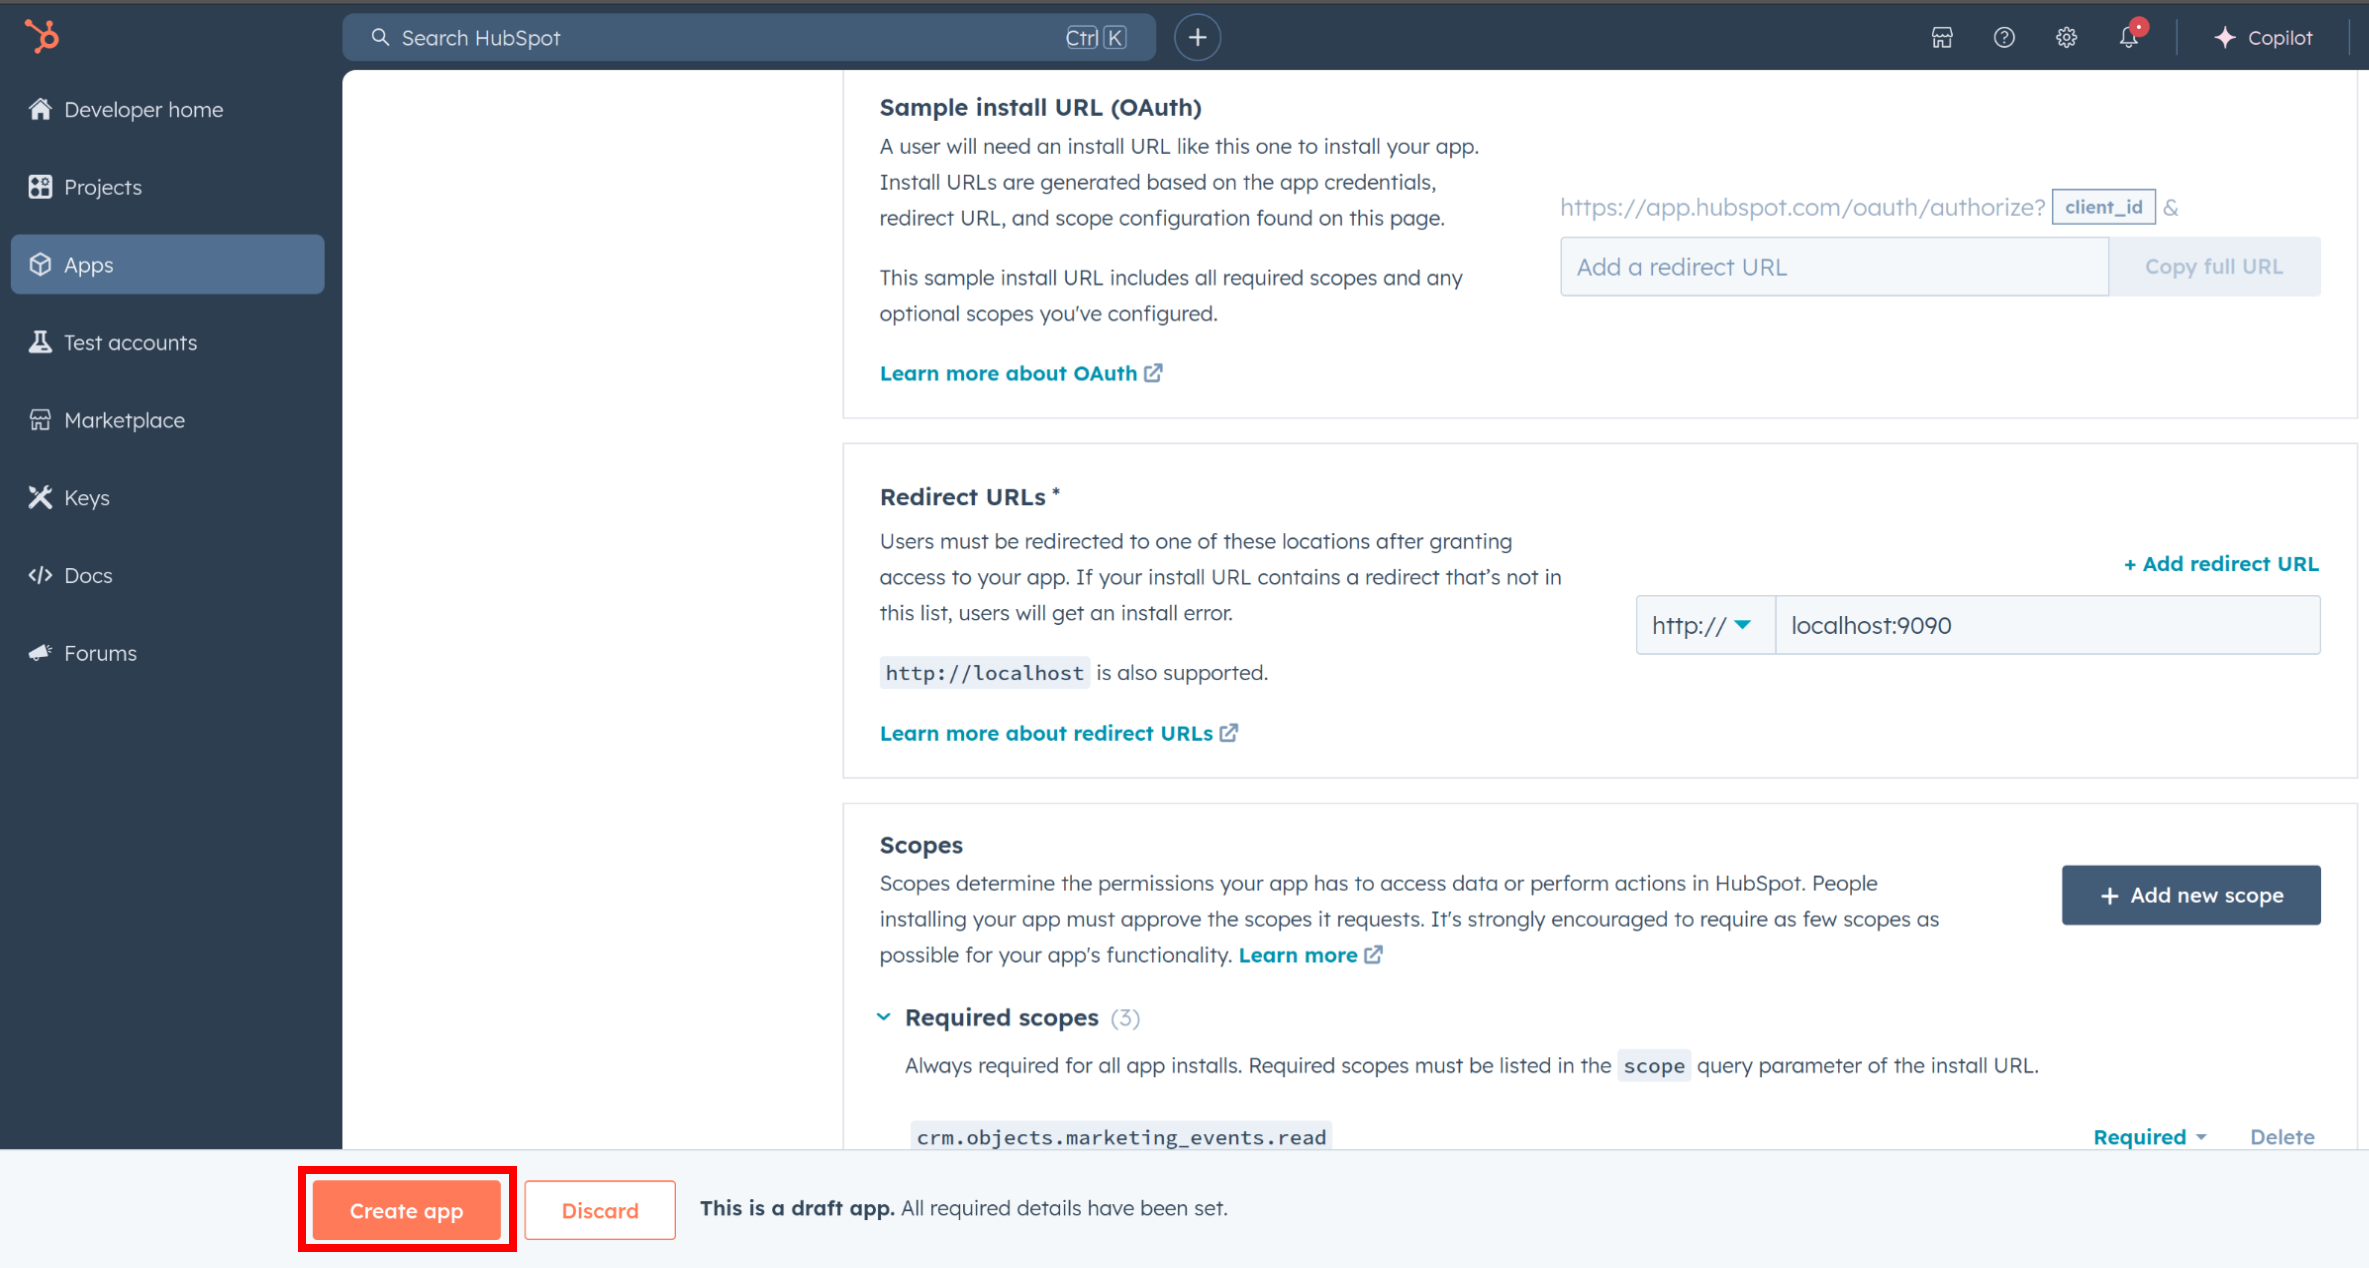
3. Add your Redirect URI in the relevant section. You can also use `localhost` addresses for local development purposes. Click "Create App".
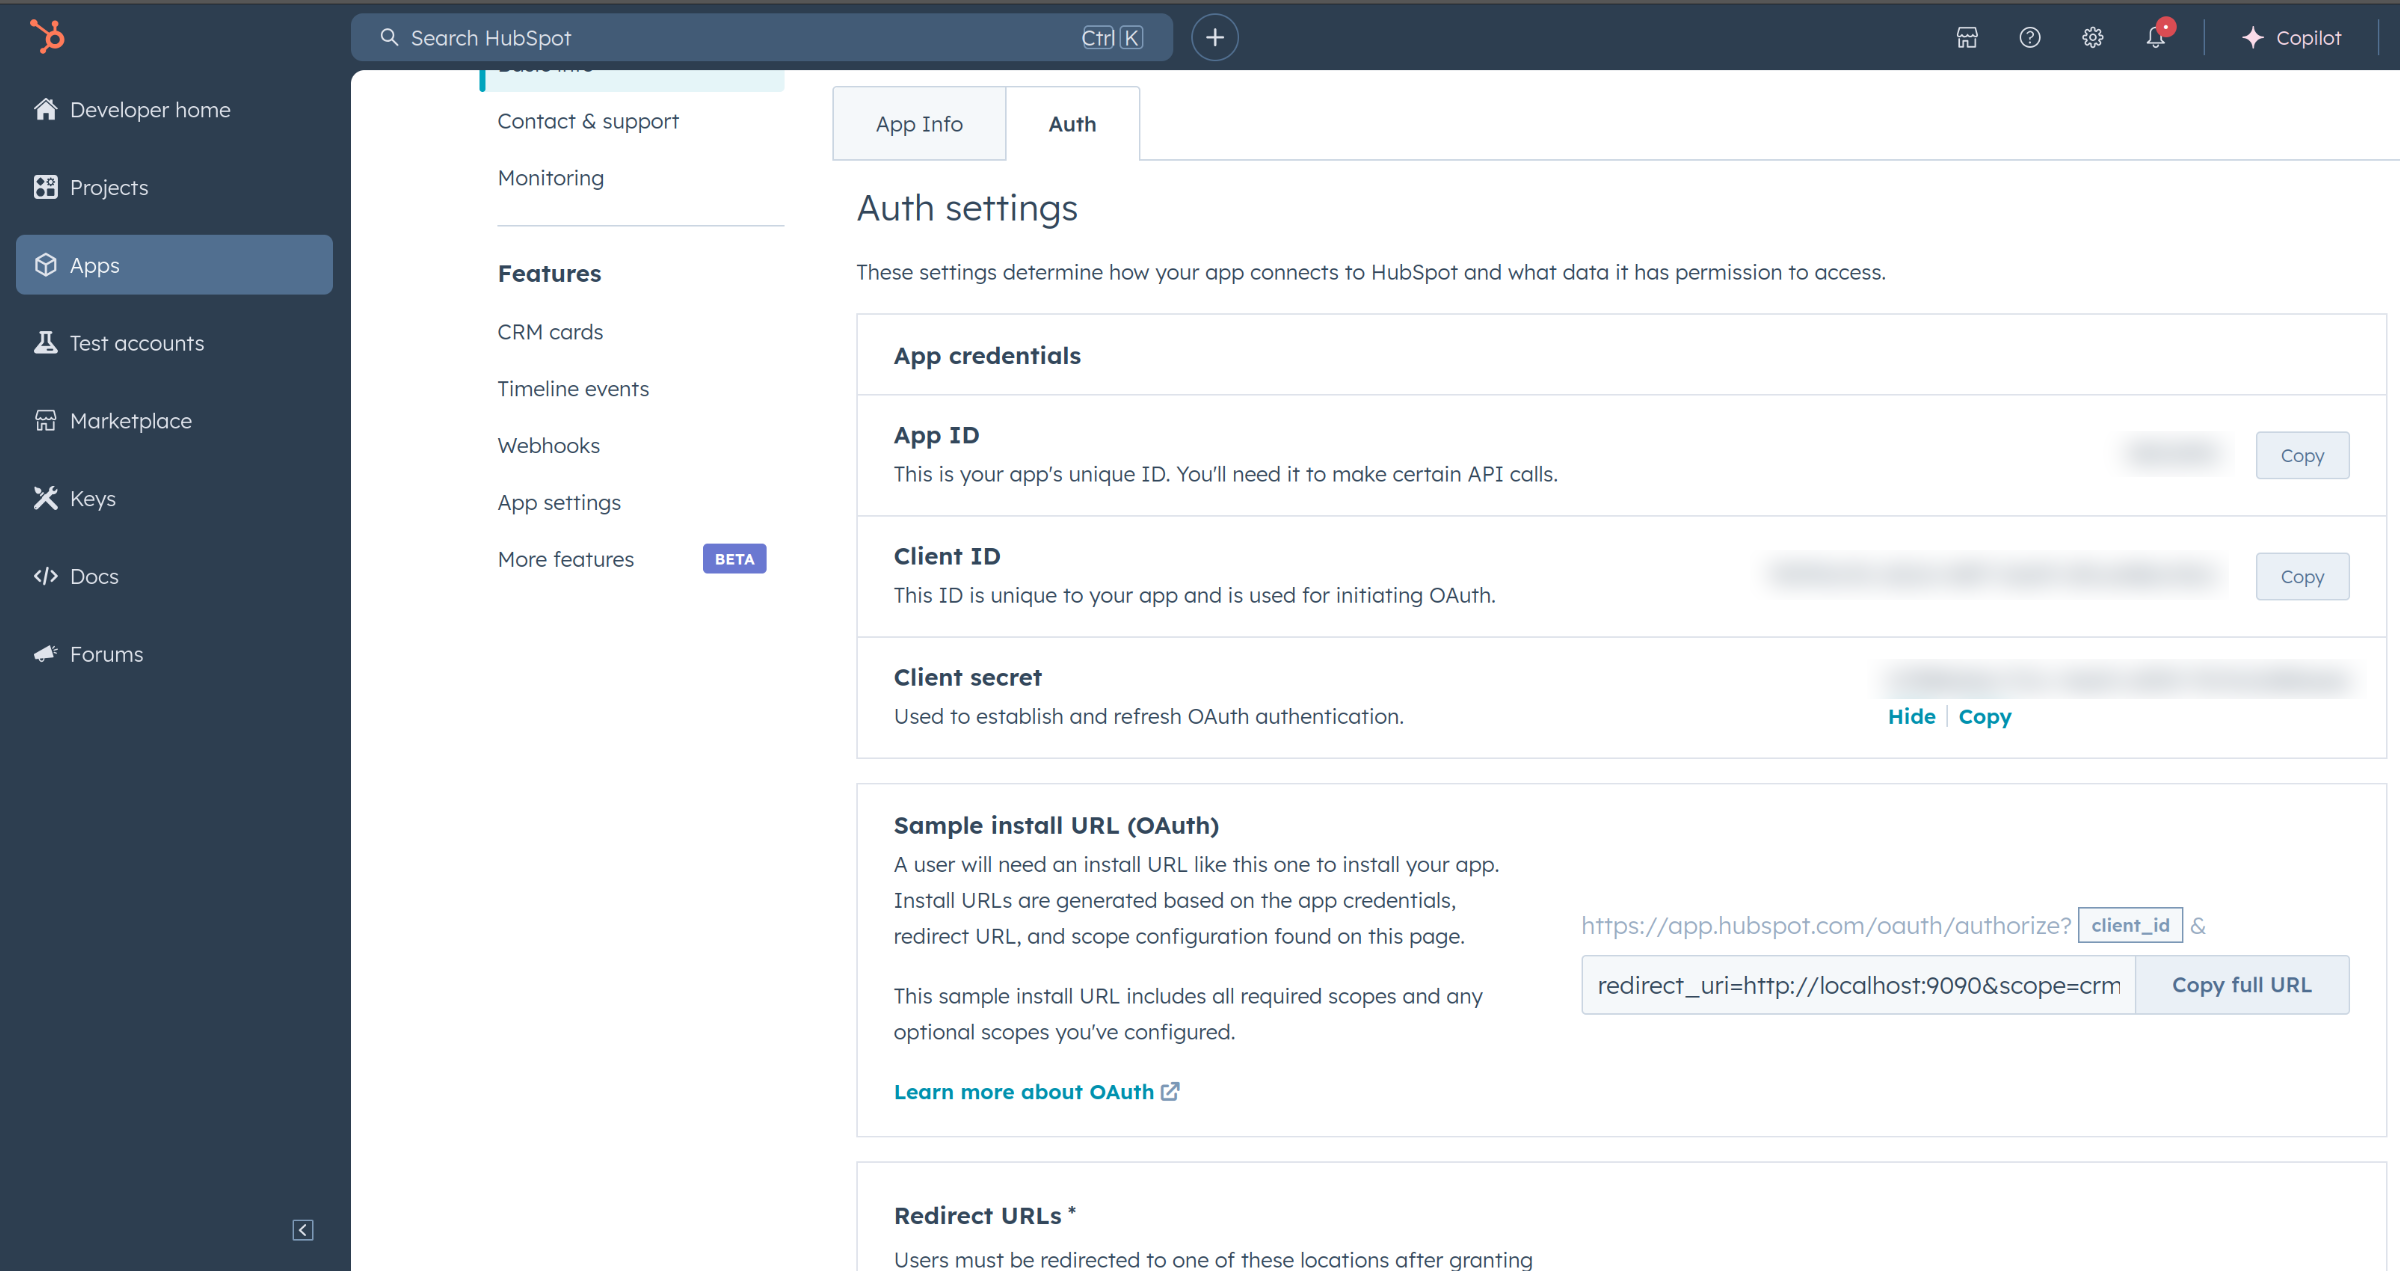
### Step 5: Get your Client ID and Client Secret
Navigate to the Auth section of your app. Make sure to save the provided Client ID and Client Secret.
### Step 6: Setup Authentication Flow
Before proceeding with the Quickstart, ensure you have obtained the Access Token using the following steps:
1. Create an authorization URL using the following format:
```
https://app.hubspot.com/oauth/authorize?client_id=&scope=&redirect_uri=
```
Replace the ``, ``, and `` with your specific value.
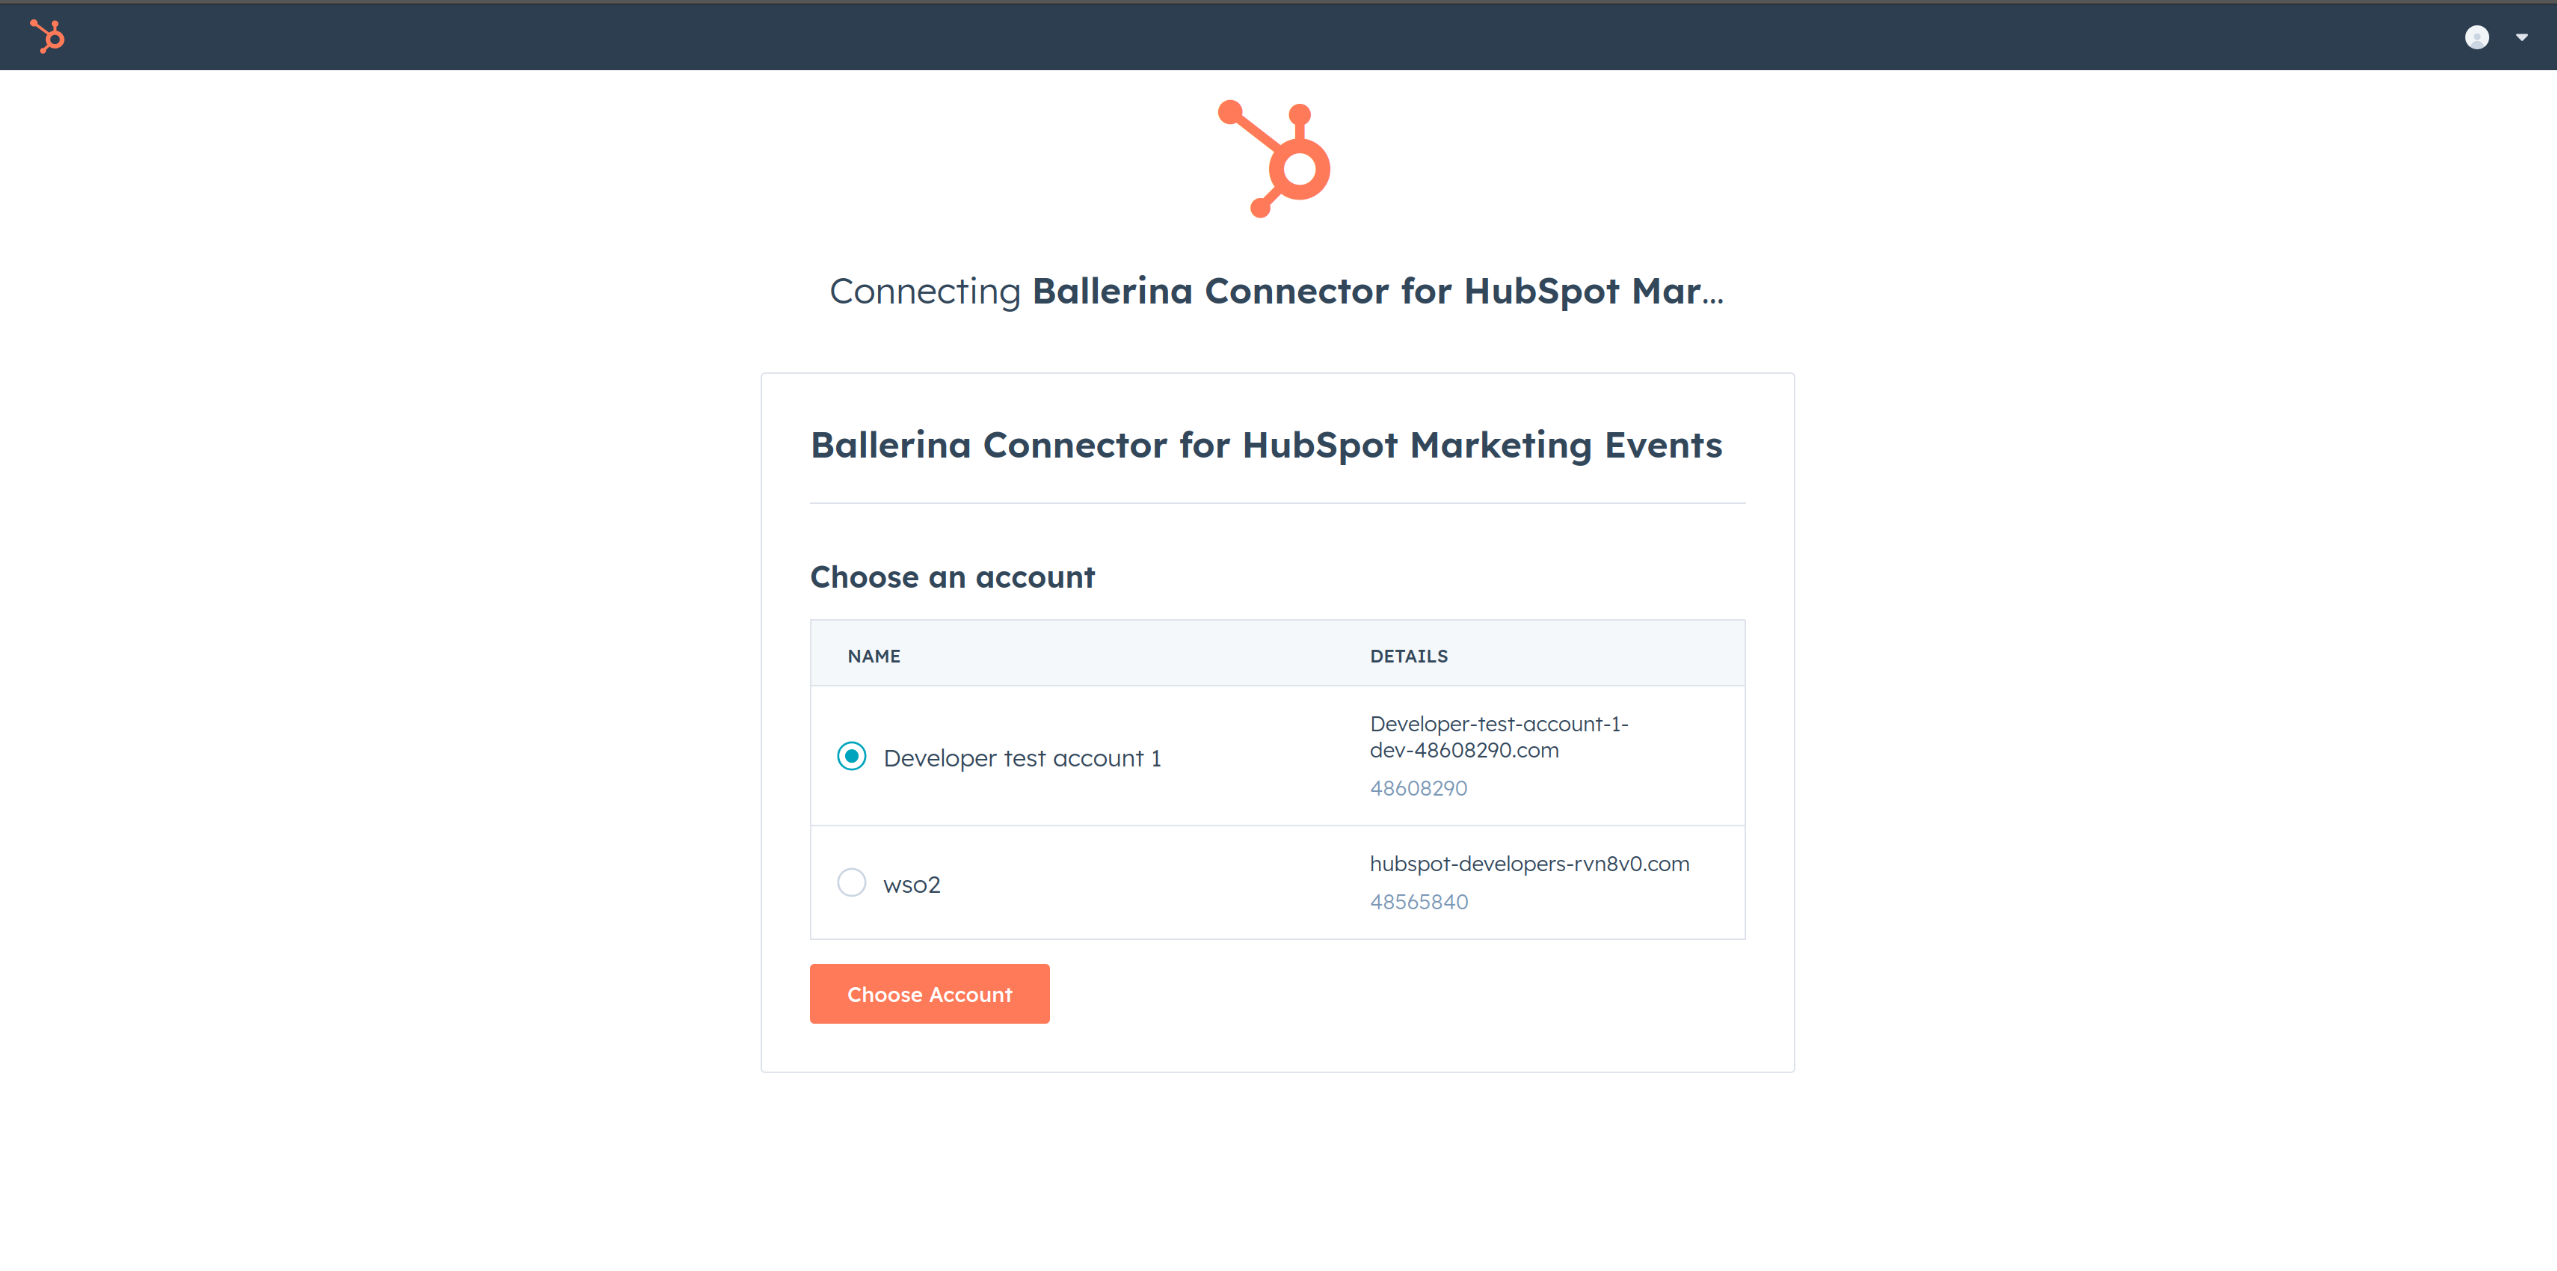
2. Paste it in the browser and select your developer test account to install the app when prompted. Provide consent for all scopes needed.
3. A code will be displayed in the browser. Copy the code.
4. Run the following curl command. Replace the ``, ``, and `` with your specific value. Use the code you received in the above step 3 as the ``.
- Linux/macOS
```bash
curl --request POST \
--url https://api.hubapi.com/oauth/v1/token \
--header 'content-type: application/x-www-form-urlencoded' \
--data 'grant_type=authorization_code&code=&redirect_uri=&client_id=&client_secret='
```
- Windows
```bash
curl --request POST ^
--url https://api.hubapi.com/oauth/v1/token ^
--header 'content-type: application/x-www-form-urlencoded' ^
--data 'grant_type=authorization_code&code=&redirect_uri=&client_id=&client_secret='
```
This command will return the access token necessary for API calls.
```json
{
"token_type": "bearer",
"refresh_token": "",
"access_token": "",
"expires_in": 1800
}
```
5. Store the access token securely for use in your application.
## Quickstart
To use the `HubSpot CRM Lists` connector in your Ballerina application, update the `.bal` file as follows:
### Step 1: Import the module
Import the `hubspot.crm.lists` module and `oauth2` module.
```ballerina
import ballerinax/hubspot.crm.lists as hslists;
import ballerina/oauth2;
```
### Step 2: Instantiate a new connector
1. Create a `Config.toml` file and, configure the obtained credentials in the above steps as follows:
```toml
clientId =
clientSecret =
refreshToken =
```
2. Instantiate an `OAuth2RefreshTokenGrantConfig` with the obtained credentials and initialize the connector with it.
```ballerina
configurable string clientId = ?;
configurable string clientSecret = ?;
configurable string refreshToken = ?;
OAuth2RefreshTokenGrantConfig auth = {
clientId,
clientSecret,
refreshToken,
credentialBearer: oauth2:POST_BODY_BEARER
};
final hslists:Client crmListClient = check new ({auth});
```
### Step 3: Invoke the connector operation
Now, utilize the available connector operations. A sample use case is shown below.
#### Create a CRM List
```ballerina
public function main() returns error? {
hslists:ListCreateRequest payload = {
objectTypeId: "0-1",
processingType: "MANUAL",
name: "my-test-list"
};
hslists:ListCreateResponse response = check crmListClient->post_create(payload);
}
```
## Examples
The `HubSpot CRM Lists` connector provides practical examples illustrating usage in various scenarios. Explore these [examples](https://github.com/ballerina-platform/module-ballerinax-hubspot.crm.lists/tree/main/examples/), covering the following use cases:
1. [Customer Support Ticket Manager](https://github.com/ballerina-platform/module-ballerinax-hubspot.crm.lists/tree/main/examples/customer_support_tickets_manager) - Integrates with HubSpot CRM Lists to create filtered lists of customer support tickets based on the priority level of the ticket.
2. [Leads Tracker](https://github.com/ballerina-platform/module-ballerinax-hubspot.crm.lists/tree/main/examples/leads_tracker) - Integrates with HubSpot CRM Lists to create Manual Lists and add leads(contacts) to the lists.
## Build from the source
### Setting up the prerequisites
1. Download and install Java SE Development Kit (JDK) version 21. You can download it from either of the following sources:
* [Oracle JDK](https://www.oracle.com/java/technologies/downloads/)
* [OpenJDK](https://adoptium.net/)
> **Note:** After installation, remember to set the `JAVA_HOME` environment variable to the directory where JDK was installed.
2. Download and install [Ballerina Swan Lake](https://ballerina.io/).
3. Download and install [Docker](https://www.docker.com/get-started).
> **Note**: Ensure that the Docker daemon is running before executing any tests.
4. Export the GitHub Personal access token with read package permissions as follows,
```bash
export packageUser=
export packagePAT=
```
### Build options
Execute the commands below to build from the source.
1. To build the package:
```bash
./gradlew clean build
```
2. To run the tests:
```bash
./gradlew clean test
```
3. To build the without the tests:
```bash
./gradlew clean build -x test
```
4. To run tests against different environments:
```bash
./gradlew clean test -Pgroups=
```
5. To debug the package with a remote debugger:
```bash
./gradlew clean build -Pdebug=
```
6. To debug with the Ballerina language:
```bash
./gradlew clean build -PbalJavaDebug=
```
7. Publish the generated artifacts to the local Ballerina Central repository:
```bash
./gradlew clean build -PpublishToLocalCentral=true
```
8. Publish the generated artifacts to the Ballerina Central repository:
```bash
./gradlew clean build -PpublishToCentral=true
```
## Contribute to Ballerina
As an open-source project, Ballerina welcomes contributions from the community.
For more information, go to the [contribution guidelines](https://github.com/ballerina-platform/ballerina-lang/blob/master/CONTRIBUTING.md).
## Code of conduct
All the contributors are encouraged to read the [Ballerina Code of Conduct](https://ballerina.io/code-of-conduct).
## Useful links
* For more information go to the [`hubspot.crm.lists` package](https://central.ballerina.io/ballerinax/hubspot.crm.lists/latest).
* For example demonstrations of the usage, go to [Ballerina By Examples](https://ballerina.io/learn/by-example/).
* Chat live with us via our [Discord server](https://discord.gg/ballerinalang).
* Post all technical questions on Stack Overflow with the [#ballerina](https://stackoverflow.com/questions/tagged/ballerina) tag.