https://github.com/binste/pipecutter
pipecutter provides a few tools for luigi such that it works better with data science libraries and environments such as pandas, scikit-learn, and Jupyter notebooks.
https://github.com/binste/pipecutter
jupyter-notebook luigi luigi-targets luigi-tasks pandas scikit-learn
Last synced: 5 months ago
JSON representation
pipecutter provides a few tools for luigi such that it works better with data science libraries and environments such as pandas, scikit-learn, and Jupyter notebooks.
- Host: GitHub
- URL: https://github.com/binste/pipecutter
- Owner: binste
- License: mit
- Archived: true
- Created: 2020-01-02T23:13:24.000Z (over 6 years ago)
- Default Branch: master
- Last Pushed: 2022-08-05T21:57:56.000Z (almost 4 years ago)
- Last Synced: 2025-02-17T09:34:46.794Z (over 1 year ago)
- Topics: jupyter-notebook, luigi, luigi-targets, luigi-tasks, pandas, scikit-learn
- Language: Python
- Homepage:
- Size: 158 KB
- Stars: 4
- Watchers: 2
- Forks: 0
- Open Issues: 1
-
Metadata Files:
- Readme: README.md
- License: LICENSE
Awesome Lists containing this project
README
# pipecutter
[](https://pypi.python.org/pypi/pipecutter/) []() [](https://travis-ci.org/binste/pipecutter) [](https://codecov.io/gh/binste/pipecutter?branch=master)
pipecutter provides a few tools for luigi such that it works better with data science libraries and environments such as pandas, scikit-learn, and Jupyter notebooks.
# Table of contents
- [Installation](#installation)
- [Usage](#usage)
- [Debug in an interactive environment](#debug-in-an-interactive-environment)
- [Targets](#targets)
- [Full example](#full-example)
# Installation
```bash
pip install pipecutter
```
Python 3.6+ is required. pipecutter follows [semantic versioning](https://semver.org/).
# Usage
pipecutter currently provides
* a more convenient way to run and debug luigi tasks in interactive environments such as Jupyter notebooks
* some luigi targets for saving pandas dataframes to parquet, scikit-learn models with joblib, ...
## Debug in an interactive environment
With luigi, you can already run tasks in a Python script/Jupyter notebook/Python console by using the `luigi.build` function (probably with `local_scheduler=True` as arugment). However, if the tasks throws an exception this will be caught by luigi and you are not able to drop into a post mortem debugging session. `pipecutter.run` is a light wrapper around `luigi.build` which disables this exception handling.
```python
In [1]: import luigi
In [2]: import pipecutter
In [3]: class TaskWhichFails(luigi.Task):
...: def run(self):
...: raise Exception("Something is wrong")
# Traceback below is shortened for readability
In [4]: pipecutter.run(TaskWhichFails())
---------------------------------------------------------------------------
Exception Traceback (most recent call last)
in
----> 1 pipecutter.run(TaskWhichFails())
...
in run(self)
1 class TaskWhichFails(luigi.Task):
2 def run(self):
----> 3 raise Exception
Exception: Something is wrong
# Drop straight into the debugger
In [5]: %debug
> (3)run()
1 class TaskWhichFails(luigi.Task):
2 def run(self):
----> 3 raise Exception
4
ipdb>
```
This should reduce the barrier for already using luigi tasks while developing a model and thereby making it easier to move into production later on.
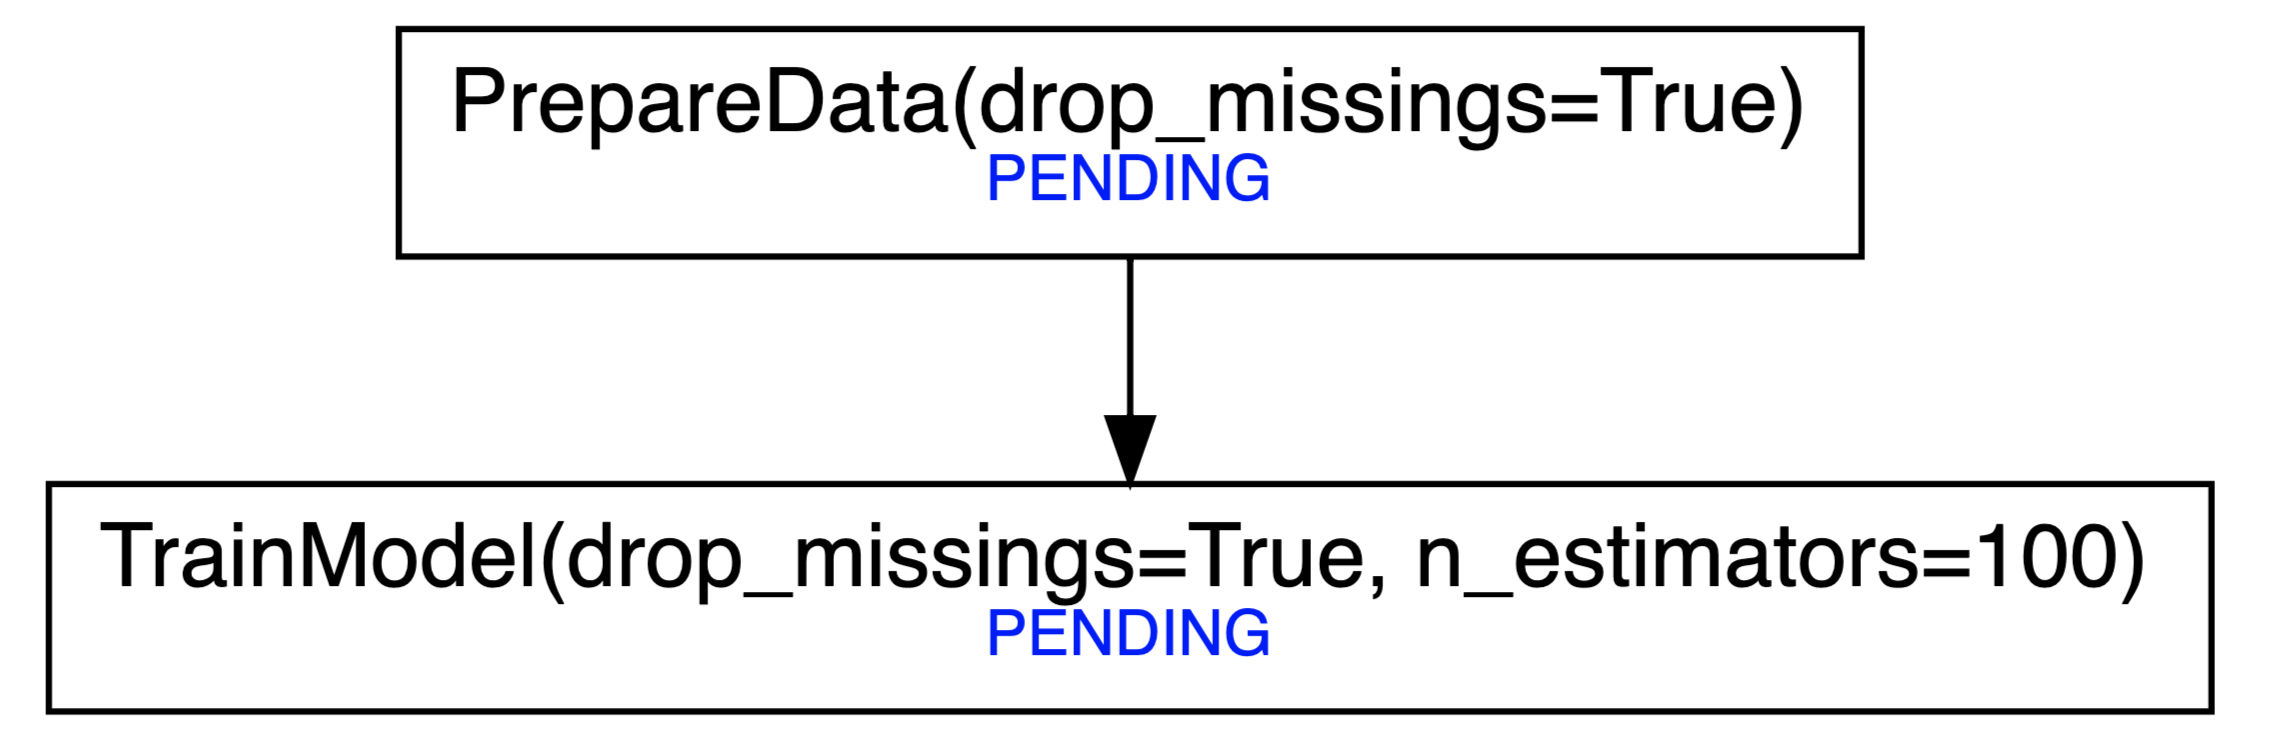
Additionally, you can print the dependencies of tasks with `pipecutter.print_tree` (wrapper around `luigi.tools.deps_tree.print_tree`) or build a graphviz Graph with `pipecutter.build_graph` which you can save as .png, .pdf, etc. or directly view in your Jupyter notebook. See the Full Example for a screenshot of how this looks. The `build_graph` function requires you to have [graphviz installed](https://graphviz.readthedocs.io/en/stable/manual.html#installation).
## Targets
In `pipecutter.targets` you find a few targets which build on luigi's `LocalTarget` but additionally have a `load` and a `dump` method. A convenient way to name the targets is hereby to use the `task_id` in the name, which is unique with respect to the task name and its passed in parameters.
```python
import luigi
import pipecutter
from pipecutter.targets import JoblibTarget
from sklearn.ensemble import RandomForestClassifier
class TrainModel(luigi.Task):
n_estimators = luigi.IntParameter()
def output(self):
return JoblibTarget(self.task_id + ".joblib")
def run(self):
model = RandomForestClassifier(n_estimators=self.n_estimators)
self.output().dump(model)
pipecutter.run(TrainModel(n_estimators=100))
# -> Produces a file called TrainModel_100_0b0ec0cdea.joblib
```
If you use `task_id` in the filename the above task can be written more concise with the `pipecutter.targets.outputs` decorator which adds the `output` method. By default it puts the files in a folder called `data`. This can be adjusted by the optional `folder` argument.
```python
from pipeline.targets import outputs
@outputs(JoblibTarget)
class TrainModel(luigi.Task):
n_estimators = luigi.IntParameter()
def run(self):
model = RandomForestClassifier(n_estimators=self.n_estimators)
self.output().dump(model)
```
You can also pass a dictionary to `pipecutter.targets.outputs` with a string as the key and a target which inherits from `pipecutter.targets.TargetBase` as the value.
## Full example
```python
import luigi
import pandas as pd
import numpy as np
import pipecutter
from luigi.util import requires
from pipecutter.targets import outputs, JoblibTarget, ParquetTarget
from sklearn.ensemble import RandomForestClassifier
@outputs(ParquetTarget)
class PrepareData(luigi.Task):
drop_missings = luigi.BoolParameter()
def run(self):
train_df = pd.DataFrame.from_dict({"A": [0, 1, np.nan], "B": [5, 1, 2], "label": [0, 1, 1]})
if self.drop_missings:
train_df = train_df.dropna()
self.output().dump(train_df)
@requires(PrepareData)
@outputs(JoblibTarget)
class TrainModel(luigi.Task):
n_estimators = luigi.IntParameter()
def run(self):
train_df = self.input().load()
X, y = train_df.drop("label", axis=1), train_df["label"]
model = RandomForestClassifier(n_estimators=self.n_estimators)
model.fit(X, y)
self.output().dump(model)
train_model = TrainModel(n_estimators=100, drop_missings=True)
pipecutter.build_graph(train_model)
```
The last command can be used to visualize the dependency tree, which is especially useful if your pipelines are more complex. It returns a `graphviz.Digraph` object which will render in a Jupyter Notebook as
Finally, run the tasks with:
```
pipecutter.run(train_model)
```