https://github.com/bluebootsy/os
A Fedora BootC OS themed like it's 2003, but updated like it's 2025.
https://github.com/bluebootsy/os
bootc fedora linux os
Last synced: 11 months ago
JSON representation
A Fedora BootC OS themed like it's 2003, but updated like it's 2025.
- Host: GitHub
- URL: https://github.com/bluebootsy/os
- Owner: bluebootsy
- Created: 2025-07-18T16:53:15.000Z (11 months ago)
- Default Branch: main
- Last Pushed: 2025-07-23T19:04:21.000Z (11 months ago)
- Last Synced: 2025-07-23T21:29:10.339Z (11 months ago)
- Topics: bootc, fedora, linux, os
- Language: Dockerfile
- Homepage:
- Size: 3.87 MB
- Stars: 3
- Watchers: 1
- Forks: 1
- Open Issues: 3
-
Metadata Files:
- Readme: README.md
Awesome Lists containing this project
README
# Blueboots: Retro Looks, Atomic Upgrades
> A Fedora BootC OS themed like it's 2003, but updated like it's 2025.
[](https://quay.io/repository/blueboots/os)

A graphical, declarative OS with a retro theme ([Bluecurve](https://github.com/neeeeow/Bluecurve)) reminiscent of [Fedora Core 1.0](https://en.wikipedia.org/wiki/Fedora_Linux#History).
Using [bootc](https://bootc-dev.github.io/bootc/) for transactional upgrades!
All built within only **ONE FILE** (`Containerfile`)!
This main OS image is hosted on Quay.io:
```sh
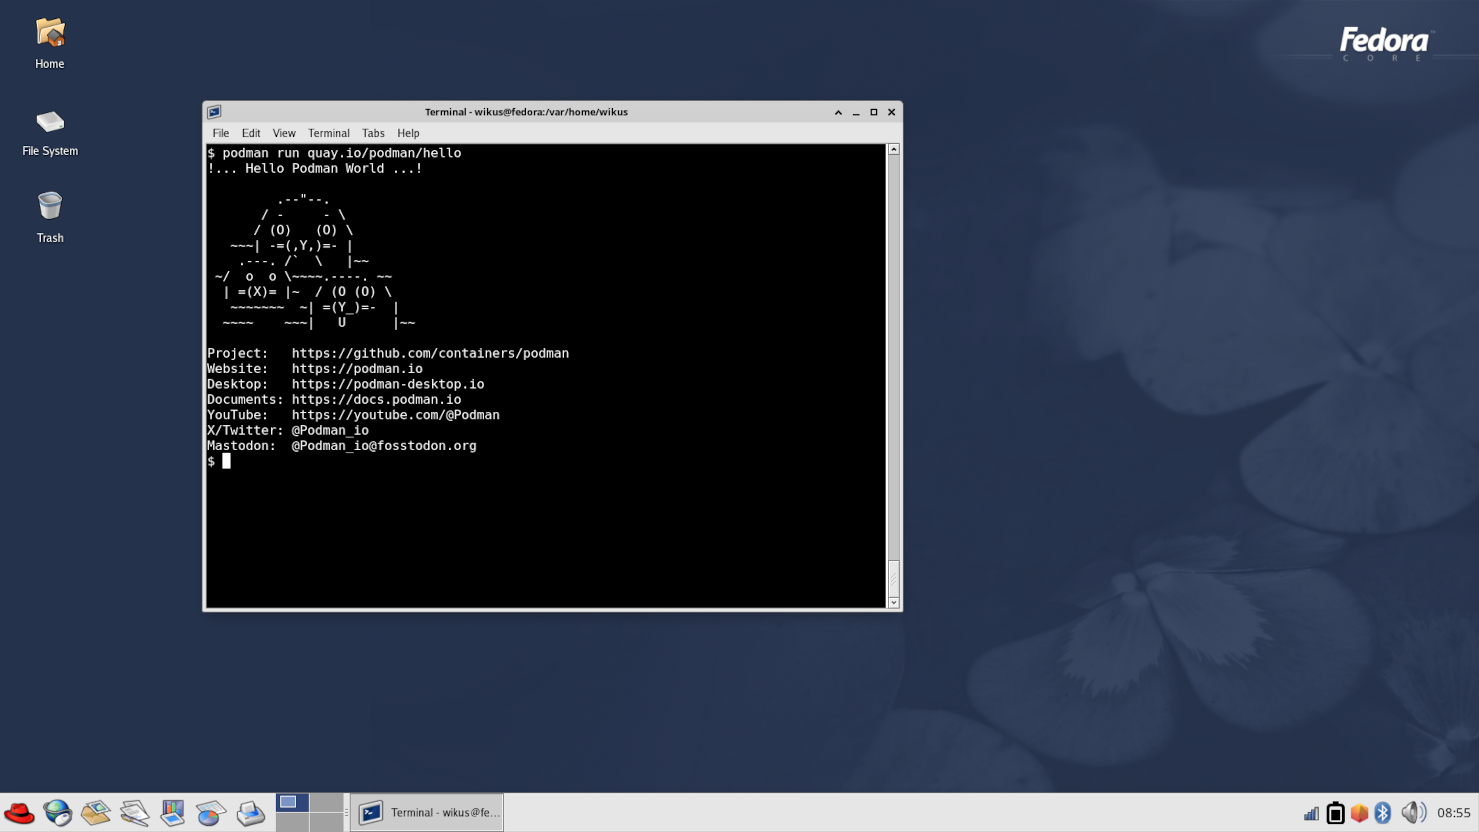
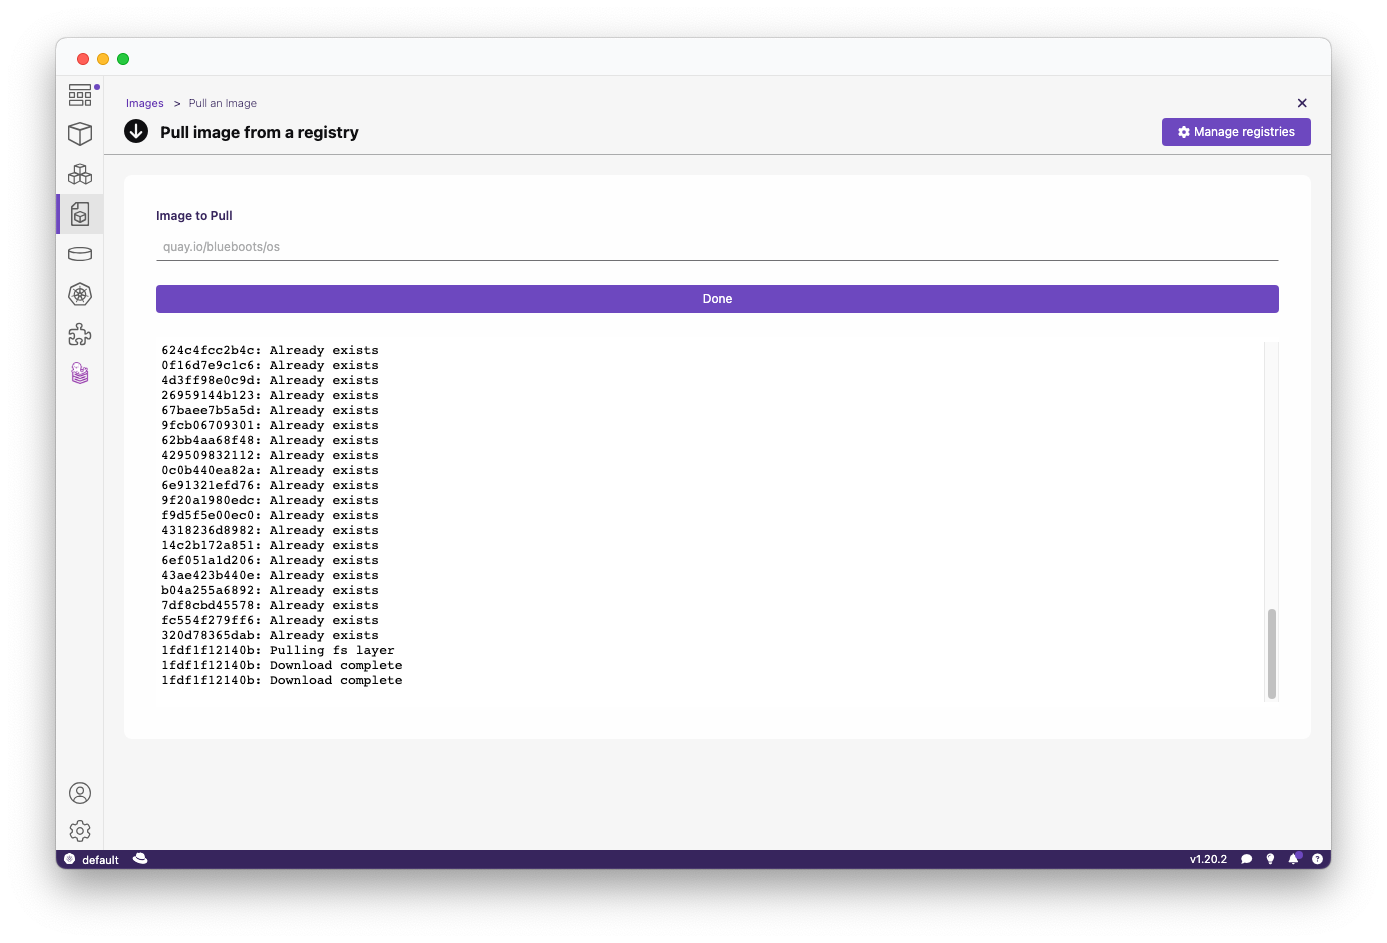
podman pull quay.io/blueboots/os
```
[1] Technically the `/theme` folder is passed in. Otherwise, everything is in a single `Containerfile`!
## Topics
- [Technology](#technology)
- [Important Notes](#important-notes)
- [Requirements](#requirements)
- [Usage](#usage)
- [Advanced Usage](#advanced-usage)
- [Known Issues](#known-issues)
## Technology
This **Bootable Container (bootc)** OS uses [bootc-image-builder](https://github.com/osbuild/bootc-image-builder) to produce bootable *container* disk images.
You will use this to **add users** so you can log in!
Once a machine is created from the disk image, it can apply transactional updates *in place* from newly pushed container images (no need to rebuild the disk image). After you push a new image (`podman push`), just run `bootc upgrade` on the system and reboot.
### Default software
There are some default applications bundled into this OS in additional to the default Fedora images:
* Visual Studio Code (core)
* Laptop and server hardware support (core)
* WiFi hardware support (core)
* Container tools such as Podman (core)
* Wireguard support (core)
* Firefox (Flatpak)
* Podman Desktop (Flatpak)
### Learning more about bootc
If you want to learn more about bootable containers, see the [Fedora Getting Started Guide](https://docs.fedoraproject.org/en-US/bootc/getting-started/) for videos, demos, best practices and more details.
## IMPORTANT NOTES
- To install additional software, use [Flatpak](https://flatpak.org/).
- Want to install a package to the **core** of the OS? See [Advanced Usage](#advanced-usage).
- ONLY generic GPU drivers are included (Intel iGPU, AMD iGPU, etc.) from `@hardware-support` in RHEL-derivative OSes.
- No NVIDIA GPU support yet (upcoming).
- No AMD GPU support yet (upcoming).
## Requirements
### Prerequisites: Software and hardware requirements
We have to initially build our OS! So look below for requirements.
**OS:**
Compatible on Windows, macOS & Linux.
**Software:**
- [Podman Desktop](https://github.com/containers/podman-desktop)
- [BootC Extension for Podman Desktop](https://github.com/podman-desktop/extension-bootc)
## Usage
1. **Pull the container image:**
> Pull via CLI or within Podman Desktop
```sh
podman pull quay.io/blueboots/os
```
2. **(Alternatively) Build your own bootc-enabled Containerfile:**
> Git clone this project and build your image locally.
```sh
git clone http://github.com/bluebootsy/os
podman build -t quay.io/foo/bar .
```
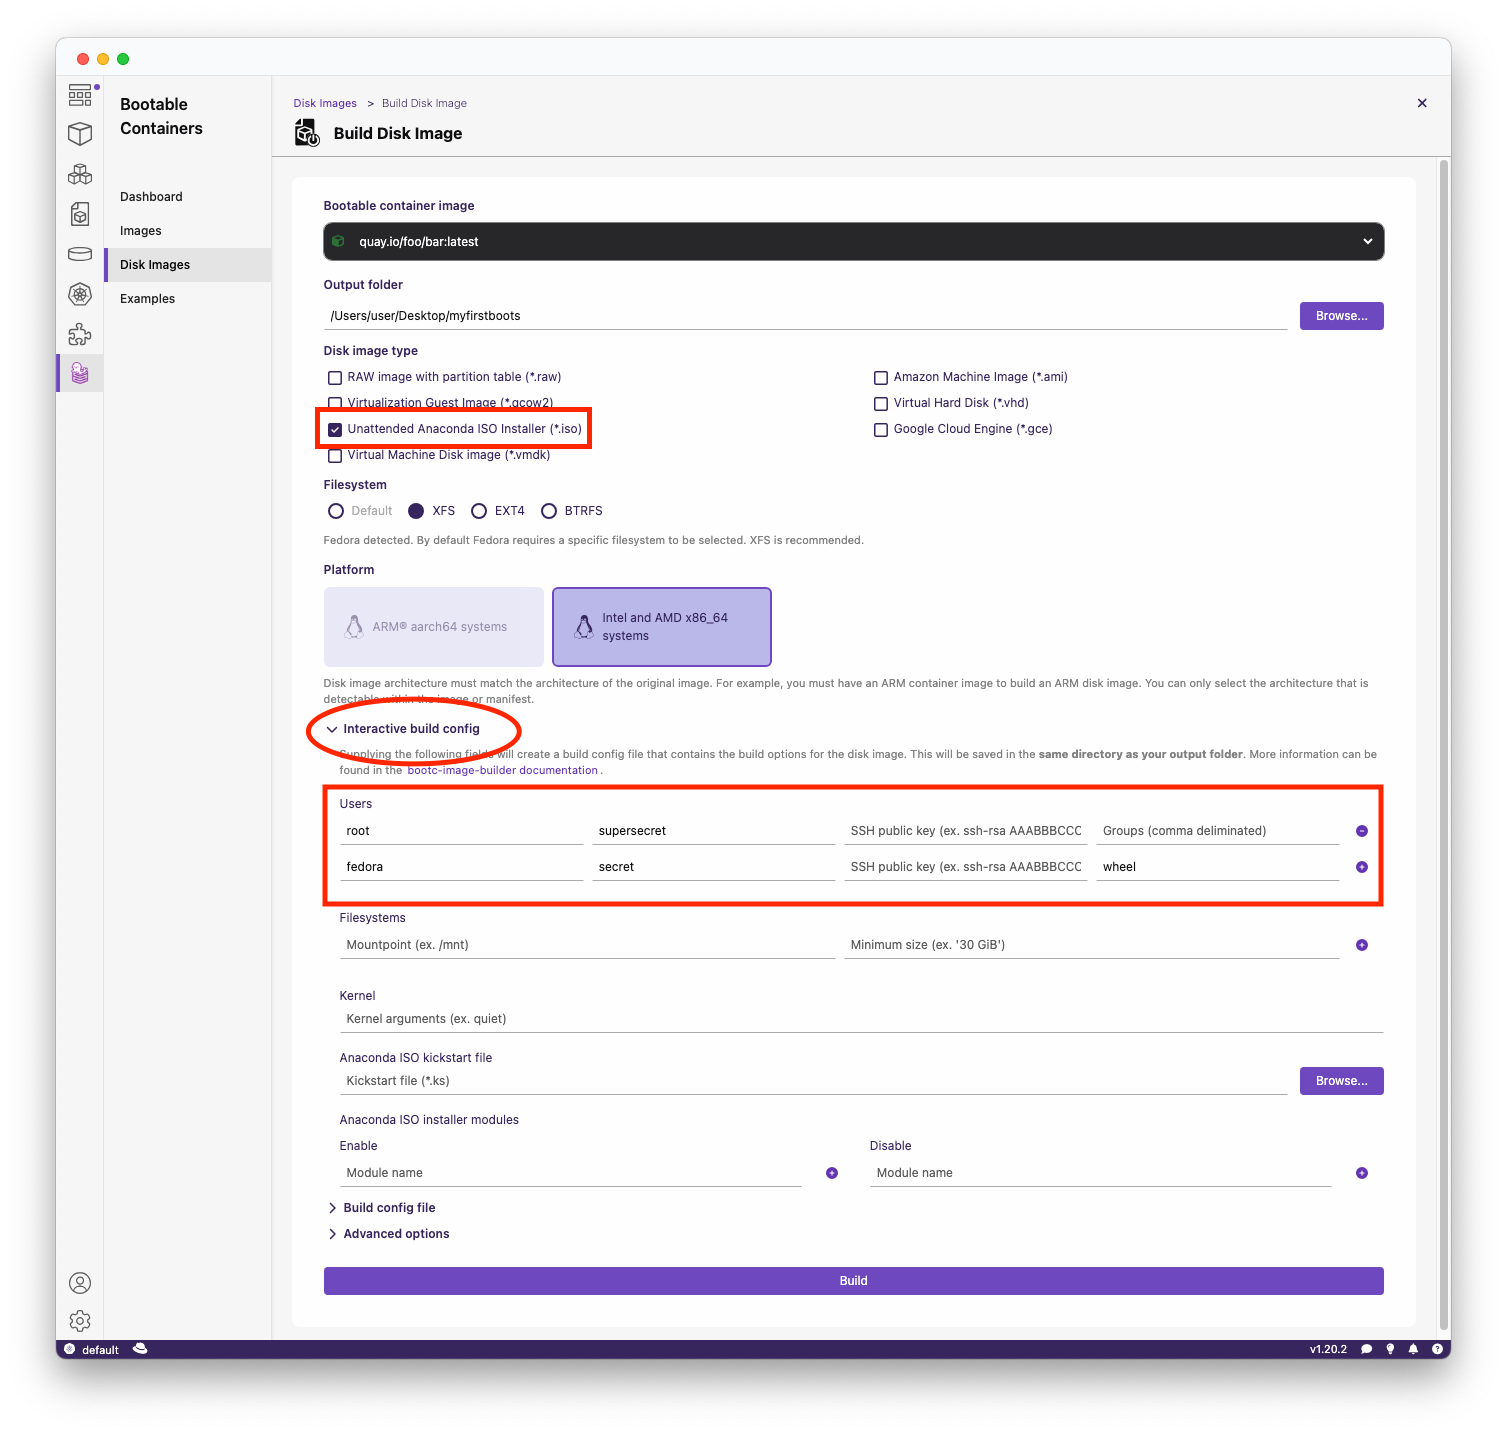
3. **Build the disk image:**
> Use the Podman Desktop BootC extension. Make sure you provide your username and password.
**Important note:** Use the *interactive installer* within the BootC extension to add your username and password! Otherwise you will **NOT BE ABLE TO LOGIN**.
1. Choose either `.iso` for an *unattended ISO installer* which will **AUTOMATICALLY WIPE THE FIRST AVAILABLE DISK** (use with caution!), or `.raw`/other image types for local testing (e.g. writing to a USB stick).
2. Add your username and password for logging in, as well as your group (e.g. `wheel` for passwordless sudo).
**LET ME REPEAT.**
**IF YOU CREATE THE .ISO, IT WILL AUTO-INSTALL TO YOUR FIRST AVAILABLE DISK AFTER SELECTING IT FOR BOOTING.**
4. **Installation:**
**If you chose ISO:**
1. "Write" the ISO using [balenaEtcher](https://etcher.balena.io/) or [Fedora Media Writer](https://en.wikipedia.org/wiki/Fedora_Media_Writer) to a USB stick.
2. Plug into a PC and select the USB from the boot screen.
3. Watch as it installs unattended to the first available drive.
**If you chose RAW:**
1. You can "write" the `.raw` image with the above tools (balenaEtcher or Fedora Media Writer) to a USB stick.
2. Plug into a PC and select the USB from the boot screen.
3. Test out the "live" image.
## Advanced Usage
### Making changes to your OS
Want to change a "core" package or make system changes that propagate to your OS? Follow below!
#### Adding "flatpak" software
Software that is _consistently_ being upgraded should be installed as a [Flatpak](https://flatpak.org/).
We recommend using [Flathub](https://flathub.org/) as the main way of installing new software.
This can be done on the command line after your OS has booted:
```sh
flatpak install flathub org.mozilla.firefox
```
#### Adding "core" software & system changes
In this example we will **add a basic package** called [`figlet`](http://www.figlet.org/):
1. **Edit your `Containerfile`:**
Within the [Containerfile](/Containerfile) add the following to the list of packages:
```Dockerfile
RUN dnf install -y \
# ... other packages ... \
figlet && \
dnf clean all && \
rm -rf /var/cache/dnf
```
2. **Build & push your container:**
```sh
podman build -t quay.io/foo/bar .
podman push quay.io/foo/bar
```
3. **Run `bootc upgrade` on your OS:**
The command downloads your hosted image and applies updates on next reboot.
```sh
bootc upgrade
```
4. **Reboot and check that `figlet` is installed!**
```sh
$ figlet "Hi"
_ _ _
| | | (_)
| |_| | |
| _ | |
|_| |_|_|
```
### Using the `bootc` CLI tool
The `bootc` CLI is the bread-and-butter of bootc-derived images. Once booted, you can manage the system with:
- **Status:** `bootc status` shows the current image and version.
- **Upgrade:** `bootc upgrade` pulls the latest OCI image to apply next reboot.
- **Fetch:** `bootc fetch` pre-downloads an update without applying it.
- **Install:** `bootc install --target /dev/sdX` writes the OS to a block device (useful when live-booting from USB for testing).
See the official docs:
## Known Issues
No GPU support for NVIDIA and AMD (yet).