https://github.com/bmf-san/akashi-slack-slash-command
This is a slack slash command for Akashi
https://github.com/bmf-san/akashi-slack-slash-command
akashi akashigo api go slack
Last synced: 3 months ago
JSON representation
This is a slack slash command for Akashi
- Host: GitHub
- URL: https://github.com/bmf-san/akashi-slack-slash-command
- Owner: bmf-san
- License: mit
- Created: 2022-05-26T00:08:01.000Z (about 3 years ago)
- Default Branch: main
- Last Pushed: 2023-01-03T10:39:48.000Z (over 2 years ago)
- Last Synced: 2025-03-28T17:05:42.072Z (4 months ago)
- Topics: akashi, akashigo, api, go, slack
- Language: Go
- Homepage:
- Size: 31.3 KB
- Stars: 3
- Watchers: 1
- Forks: 1
- Open Issues: 2
-
Metadata Files:
- Readme: README.md
- License: LICENSE
Awesome Lists containing this project
README
# akashi-slack-slash-command
SlackのスラッシュコマンドでAkashiのAPIを利用するアプリケーション。
SlackのスラッシュコマンドでCloud Functionsの関数を呼び出しで処理を実行します。
関数はSheets APIとAkashi APIをコールしてレスポンスを返します。
# 手順
## 前提
- gcloudコマンドが利用できること
- アプリケーションをデプロイするために、gcloudコマンドが利用できる必要があります。
- Cloud Build APIが有効化されていること
- Cloud Functionsに関数をデプロイするために必要です。
- Google Sheet APIが有効化されていること
- Google Cloud Platform上でGoogle Sheet APIを有効化しておく必要があります。
- AKASHI APIが有効化されていること
## 準備
### Cloud Functionに関数を作成
Cloud Functionsにて関数を作成しておく。トリガータイプは`HTTP`、認証は`未認証の呼び出しを許可`を選択。`HTTPSが必須`はチェック。
関数デプロイ後、Cloud Functionsの関数の詳細>トリガーに記載されているトリガーURLをコピーしておく。
### Slack App
#### Slack Appを作成
#####
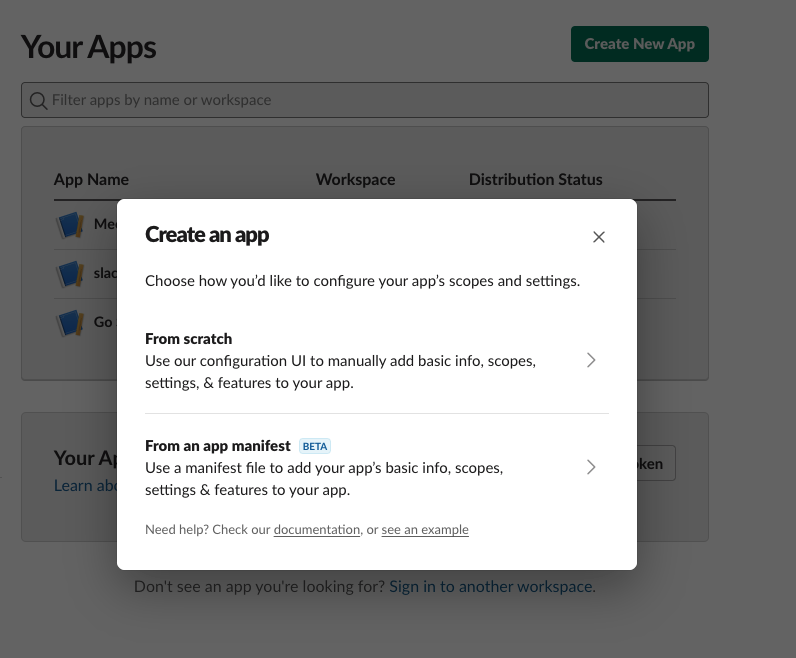
[Create an app](https://api.slack.com/apps?new_app=1)にて、`From scratch`を
押下。
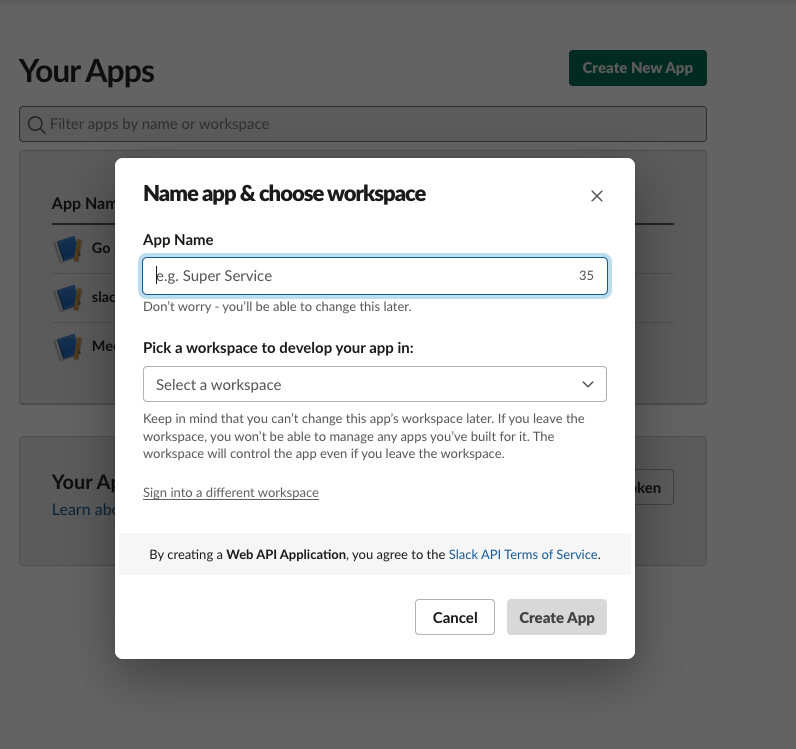
`App Name`を入力、`Pick a workspace to develop your app in:`にてワークスペースを選択して、`Create App`を押下。
#### Slash Commandを設定
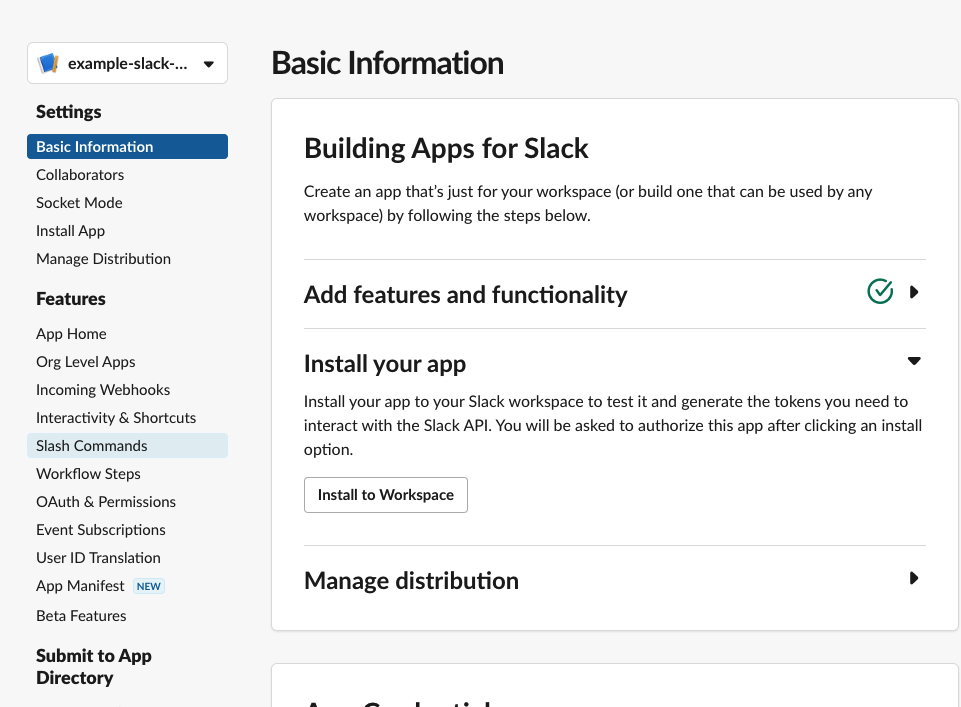
設定画面(ex. `https://api.slack.com/apps/*******`)にて、Slash Commandsを選択。
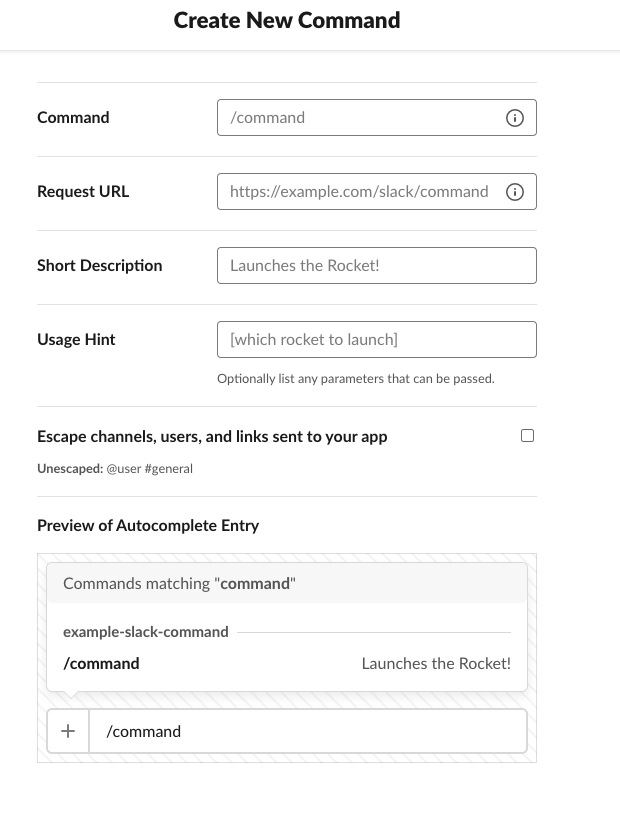
`Create New Command`を押下し、`Command`、`Short Description`、`Usage Hint`、`Escape channels, users, and links sent to your app`は任意で設定。
`Request URL`はCloud Functionsの関数の詳細>トリガーに記載されているトリガーURLを入力。`https://REGION名-PROJECTのID.cloudfunctions.net/関数名`の形式。
`Save`を押下。
#### Slack Appをインストール
設定画面(ex. `https://api.slack.com/apps/*******`)にて、`Install App`を押下。
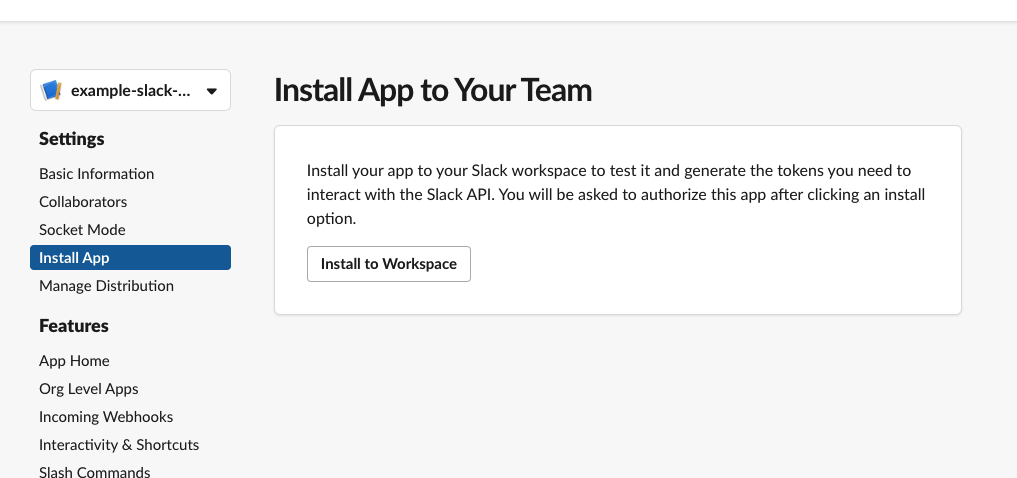
`Install to workspace`を押下して、任意のワークスペースにAppをインストール。
#### Signing Secretを取得
設定画面(ex. `https://api.slack.com/apps/*******`)にて、`Basic Infomation`を押下。App Credentialsという項目に、`Signing Secret`があるので、値をコピーしておく。
### サービスアカウントの発行
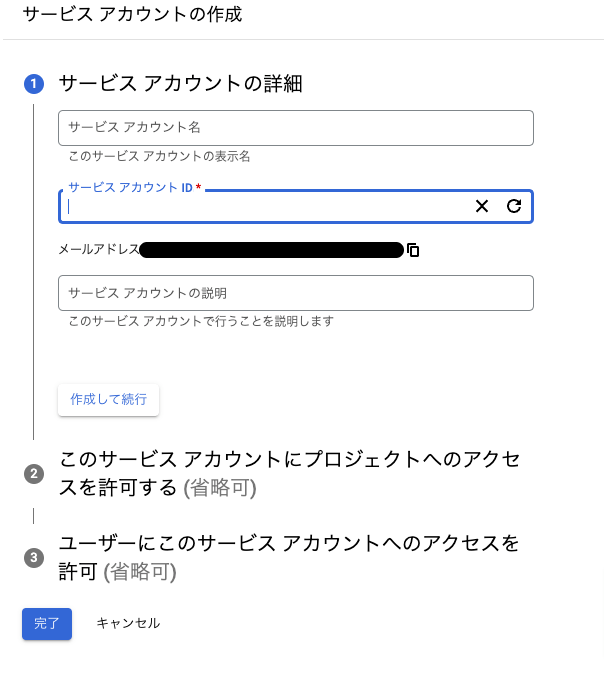
GCPでサービスアカウントを発行。
任意のサービスアカウント名を入力したら`作成して続行`を押下。ロールの調整はせずに、`完了`を押下。
サービスアカウント一覧から作成したサービスアカウントを選択、新しい鍵をJSON形式で作成。
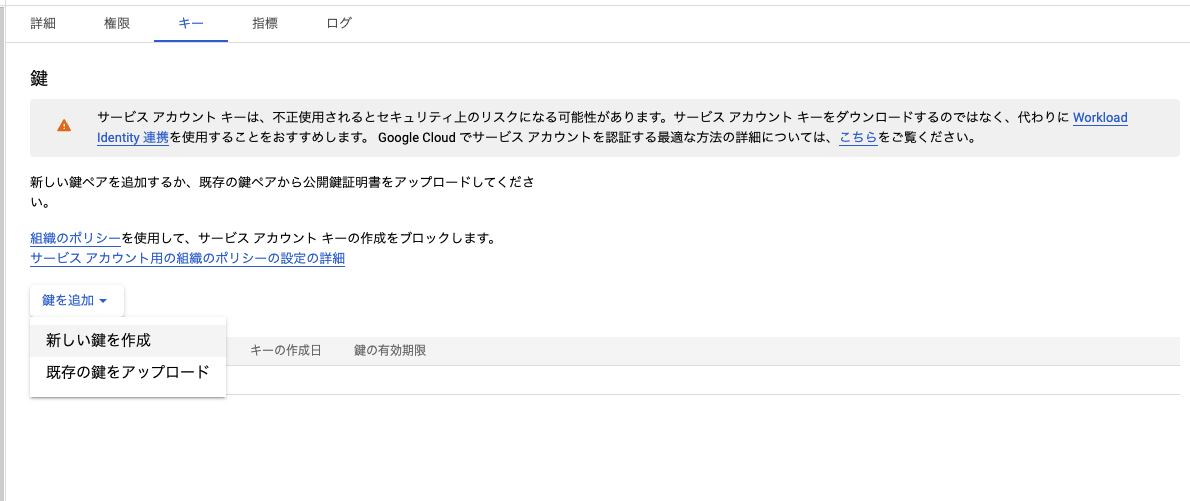
作成された秘密鍵(jsonファイル)をbase64でエンコードした値をコピーしておく。
`base64 service_account.json`
### Spread Sheetsを作成
Spread Sheetを作成。
以下シートに貼り付けるためのコピペ用データ。
```
employee_id slack_user_name akashi_company_id akashi_api_token
dummy_id dummy_name dummy_com_id dummy_token
dummy_id dummy_name dummy_com_id dummy_token
dummy_id dummy_name dummy_com_id dummy_token
dummy_id dummy_name dummy_com_id dummy_token
dummy_id dummy_name dummy_com_id dummy_token
```
`employee_id`は社員番号。
`slack_user_name`はslackのユーザ名。
`akashi_company_id`はAkashi APIのコールで利用する企業ID。
`akashi_api_token`はAkashiでユーザーごとに発行するAPIトークン。
作成したSpread Sheetの共有設定を開き、サービスアカウントのメールを追加する。
サービスアカウントのメールは、サービスアカウントの詳細で確認できる。
### .env.yamlの作成
`.env.yaml`を作成。
```sh
cp .env.yaml.example .env.yaml
```
`SLACK_SIGINING_SECRET`はSlack Appのsigning secret。
`SERVICE_ACCOUNT`はbase64エンコードしたサービスアカウントの値。
`SPREAD_SHEET_ID`はSpread SheetのID。IDはSpread Sheetのリンクから確認できる。`https://docs.google.com/spreadsheets/d//edit#gid=0`
## 関数を再デプロイ
```sh
export FUNC=関数名
make deploy
```
## 使い方
| コマンド | 内容 |
| ------------ | ------------------------------------------------------------------------------------------------------------------------------ |
| /akashi | 出勤または退勤します。出勤が打刻されていない場合は出勤。出勤が打刻されているまたは退勤が打刻されている場合は退勤を打刻します。 |
| /akashi 出勤 | 出勤を打刻します。 |
| /akashi 退勤 | 退勤を打刻します。 |
※Slash CommandのCommandを`akashi`とした場合を想定。
## 運用
トークンの期限切れた場合は、手動で再発行し、Spreadsheetの各自のトークンを更新する必要がある。
Akashiのトークンの有効期限は発行から1ヶ月であるため、月1回の更新が必要となる。
トークン再発行の自動化については以下issue参照。
cf. https://github.com/bmf-san/akashi-slack-slash-command/issues/6
# コスト
[Cloud Functions - Cloudfunctionsの料金](https://cloud.google.com/functions/pricing?hl=ja)
# クォータ
[Sheets API - Usage limits](https://developers.google.com/sheets/api/limits)
# 参考
- [Google Cloud - Go on Google App Engine](https://cloud.google.com/appengine/docs/go)
- [Google Cloud - App Engine pricing](https://cloud.google.com/appengine/pricing)
- [www.serversus.work - Google App Engine(GAE)を無料枠で収めるための勘所](https://www.serversus.work/topics/p1uaj4jrv8b5x70hwe6p/)
- [github.com - slack-go/slack](https://github.com/slack-go/slack)
# 関連
- [bmf-tech.com - Cloud Functionsを使ってSlack AppのSlash Commandを実装](https://bmf-tech.com/posts/Cloud%20Functions%E3%82%92%E4%BD%BF%E3%81%A3%E3%81%A6Slack%20App%E3%81%AESlash%20Command%E3%82%92%E5%AE%9F%E8%A3%85)