https://github.com/carlonluca/docker-mldonkey
Project to build a docker image containing the mldonkey service.
https://github.com/carlonluca/docker-mldonkey
docker mldonkey
Last synced: 9 months ago
JSON representation
Project to build a docker image containing the mldonkey service.
- Host: GitHub
- URL: https://github.com/carlonluca/docker-mldonkey
- Owner: carlonluca
- License: gpl-3.0
- Created: 2020-09-12T15:45:40.000Z (almost 6 years ago)
- Default Branch: master
- Last Pushed: 2025-09-06T09:06:49.000Z (10 months ago)
- Last Synced: 2025-09-06T10:26:11.135Z (10 months ago)
- Topics: docker, mldonkey
- Language: Dockerfile
- Homepage:
- Size: 255 KB
- Stars: 26
- Watchers: 6
- Forks: 5
- Open Issues: 2
-
Metadata Files:
- Readme: README.md
- License: LICENSE
Awesome Lists containing this project
README
# mldonkey docker image
This repository hosts the Dockerfile for building the mldonkey docker image.
This image includes:
* mldonkey core from the [official mldonkey repo](https://github.com/ygrek/mldonkey);
* additional patches from my [mldonkey fork](https://github.com/carlonluca/mldonkey);
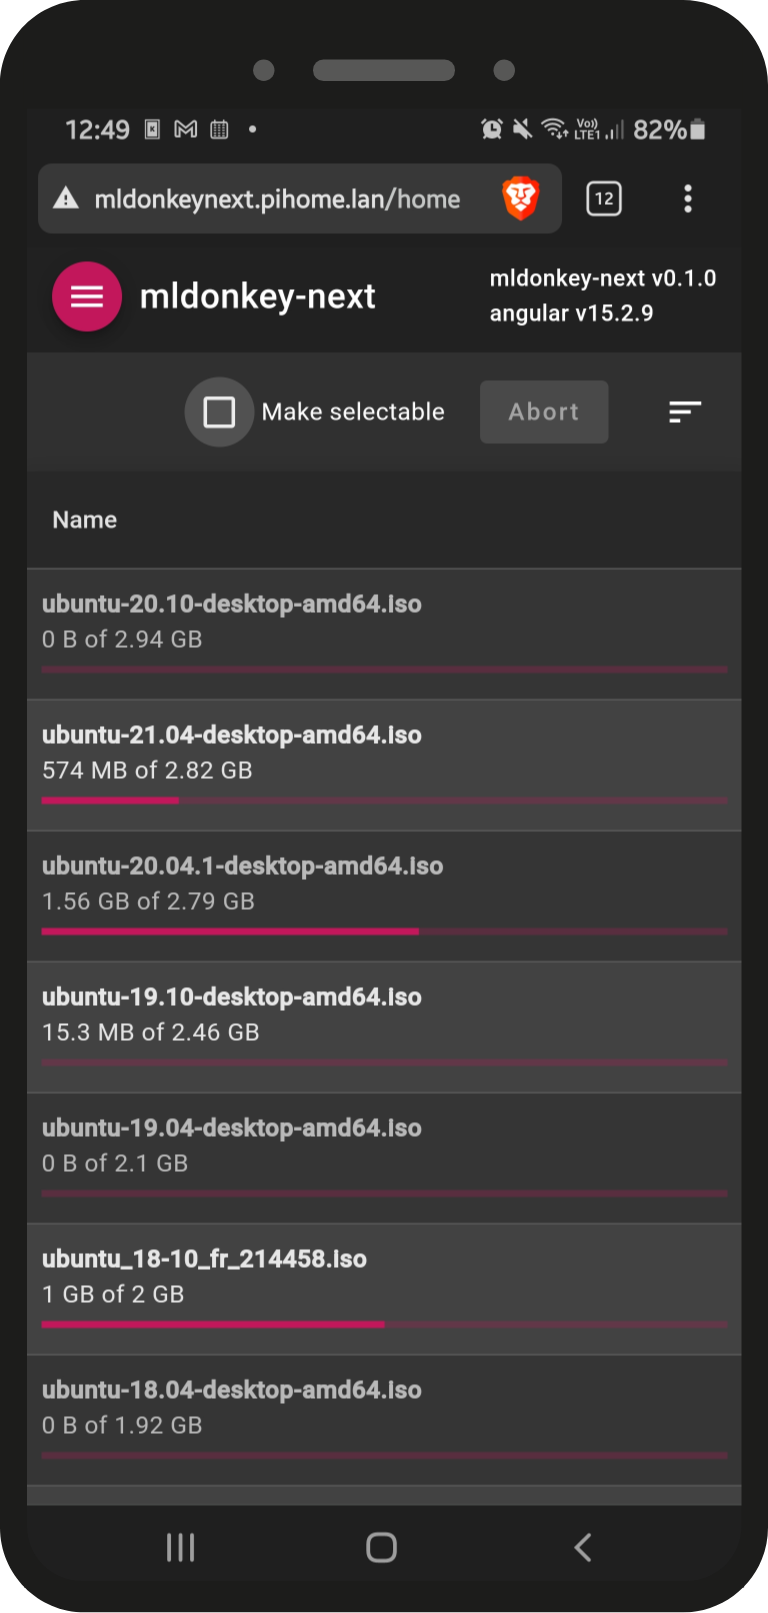
* [mldonkey-next](https://github.com/carlonluca/mldonkey-next), a modern web client for mldonkey written in Angular (see the [official repo](https://github.com/carlonluca/mldonkey-next) for other native clients).

Desktop | Mobile
:-------------------------:|:-------------------------:
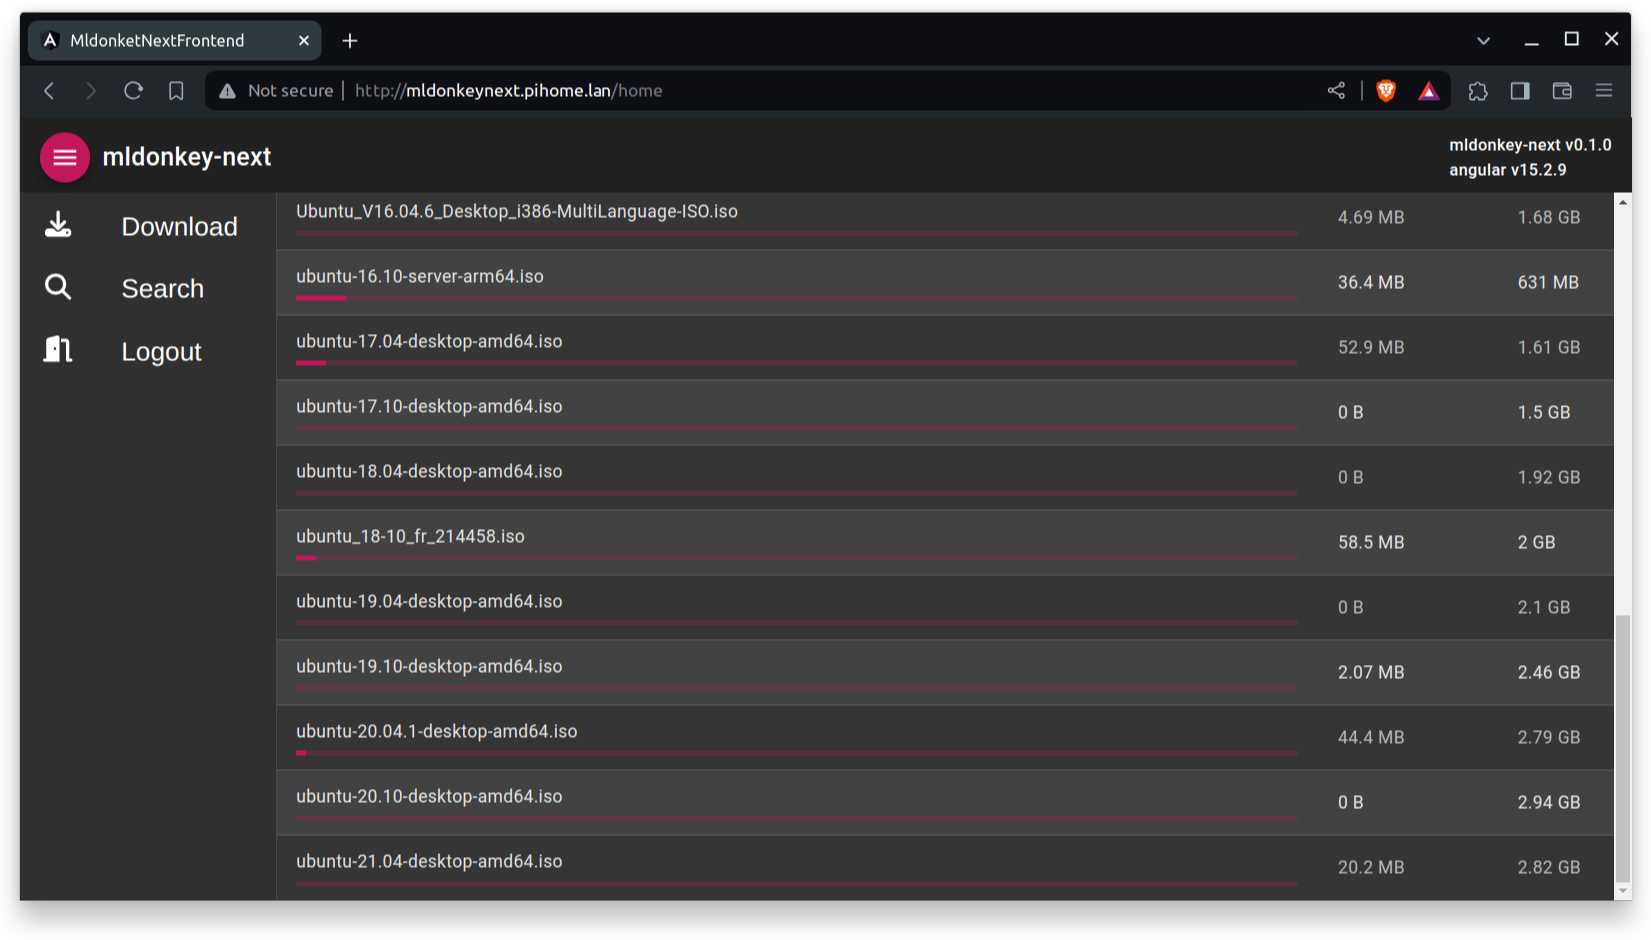 | 
## Available versions
Versions tagged just with a software versions are builds of mldonkey from official mldonkey releases. The mldonkey code is currently taken from https://github.com/ygrek/mldonkey.
Versions including a hash are versions built from specific commits. Commits do not refer to the official repo but to my fork https://github.com/carlonluca/mldonkey. If you want to know what the image includes, refer to that repo history and branches (in particular the dev branch). My fork tries to stay in sync with the more official repo above.
Currently, dev images include the dark theme and all the most recent commits to the official repo + other updates. Refer to https://github.com/carlonluca/mldonkey for more info.
**Refer to https://bugfreeblog.duckdns.org/docker-images-for-the-mldonkey-service for more info about each available image.**
## Owner and permissions
The mldonkey daemon running inside the container must be able to read and modify
data inside the volume. You'll also probably want to properly share data with a
user available in your host. The mldonkey daemon always use the **mldonkey** user and
group, but you can setup the environment so that the container assignes the desired
uid and gid to the mldonkey user and group inside the container. This will allow you
to see those files with the proper permissions in your host.
### Example
Let's assume your user is named _luca_ and has the uid 1001, and that you want your
data to be assigned group _luca_, which has the same gid 1001. In this case you
can ask the container to assign the value 1001 to uid and gid _mldonkey_ in the container
by using the env variables:
```
MLDONKEY_UID=1001
MLDONKEY_GID=1001
```
This will establish a mapping between user _luca_ in the host to user _mldonkey_ in the
container, and group _luca_ in the host with group _mldonkey_ in the container.
## Ports
|Network|Type|MLDonkey default|Configuration file|
|---|---|---|---|
|http_port|HTTP|4080|downloads.ini|
|mldonkey-next interface|HTTP|4081|container remap
(required for mldonkey-next for webserver and websocket)|
|telnet_port|TCP|4000|downloads.ini|
|gui_port|TCP|4001|downloads.ini|
|websocket to core|TCP|4002|**not used anymore** [1]|
|websocket for log stream|TCP|4003|**not used anymore** [2]|
|eDonkey2000|TCP|random|donkey.ini|
|eDonkey2000|UDP|TCP port + 4|donkey.ini|
|Kad|TCP|random|donkey.ini, Kademlia section|
|Kad1|UDP|Same as TCP|donkey.ini, Kademlia section|
|Overnet|TCP|random|donkey.ini, Overnet section|
|Overnet|UDP|Same as TCP|donkey.ini, Overnet section|
|BitTorrent Client |TCP|6882|bittorrent.ini|
|BitTorrent Tracker |TCP|6881|bittorrent.ini|
|BitTorrent DHT |UDP|random|bittorrent.ini|
|DirectConnect|TCP|4444|directconnect.ini|
|DirectConnect|UDP|Same as TCP|directconnect.ini|
* [1]: websocket server is now listening on the webapp port (4081) appening the _/ws_ path
* [2]: websocket server is now listening on the webapp port (4081) appening the _/logstream_ path. **logstream is returned without authentication**, use the MLDONKEY_NEXT_ENABLE_LOG_STREAM env variable to enable/disable (1 to enable, 0 or unset to disable). By default it is unset.
## Running the Container
This is an example command to run docker-mldonkey:
```
docker create --name=mldonkey \
-v :/var/lib/mldonkey:rw \
-e MLDONKEY_GID= \
-e MLDONKEY_UID= \
-e TZ= \
-e MLDONKEY_ADMIN_PASSWORD=password \
-e MLDONKEY_NEXT_ENABLE_LOG_STREAM=<0 or 1> \
-p 4000:4000 \
-p 4001:4001 \
-p 4002:4002 \
-p 4080:4080 \
-p 4081:4081 \
-p : \
-p :/udp \
-p : \
-p :/udp \
-p : \
-p :/udp \
-p 6881:6881 \
-p 6882:6882 \
-p 3617:3617/udp \
-p 4444:4444 \
-p 4444:4444/udp \
carlonluca/mldonkey:dev
```
mldonkey stores data inside `/var/lib/mldonkey`. You may want to mount the data directory to local filesystem. Doing this will persist the data when you re-create the docker container. It is also easier to get downloaded files this way.
NOTE: for the randomly chosen ports, you'll have to run the container first and let the core create his conf files. Then create the container again by remapping the chosen ports.
### Running using Docker Compose
Create a docker compose file docker-compose.yml (or add to an existing one):
```yaml
services:
mldonkey:
container_name: mldonkey
restart: unless-stopped
environment:
- MLDONKEY_ADMIN_PASSWORD=$ADMIN_PWD
- MLDONKEY_UID=
- MLDONKEY_GID=
- TZ=
ports:
- 4000:4000
- 4001:4001
- 4002:4002
- 4080:4080
- 4081:4081
- :
- :/udp
- :
- :/udp
- :
- :/udp
- 6881:6881
- 6882:6882
- 3617:3617/udp
- 4444:4444
- 4444:4444/udp
volumes:
- :/var/lib/mldonkey
```
now run the configuration:
```
docker compose up -d
```
### Running behind a reverse proxy
It is possible to run mldonkey-next behind a reverse proxy. This is an example an nginx configuration:
```plain
server {
listen 80;
server_name mldonkey.your.domain;
location / {
proxy_pass http://upstream;
proxy_set_header Host $host;
proxy_set_header X-Real-IP $remote_addr;
proxy_set_header X-Forwarded-For $proxy_add_x_forwarded_for;
proxy_set_header X-Forwarded-Proto $scheme;
}
location /ws {
proxy_pass http://upstream;
proxy_http_version 1.1;
proxy_set_header Upgrade $http_upgrade;
proxy_set_header Connection "upgrade";
proxy_set_header Host $host;
}
location /logstream {
proxy_pass http://upstream;
proxy_http_version 1.1;
proxy_set_header Upgrade $http_upgrade;
proxy_set_header Connection "upgrade";
proxy_set_header Host $host;
}
}
```
**NOTE**: mldonkey implementation is not probably safe enough for public exposure, so I suggest to only use this setup in a safe environment. If you really intend to expose the service, you can do so even throught HTTPS:
```plain
server {
listen 443 ssl;
server_name mldonkey.your.domain;
ssl_certificate [...];
ssl_certificate_key [...];
[...]
}
```
## Notes for Docker for Mac
mldonkey does not like the `temp` directory to reside in Mac filesystem. It is better to mount `/var/lib/mldonkey/temp` inside the Docker VM filesystem.