https://github.com/chenqianhe/swap_face_for_graduate
换脸制作学士服毕业照
https://github.com/chenqianhe/swap_face_for_graduate
Last synced: about 1 month ago
JSON representation
换脸制作学士服毕业照
- Host: GitHub
- URL: https://github.com/chenqianhe/swap_face_for_graduate
- Owner: chenqianhe
- License: apache-2.0
- Created: 2020-06-07T14:20:23.000Z (about 5 years ago)
- Default Branch: master
- Last Pushed: 2021-03-07T11:31:21.000Z (over 4 years ago)
- Last Synced: 2025-04-02T05:23:08.013Z (3 months ago)
- Language: Python
- Size: 17.6 KB
- Stars: 9
- Watchers: 1
- Forks: 2
- Open Issues: 0
-
Metadata Files:
- Readme: README.md
- License: LICENSE
Awesome Lists containing this project
README
# 基于PaddlePaddle和PaddleHub的学士服换脸
## 一、项目起因
今年许多毕业生艰难的毕业,并且由于疫情的影响,他们可能都没办法拥有一张属于自己的毕业照。 在微博、朋友圈、空间都能看到许多人说遗憾。于是便有了这样一个学士服换脸的项目,祝福各位毕业生前程似锦,万事如意。
## 二、效果展示
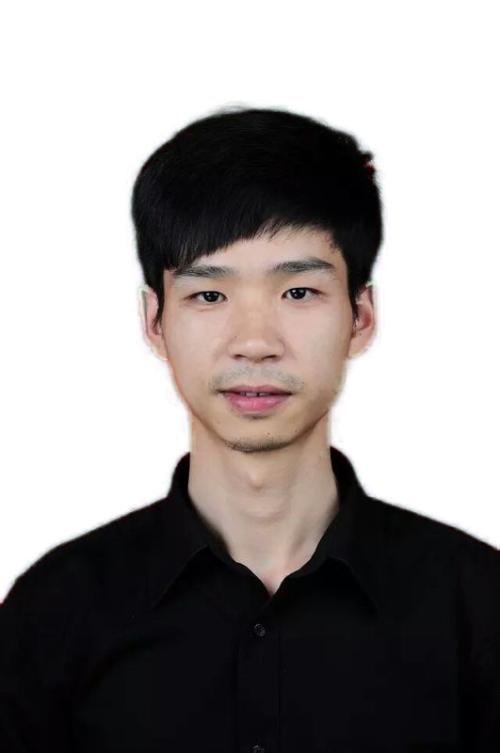
原图:
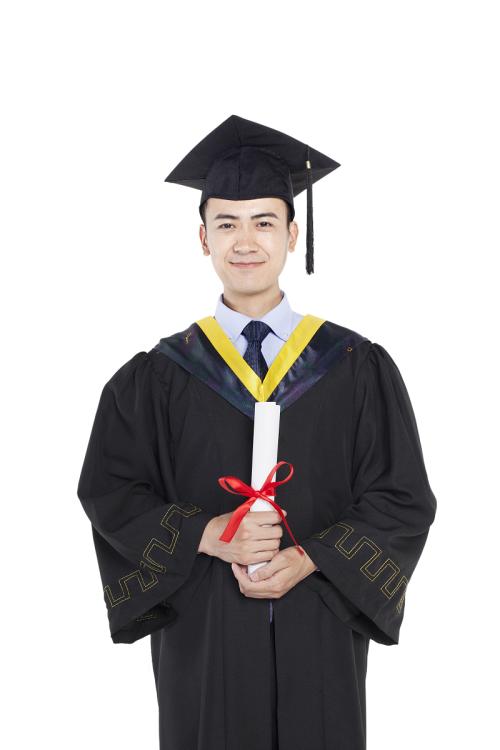
学士服照片:
合成后的图:
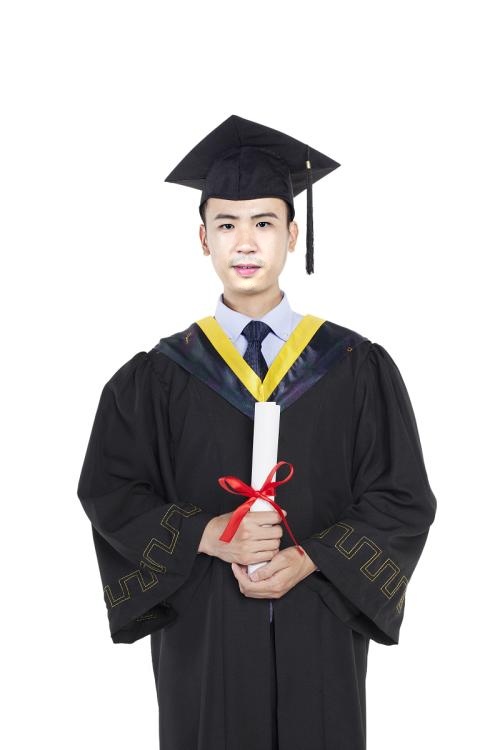
可以看出效果很棒,并且选取不同的学士服照片,就能解锁不同场景下的学士服纪念照。
最为重要的是,该程序可以自己下载到电脑运行,有GUI界面,简单易操作,保证不会泄露隐私。
## 三、原理
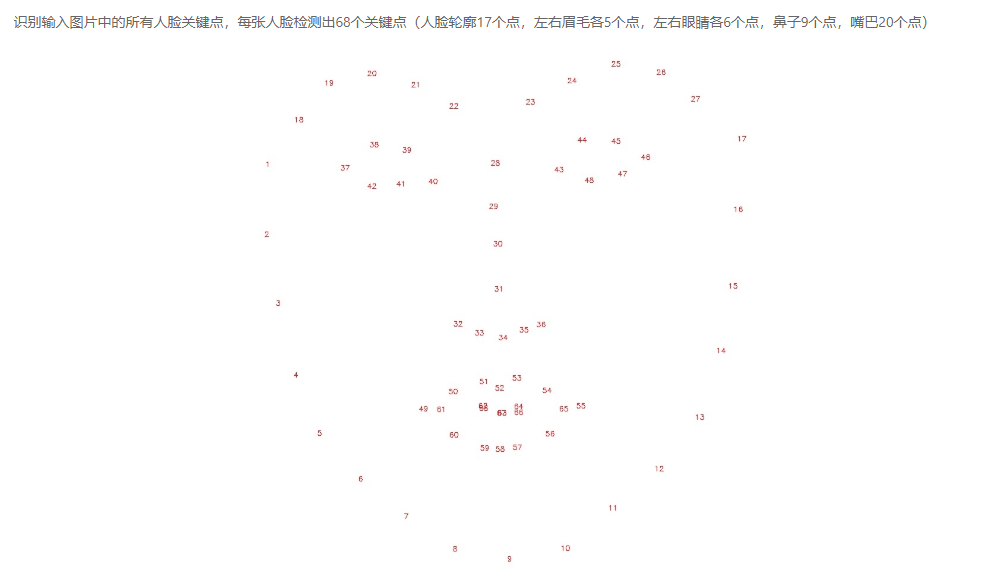
1. 使用PaddleHub的face_landmark_localization模型获取人脸图片im1和学士服图片im2的68个人脸特征点。
2. 根据上一步获得的特征点得到两张图片的人脸掩模im1_mask和im2_mask。
3. 利用68个特征点中的3个特征点,对人脸图片im1进行仿射变换使其脸部对准学士服图片中的脸部,得到图片affine_im1。
4. 对人脸图片的掩模im1_mask也进行相同的仿射变换得到affine_im1_mask。
5. 对掩模im2_mask和掩模affine_im1_mask的掩盖部分取并集得到union_mask。
6. 利用opencv里的seamlessClone函数对仿射变换后的affine_im1和摄像头图片im2进行泊松融合,掩模为union_mask,得到融合后的图像seamless_im。
## 四、代码实现
```python
import cv2
import numpy as np
import paddlehub as hub
import tkinter.filedialog
import tkinter as tk
from tkinter import ttk
import tkinter.messagebox
import sys
def get_image_size(image):
"""
获取图片大小(高度,宽度)
:param image: image
:return: (高度,宽度)
"""
image_size = (image.shape[0], image.shape[1])
return image_size
def get_face_landmarks(image):
"""
获取人脸标志,68个特征点
:param image: image
:param face_detector: dlib.get_frontal_face_detector
:param shape_predictor: dlib.shape_predictor
:return: np.array([[],[]]), 68个特征点
"""
dets = face_landmark.keypoint_detection([image])
num_faces = len(dets[0]['data'][0])
if num_faces == 0:
print("Sorry, there were no faces found.")
return None
# shape = shape_predictor(image, dets[0])
face_landmarks = np.array([[p[0], p[1]] for p in dets[0]['data'][0]])
return face_landmarks
def get_face_mask(image_size, face_landmarks):
"""
获取人脸掩模
:param image_size: 图片大小
:param face_landmarks: 68个特征点
:return: image_mask, 掩模图片
"""
mask = np.zeros(image_size, dtype=np.int32)
points = np.concatenate([face_landmarks[0:16], face_landmarks[26:17:-1]])
points = np.array(points, dtype=np.int32)
cv2.fillPoly(img=mask, pts=[points], color=255)
# mask = np.zeros(image_size, dtype=np.uint8)
# points = cv2.convexHull(face_landmarks) # 凸包
# cv2.fillConvexPoly(mask, points, color=255)
return mask.astype(np.uint8)
def get_affine_image(image1, image2, face_landmarks1, face_landmarks2):
"""
获取图片1仿射变换后的图片
:param image1: 图片1, 要进行仿射变换的图片
:param image2: 图片2, 只要用来获取图片大小,生成与之大小相同的仿射变换图片
:param face_landmarks1: 图片1的人脸特征点
:param face_landmarks2: 图片2的人脸特征点
:return: 仿射变换后的图片
"""
three_points_index = [18, 8, 25]
M = cv2.getAffineTransform(face_landmarks1[three_points_index].astype(np.float32),
face_landmarks2[three_points_index].astype(np.float32))
dsize = (image2.shape[1], image2.shape[0])
affine_image = cv2.warpAffine(image1, M, dsize)
return affine_image.astype(np.uint8)
def get_mask_center_point(image_mask):
"""
获取掩模的中心点坐标
:param image_mask: 掩模图片
:return: 掩模中心
"""
image_mask_index = np.argwhere(image_mask > 0)
miny, minx = np.min(image_mask_index, axis=0)
maxy, maxx = np.max(image_mask_index, axis=0)
center_point = ((maxx + minx) // 2, (maxy + miny) // 2)
return center_point
def get_mask_union(mask1, mask2):
"""
获取两个掩模掩盖部分的并集
:param mask1: mask_image, 掩模1
:param mask2: mask_image, 掩模2
:return: 两个掩模掩盖部分的并集
"""
mask = np.min([mask1, mask2], axis=0) # 掩盖部分并集
mask = ((cv2.blur(mask, (5, 5)) == 255) * 255).astype(np.uint8) # 缩小掩模大小
mask = cv2.blur(mask, (3, 3)).astype(np.uint8) # 模糊掩模
return mask
def skin_color_adjustment(im1, im2, mask=None):
"""
肤色调整
:param im1: 图片1
:param im2: 图片2
:param mask: 人脸 mask. 如果存在,使用人脸部分均值来求肤色变换系数;否则,使用高斯模糊来求肤色变换系数
:return: 根据图片2的颜色调整的图片1
"""
if mask is None:
im1_ksize = 55
im2_ksize = 55
im1_factor = cv2.GaussianBlur(im1, (im1_ksize, im1_ksize), 0).astype(np.float)
im2_factor = cv2.GaussianBlur(im2, (im2_ksize, im2_ksize), 0).astype(np.float)
else:
im1_face_image = cv2.bitwise_and(im1, im1, mask=mask)
im2_face_image = cv2.bitwise_and(im2, im2, mask=mask)
im1_factor = np.mean(im1_face_image, axis=(0, 1))
im2_factor = np.mean(im2_face_image, axis=(0, 1))
im1 = np.clip((im1.astype(np.float) * im2_factor / np.clip(im1_factor, 1e-6, None)), 0, 255).astype(np.uint8)
return im1
def main():
global path1, path2
if path1 == '' or path2 == '':
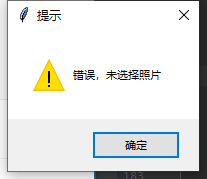
tkinter.messagebox.showwarning(title='提示', message='错误,未选择照片')
sys.exit()
im1 = cv2.imread(path1) # face_image
im1 = cv2.resize(im1, (600, im1.shape[0] * 600 // im1.shape[1]))
landmarks1 = get_face_landmarks(im1) # 68_face_landmarks
if landmarks1 is None:
tkinter.messagebox.showwarning(title='提示', message='检测不到人脸')
sys.exit()
im1_size = get_image_size(im1) # 脸图大小
im1_mask = get_face_mask(im1_size, landmarks1) # 脸图人脸掩模
im2 = cv2.imread(path2)
landmarks2 = get_face_landmarks(im2) # 68_face_landmarks
if landmarks2 is not None:
im2_size = get_image_size(im2) # 摄像头图片大小
im2_mask = get_face_mask(im2_size, landmarks2) # 摄像头图片人脸掩模
affine_im1 = get_affine_image(im1, im2, landmarks1, landmarks2) # im1(脸图)仿射变换后的图片
affine_im1_mask = get_affine_image(im1_mask, im2, landmarks1, landmarks2) # im1(脸图)仿射变换后的图片的人脸掩模
union_mask = get_mask_union(im2_mask, affine_im1_mask) # 掩模合并
affine_im1 = skin_color_adjustment(affine_im1, im2, mask=union_mask) # 肤色调整
point = get_mask_center_point(affine_im1_mask) # im1(脸图)仿射变换后的图片的人脸掩模的中心点
seamless_im = cv2.seamlessClone(affine_im1, im2, mask=union_mask, p=point, flags=cv2.NORMAL_CLONE) # 进行泊松融合
cv2.imwrite('new.jpg', seamless_im)
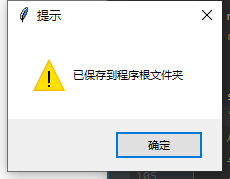
tkinter.messagebox.showwarning(title='提示', message='已保存到程序根文件夹')
sys.exit()
else:
cv2.imshow('seamless_im', im2)
tkinter.messagebox.showwarning(title='提示', message='失败')
sys.exit()
def callbackClose():
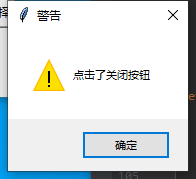
tkinter.messagebox.showwarning(title='警告', message='点击了关闭按钮')
sys.exit(0)
def selectPath1():
global path1
# 选择文件path_接收文件地址
path_ = tkinter.filedialog.askopenfilename()
# 通过replace函数替换绝对文件地址中的/来使文件可被程序读取
# 注意:\\转义后为\,所以\\\\转义后为\\
path_ = path_.replace("/", "\\\\")
path1 = path_
# path设置path_的值
rawpath1.set(path_)
def selectPath2():
global path2
# 选择文件path_接收文件地址
path_ = tkinter.filedialog.askopenfilename()
# 通过replace函数替换绝对文件地址中的/来使文件可被程序读取
# 注意:\\转义后为\,所以\\\\转义后为\\
path_ = path_.replace("/", "\\\\")
path2 = path_
# path设置path_的值
rawpath2.set(path_)
if __name__ == '__main__':
path1 = ""
path2 = ""
face_landmark = hub.Module(name="face_landmark_localization")
main_box = tk.Tk()
#变量path
rawpath1 = tk.StringVar()
rawpath2 = tk.StringVar()
main_box.title("换脸制作学士服毕业照") # 添加标题
tk.Label(main_box, text="原图片路径:").grid(row=0, column=0)
tk.Entry(main_box, textvariable=rawpath1).grid(row=0, column=1)
tk.Button(main_box, text="路径选择", command=selectPath1).grid(row=0, column=2)
tk.Label(main_box, text="学士服图片路径:").grid(row=1, column=0)
tk.Entry(main_box, textvariable=rawpath2).grid(row=1, column=1)
tk.Button(main_box, text="路径选择", command=selectPath2).grid(row=1, column=2)
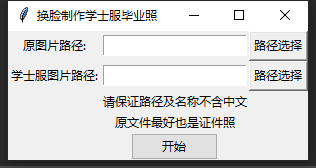
ttk.Label(main_box, text="请保证路径及名称不含中文").grid(column=1, row=2)
ttk.Label(main_box, text="原文件最好也是证件照").grid(column=1, row=3)
main_box.protocol("WM_DELETE_WINDOW", callbackClose)
action1 = ttk.Button(main_box, text="开始", command=main) # 创建一个按钮, text:显示按钮上面显示的文字, command:当这个按钮被点击之后会调用command函数
action1.grid(column=1, row=4) # 设置其在界面中出现的位置 column代表列 row 代表行
main_box.mainloop()
```
## 五、GUI界面
进入界面
未选择路径提示:
关闭提示:
成功提示:
## 六、对比分析
拥有同样功能的库有dlib等。当然这也是最常用的一个视觉方面的库。他同样提供了类似的获取人脸关键点的模型,但是在使用过程中对电脑配置要求较高,使用常见的8G内存时,直接内存溢出,无法正常使用。而使用PaddleHub提供的模型则对配置要求较低,更适合普通群众使用和推广使用。