https://github.com/chenyun122/StepIndicator
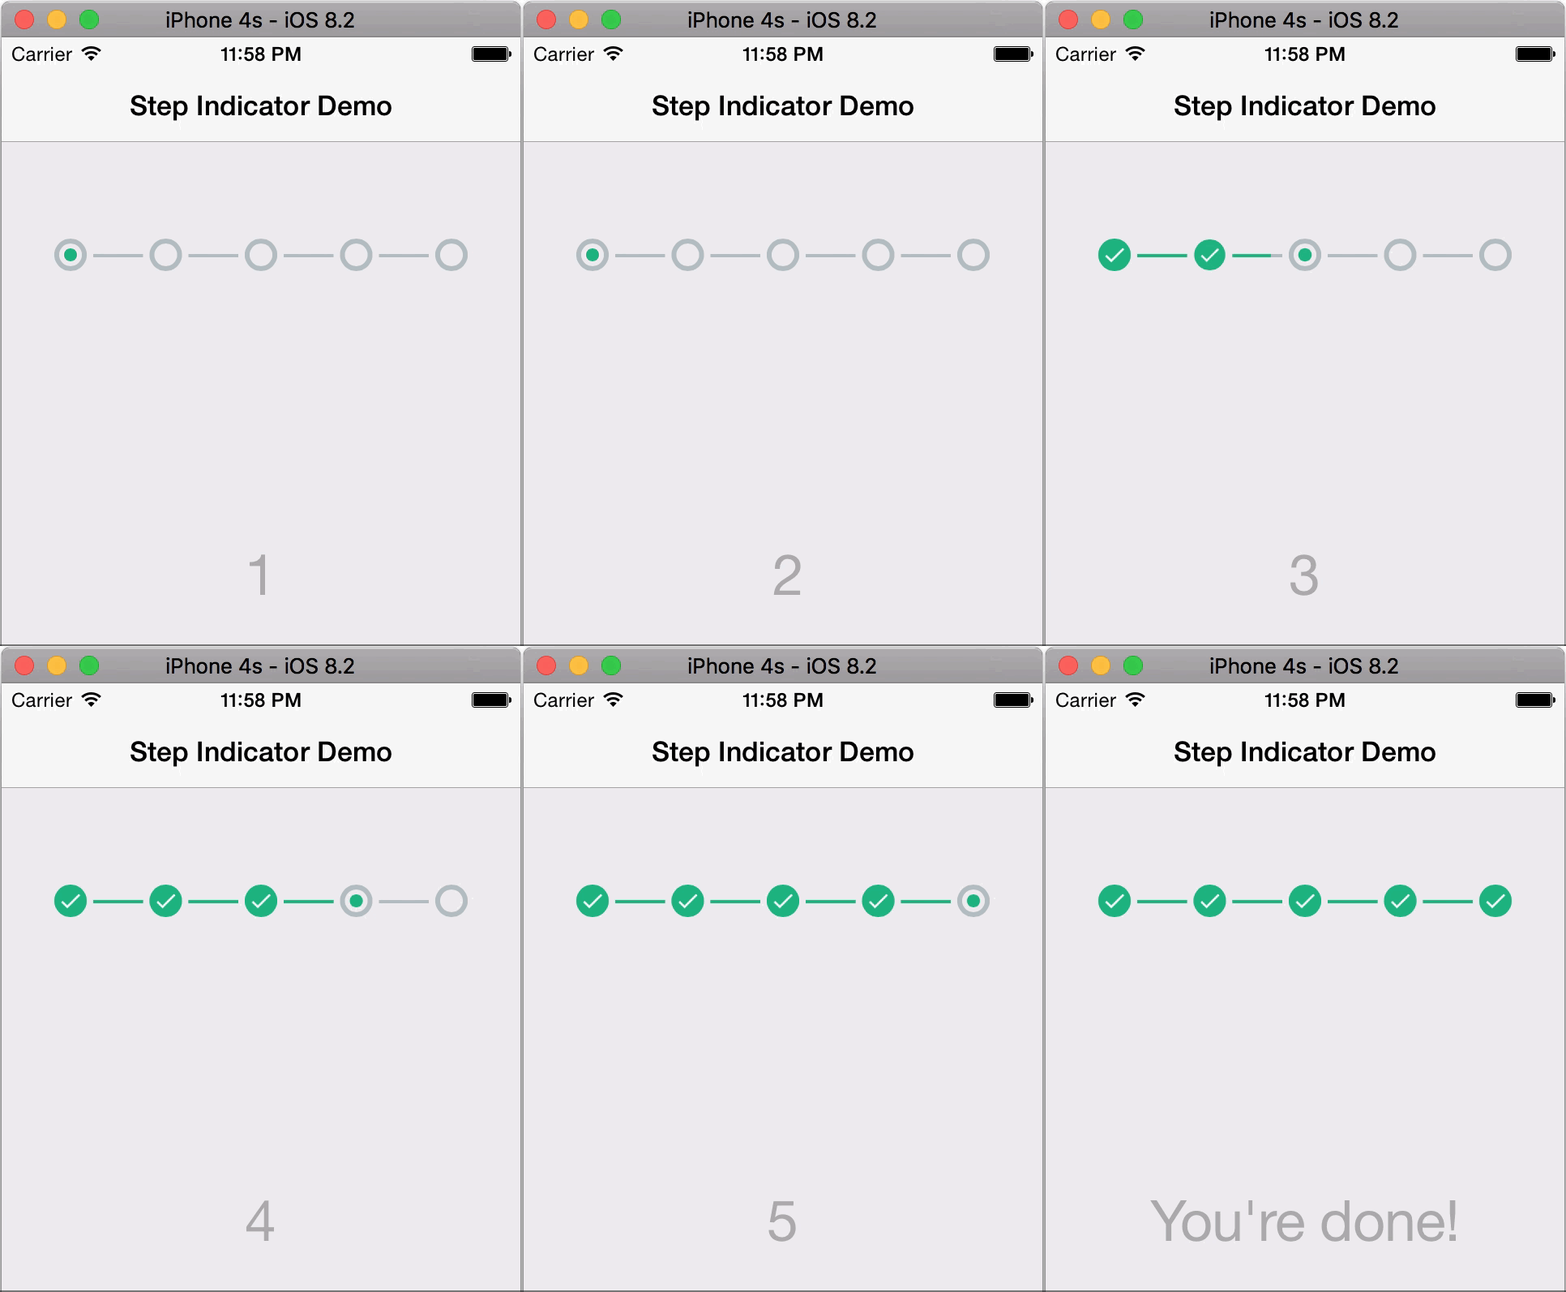
StepIndicator is an iOS library that indicates steps in an animated way.
https://github.com/chenyun122/StepIndicator
animation bu-zhou calayer indicator progress step swift
Last synced: 7 months ago
JSON representation
StepIndicator is an iOS library that indicates steps in an animated way.
- Host: GitHub
- URL: https://github.com/chenyun122/StepIndicator
- Owner: chenyun122
- License: mit
- Created: 2017-09-20T11:35:12.000Z (over 8 years ago)
- Default Branch: master
- Last Pushed: 2021-07-19T09:09:28.000Z (over 4 years ago)
- Last Synced: 2024-04-25T10:43:40.102Z (almost 2 years ago)
- Topics: animation, bu-zhou, calayer, indicator, progress, step, swift
- Language: Swift
- Homepage:
- Size: 5.7 MB
- Stars: 356
- Watchers: 8
- Forks: 67
- Open Issues: 19
-
Metadata Files:
- Readme: README.md
- License: LICENSE
Awesome Lists containing this project
- jimsghstars - chenyun122/StepIndicator - StepIndicator is an iOS library that indicates steps in an animated way. (Swift)
README
# StepIndicator
[](https://img.shields.io/cocoapods/v/StepIndicator.svg)
[](http://cocoadocs.org/docsets/StepIndicator)
[简体中文](https://github.com/chenyun122/StepIndicator/blob/master/README_CN.md)
StepIndicator is an iOS library that indicates steps in an animated way.
Swfit 5 is supported.
The idea and design are derived from the awesome [Android version](https://github.com/badoualy/stepper-indicator).

Numbers supported:

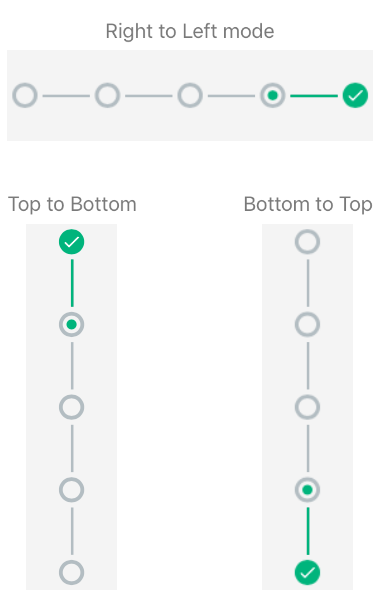
More directions supported(05/16/2018):

## Installation
### CocoaPods
To integrate StepIndicator into your Xcode project using CocoaPods, specify it in your `Podfile`:
```ruby
platform :ios, '8.0'
use_frameworks!
target 'YourProjectName' do
pod 'StepIndicator', '~> 1.0.8'
end
```
And then remember to `import StepIndicator` module before using it.
### Manually
You could directly copy and add the folder `StepIndicator` which contains 'StepIndicatorView.swift' file to your project.
## Usage
You could use `StepIndicatorView` like you use `UIView`, create and layout it programmatically, or get everything done with Storyboard and XIB. Additionally, clone this [Demo](https://github.com/chenyun122/StepIndicator) project to find out how easy it is working. It also provides a way to cooperate with UIScrollView.
### Programmatically
```swift
//......
let stepIndicatorView = StepIndicatorView()
override func viewDidLoad() {
super.viewDidLoad()
self.stepIndicatorView.frame = CGRect(x: 0, y: 50, width: 280, height: 100)
self.view.addSubview(self.stepIndicatorView)
self.stepIndicatorView.numberOfSteps = 5
self.stepIndicatorView.currentStep = 0
}
//......
```
### Customization (Optional)
Values of following properties have been set as defaults already. Change them if they are not suitable for you.
```swift
self.stepIndicatorView.circleColor = UIColor(red: 179.0/255.0, green: 189.0/255.0, blue: 194.0/255.0, alpha: 1.0)
self.stepIndicatorView.circleTintColor = UIColor(red: 0.0/255.0, green: 180.0/255.0, blue: 124.0/255.0, alpha: 1.0)
self.stepIndicatorView.circleStrokeWidth = 3.0
self.stepIndicatorView.circleRadius = 10.0
self.stepIndicatorView.lineColor = self.stepIndicatorView.circleColor
self.stepIndicatorView.lineTintColor = self.stepIndicatorView.circleTintColor
self.stepIndicatorView.lineMargin = 4.0
self.stepIndicatorView.lineStrokeWidth = 2.0
self.stepIndicatorView.displayNumbers = false //indicates if it displays numbers at the center instead of the core circle
self.stepIndicatorView.direction = .leftToRight //four directions
```
### Designable in Stroyboard and Xib (Optional)
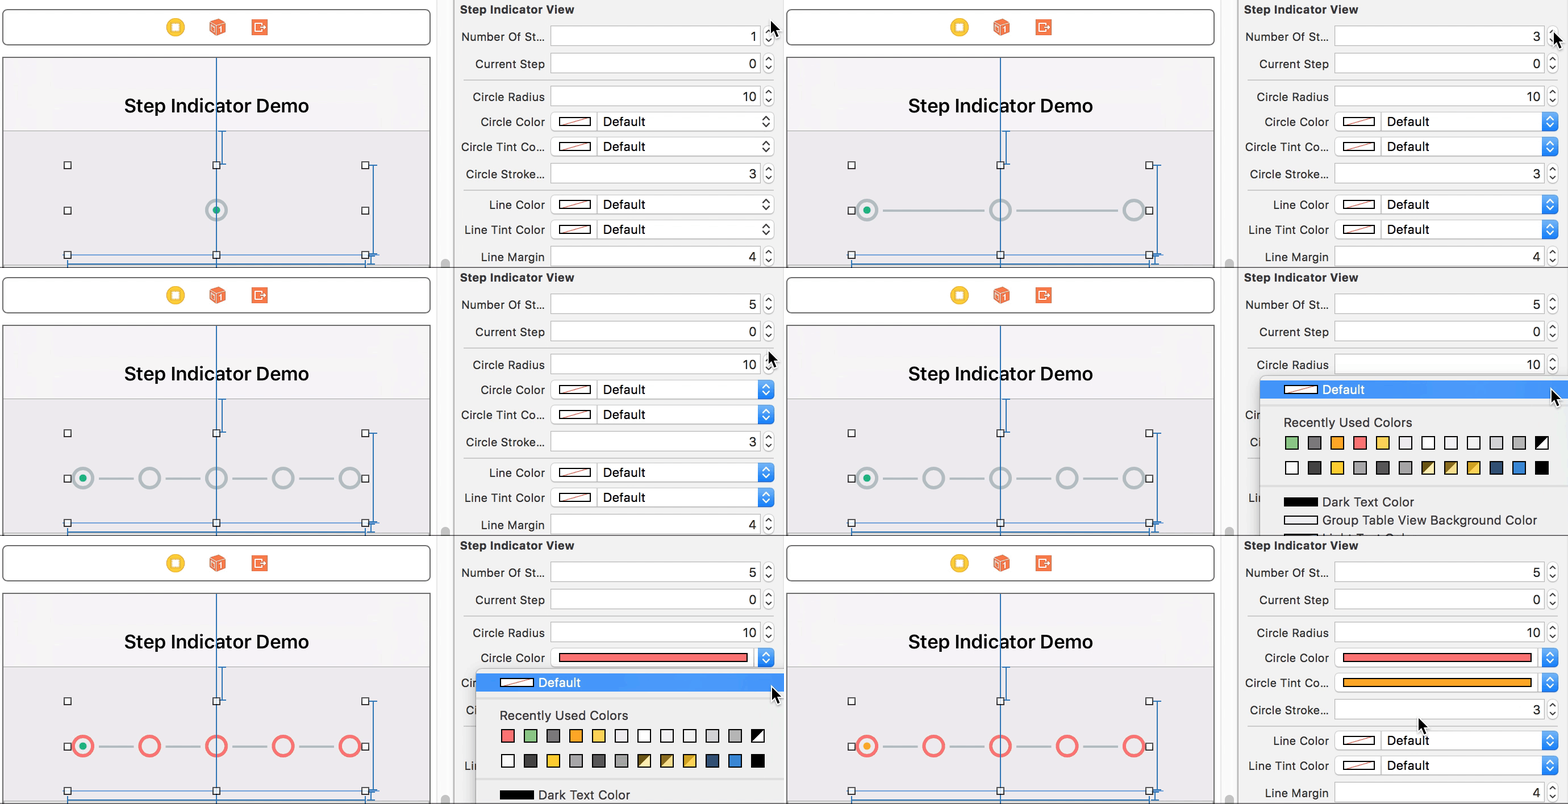
After adding a `UIView` to Stroyboard or Xib, change its class to `StepIndicatorView`. Then you are able to config it as this demonstration:

Since Xcode(9.3) Inspector does not support enumeration options, we provide raw integer options for the directions:

0-default,left to right. 1-right to left. 2-top to bottom. 3-bottom to top.
## Help
Hope you will enjoy it! Feel free to make an issue to me if you have any problems or need some improvements. And Please give the project a **star** if it's helpful to you, that's a great encouragement to me! ;)
## License
StepIndicator is released under the MIT license. See LICENSE for details.