https://github.com/code-forge-temple/circuit-sketcher-app
A web application to draw circuits on a canvas, based on circuit-sketcher-core.
https://github.com/code-forge-temple/circuit-sketcher-app
circuit-design circuit-diagrams circuit-sketcher electronics fortheloveofcode productivity-tool visual-editor
Last synced: 6 months ago
JSON representation
A web application to draw circuits on a canvas, based on circuit-sketcher-core.
- Host: GitHub
- URL: https://github.com/code-forge-temple/circuit-sketcher-app
- Owner: code-forge-temple
- License: gpl-3.0
- Created: 2024-12-22T00:35:48.000Z (over 1 year ago)
- Default Branch: main
- Last Pushed: 2025-09-07T09:17:13.000Z (11 months ago)
- Last Synced: 2025-09-07T11:29:09.413Z (11 months ago)
- Topics: circuit-design, circuit-diagrams, circuit-sketcher, electronics, fortheloveofcode, productivity-tool, visual-editor
- Language: TypeScript
- Homepage: https://code-forge-temple.github.io/circuit-sketcher-app/
- Size: 1.27 MB
- Stars: 5
- Watchers: 1
- Forks: 0
- Open Issues: 0
-
Metadata Files:
- Readme: README.md
- Funding: .github/FUNDING.yml
- License: LICENSE
Awesome Lists containing this project
README
# Circuit Sketcher - Web App
**An application to draw circuits on a canvas. It is based on the [code-forge-temple/circuit-sketcher-core](https://github.com/code-forge-temple/circuit-sketcher-core).**
> ⭐️ **Love this project?** Please consider [starring the repository](https://github.com/code-forge-temple/circuit-sketcher-app) on GitHub and [supporting development](https://github.com/sponsors/code-forge-temple) to help me continue building amazing features!
## Table of Contents
- [Features](#features)
- [Development](#development)
- [Installation](#installation)
- [Building](#building)
- [Linting](#linting)
- [Preview](#preview)
- [Demo](#demo)
- [Component Library](#component-library)
- [License](#license)
## Features
- Draw and save circuit diagrams
- Load and save canvas and library data
- Save to Local Storage Library the customized circuit nodes
- Responsive design
- Interactive user interface
## Development
### Installation
1. Clone the repository:
```sh
git clone https://github.com/code-forge-temple/circuit-sketcher-app.git
cd circuit-sketcher-app
```
2. Set the Node.js version:
- For Unix-based systems:
```sh
nvm use
```
- For Windows:
```sh
nvm use $(cat .nvmrc)
```
3. Install dependencies:
```sh
npm install
```
4. Start the development server:
```sh
npm run dev
```
### Building
To build the project for production, run:
```sh
npm run build
```
### Linting
To lint the project, run:
```sh
npm run lint
```
### Preview
To preview the production build, run:
```sh
npm run preview
```
## Usage
1. Open the deployed version of the application [here](https://code-forge-temple.github.io/circuit-sketcher-app).
2. Start drawing your circuit on the canvas:
- On the canvas, right-click to show the canvas menu, and select `Create Node`.
- Right-click on the node to show the node menu, select `Change Image`, and choose an image relevant to your circuit node.
- Right-click on the node to show the node menu, select `Add Port...`, and choose the port location and type.
- You can rename the circuit node label or port label by double-clicking on the label. The port or port label can also be deleted (right-click on the port to show the port menu and proceed from there).
- You can relocate ports, either to a different node side or rearrange the ports on the same side, by dragging and dropping the port to the desired location within the dotted blue area.
- After you are satisfied with your changes to the circuit node, and if you wish to save the circuit node to reuse it in the current or a different `.circuit-sketcher` file, you can right-click on the circuit node and press `Save Node to Library` (this will update the root Obsidian vault `circuit-sketcher.lib` file).
- You can reuse the node by right-clicking on the canvas and selecting `Library...` then selecting the desired node.
- Connections between circuit nodes can be made by dragging and dropping one port to the destination port (if it is a compatible port). You can delete a connection by selecting it and then pressing the Delete key.
- You can drag the entire circuit by holding the mouse scroll button and moving the mouse.
A short video tutorial on how to use the application (the video is showcasing the Obsidian plugin version of the Circuit Sketcher but the core functionality is the same):
[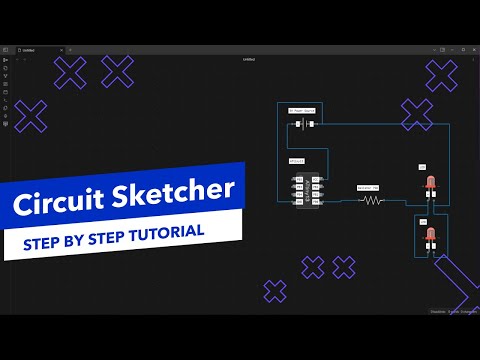](https://www.youtube.com/watch?v=S6ifgDb83Pg)
## Demo
You can view the deployed version of the application [here](https://code-forge-temple.github.io/circuit-sketcher-app).
## Component Library
To help you get started with Circuit Sketcher, we provide a curated library of circuit components at [circuit-sketcher-lib](https://github.com/code-forge-temple/circuit-sketcher-lib).
### Quick Start with Pre-built Components
**Import the entire library:**
- Download the complete component library: [library.json](https://github.com/code-forge-temple/circuit-sketcher-lib/blob/main/assets/lib/library.json)
- Import it directly into Circuit Sketcher to get access to all available components (right click on canvas to show the menu, then `Library...` -> `Import Library`)
**Import individual components:**
- Browse individual components: [assets/nodes](https://github.com/code-forge-temple/circuit-sketcher-lib/tree/main/assets/nodes)
- Download specific `.json` files for the components you need
- Import them one by one into your Circuit Sketcher workspace (right click on canvas to show the menu, then `Import Node`)
## License
This project is licensed under the GNU General Public License v3.0. See the [LICENSE](LICENSE) file for more details.
## ✨ My Other Projects
✦ [**Agentic Signal**](https://github.com/code-forge-temple/agentic-signal) – Visual AI agent workflow automation platform with local LLM integration - build intelligent workflows using drag-and-drop interface, no cloud dependencies required.
✦ [**ScribePal**](https://github.com/code-forge-temple/scribe-pal) - An Open Source intelligent browser extension that leverages AI to empower your web experience by providing contextual insights, efficient content summarization, and seamless interaction while you browse.
✦ [**Local LLM NPC**](https://github.com/code-forge-temple/local-llm-npc) An interactive educational game built for the Google Gemma 3n Impact Challenge.