https://github.com/code100x/job-board
100xdevs job board - temp domain attached ( will update soon )
https://github.com/code100x/job-board
hacktoberfest
Last synced: about 1 year ago
JSON representation
100xdevs job board - temp domain attached ( will update soon )
- Host: GitHub
- URL: https://github.com/code100x/job-board
- Owner: code100x
- Created: 2024-08-01T17:06:39.000Z (almost 2 years ago)
- Default Branch: main
- Last Pushed: 2024-11-03T19:06:41.000Z (over 1 year ago)
- Last Synced: 2025-04-13T22:39:39.378Z (about 1 year ago)
- Topics: hacktoberfest
- Language: TypeScript
- Homepage: https://job.vineet.pro
- Size: 1.24 MB
- Stars: 368
- Watchers: 14
- Forks: 457
- Open Issues: 35
-
Metadata Files:
- Readme: README.md
- Contributing: CONTRIBUTING.md
Awesome Lists containing this project
README
# Project Name: Job Board
[All about job board](https://marmalade-height-05f.notion.site/100xDevs-Job-board-ab8ca399180d49e4bc0c2ff5c81dfb08?pvs=25)
[Project Status](https://marmalade-height-05f.notion.site/Job-board-10315651c69c80b581b5f7b64667341c)
## Table of Contents
- [Description](#description)
- [Features](#features)
- [Technologies](#technologies)
- [Getting Started](#getting-started)
## Description
Job Board is a platform designed to connect employers with potential employees. Employers can post job listings, and job seekers can apply for these positions. The application ensures a seamless and efficient job search and hiring process.
## Technologies
- **Web-app**: Next.Js, TypeScript
- **Database**: Prisma ORM, Postgres
- **Authentication**: NextAuth
- **Containerization**: Docker
## Getting Started
To get started with the Job Board app, follow these steps:
1. Clone the repository:
```sh
git clone https://github.com/yourusername/job-board
```
Follow these steps to set up the repository locally and run it.
### Configuration
1. Create a `.env` file in the root folder of your project. Update it following the convention of the `.env.example` file. Here's an example:
```bash
#
# Database
#
DATABASE_URL="postgres://postgres:password@localhost:5432/postgres"
#
# AUTH
#
NEXTAUTH_SECRET=
NEXTAUTH_URL="http://localhost:3000"
#
# Bunny CDN
#
CDN_API_KEY=
CDN_BASE_UPLOAD_URL=
CDN_BASE_ACCESS_URL=
NEXT_PUBLIC_GOOGLE_MAPS_API_KEY=
#
# Email SMTP credentials
#
EMAIL_USER=user@gmail.com
EMAIL_PASSWORD=
#
# Google OAuth credentials
#
GOOGLE_CLIENT_ID=
GOOGLE_CLIENT_SECRET=
```
2. To generate AUTH_SECRET,
Run this command in your terminal:
```bash
openssl rand -base64 33
```
or
[Run in browser](https://www.cryptool.org/en/cto/openssl/)
### Running the Project with Docker
```bash
docker compose up --build
```
### Running the Project without Docker
1. Install the necessary dependencies:
```bash
npm install
```
2. Sync & Seed your database:
```bash
npm run db:seed
```
3. Start the development server:
```bash
npm run dev
```
Now, you can run the project and make changes as needed.
### Test User Credentials
```js
Emails: 'user@gmail.com, admin@gmail.com';
Password: '123456';
```
## Steps to create a BunnyCDN storage for this repo:
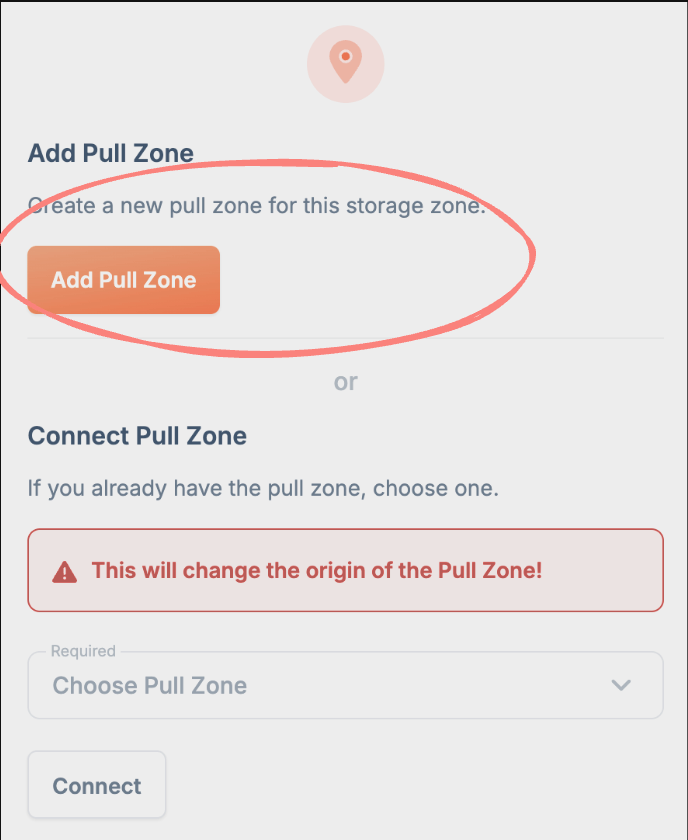
1. **Create a storage zone:**
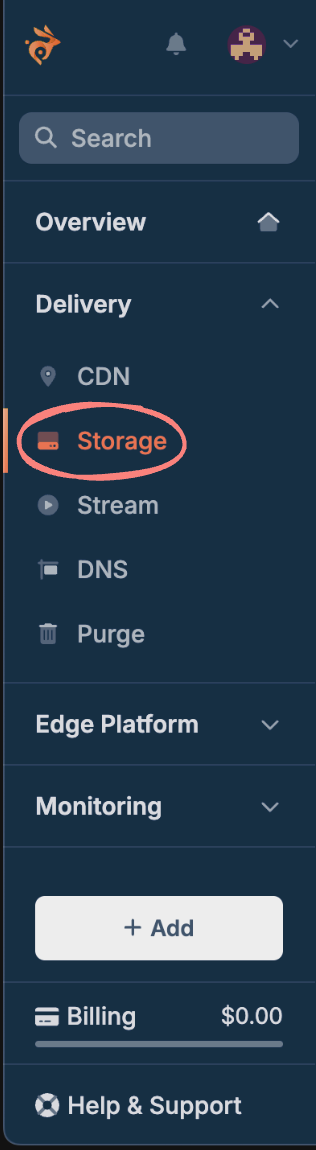
2. **Connect the storage zone to a pull zone:**
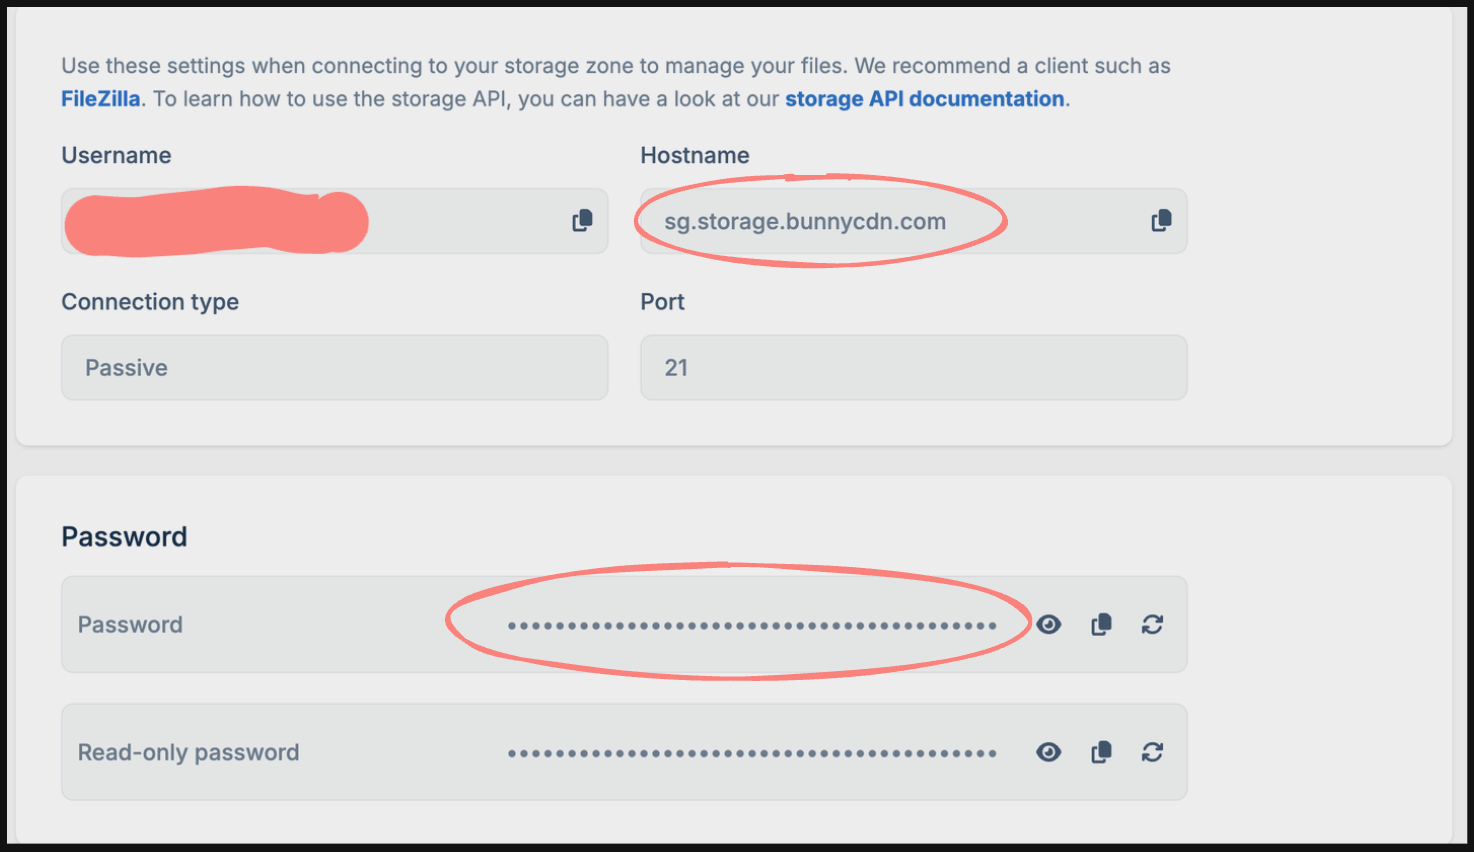
3. **Set environment variables:**
Go to the FTP & API Access section in the storage zone and add the following environment variables:
```bash
CDN_API_KEY=
```
Which you can find in the storage -> [storage name] -> FTP & API Access section
---
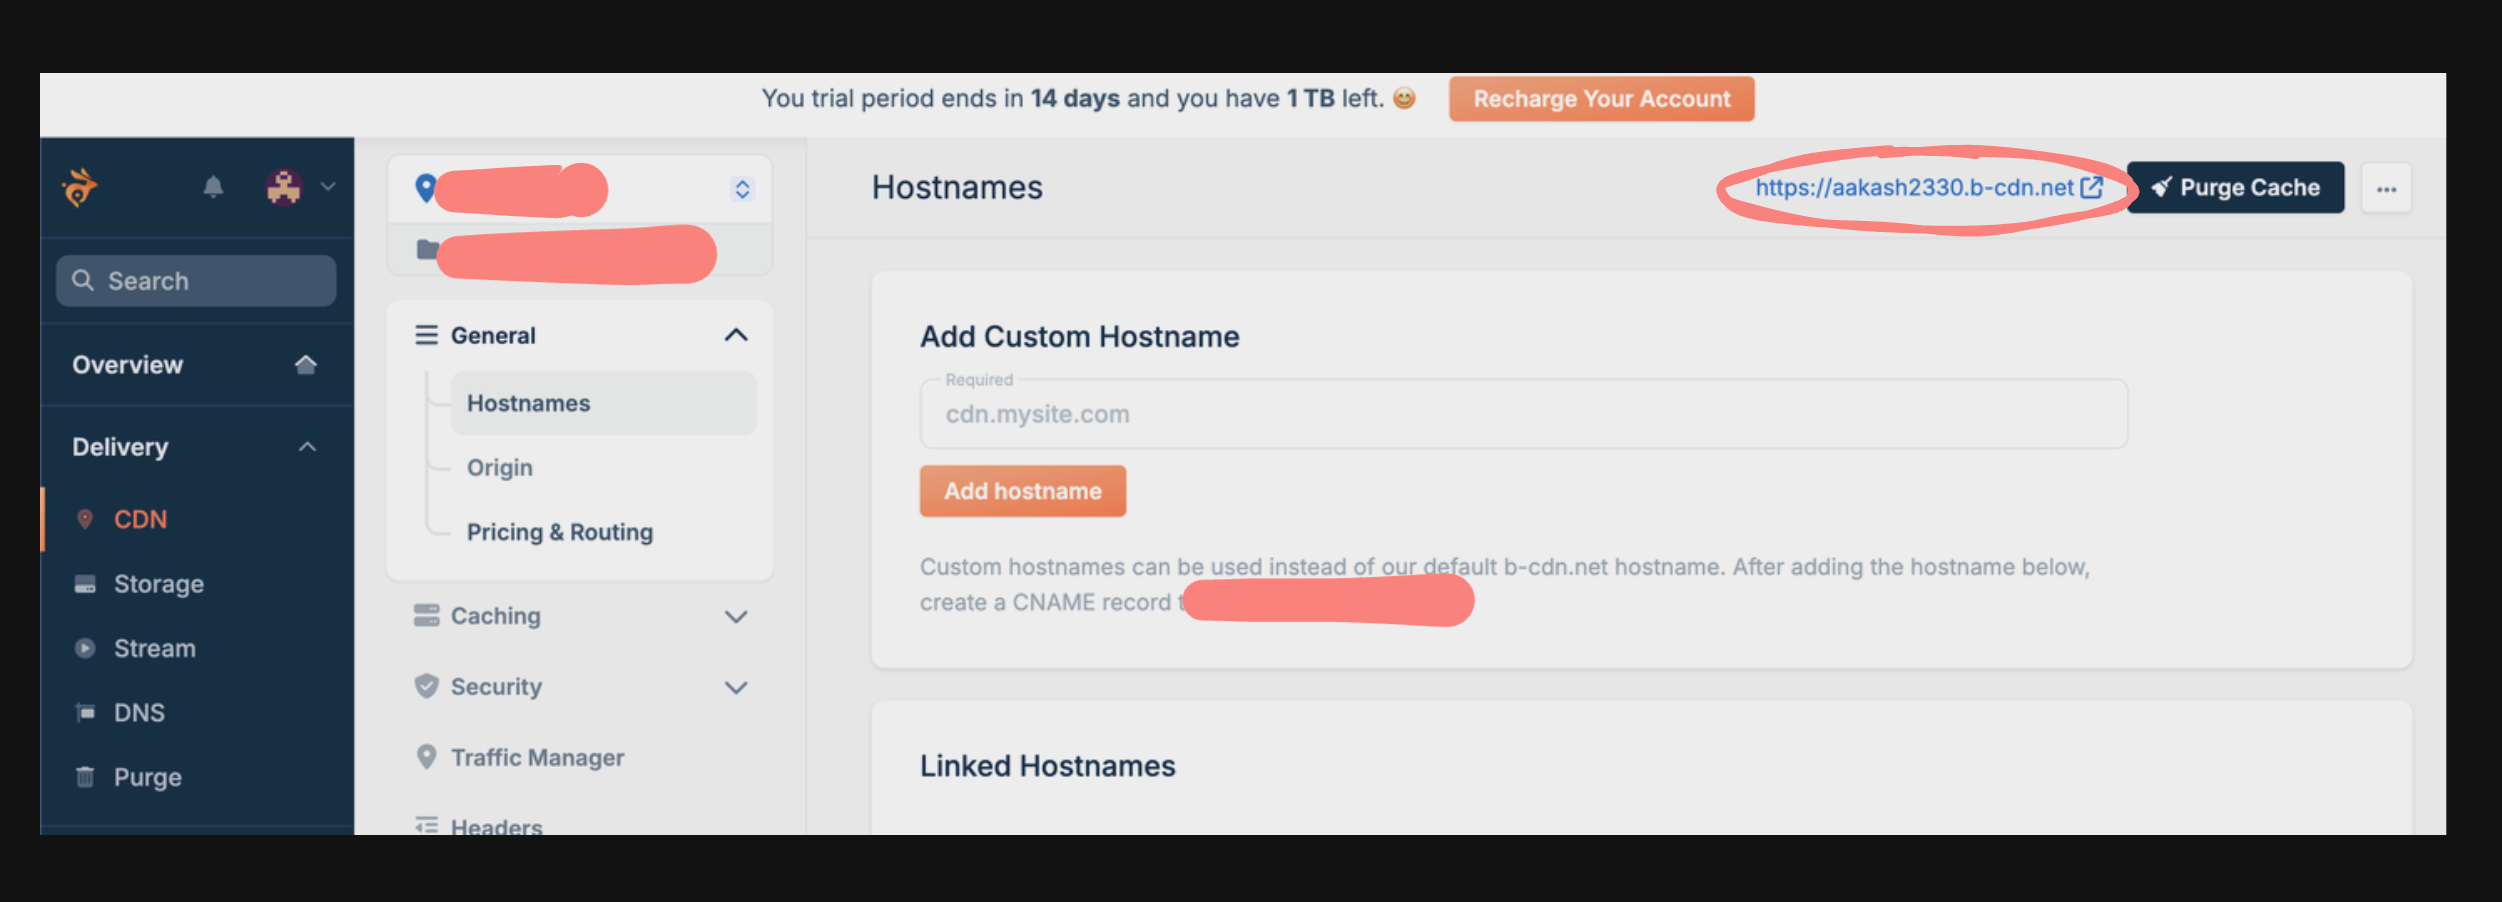
```bash
CDN_BASE_UPLOAD_URL=
```
Which is https://[your-hostname]/[storage-name]/[any folder name you might have added otherwise empty]
---
```bash
CDN_BASE_ACCESS_URL=
```
Which is https://[your-pull-zone-hostname]/[any folder name you might have added otherwise empty] or get link from the dashboard as mentioned below
# Steps to Set Up Google Maps Platform API Key
To use the Google Maps API in your applications, follow the steps below to create and set up your API key.
### Step 1: Go to Google Cloud Console
1. Navigate to the [Google Cloud Console](https://console.cloud.google.com/).
2. If you don’t have a Google account, create one and sign in.
### Step 2: Create a New Project
1. In the Cloud Console, click on the **Select a project** dropdown at the top.
2. Click **New Project** to create a new project.
3. Give your project a name, select the organization (optional), and choose the billing account.
4. Click **Create**.
### Step 3: Google Maps Platform
1. Search Google Maps Platform in the Console search bar

2. If your account is not setup yet , finish your account setup

3.After Completeing account setup , select the "Keys and Credentails" Section.
4.Then select the Create Credentials option , under which you can select the "API Key Option"

5. You will receive a API Key , add the key to the NEXT_PUBLIC_GOOGLE_MAPS_API_KEY in the .env

### Step 4: Changes required to make it work on localhost
1. Although the documentation mentions that without restriction , the API key will work everywhere, that is not the case for http requests.
2. Add a restriction and mention your localhost along with your port for it to start working on local , and save and continue

3. to test navigate to the http://localhost:3000/create , and test the "Where is the job located" input.