https://github.com/codewithdennis/filament-advanced-components-documentation
This plugin extends existing FilamentPHP components with advanced features and enhanced functionality, offering more powerful and flexible options for your projects.
https://github.com/codewithdennis/filament-advanced-components-documentation
filamentphp filamentphp-3 filamentphp-plugin laravel plugin
Last synced: about 1 year ago
JSON representation
This plugin extends existing FilamentPHP components with advanced features and enhanced functionality, offering more powerful and flexible options for your projects.
- Host: GitHub
- URL: https://github.com/codewithdennis/filament-advanced-components-documentation
- Owner: CodeWithDennis
- Created: 2024-12-24T15:46:11.000Z (over 1 year ago)
- Default Branch: main
- Last Pushed: 2025-03-28T08:08:33.000Z (about 1 year ago)
- Last Synced: 2025-04-16T01:59:19.733Z (about 1 year ago)
- Topics: filamentphp, filamentphp-3, filamentphp-plugin, laravel, plugin
- Homepage:
- Size: 1.91 MB
- Stars: 24
- Watchers: 1
- Forks: 2
- Open Issues: 0
-
Metadata Files:
- Readme: README.md
Awesome Lists containing this project
README
# Filament Advanced Components
This plugin **extends** existing **FilamentPHP 3** components with advanced features and enhanced functionality, offering more powerful and flexible options for your projects.
## Licences
You can buy a license for the plugin on the [AnyStack](https://checkout.anystack.sh/filament-advanced-components) website.
## Table of Contents
- [Licences](#licences)
- [Installation](#installation)
- [Custom Theme](#custom-theme)
- [Getting Started](#getting-started)
- [Image](#image)
- [Image size](#image-size)
- [Image extra attributes](#image-extra-attributes)
- [Mailable](#mailable)
- [Callable](#callable)
- [WhatsApp-able](#whatsapp-able)
- [Masked](#masked)
- [Mask Characters](#mask-characters)
- [Mask Index](#mask-index)
- [Mask Length](#mask-length)
- [Bold](#bold)
- [Underline](#underline)
- [Italic](#italic)
- [Strikethrough](#strikethrough)
- [Badges](#badges)
- [Border](#border)
- [Pulse](#pulse)
- [Bounce](#bounce)
- [Border radius](#border-radius)
- [Color](#color)
- [Character count](#character-count)
- [Character limit](#character-limit)
- [Character limit color](#character-limit-color)
- [Character limit border color](#character-limit-border-color)
- [Character limit icon](#character-limit-icon)
- [Copyable](#copyable)
- [Border color](#border-color)
- [Filters](#filters)
- [Advanced Select Filter](#advanced-select-filter)
- [Advanced Toggle Buttons Filter](#toggle-buttons-filter)
- [Code Distribution](#code-distribution)
## Installation
To install the plugin, you need to add the repository to your `composer.json` file.
```json
{
"repositories": [
{
"type": "composer",
"url": "https://filament-advanced-components.composer.sh"
}
]
}
```
Once the repository has been added to the composer.json file, you can install the plugin using the following command.
```bash
composer require codewithdennis/filament-advanced-components
```
You will be prompted to provide your username and password. The username will be the email address and the password will be equal to your license key.
```bash
Loading composer repositories with package information
Authentication required (filament-advanced-components.composer.sh):
Username: [licensee-email]
Password: [license-key]
```
### Custom Theme
You will need a [custom theme](https://filamentphp.com/docs/3.x/panels/themes#creating-a-custom-theme) to use the plugin.
Make sure you add the following to your `tailwind.config.js file.
```bash
'./vendor/codewithdennis/filament-advanced-components/resources/**/*.blade.php',
```
Include the following import in your theme stylesheet.
```css
@import '/vendor/codewithdennis/filament-advanced-components/resources/css/index.css';
```
## Getting Started
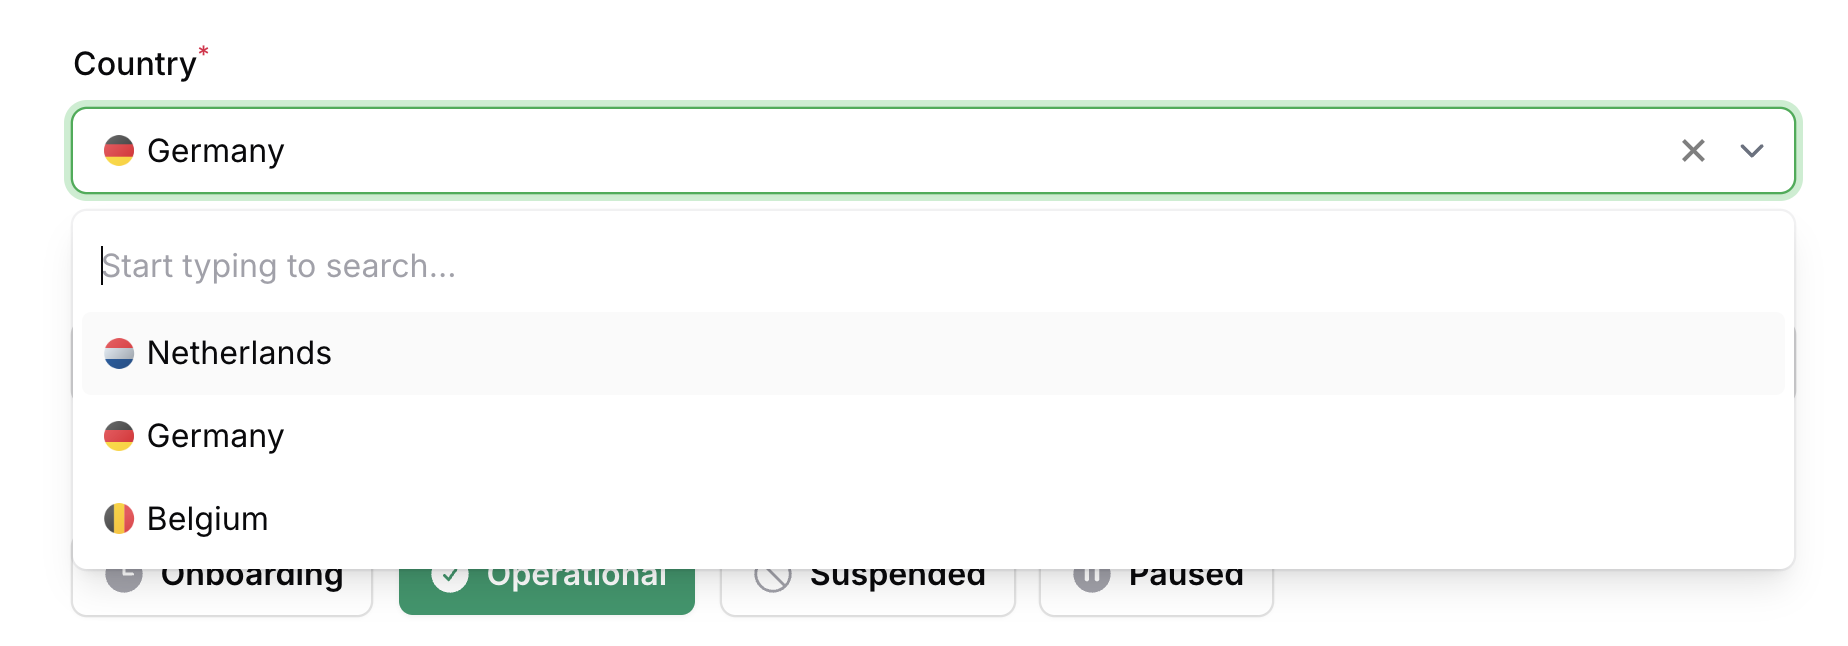
### Image
You can add a `suffix` or `prefix` image to the following components; `AdvancedCheckboxList`, `AdvancedSelect`, `AdvancedSelectFilter`, `AdvancedTextColumn` and `AdvancedTextEntry`.
```php
->suffixImage(fn (Model $record): string => asset('images/'.$record->image))
```
```php
->prefixImage(fn (Model $record): string => asset('images/'.$record->image))
```
#### Image size
```php
->suffixImageSize(32)
```
```php
->prefixImageSize(32)
```
#### Image extra attributes
```php
->suffixImageExtraAttributes([
'class' => 'pr-4',
]),
```
```php
->prefixImageExtraAttributes([
'class' => 'pr-4',
]),
```
### Mailable
Mailable works with the following components; `AdvancedTextColumn` and `AdvancedTextEntry`, This will make the value a clickable mailto link.
```php
->mailable()
```
If you want to apply a mailable based on a condition, you can pass a closure that returns a boolean value.
```php
->mailable(fn (string $state): bool => str($state)->endsWith('.com'))
```
### Callable
Callable works with the following components; `AdvancedTextColumn` and `AdvancedTextEntry`, This will make the value a clickable tel link.
```php
->callable()
```
If you want to apply a callable based on a condition, you can pass a closure that returns a boolean value.
```php
->callable(fn (string $state): bool => str($state)->startsWith('+'))
```
### WhatsApp-able
WhatsApp-able works with the following components; `AdvancedTextColumn` and `AdvancedTextEntry`, This will make the value a clickable WhatsApp link.
```php
->whatsappable()
```
If you want to apply a WhatsApp-able based on a condition, you can pass a closure that returns a boolean value.
```php
->whatsappable(fn (string $state): bool => str($state)->startsWith('+'))
```
### Masked
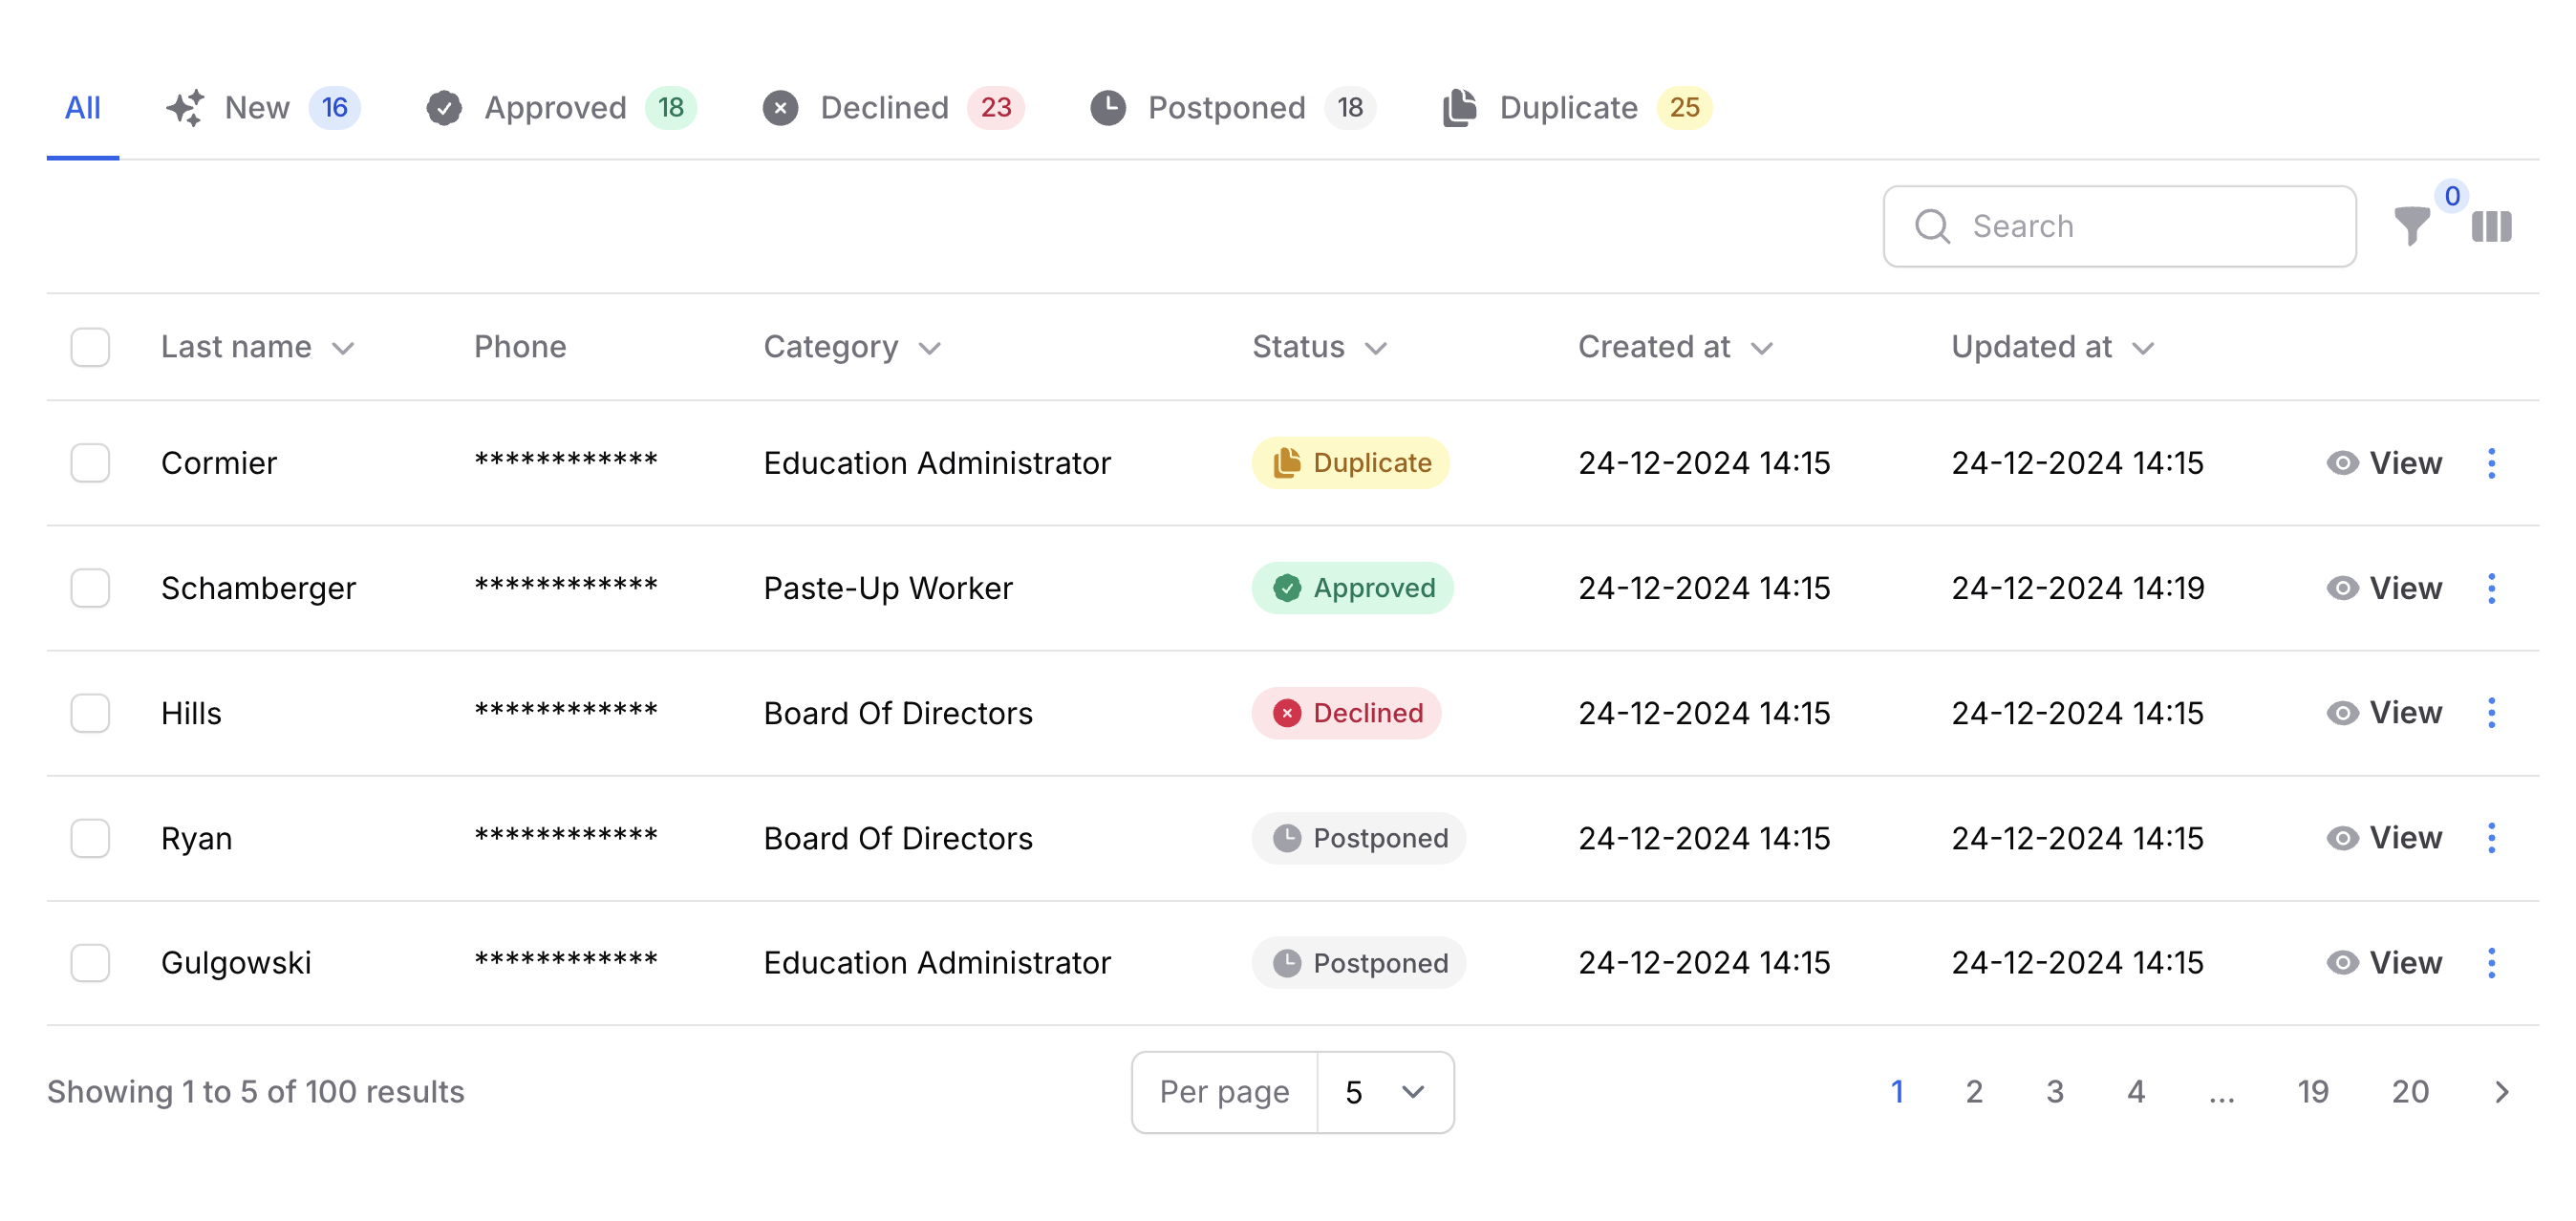
Masked works with the following components; `AdvancedTextColumn` and `AdvancedTextEntry`, This will mask the value.
```php
->masked()
```
If you want to apply a mask based on a condition, you can pass a closure that returns a boolean value.
```php
->masked(fn (string $state): bool => ! auth()->user()->is_admin)
```
#### Mask Characters
You can change the mask character by passing a **maskCharacters** option to the component.
```php
->maskCharacters('█')
```
#### Mask Index
If you want to start the mask from a specific index, you can add a **maskIndex** option to the component.
```php
->maskIndex(5)
```
#### Mask Length
The length of the mask can be changed by adding a **maskLength** option to the component. When the length is set to `null` (default), the mask will be applied to the whole value.
```php
->maskLength(5)
```
### Bold
Bold works with the following components; `AdvancedTextColumn` and `AdvancedTextEntry`, This will make the value bold.
```php
->bold()
```
### Underline
Underline works with the following components; `AdvancedTextColumn` and `AdvancedTextEntry`, This will underline the value.
```php
->underline()
```
### Italic
Italic works with the following components; `AdvancedTextColumn` and `AdvancedTextEntry`, This will italicize the value.
```php
->italic()
```
### Strikethrough
Strikethrough works with the following components; `AdvancedTextColumn` and `AdvancedTextEntry`, This will strikethrough the value.
```php
->strikethrough()
```
### Badges
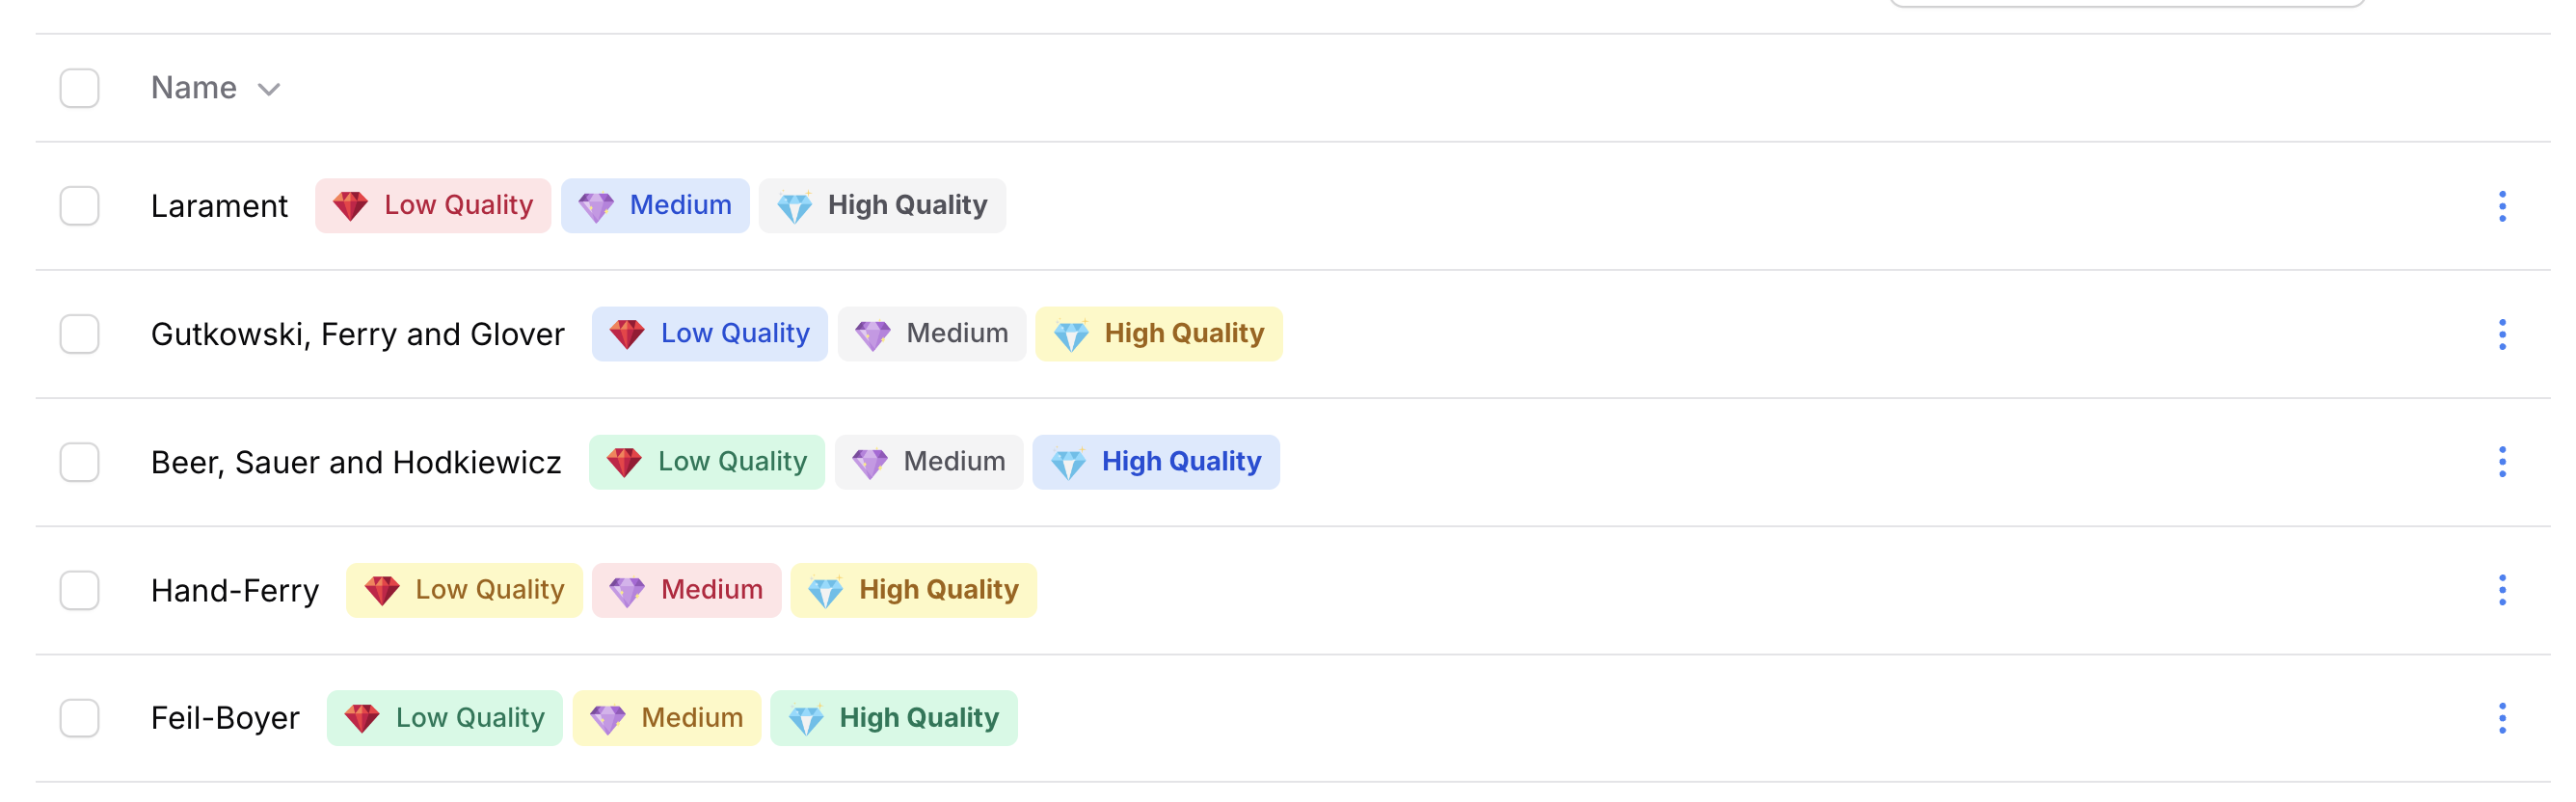
Badges works with the following components; `AdvancedTextColumn` and `AdvancedTextEntry`.
```php
->badges([
AdvancedBadge::make('example'),
])
```
#### Border
If you want to have a border on your badge you can use the **border** method.
```php
->border()
```
#### Pulse
If you want to make a badge pulse you can use the **pulse** method.
```php
->pulse()
```
#### Bounce
If you want to make a badge bounce you can use the **bounce** method.
```php
->bounce()
```
#### Border radius
If you want to change the border radius of the badge you can use the **borderRadius** method (in px).
```php
->borderRadius(5)
```
#### Color
If you want to change the color of the badge you can use the **color** method.
```php
->color('danger')
```
### Character count

Character count works with the following components; `AdvancedTextColumn` and `AdvancedTextarea`, This will count the characters and display the count.
```php
->characterCount()
```
### Character limit
> [!WARNING]
> This is only **visual** and does not enforce the limit.
Character limit works with the following components; `AdvancedTextColumn` and `AdvancedTextarea`, This will display a limit.
```php
->characterLimit(100)
```
### Character limit color
If you want to change the color of the character limit you can use the **characterLimitColor** method.
```php
->characterLimitColor('danger'),
```
#### Character limit border color
By default, the border color will not change when the limit is reached. You can change this by passing a second parameter.
```php
->characterLimitColor(color: 'danger', border: true),
```
### Character limit icon
If you want to change the icon of the character limit you can use the **characterLimitIcon** method.
```php
->characterLimitIcon('heroicon-s-exclamation'),
```
### Copyable
Copyable works with the following components; `AdvancedTextInput` which will add a copy button to the input.
```php
->copyable()
```
### Border color
If you want to change the border color of `AdvancedTextInput`, `AdvancedSelect` or `AdvancedTextarea` you can use the **borderColor** method.
```php
->borderColor('primary')
```
### Filters
#### Advanced Select Filter
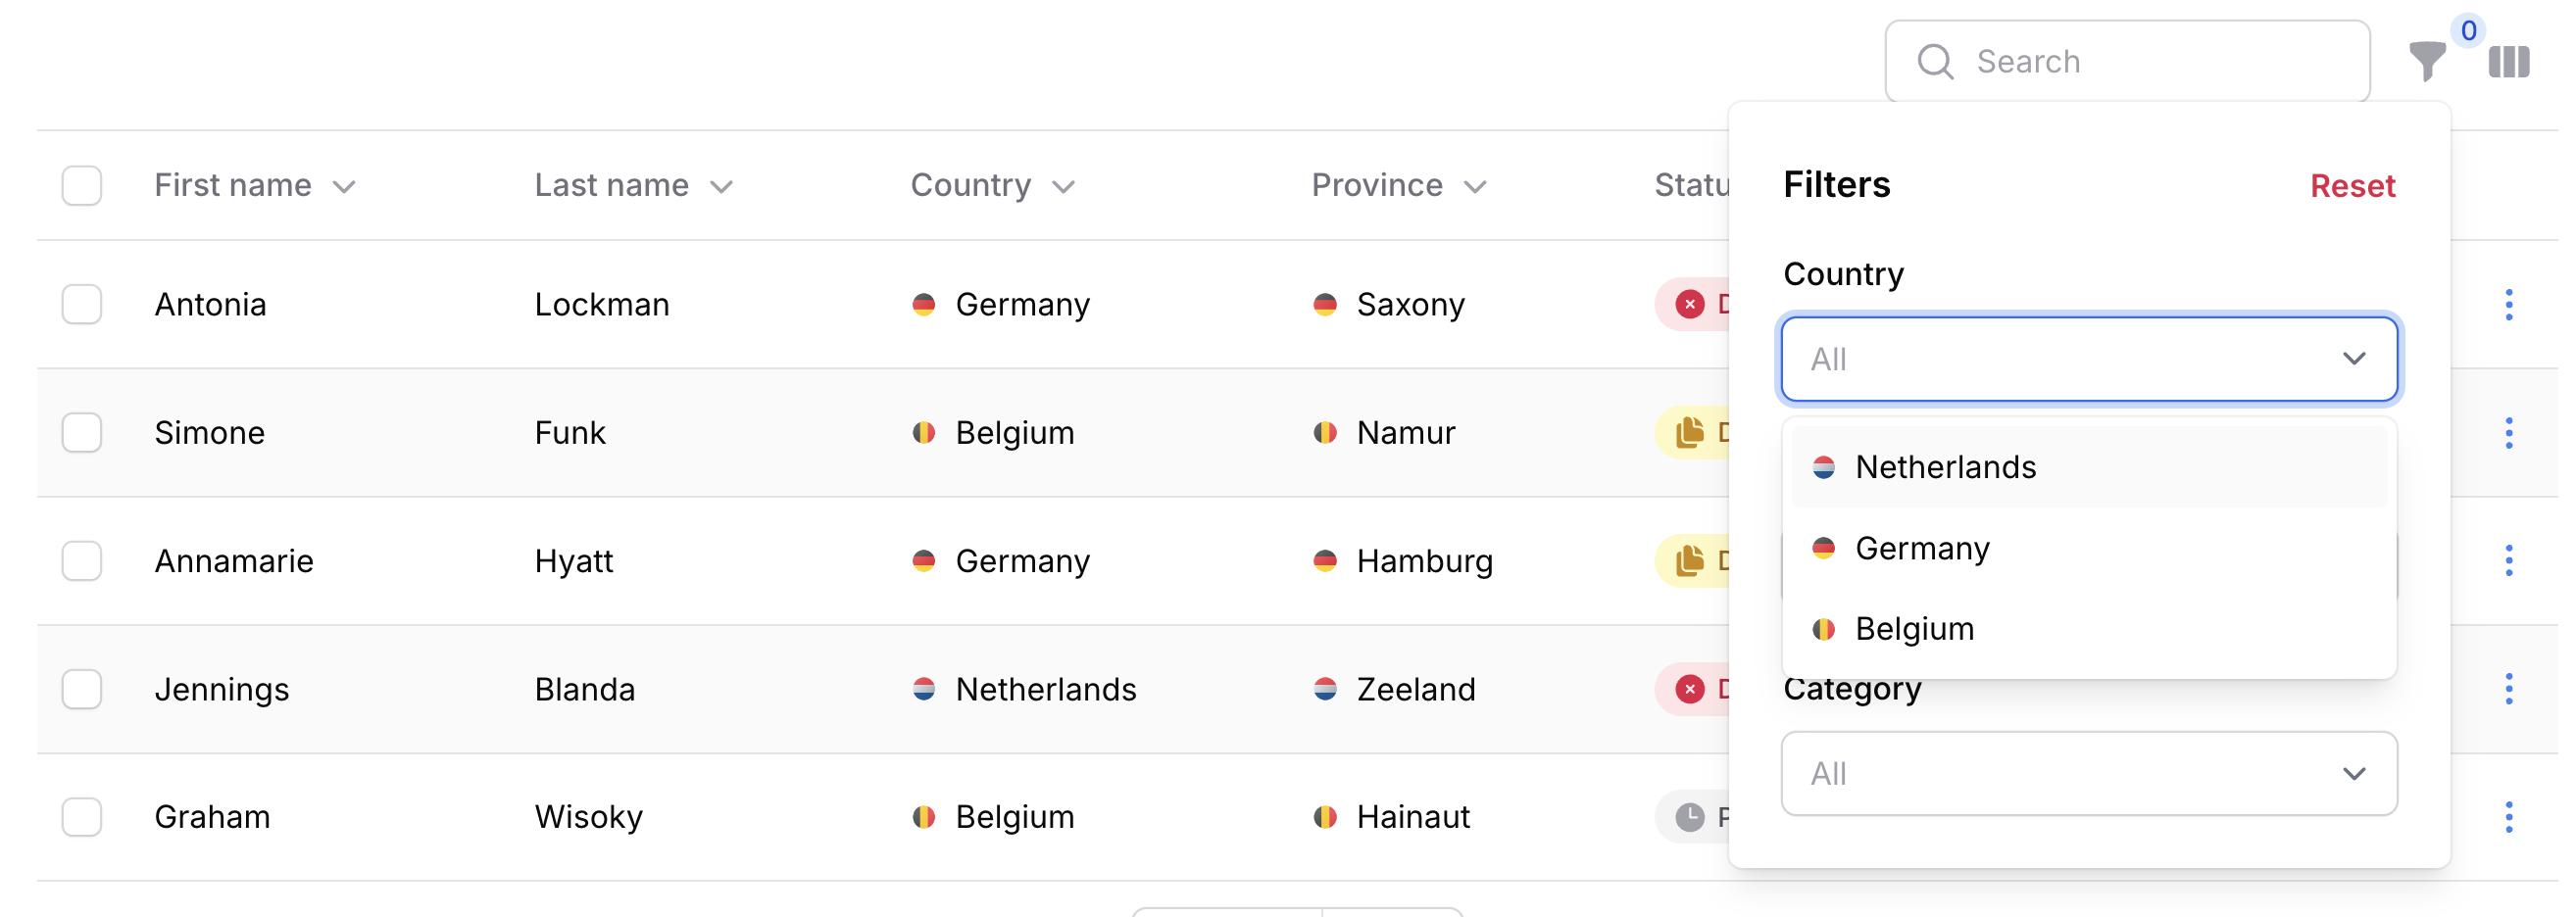
```php
->filters([
AdvancedSelectFilter::make('country.name')
->relationship('country', 'name')
])
```
#### Toggle Buttons Filter
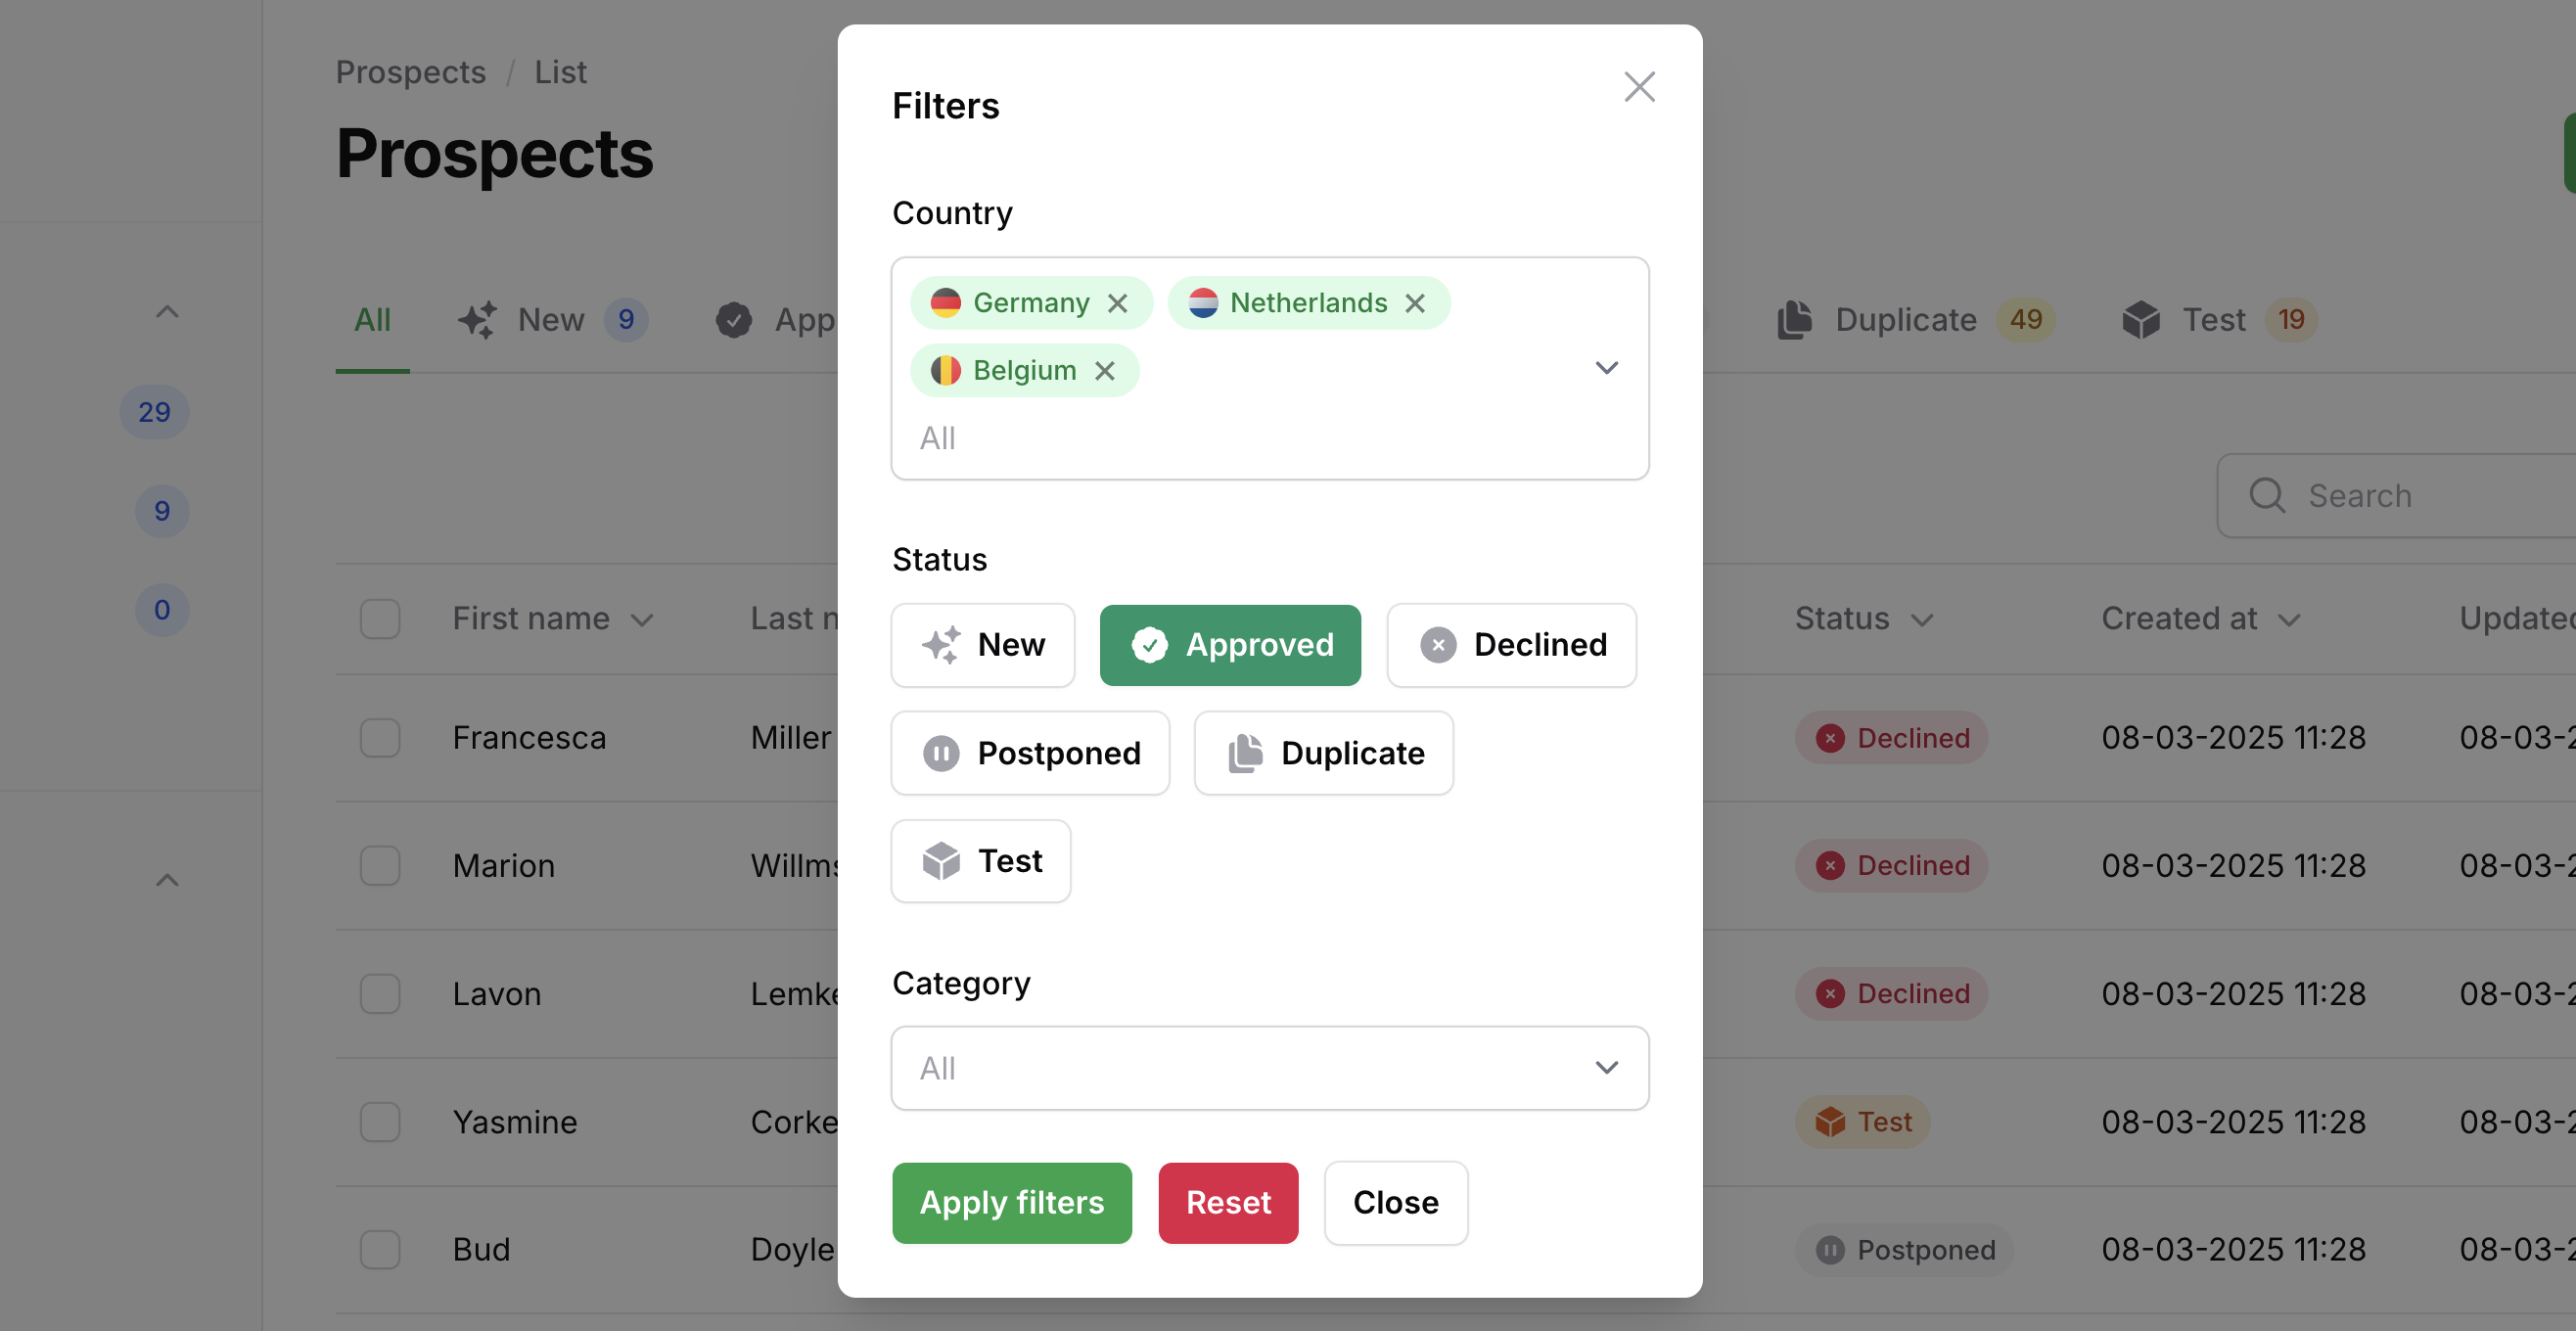
Similar to the `ToggleButtons` form component, the `AdvancedToggleButtonsFilter` allows you to filter using toggle buttons.
```php
->filters([
AdvancedToggleButtonsFilter::make('status')
->options(CompanyStatus::class)
->inline(),
])
```
## Code Distribution
Licenses strictly prohibit the public distribution of its source code. This means you are not permitted to use Filament Advanced Components to build an application and then distribute that application publicly through open-source repositories, hosting platforms, or any other code-sharing platforms.