https://github.com/coldheat/psneepy
A Playstation 1 Modchip written in Python
https://github.com/coldheat/psneepy
esp8266 modchip playstation python
Last synced: 5 months ago
JSON representation
A Playstation 1 Modchip written in Python
- Host: GitHub
- URL: https://github.com/coldheat/psneepy
- Owner: ColdHeat
- License: gpl-3.0
- Created: 2018-05-06T23:07:18.000Z (over 7 years ago)
- Default Branch: master
- Last Pushed: 2020-12-06T01:27:24.000Z (almost 5 years ago)
- Last Synced: 2025-04-30T20:04:23.831Z (5 months ago)
- Topics: esp8266, modchip, playstation, python
- Language: Python
- Homepage: https://blog.kchung.co/making-playstation-modchips/
- Size: 19.5 KB
- Stars: 43
- Watchers: 7
- Forks: 3
- Open Issues: 0
-
Metadata Files:
- Readme: README.md
- License: LICENSE
Awesome Lists containing this project
README
# PsNeePy
A Playstation 1 Modchip written in Python

The main code is derived partially from different versions of [PSNee](https://github.com/kalymos/PsNee).
Unfortunately this modchip is more of a proof of concept than it is something you should use in your console.
Help make it better by trying it out and submitting pull requests!
If you're interested in a more traditional modchip like MM3 or MayumiV4, read my [blog post about making your own modchips](https://blog.kchung.co/making-playstation-modchips/).
## Install
1. To begin you need to install MicroPython onto an [ESP8266](https://amzn.to/2K4HdTq) by following the [MicroPython documentation](https://docs.micropython.org/en/latest/esp8266/esp8266/tutorial/intro.html).
2. Setup the MicroPython [WebREPL](http://micropython.org/webrepl/) using the [instructions](https://docs.micropython.org/en/latest/esp8266/esp8266/tutorial/repl.html#webrepl-a-prompt-over-wifi).
3. Power on the ESP8266.
4. Connect to the ESP8266 via WiFi and use the [WebREPL](http://micropython.org/webrepl/) to connect.
The SSID will be `MicroPython-xxxxxx` where the x's are part of the ESP8266's MAC address. The password is `micropythoN`.
5. Upload `main.py` through the "Send a file" interface.
6. Disconnect the ESP8266 and prepare to solder it to the PS1.
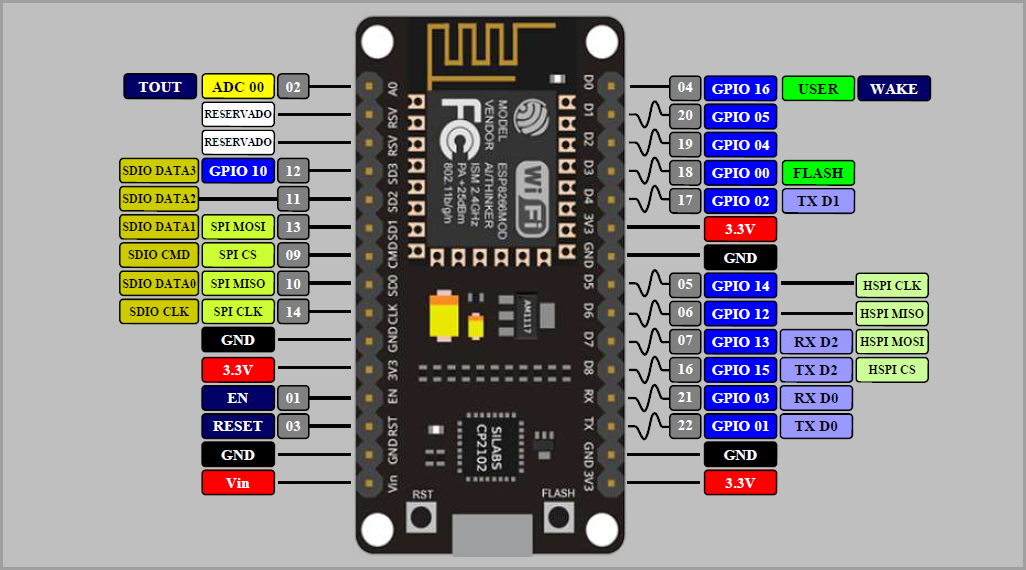
7. PsNeePy uses three pins to communicate to the PS1. It can be tricky to identify where to solder to but I've simplified it by mapping GPIO pins to MM3 pins.
| GPIO | MM3 Chip |
| ----------- | --------- |
| GPIO14 (D5) | Pin 6 |
| GPIO12 (D6) | Pin 5 |
| GPIO13 (D7) | Pin 7 |
| 3.3V | Pin 1 |
| GND | Pin 8 |
Take an MM3 soldering diagram for your PS1 motherboard revision and map the MM3 pin to the corresponding GPIO pin to figure out where to solder.

4. Solder the corresponding pins to the right pads on the PS1 PCB.
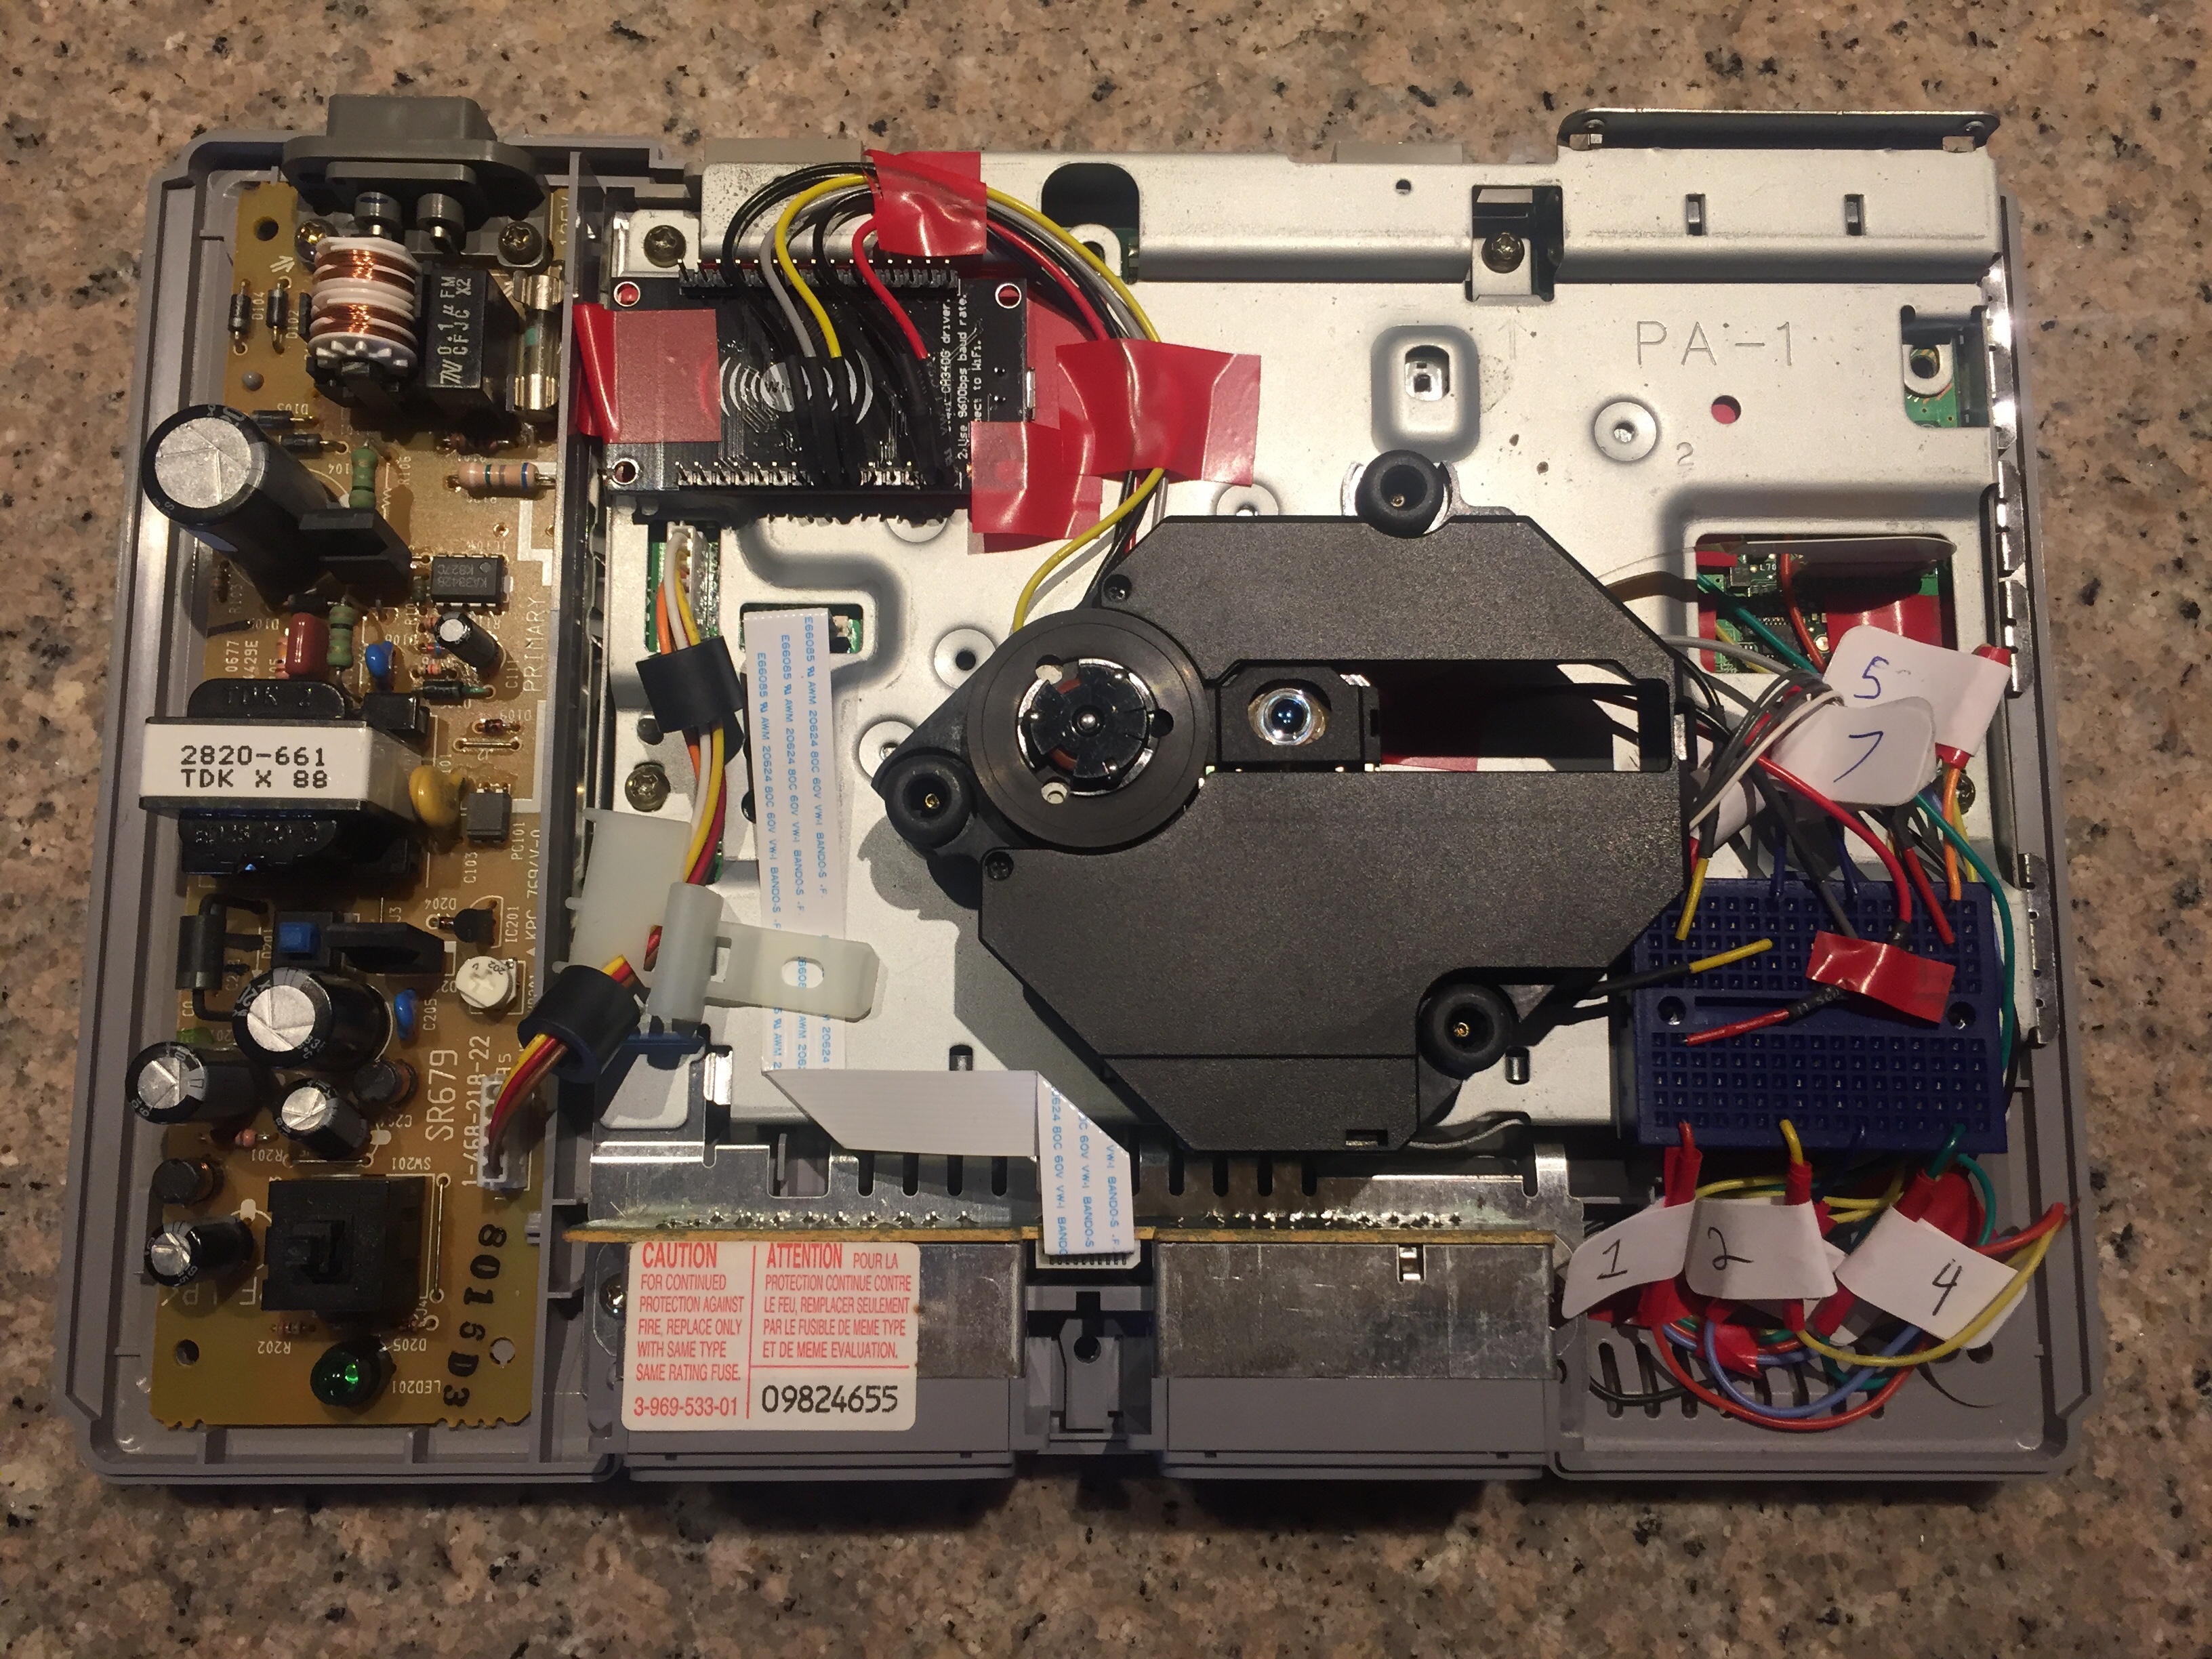
In my PS1 I soldered [stranded wire](https://amzn.to/2IaBHcL) onto [jumpers into a breadboard](https://amzn.to/2llKUG7).
To reduce the amount of soldering and also make removal, I use [more jumpers](https://amzn.to/2lloqoE) to connect the ESP8266 to the breadboard.
7. Reboot the PS1. While the PS1 is on, the `MicroPython-xxxxxx` SSID should be available and you should be able to connect to it and update the modchip.
**Note:** You can connect the ESP8266 to your network so that you do not need to connect to the `MicroPython-xxxxxx` network instead.
## Known Working PS1 Models
* SCPH-7501
* [SCPH-1001 (PU-8)](https://github.com/ColdHeat/PsNeePy/issues/2)