https://github.com/csiro-robotics/raycloudtools
https://github.com/csiro-robotics/raycloudtools
library point-cloud raycloud
Last synced: over 1 year ago
JSON representation
- Host: GitHub
- URL: https://github.com/csiro-robotics/raycloudtools
- Owner: csiro-robotics
- License: other
- Created: 2020-11-20T03:15:48.000Z (over 5 years ago)
- Default Branch: main
- Last Pushed: 2025-02-14T00:23:27.000Z (over 1 year ago)
- Last Synced: 2025-02-14T01:27:51.061Z (over 1 year ago)
- Topics: library, point-cloud, raycloud
- Language: C++
- Homepage:
- Size: 8.64 MB
- Stars: 77
- Watchers: 11
- Forks: 19
- Open Issues: 2
-
Metadata Files:
- Readme: README.md
Awesome Lists containing this project
README
## Ray Cloud Tools
A set of command line tools for processing ray clouds, together with an associated C++ library.
Ray clouds are point clouds with the sensor origin stored per point (currently encoded in the 'normal' field of .ply files).
Ray clouds represent free space as well as surfaces. This allows processing that cannot be done on point cloud data alone.
This is an open-source research library, a place to release new techniques in ray cloud analysis and manipulation. So if you would like to contribute with a new or improved method, do suggest it in our discussions page: https://github.com/csiro-robotics/raycloudtools/discussions.
## Install using a Pre-built Container
### Docker (Linux, MacOS, Windows)
#### Pull the Latest Image
To download the latest image from GitHub Packages, use the following command:
```bash
docker pull ghcr.io/csiro-robotics/raycloudtools:latest
```
#### Run an Interactive Container
To run the container interactively and bind your home directory to a directory inside the container for accessing host files:
#### On Linux/MacOS
```bash
docker run -it --name raycloudtools -v /home/yourusername:/workspace ghcr.io/csiro-robotics/raycloudtools:latest /bin/bash
```
#### On Windows
```bash
docker run -it --name raycloudtools -v C:/Users/YourUsername:/workspace ghcr.io/csiro-robotics/raycloudtools:latest /bin/bash
```
Replace `/home/yourusername` or `C:/Users/YourUsername` with the path to your home directory.
#### Reusing Container
To restart and attach to the container in the future:
```bash
docker start -ai raycloudtools
```
### Apptainer (Linux/HPC)
```console
# Login to GitHub Container Registry (required once)
export CR_PAT=YOUR_GITHUB_TOKEN
apptainer registry login -u YOUR_GITHUB_USERNAME -p $CR_PAT oras://ghcr.io
# Pull and convert the container
apptainer pull docker://ghcr.io/csiro-robotics/raycloudtools:latest
# Run an interactive container (binds host home directory by default)
apptainer shell raycloudtools_latest.sif
```
To create a GitHub token:
1. Go to GitHub Settings → Developer Settings → Personal Access Tokens → Tokens (classic)
2. Generate new token with `read:packages` scope
3. Copy the token and use it in the login command above
## Build from Source with Docker
```console
# Clone the repository
git clone https://github.com/csiro-robotics/raycloudtools.git
cd raycloudtools
# Build the image
docker build -f docker/Dockerfile -t raycloudtools:local .
```
## Build from Source (tested on Linux-based systems):
```console
sudo apt-get install libeigen3-dev
git clone https://github.com/ethz-asl/libnabo.git
cd libnabo
git checkout tags/1.0.7
mkdir build
cd build
cmake .. -DCMAKE_BUILD_TYPE=RelWithDebInfo
make
sudo make install
cd ../..
git clone https://github.com/csiro-robotics/raycloudtools.git
cd raycloudtools
mkdir build
cd build
cmake ..
make
```
To run the rayXXXX tools from anywhere either sudo make install, or place in your ~/.bashrc:
```console
export PATH=$PATH:'source code path'/raycloudtools/build/bin
```
If not there already, add to your ~/.bashrc:
'''console
export LD_LIBRARY_PATH=$LD_LIBRARY_PATH:/usr/local/lib
'''
## File format:
Raycloud files are loaded and saved in binary .ply format, the header section is text and follows this format:
```console
ply
format binary_little_endian 1.0
comment generated by raycloudtools library
element vertex 0000000000
property x
property y
property z
property time
property nx
property ny
property nz
property uchar red
property uchar green
property uchar blue
property uchar alpha
end_header
```
followed by the binary data. By default it uses floats for x,y,z,nx,ny,nz and doubles for time. nx,ny,nz is the vector from the end point x,y,z to the sensor's location at the time that the point was observed. It is not a surface normal, but the ray representing free space from point to source.
Imported .ply point cloud files have a similar format, but without the nx,ny,nz fields, and optionally an intensity field instead of the red,green,blue,alpha:
```console
ply
format binary_little_endian 1.0
comment Any comment here
element vertex 0000000000
property x
property y
property z
property time
property intensity
end_header
```
The range of this intensity mapped onto the raycloud's 0-255 alpha value using rayimport's max_intensity optional parameter.
The imported .laz point cloud format is the 3D point, time and intensity fields. Plus the optional colour field.
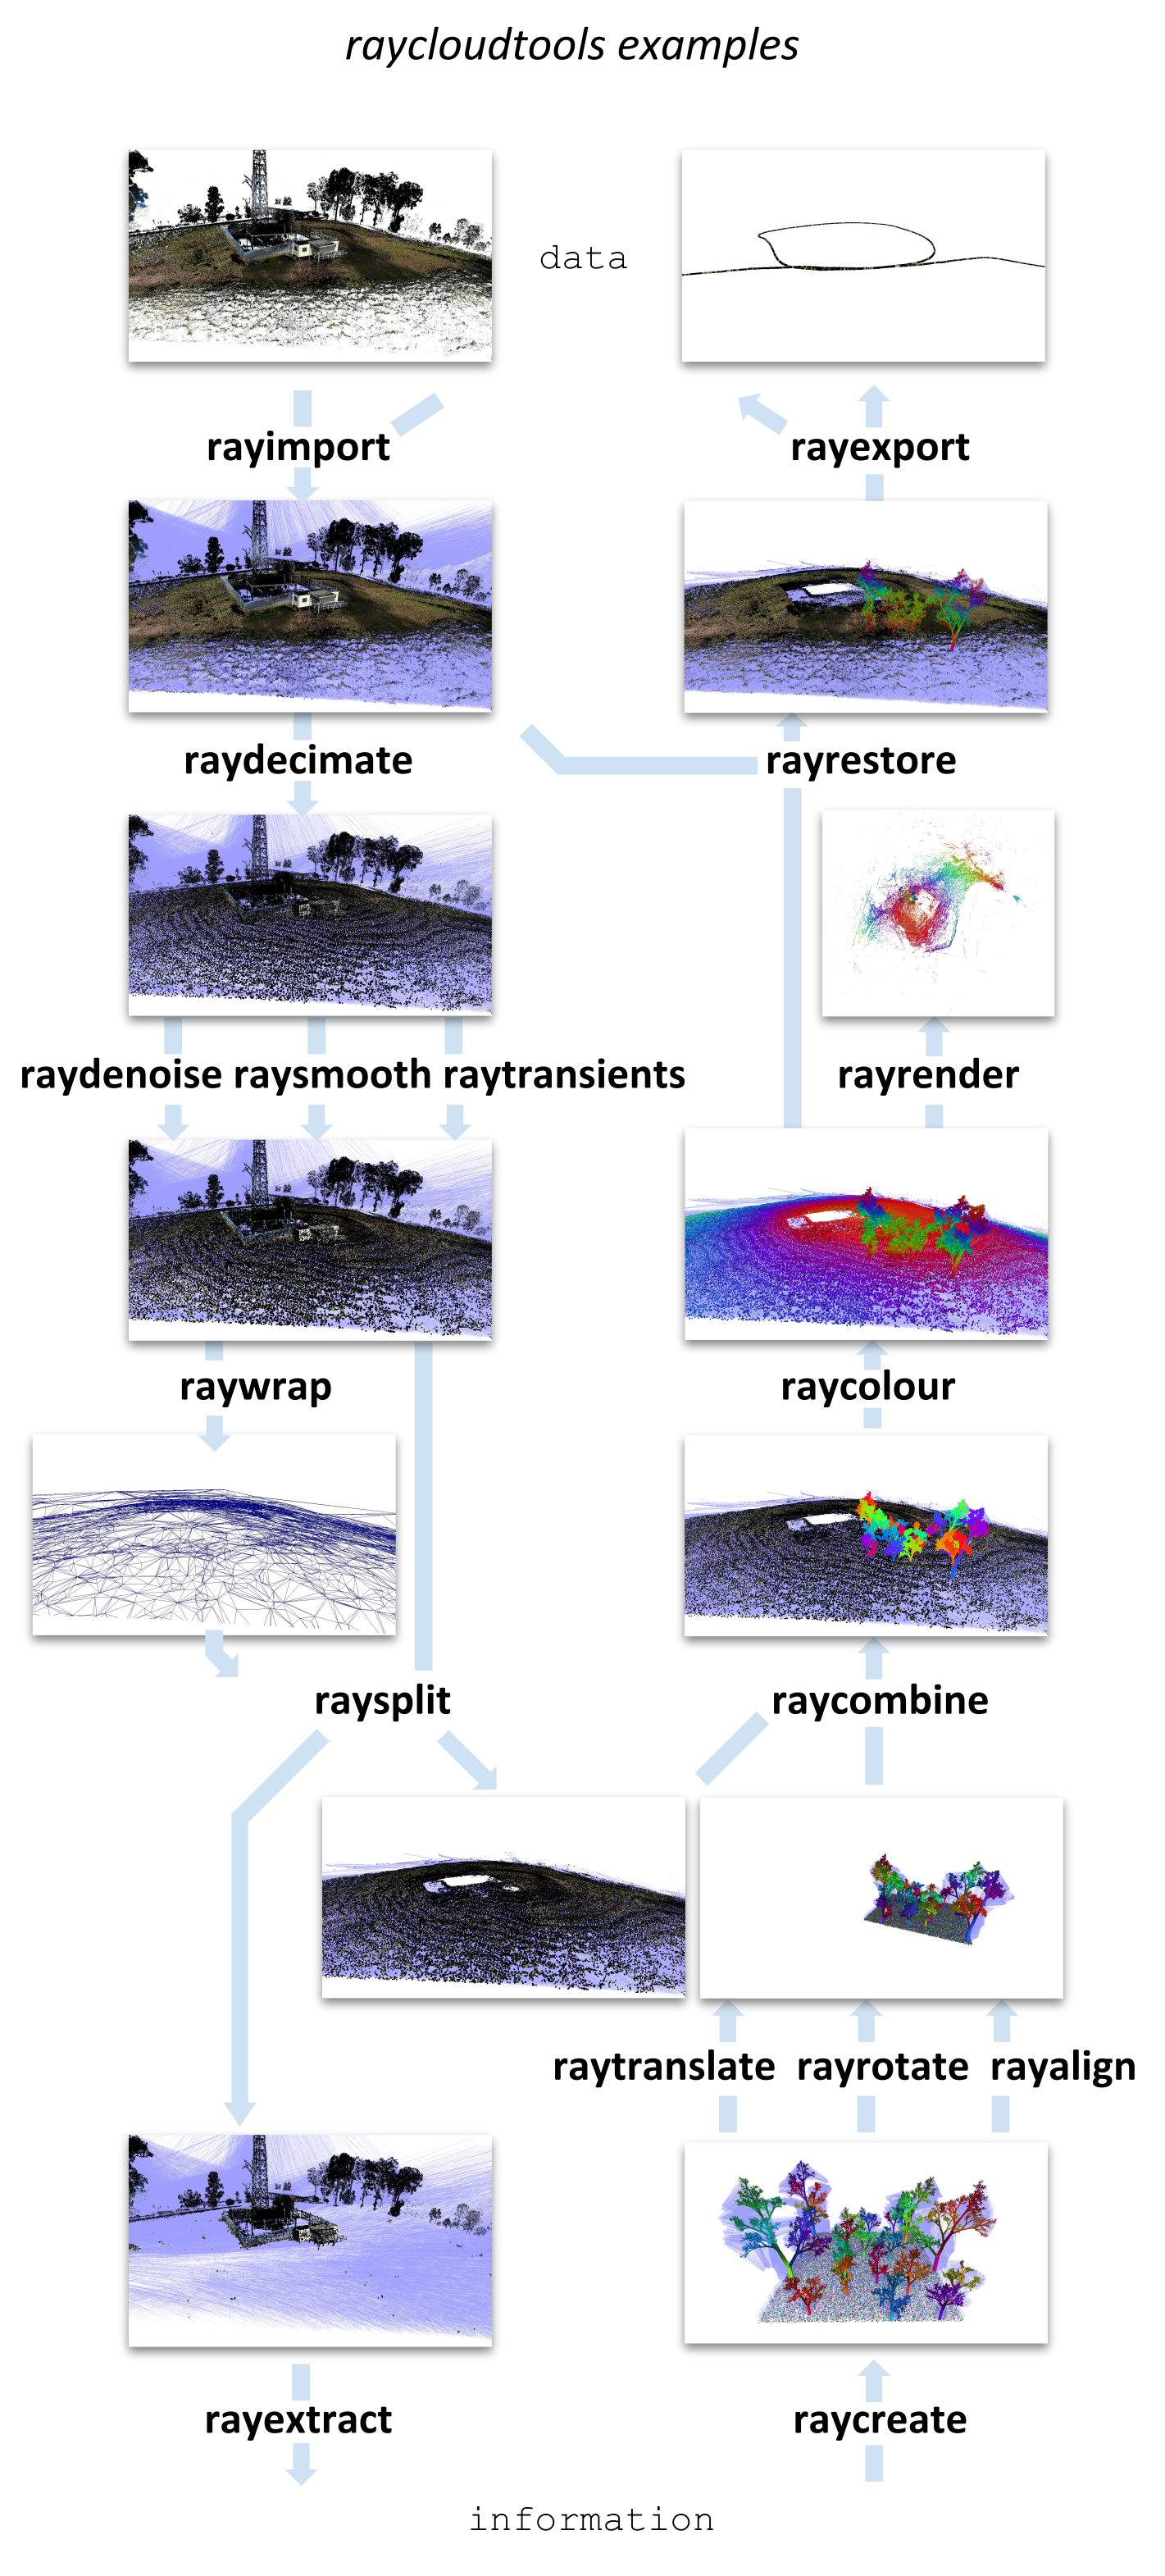
## Visual Guide:
This gives an example of how the command line tools could be sequenced to analyse (top down) and generate (bottom up) ray clouds.
## Individual Examples:
**rayimport forest.laz forest_traj.txt** Import point cloud and trajectory to a single raycloud file forest.ply. forest_traj.txt is space separated 'time x y z' per line.
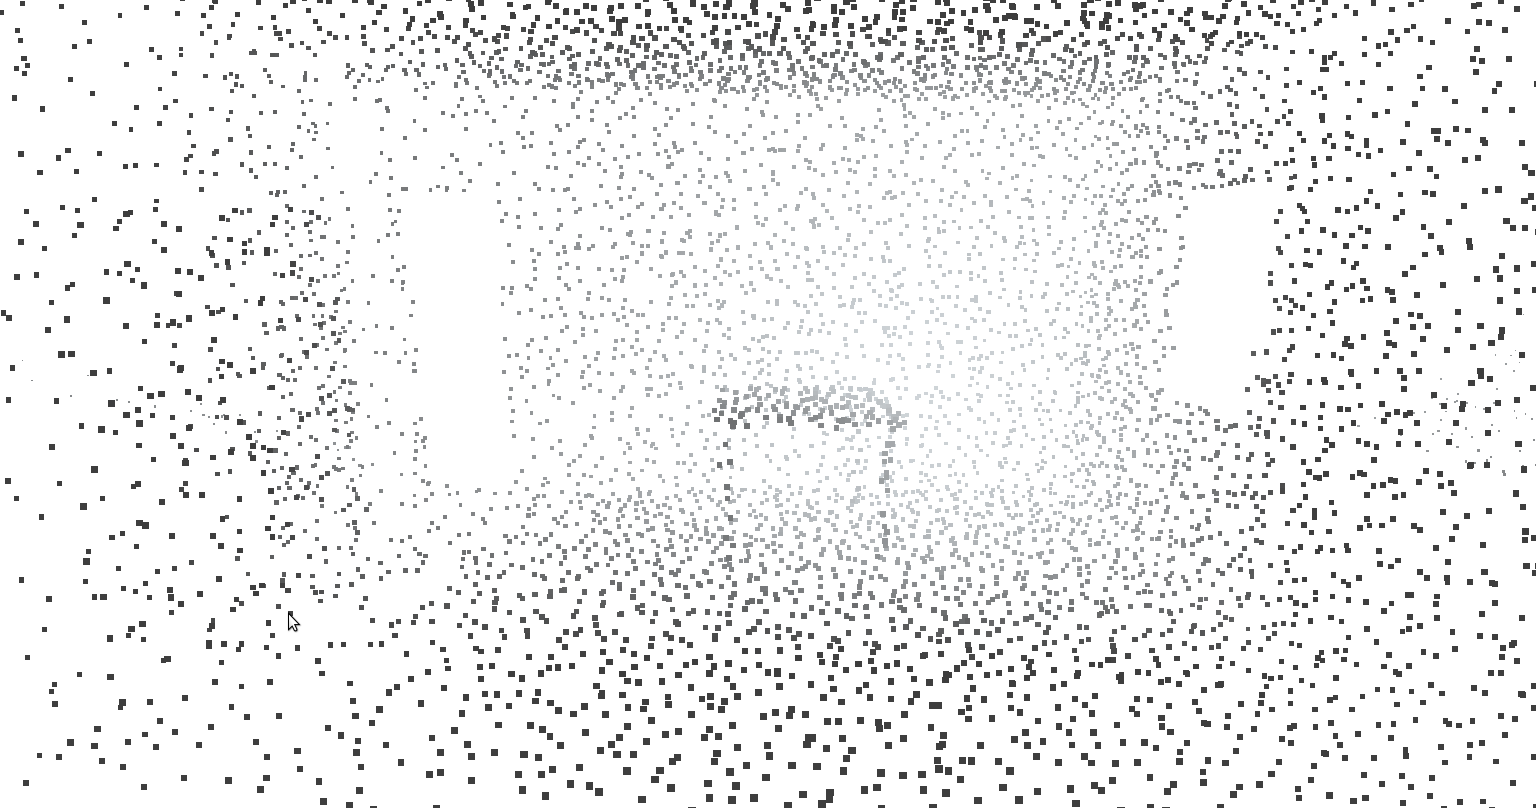
**raycreate room 1** Generate a single room with a window and door, using random seed 1.
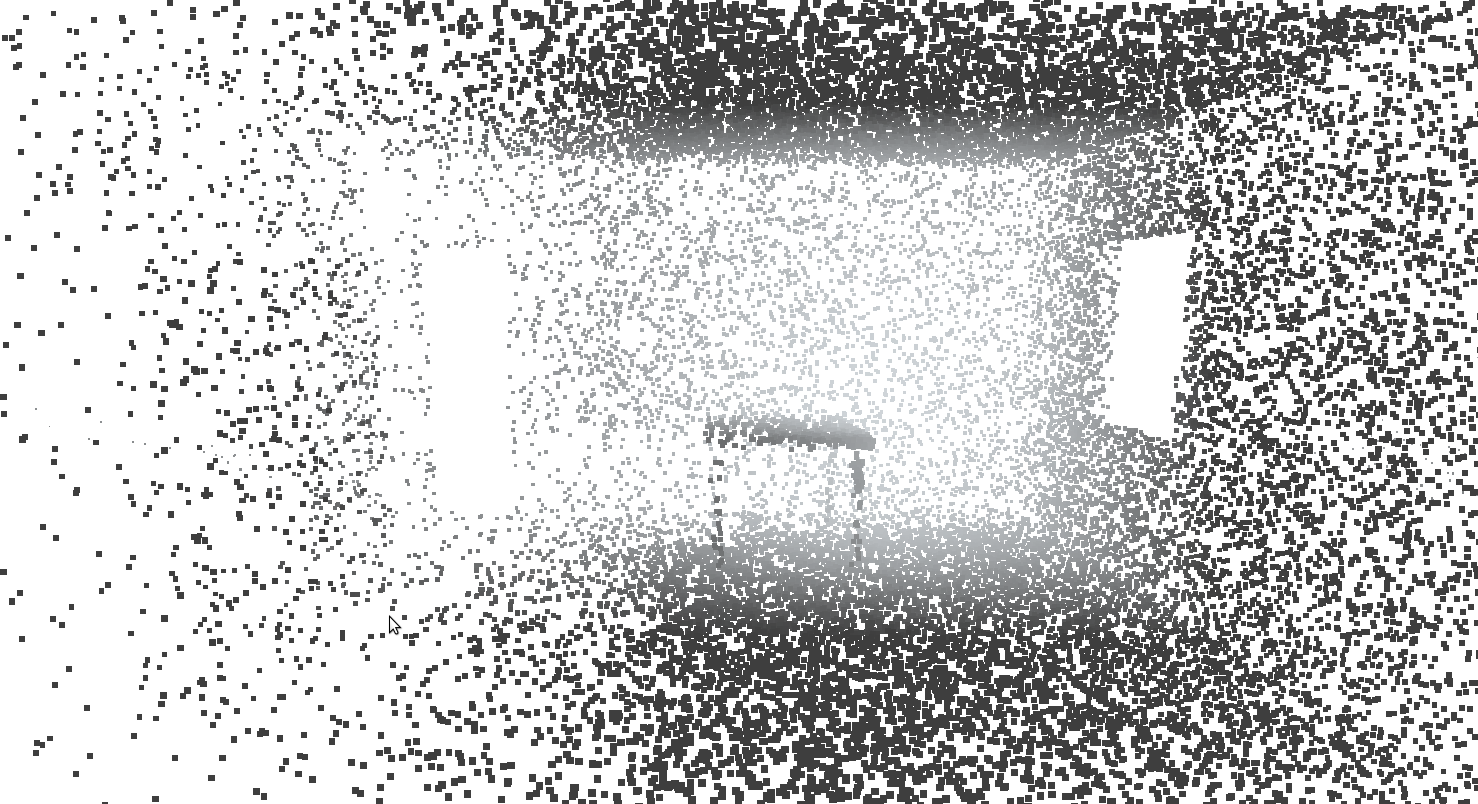
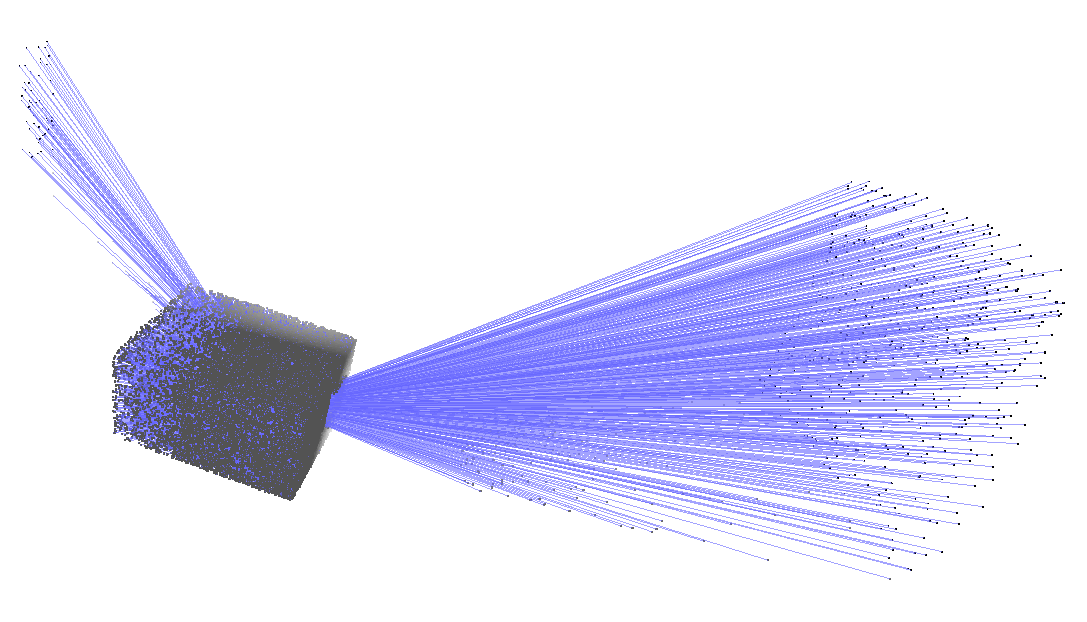
You can visualise the rays in meshlab with Render | Show Vertex Normals. The ray lengths need to be scaled: Tools | Options | NormalLength roughly 0.025 (smaller for larger clouds)
**raydecimate room.ply 10 cm** Spatially decimate cloud to one point every cubic 10 cm.
**raytranslate room.ply 3 0 0** Translate the ray cloud 3 metres along the x axis.
**rayrotate room.ply 0 0 30** Rotate the ray cloud 30 degrees around the z axis.
**raydenoise room.ply 10 cm** Remove rays with isolated end points more than 10 cm from any other, not including unbounded rays.

**raysmooth room.ply** Move ray end points onto the nearest surface, to smooth the resulting cloud.


**rayrender room.ply top density_rgb** Render the cloud from the top, as a surface area density.
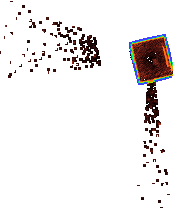
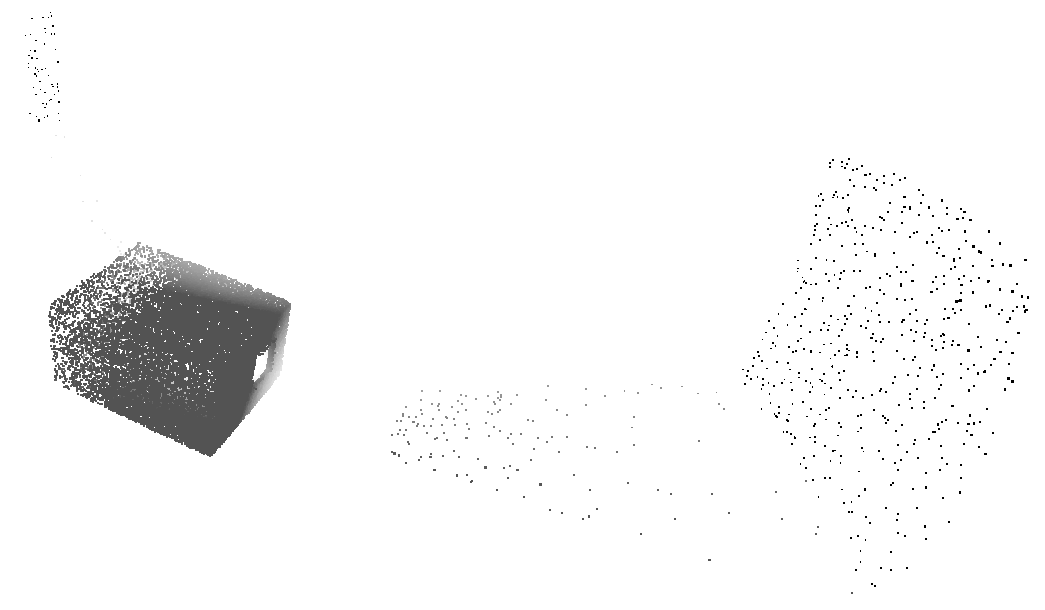
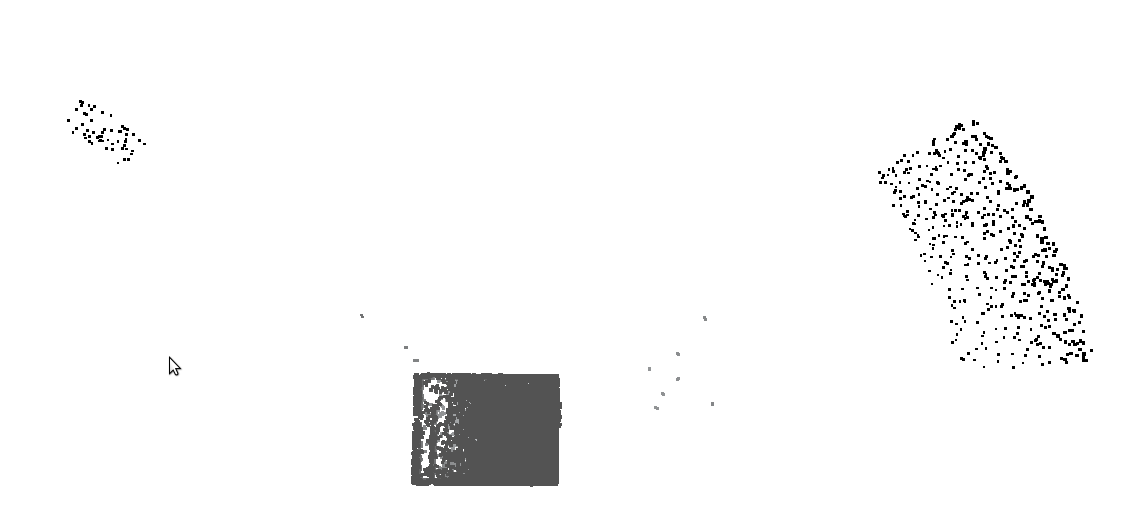
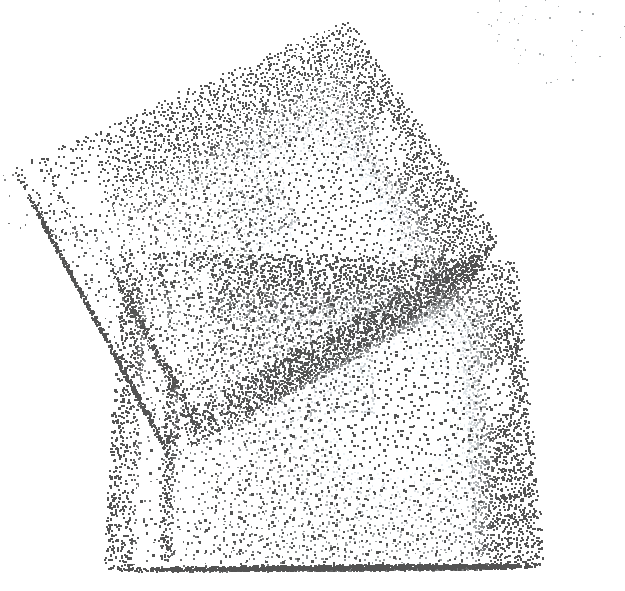
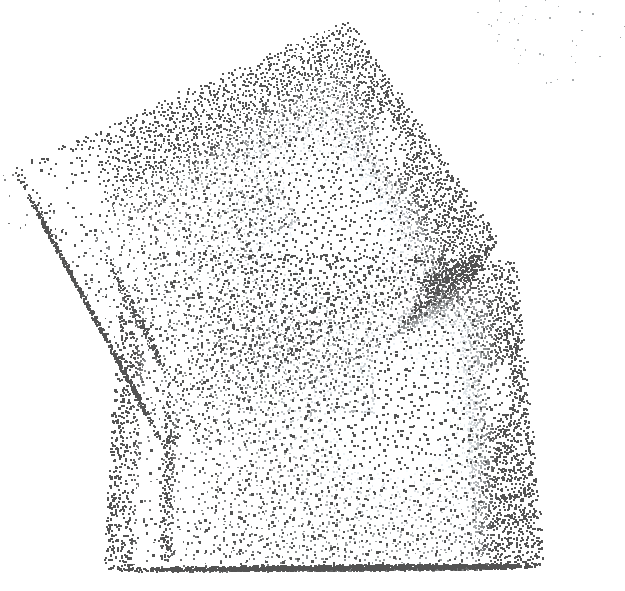
**raytransients min room.ply 2 rays** Segment out moving or moved objects during the scan, when matter has been re-observed as missing by 2 or more rays.
Leaving the ***minimum*** of geometry when transient.
In this raycloud the table and cupboard appear only after the empty room has been scanned for several seconds, so we can isolate these transient objects.
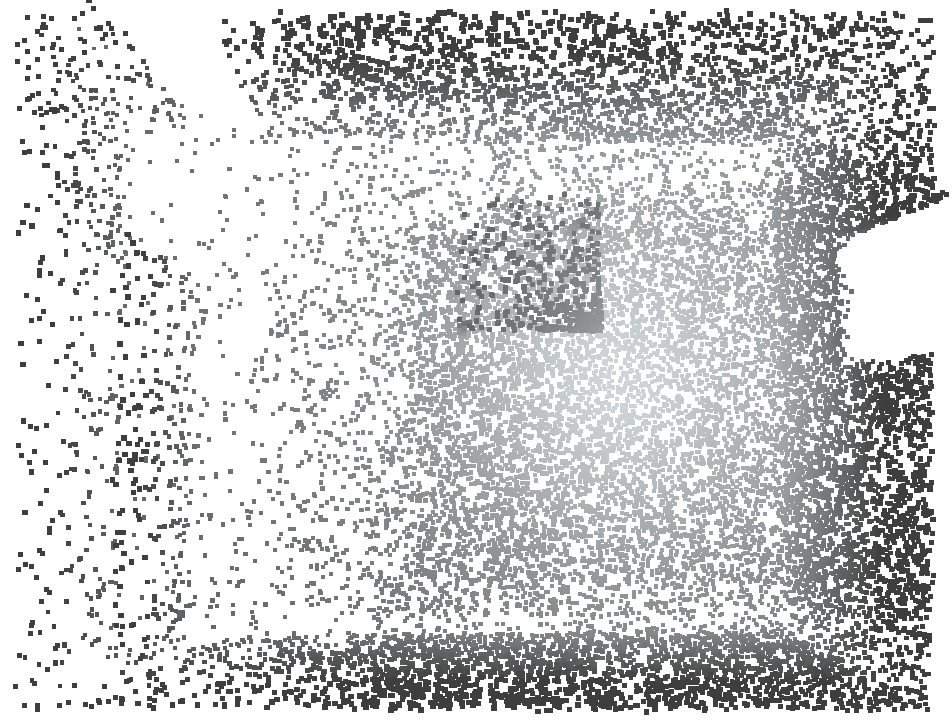
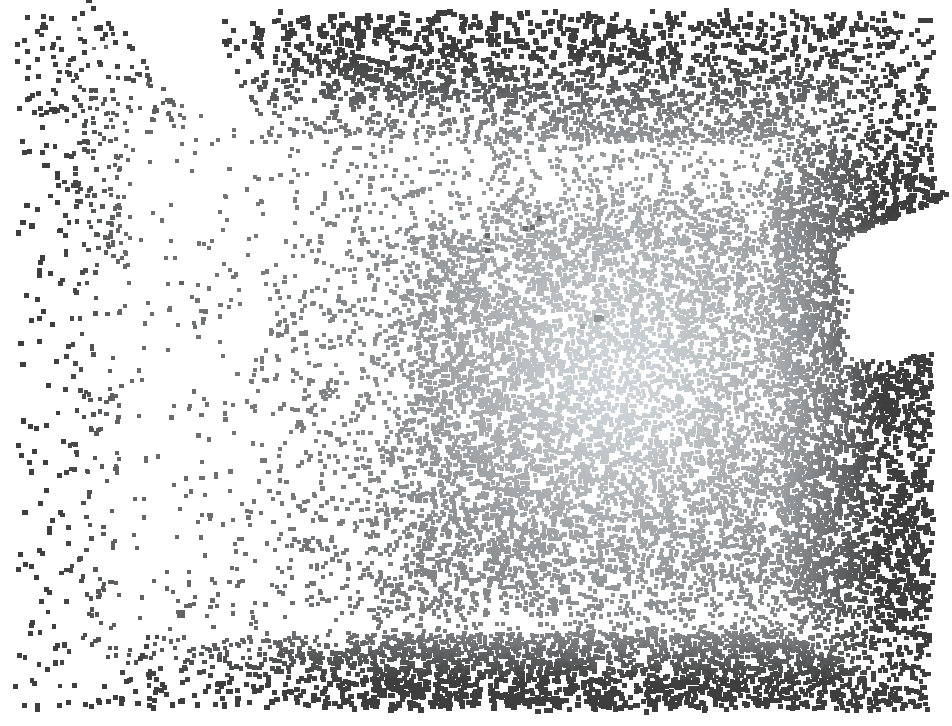
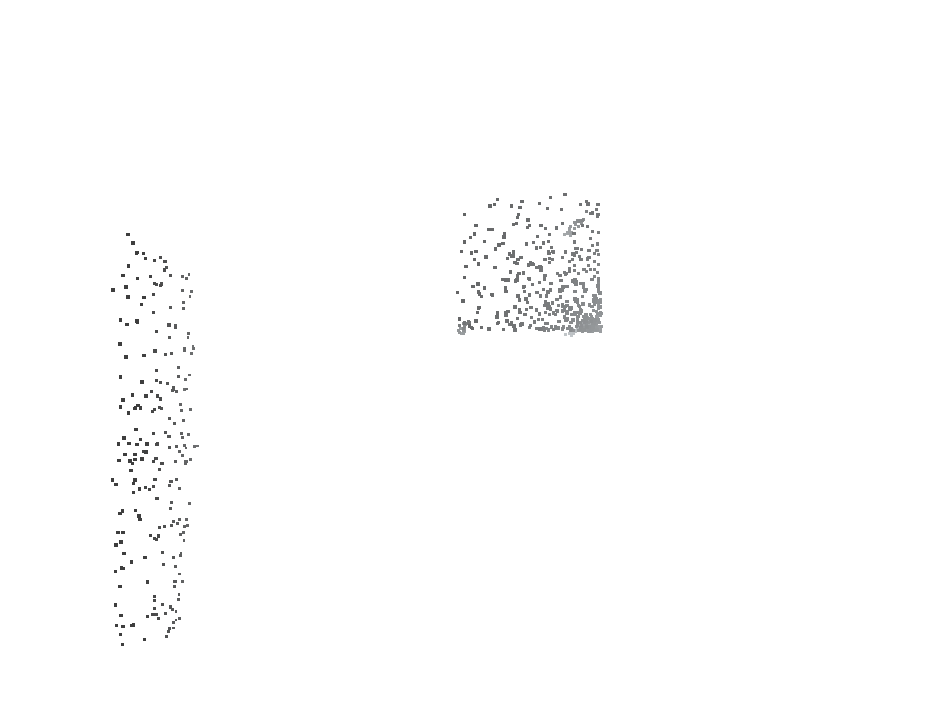
Left: original cloud. Middle: the fixed (untransient) raycloud. Right: the remaining transient rays are also saved.
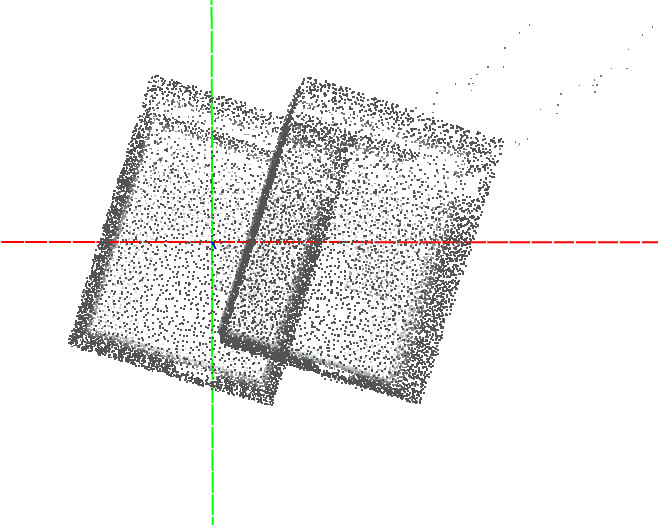
**raycombine room.ply room2.ply** Combine room and its transformed version together, keeping ***all*** rays.
**raycombine min room.ply room2.ply 1 rays** Combine the two ray clouds keeping only the ***minimum*** of geometry where there is a difference.
This is a form of union of the two volumes.
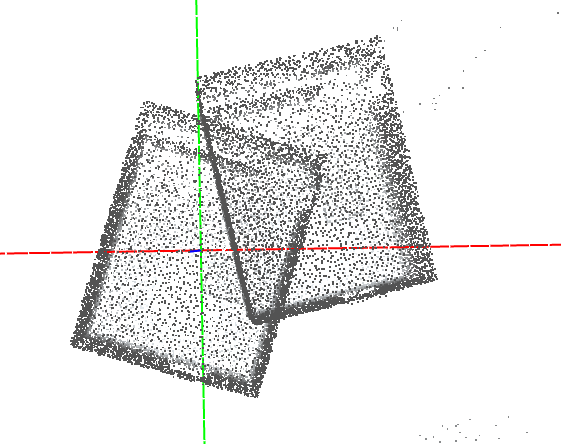
**rayalign room.ply room2.ply** Aligns room onto room2, allowing for a small about of non-rigidity
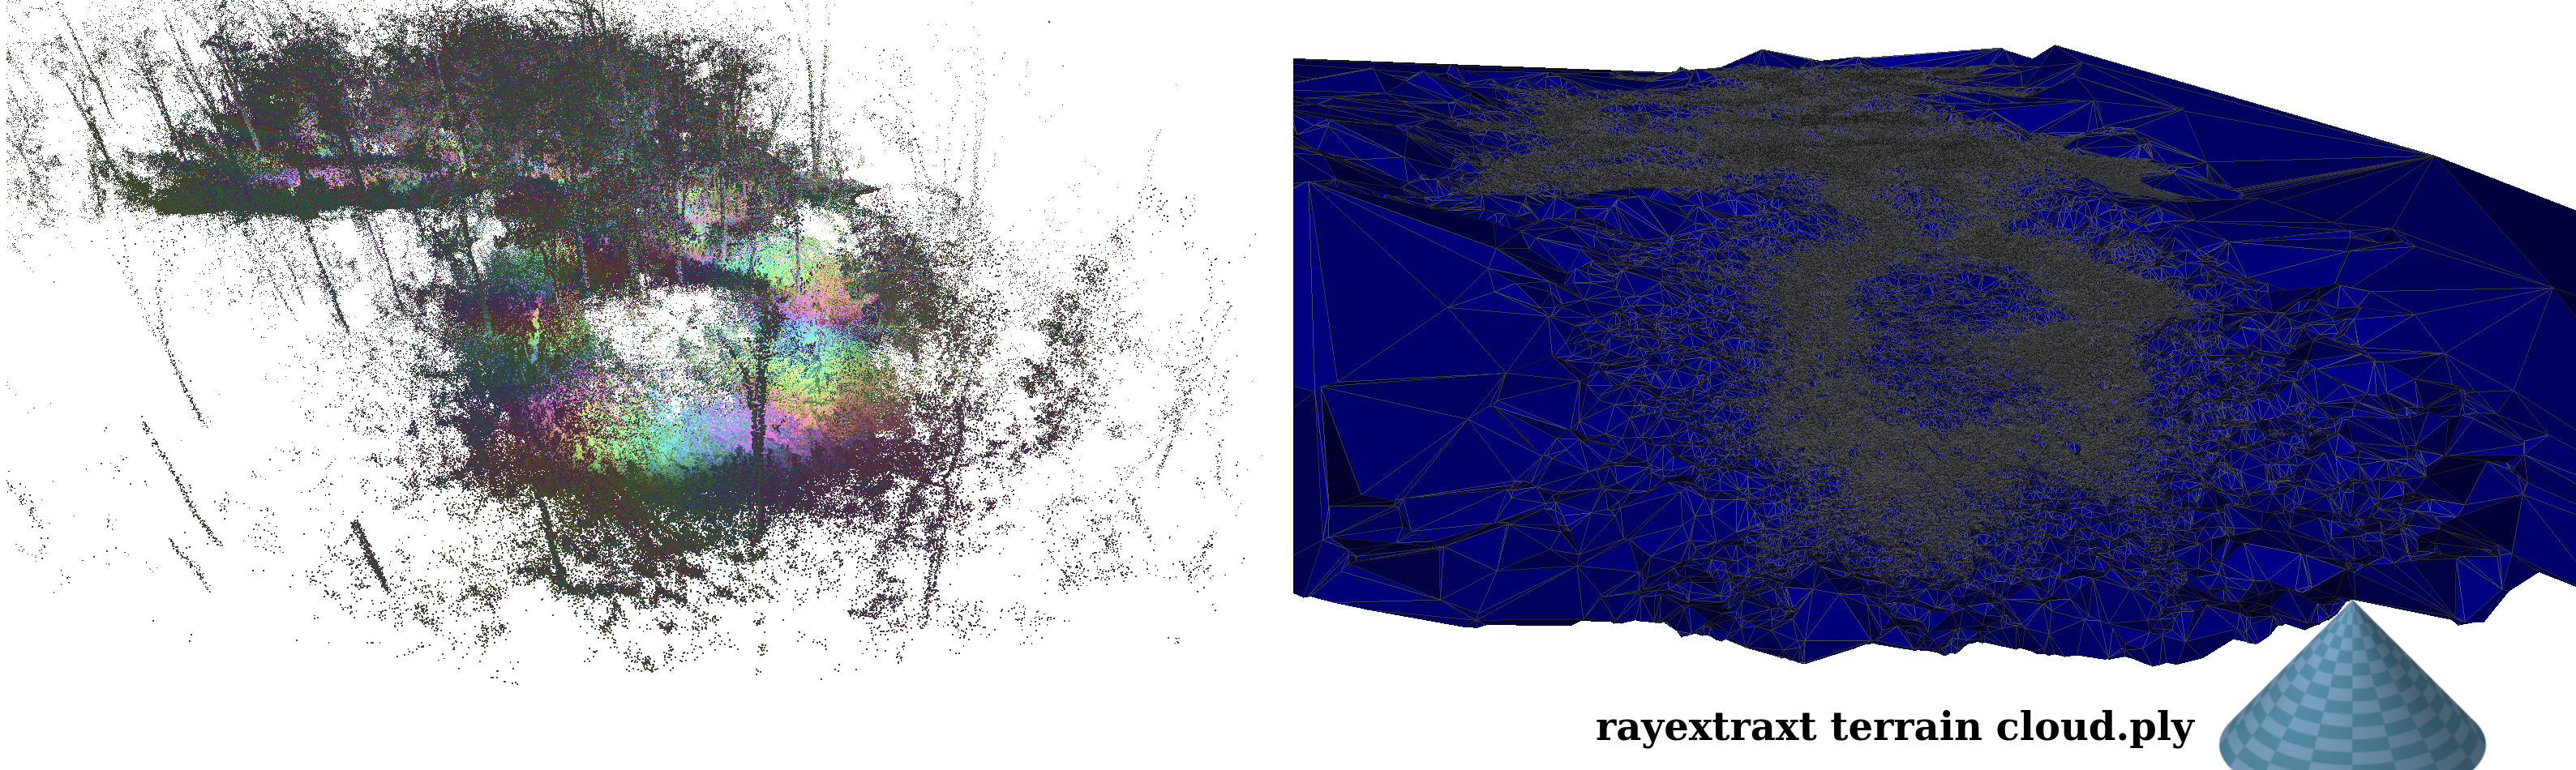
**rayextract terrain cloud.ply** extracts a ground mesh based on a conical height condition.
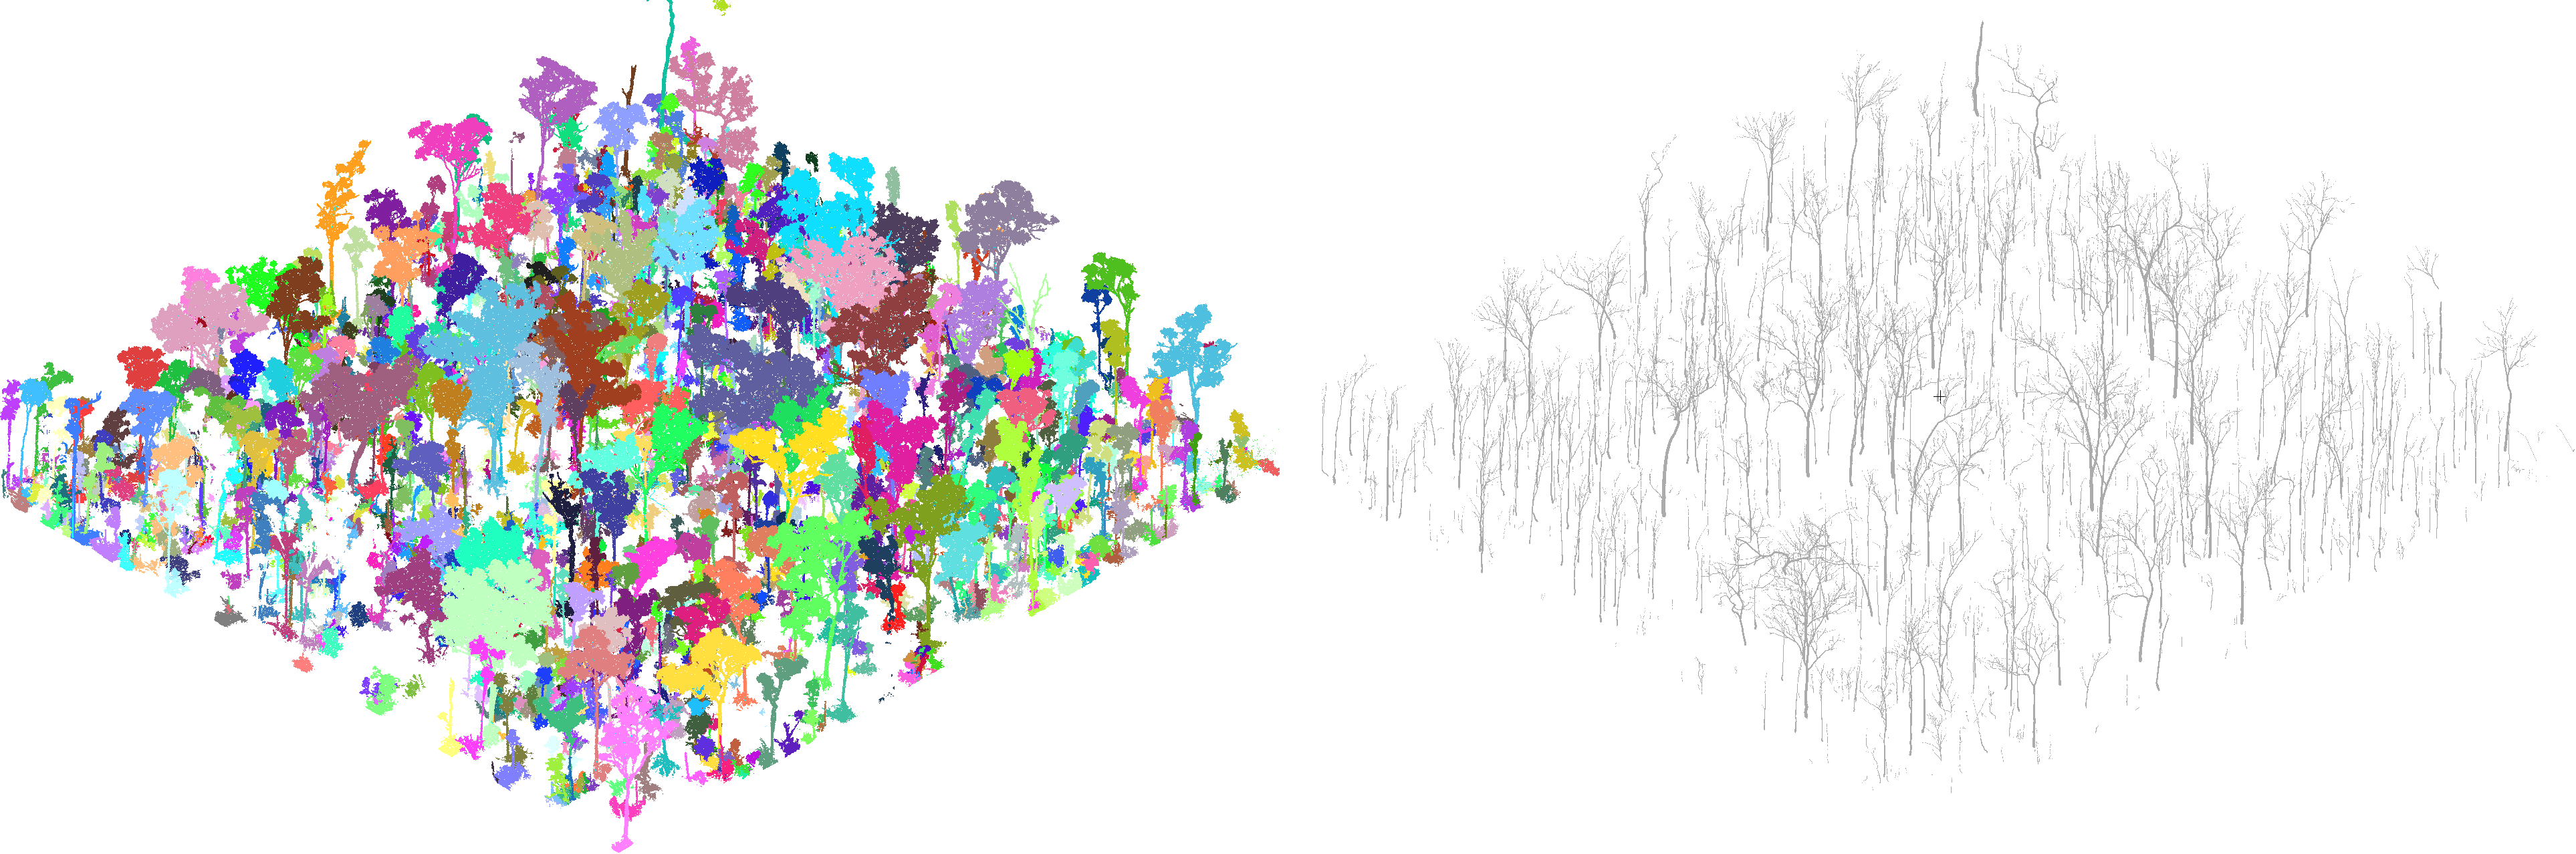
**rayextract trees forest.ply forest_mesh.ply** extracts tree structures to text file, and segments forest.
*Optional build dependencies:*
For rayconvert to work from .laz files:
* git clone https://github.com/LASzip/LASzip.git, then git checkout tags/2.0.1, then mkdir build, cd build, cmake .., make, sudo make install.
* git clone https://github.com/libLAS/libLAS.git, then mkdir build, cd build, cmake .. -DWITH_LASZIP=ON, make, sudo make install (you'll need GEOTIFF to be off in libLAS, and to have installed boost)
* in raycloudtools/build: cmake .. -DWITH_LAS=ON (or ccmake .. to turn on/off WITH_LAS)
* note that you may need to add the liblas path into LD_LIBRARY path, normally this can be done with the following line in your ~/.bashrc: export LD_LIBRARY_PATH=$LD_LIBRARY_PATH:/usr/local/lib
For raywrap:
* git clone http://github.com/qhull/qhull.git, git checkout tags/v7.3.2
* In qhull: mkdir build, cd build, cmake .. -DCMAKE_POSITION_INDEPENDENT_CODE:BOOL=true, make, sudo make install.
* in raycloudtools/build: cmake .. -DWITH_QHULL=ON (or ccmake .. to turn on/off WITH_QHULL)
To render clouds to geotif (.tif) images:
* git clone https://github.com/OSGeo/libgeotiff.git
* follow the build instructions in its README.md, note that the "DCMAKE_C_FLAGS" parameter needs a preceeding "-"
* copy a FindGeoTIFF.cmake file to your cmake folder, such as from here: https://github.com/ufz/geotiff
* in raycloudtools/build: cmake .. -DWITH_TIFF=ON (or ccmake .. to turn on/off WITH_TIFF)
## Unit Tests
Unit tests must be enabled at build time before running. To build with unit tests, the CMake variable `RAYCLOUD_BUILD_TESTS` must be `ON`. This can be done in the initial project configuration by running the following command from the `build` directory: `cmake -DRAYCLOUD_BUILD_TESTS=ON ..`
Unit tests may then be run directly or using `CTest`.
### Running using CTest
To run using CTest:
* Change into the `build` directory
* Run `ctest .`
On some platforms it may be necessary to specify the build configuration to test. For example, the `Release` build may be tested using the modified command `ctest . -C Release`.
### Directly invoking the tests
When directly invoking the unit tests, is important that the tests are run from the directory to which the raycloud tools executables are built. To invoke the tests directly:
* Change into the `build` directory
* Change into the `bin/` directory
* Run `./raytest`
## Development Container Setup (.devcontainer)
This project provides a `.devcontainer` directory for consistent development environments. Using the devcontainer is optional, but recommended for a streamlined setup. Here's how to get started:
1. **Install Docker:** You'll need Docker Desktop (or a similar Docker engine) installed on your machine.
2. **Open in VS Code:**
* Open the project in VS Code.
* VS Code should automatically detect the `.devcontainer` folder and prompt you to "Reopen in Container". Click it.
* If you're not prompted, open the command palette (Ctrl+Shift+P or Cmd+Shift+P) and type "Remote-Containers: Reopen in Container".
That's it! VS Code will handle building and running the development container for you. If you choose not to use the devcontainer, you will need to ensure your local environment matches the project's dependencies and requirements.
## Acknowledgements
This research was supported by funding from CSIRO's Data61, Land and Water, Wine Australia, and the Department of Agriculture's Rural R&D for Profit program. The authors gratefully acknowledge the support of these groups, which has helped in making this library possible.
The paper describing this software is available here: https://ieeexplore.ieee.org/abstract/document/9444433
Citations:
```
Lowe, Thomas, and Kazys Stepanas. "RayCloudTools: A Concise Interface for Analysis and Manipulation of Ray Clouds." IEEE Access (2021).
Lowe, T, Moghadam, P, Edwards, E, Williams, J. Canopy density estimation in perennial horticulture crops using 3D spinning lidar SLAM. J Field Robotics. 2021; 1– 21. https://doi.org/10.1002/rob.22006
```