https://github.com/datastaxdevs/conf-grpc-rest-graphql-data-apis
Expose Rest,Graphql,Grpc Apis on Top for Your Databases
https://github.com/datastaxdevs/conf-grpc-rest-graphql-data-apis
Last synced: about 1 year ago
JSON representation
Expose Rest,Graphql,Grpc Apis on Top for Your Databases
- Host: GitHub
- URL: https://github.com/datastaxdevs/conf-grpc-rest-graphql-data-apis
- Owner: datastaxdevs
- Created: 2021-11-16T14:06:52.000Z (over 4 years ago)
- Default Branch: main
- Last Pushed: 2022-12-13T13:21:56.000Z (over 3 years ago)
- Last Synced: 2023-03-04T04:05:47.311Z (over 3 years ago)
- Language: Java
- Size: 8.54 MB
- Stars: 3
- Watchers: 4
- Forks: 4
- Open Issues: 0
-
Metadata Files:
- Readme: README.md
Awesome Lists containing this project
README
## 🎓🔥 Expose Rest, Graphql, Grpc Data Apis for Your Databases 🔥🎓
[](http://www.apache.org/licenses/LICENSE-2.0)
[](https://discord.com/widget?id=685554030159593522&theme=dark)
This instructions will lead you to step by step operations for the talks at DeveloperWeek Austin
## Table of content
1. [Show me some Api Code](https://github.com/datastaxdevs/conference-2021-developer-week-austin/tree/main/sample-code)
2. [Show me Docker File](https://github.com/datastaxdevs/conference-2021-developer-week-austin/blob/main/sample-docker/docker-compose.yml)
3. [Show me the SLIDES](https://github.com/datastaxdevs/conference-2021-developer-week-austin/blob/main/slides.pdf)
3. [Create Astra Instance](#1-create-astra-instance)
4. [Working with Cassandra](#2-working-with-cassandra)
5. [Working with REST API](#3-working-with-rest-api)
6. [Working with DOCUMENT API](#4-working-with-document-api)
7. [Working with GRAPHQL API](#5-working-with-graphql-api)
## 1. Create Astra Instance
**`ASTRA`** is the simplest way to run Cassandra with zero operations at all - just push the button and get your cluster. No credit card required, $25.00 USD credit every month, roughly 5M writes, 30M reads, 40GB storage monthly - sufficient to run small production workloads.
✅ Register (if needed) and Sign In to Astra [https://astra.datastax.com](https://dtsx.io/workshop): You can use your `Github`, `Google` accounts or register with an `email`.
_Make sure to chose a password with minimum 8 characters, containing upper and lowercase letters, at least one number and special character_
✅ Create a "pay as you go" plan
Follow this [guide](https://docs.datastax.com/en/astra/docs/creating-your-astra-database.html), to set up a pay as you go database with a free $25 monthly credit.
- **Select the pay as you go option**: Includes $25 monthly credit - no credit card needed to set up.
You will find below which values to enter for each field.
- **For the database name** - `free_db.` While Astra allows you to fill in these fields with values of your own choosing, please follow our recommendations to ensure the application runs properly.
- **For the keyspace name** - `ks1`. It's really important that you use the name "ks1" for the code to work.
_You can technically use whatever you want and update the code to reflect the keyspace name. This is really to get you on a happy path for the first run._
- **For provider and region**: Choose GCP as a provider. Region is where your database will reside physically (choose one close to you or your users...you may not have a lot of "free" choices).
- **Create the database**. Review all the fields to make sure they are as shown, and click the `Create Database` button.
- **Save your secure token details**: It's a good idea to save the auto-generated token details off at this point. You can click the "Copy" icon or download them locally as a JSON file.
You will see your new database `pending` in the Dashboard.
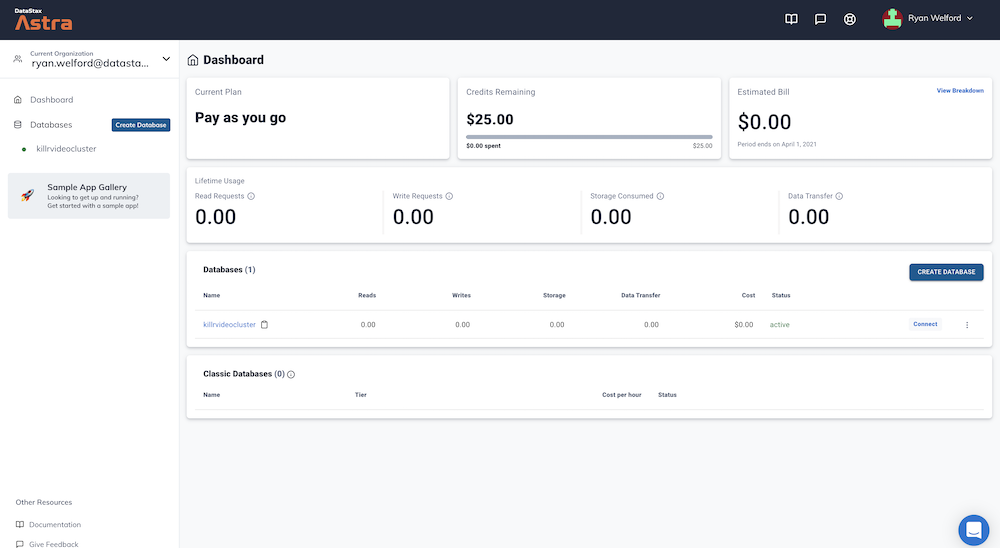
The status will change to `Active` when the database is ready, this will only take 2-3 minutes. You will also receive an email when it is ready.
## 2. Working with Cassandra
**✅ Check that our keyspace exist**
Click your database name, locate the `CQL Console` TAB and enter this first command:
```sql
describe keyspaces;
```
**✅ Create Entities**
```sql
use ks1;
CREATE TYPE IF NOT EXISTS video_format (
width int,
height int
);
CREATE TABLE IF NOT EXISTS videos (
videoid uuid,
title text,
upload timestamp,
email text,
url text,
tags set ,
frames list,
formats map >,
PRIMARY KEY (videoid)
);
describe ks1;
```
**✅ Use the data model** :
- Insert value using plain CQL
```sql
INSERT INTO videos(videoid, email, title, upload, url, tags, frames, formats)
VALUES(uuid(), 'clu@sample.com', 'sample video',
toTimeStamp(now()), 'http://google.fr',
{ 'cassandra','accelerate','2020'},
[ 1, 2, 3, 4],
{ 'mp4':{width:1,height:1},'ogg':{width:1,height:1}});
INSERT INTO videos(videoid, email, title, upload, url)
VALUES(uuid(), 'clu@sample.com', 'video2', toTimeStamp(now()), 'http://google.fr');
```
- Insert Value using JSON
```sql
INSERT INTO videos JSON '{
"videoid":"e466f561-4ea4-4eb7-8dcc-126e0fbfd573",
"email":"clunven@sample.com",
"title":"A Second videos",
"upload":"2020-02-26 15:09:22 +00:00",
"url": "http://google.fr",
"frames": [1,2,3,4],
"tags": [ "cassandra","accelerate", "2020"],
"formats": {
"mp4": {"width":1,"height":1},
"ogg": {"width":1,"height":1}
}
}';
```
- Read values
```sql
select * from videos;
```
- Read by id
```sql
select * from videos where videoid=e466f561-4ea4-4eb7-8dcc-126e0fbfd573;
```
[🏠 Back to Table of Contents](#table-of-content)
## 3. Working with REST API
To use the API we will need a token please create a token following the instructions here:
#### ✅ 3a. Create a token
Follow the documentation to [create a token for your app](https://docs.datastax.com/en/astra/docs/manage-application-tokens.html).
Role: `Database Administrator`
Copy the token value (eg `AstraCS:KDfdKeNREyWQvDpDrBqwBsUB:ec80667c....`) in your clipboard and save the CSV this value would not be provided afterward.
_If you have your auto-generated token details from before, you should be able to skip this step._
**👁️ Expected output**

Now launch the swagger UI
- Click on the "Connect" tab at the top, and then on the "REST API" entry in the left nav.

Scroll down to the "Launching Swagger UI" section, and click the link.
_Everyone's Swagger UI link will be unique to their instance of Astra DB._

You can also follow the link to the [REST API Quick Start](https://stargate.io/docs/stargate/1.0/quickstart/quick_start-rest.html) and run Stargate locally. Here we will use the [SwaggerUI](http://localhost:8082/swagger-ui/#/data).
#### ✅ 3b. List keyspaces
- Scroll to the "schemas" section of the Swagger spec.
- For all exercises, remember that we're using the *v2* API version.
- [`GET: /v2/schemas/keyspaces`](http://localhost:8082/swagger-ui/#/schemas/getAllKeyspaces)

- Click `Try it out`
- Provide your token in the field `X-Cassandra-Token`
- Click on `Execute`
#### ✅ 3c. List Tables
- [GET /v2/schemas/keyspaces/{keyspaceName}/tables](http://localhost:8082/swagger-ui/#/schemas/getAllTables)

- Click `Try it out`
- Provide your token in the field `X-Cassandra-Token`
- keyspace: `ks1`
- Click on `Execute`
#### ✅ 3d. List Types
- [GET /v2/schemas/keyspaces/{keyspaceName}/types](http://localhost:8082/swagger-ui/#/schemas/findAll)

- Click `Try it out`
- X-Cassandra-Token: ``
- keyspace: `ks1`
- Click on `Execute`
#### ✅ 3e Create a Table
- [POST /v2/schemas/keyspaces/{keyspaceName}/tables](http://localhost:8082/swagger-ui/#/schemas/createTable)

- Click `Try it out`
- X-Cassandra-Token: ``
- keyspace: `ks1`
- Data
```json
{
"name": "users",
"columnDefinitions":
[
{
"name": "firstname",
"typeDefinition": "text"
},
{
"name": "lastname",
"typeDefinition": "text"
},
{
"name": "email",
"typeDefinition": "text"
},
{
"name": "color",
"typeDefinition": "text"
}
],
"primaryKey":
{
"partitionKey": ["firstname"],
"clusteringKey": ["lastname"]
},
"tableOptions":
{
"defaultTimeToLive": 0,
"clusteringExpression":
[{ "column": "lastname", "order": "ASC" }]
}
}
```
**👁️ Expected output**
```json
{
"name": "users"
}
```
#### ✅ 3f. Insert Rows
*Notice for the DML you scroll to the `data` section. Make sure you are using url with `V2`, `V1` would also work but this is NOT the same payload.*
- [POST /v2/keyspaces/{keyspaceName}/{tableName}](http://localhost:8082/swagger-ui/#/data/createRow)

- X-Cassandra-Token: ``
- keyspaceName: `ks1`
- tableName: `users`
- Data
```json
{
"firstname": "Cedrick",
"lastname": "Lunven",
"email": "c.lunven@gmail.com",
"color": "blue"
}
```
You can note that the output code is `201` and return your primary key `{ "firstname": "Cedrick","lastname": "Lunven" }
- You can add a second record changing only the payload
```json
{
"firstname": "David",
"lastname": "Gilardi",
"email": "d.gilardi@gmail.com",
"color": "blue"
}
```
- Add a third
```json
{
"firstname": "Kirsten",
"lastname": "Hunter",
"email": "k.hunter@gmail.com",
"color": "pink"
}
```
#### ✅ 3g. Read multiple rows
- [GET /v2/keyspaces/{keyspaceName}/{tableName}/rows](http://localhost:8082/swagger-ui/#/data/getAllRows_1)

- X-Cassandra-Token: ``
- keyspaceName: `ks1`
- tableName: `users`
- Click Execute
- Notice how now you can only limited return fields
- fields: `firstname, lastname`
#### ✅ 3h. Read a single partition
- [GET /v2/keyspaces/{keyspaceName}/{tableName}/{primaryKey}](http://localhost:8082/swagger-ui/#/data/getRows_1)

- X-Cassandra-Token: ``
- keyspaceName: `ks1`
- tableName: `users`
- primaryKey; 'Cedrick`
- Click Execute
```diff
- Important: The Swagger user interface is limited as of now and you cannot test a composite key (here adding Lunven). This is a bug in the UI not the API.
```
#### ✅ 3i. Delete a row
- [DELETE /v2/keyspaces/{keyspaceName}/{tableName}/{primaryKey}](http://localhost:8082/swagger-ui/#/data/deleteRows)

- X-Cassandra-Token: ``
- keyspaceName: `ks1`
- tableName: `users`
- primaryKey; 'Cedrick`
- Click Execute
## 4. Working with DOCUMENT API
This walkthrough has been realized using the [Quick Start](https://stargate.io/docs/stargate/1.0/quickstart/quick_start-document.html)
Scroll to the top to locate the "documents" section in the Swagger UI.

**✅ 4a. List Namespaces** :

- Fill with Header `X-Cassandra-Token` with ``
**👁️ Expected output**
```json
{
"data": [
{ "name": "system_distributed" },
{ "name": "system" },
{ "name": "data_endpoint_auth"},
{ "name": "system_schema"},
{ "name": "ks1" },
{ "name": "stargate_system"},
{ "name": "system_auth" },
{ "name": "system_traces"}
]
}
```
**✅ 4b. Create a document** :
*Note: operations requiring providing `namespace` and `collections` on the swagger UI seems not functional. We are switching to CURL the API is working, this is a documentation bug that has been notified to the development team.*

- X-Cassandra-Token: ``
- namespaceName: `ks1`
- collectionname: `col1`
- Click `Execute`
```json
{
"videoid":"e466f561-4ea4-4eb7-8dcc-126e0fbfd573",
"email":"clunven@sample.com",
"title":"A Second videos",
"upload":"2020-02-26 15:09:22 +00:00",
"url": "http://google.fr",
"frames": [1,2,3,4],
"tags": [ "cassandra","accelerate", "2020"],
"formats": {
"mp4": {"width":1,"height":1},
"ogg": {"width":1,"height":1}
}
}
```
**👁️ Expected output**:
```json
{
"documentId":""
}
```
**✅ 4c. Retrieve documents** :

- X-Cassandra-Token: ``
- namespaceName: `ks1`
- collectionname: `col1`
- Click `Execute`
**✅ 4d. Retrieve 1 document** :

- X-Cassandra-Token: ``
- namespaceName: `ks1`
- collectionname: `col1`
- documentId: ``
- Click `Execute`
**✅ 4e. Search for document by properties** :

- X-Cassandra-Token: ``
- namespaceName: `ks1`
- collectionname: `col1`
- documentId: ``
- WhereClause
```json
{"email": {"$eq": "clunven@sample.com"}}
```
[🏠 Back to Table of Contents](#table-of-content)
## 5. Working with GRAPHQL API
This walkthrough has been realized using the [GraphQL Quick Start](https://stargate.io/docs/stargate/1.0/quickstart/quick_start-graphql.html)
**✅ Creating a keyspace** :
Before you can start using the GraphQL API, you must first create a Cassandra keyspace and at least one table in your database. If you are connecting to a Cassandra database with existing schema, you can skip this step.

Then provide the keyspace name `library`:

**✅ Open GraphQL Playground** :
Open the playground

_Everyone's GraphQL Playground link will be unique to their instance of Astra DB._
**👁️ Expected output**

**✅ Creating a Table** :
- Use this query
```
mutation {
books: createTable(
keyspaceName:"library",
tableName:"books",
partitionKeys: [ # The keys required to access your data
{ name: "title", type: {basic: TEXT} }
]
values: [ # The values associated with the keys
{ name: "author", type: {basic: TEXT} }
]
)
authors: createTable(
keyspaceName:"library",
tableName:"authors",
partitionKeys: [
{ name: "name", type: {basic: TEXT} }
]
clusteringKeys: [ # Secondary key used to access values within the partition
{ name: "title", type: {basic: TEXT}, order: "ASC" }
]
)
}
```
**👁️ Expected output**

**✅ Populating Table** :
Any of the created APIs can be used to interact with the GraphQL data, to write or read data.
First, let’s navigate to your new keyspace `library` inside the playground. Change tab to `graphql` and pick url `/graphql/library`.
- Use this query
```
mutation insert2Books {
moby: insertbooks(value: {title:"Moby Dick", author:"Herman Melville"}) {
value {
title
}
}
catch22: insertbooks(value: {title:"Catch-22", author:"Joseph Heller"}) {
value {
title
}
}
}
```
- Don't forget to update the header again
```
{
"x-cassandra-token":"7c37bda5-7360-4d39-96bc-9765db5773bc"
}
```
**👁️ Expected output**

**✅ Read data** :
Stay on the same screen and sinmply update the query with
```
query oneBook {
books (value: {title:"Moby Dick"}) {
values {
title
author
}
}
}
```
**👁️ Expected output**

[🏠 Back to Table of Contents](#table-of-content)
## THE END
Congratulations, you made it to the END!