https://github.com/datenhahn/cosilino-device
ESP8266 IoT device to control electric heatings
https://github.com/datenhahn/cosilino-device
Last synced: 10 months ago
JSON representation
ESP8266 IoT device to control electric heatings
- Host: GitHub
- URL: https://github.com/datenhahn/cosilino-device
- Owner: datenhahn
- License: mit
- Created: 2018-02-23T21:19:49.000Z (over 8 years ago)
- Default Branch: master
- Last Pushed: 2018-10-03T18:47:42.000Z (over 7 years ago)
- Last Synced: 2025-02-23T22:28:18.554Z (over 1 year ago)
- Language: C++
- Size: 901 KB
- Stars: 1
- Watchers: 2
- Forks: 0
- Open Issues: 0
-
Metadata Files:
- Readme: Readme.md
- License: LICENSE
Awesome Lists containing this project
README
# Cosilino - Remote control Stiebel Eltron electronic heating applicances (ETS200-700) via MQTT
[](https://opensource.org/licenses/MIT)
## Introduction
We live in an apartment fitted with these electronic heaters. They have two problems (besides
the generally bad efficency of electric heating):
1. They have one day of ineratia (they heat only at night and then keep the heat over a
whole day). This means if the next day is unusually warm and you forget to switch them
off the appartment is overheated the whole day. And in reverse, if you forget to switch
them on, you have no way of "adhoc-heat".
2. The minimal setting is too hot for the transition seasons (autum, spring).
A colleague pointed me to the nice ESP8266 development board (thanks Ivan!) and with some
temperature sensors and a servo it is easy to turn this 15 year old heater into a fancy
IoT-device.
First I tried to use the DC control port which is powered by a DC current between
0.9 - 1.4 Volt , but then I ditched that idea because it would have required opening
the heater and fiddling with its internals which I didn't want to do (too risky).
The easy workaround was to just turn the max heat knob with a servo.
I 3D-printed the part to hold the servo with a cheap 40€ 3D print
pen which uses the normal 1,75mm PLA filament. It doesn't look nice
but it does the job. It is connected to the heating with magnets
(which I stole from my son's toy box).
The device's casing is way too big. This is the first prototype, so
I wanted to have some space to play around. Also I used an additional
NodeMCU breakout-board which makes using normal bread-board-connectors
more convenient.


### Watch in action
[](https://www.youtube.com/watch?v=otGSGF0wK6k)
## cosilino-device
I built and flashed the firmware with the Arduino IDE. This folder contains the Arduino IDE ino-file for the device.
The device uses the WifiManager arduino lib (https://github.com/tzapu/WiFiManager).
If it cannot connect to a Wifi all LEDs will be on. You then can
connect to the devices accesspoint ( look for "cosilino-...) (... == deviceid).
You might have to adjust the mqtt server to your hostname/ip before
flashing.
#define MQTT_SERVER "cosilino-gateway"
example for different ip:
#define MQTT_SERVER "192.168.123.33"
### Anroid IDE plugins
I screenshotted all plugins I installed (see doc/arduino_ide_plugins).
### Material List
* ESP8266 (NodeMCU 1.0)
* Tower SG90 Micro Servo
* DHT-22 Temperature and Humidity-Sensor
* DS18S20 Temperature Sensor
* 1x red, 1x yellow, 1x green LEDs
* 3x 220Ohm resistor (for LEDs)
* 1x 1k Ohm resistor (pullup DHT-22)
* 1x 4,7k Ohm resistor (pullup DS18S20)
* RaspberryPi or any other permanently running pc (for MQTT broker + mongodb)
### Schematics
You find the fritzing file, schematics and plan in doc/fritzing.


## cosilino-backend
I used a raspberrypi with mosquitto and mongodb as backend.
```
apt-get install mosquitto mongodb-server
```
You might want to enable mongodb to your internal network by
commenting out
/etc/mongodb.conf
#bind_ip = 127.0.0.1
Then restart mongodb (`/etc/init.d/mongodb restart`)
### Get and set heat
You can connect to all topics on the broker for debugging purposes.
`-v` also prints the topic names.
#### Read status messages
$> mosquitto_sub -v -t "#"
cosilino/171d45/status {"deviceId":"171d45","roomHum":51.80,"roomTemp":22.30,"heaterTemp":-127.00,"heaterPower":0}
#### Set heating level
For now I didn't implement any awesome logic. I just set up a cronjob
to switch the heater on for 1-2 hours at night. In winter it is on
all the time anyway and in summer off all the time. Of course a nice
automatic adjustment using a weather forecast would be nice (see todo).
Actually the percentage values aren't to helpful. In the end I controled
the heat by how long I set the heater to 100% (which is actually 66% as
the servo doesn't turn 270° but only 180°).
For me 1-2 hours per night was enough during autum/spring.
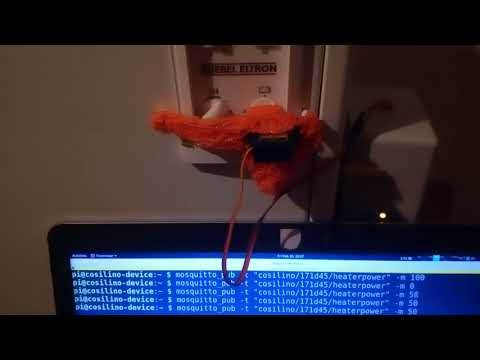
$> mosquitto_pub -t "cosilino/171d45/heaterpower" -m 0
$> mosquitto_pub -t "cosilino/171d45/heaterpower" -m 100
Example cronjobs
```
$> crontab -l
# For more information see the manual pages of crontab(5) and cron(8)
#
# m h dom mon dow command
#0 21 * * * mosquitto_pub -h cosilino-gateway -t cosilino/171d45/heaterpower -m 100
#45 21 * * * mosquitto_pub -h cosilino-gateway -t cosilino/171d45/heaterpower -m 0
#10 1 * * * mosquitto_pub -h cosilino-gateway -t cosilino/171d45/heaterpower -m 100
#30 1 * * * mosquitto_pub -h cosilino-gateway -t cosilino/171d45/heaterpower -m 0
#40 4 * * * mosquitto_pub -h cosilino-gateway -t cosilino/171d45/heaterpower -m 100
#0 5 * * * mosquitto_pub -h cosilino-gateway -t cosilino/171d45/heaterpower -m 0
```
### Pumping data into mongodb
I just run the backend in screen.
apt-get install screen
screen
./cosilino-backend.py
You might have to install an **older version of pymongo** as the mongodb version
which comes with raspbian is quite old (2.4..) .
## cosilino-mathplot
The plans to build a shiny webui were there, but for now I just built a
minimal gtk interface with mathplot lib.
You might have to install an **older version of pymongo** as the mongodb version
which comes with raspbian is quite old (2.4..) .
./cosilino-draw.py

## Todo
The real plan was to dynamically set the heat level depending on the
next days weather and condition (sun/clouds).
And of course it should be possible to access and control the devices
from the phone. So a nice webui should follow.
* add auto tune by getting weather forecast: https://openweathermap.org/
* add mobile-friendly webui
## Other resources
If you are interested in learning more about the heaters specs, have a look at the manual.
https://www.stiebel-eltron.com/content/dam/ste/cdbassets/current/bedienungs-_u_installationsanleitungen/ETS_200-700__89e3d3f0-fcf7-11e6-a5ac-005056a95add.pdf